[Summary]: Want to backup data from Google Pixel 3a/3a XL to computer? This article teach you a easily method to back up your Android data from Google Pixel 3a/3/2/1(XL) to computer, you can also learn how to selectively restore backed up data to your Google Pixel, as well as restore iTunes/iCloud backup to Google Pixel phone.
Contents:
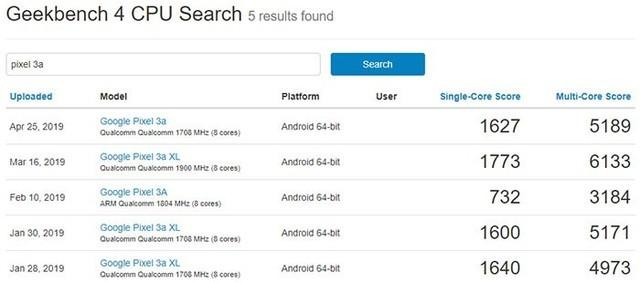
Google has released two mid-range smartphones – Pixel 3a and Pixel 3a XL. The Pixel 3a’s screen is 5.6-inch with a resolution of 1080 x 2160, while the Pixel 3a XL phone’s screen is 6-inch screen with a resolution of 2220 x 1080.The Pixel 3a will be powered by a Qualcomm Snapdragon 670 processor with 4GB of RAM and 64GB of storage. The single-core/multi-core runs in Geekbench are 1627 / 5189. The Pixel 3a XL will be powered by the Qualcomm Snapdragon 710 processor with 4GB of RAM and 128GB of storage. The single-core/multi-core runs in Geekbench are 1773 / 6133 respectively.
In terms of shooting, Pixel 3a and Pixel 3a XL will use a 12.2 megapixel rear lens, equipped with Google Pixel Visual Core image processing unit, which can accelerate the camera’s HDR+ calculation, make image processing faster, and make HDR+ performance better than current 5 times faster. Pixel 3a and Pixel 3a XL will use the Titan M security chip and support fast charging. In terms of price, the Pixel 3a is priced at $399 and the Pixel 3a XL is priced at $479.
If you often take photos and shoot videos by Google Pixel phone, since there are a lot of photos and videos stored on your phone, in order to speed up your Google Pixel phone, you may need to regularly back up your large capacity videos and photos to your computer, and then deleted the photos and videos on your phone. In order to make your data safely, you must to backup contacts, text messages, photos, videos, call logs, calendar, Application and Application data to the computer. In the following cases, you may need to back up your Android data in advance.
Part 1: Why You Need to Backup Android Data Regularly?
Avoiding files deleted by mistakenly.
Before perform factory reset your Android phone.
Avoiding formatting phone’s SD card by careless.
Before updating Android OS.
Avoiding data lost due to virus or malware attack.
Forgot lock screen password password/PIN/pattern.
Before rooting the Android phone
Prevent the phone stuck at white/black/blank screen of death and can’t access data.
Avoid losing data due to water-damaged the phone
Avoiding the phone ROM flashing.
And so on…
If you are looking for some way to backup and restore your Pixel 3a/3a XL and Google Pixel 3/2/1(XL), you’d better read our passage in detail. We recommend you to use Android Toolkit – Backup & Restore and U.Fone Android Data Backup & Restore tool, both can help you backup and restore Android data easily.
Part 2: Backup and Restore Pixel 3a/3a XL Data by U.Fone Android Data Backup & Restore
The U.Fone Android Data Backup & Restore is a part of U.Fone Android Toolkit, which is designed to back up data from Pixel 3a/3/2/1(XL) to computer and even selectively restore backed up data to your other Android device. You can safely and selectively back up your Android data, including contacts, text messages, WhatsApp messages, call logs, gallery, videos, audio and documents. Moreover, you can also set a password for protecting your important backup files.


Steps to Backup Data from Pixel 3a/3a XL to Computer
Step 1. Launch Android Toolkit on PC or Mac
First of all, please download, install and launch the Android Toolkit on the computer, click “Android Data Backup & Restore” section, you can see the screenshot as below.
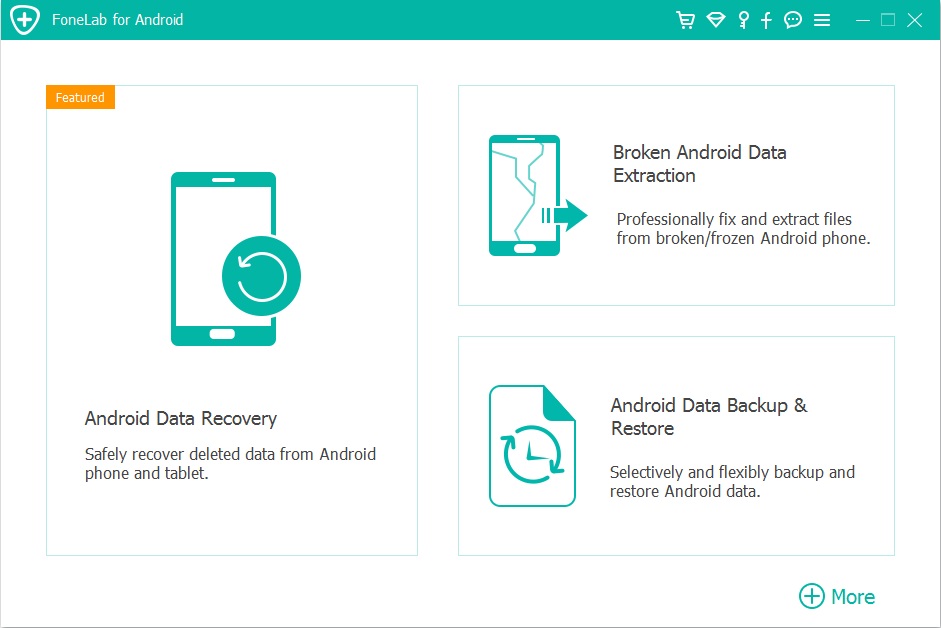
Entering “Android Data Backup & Restore” function and select “Device Data Backup”
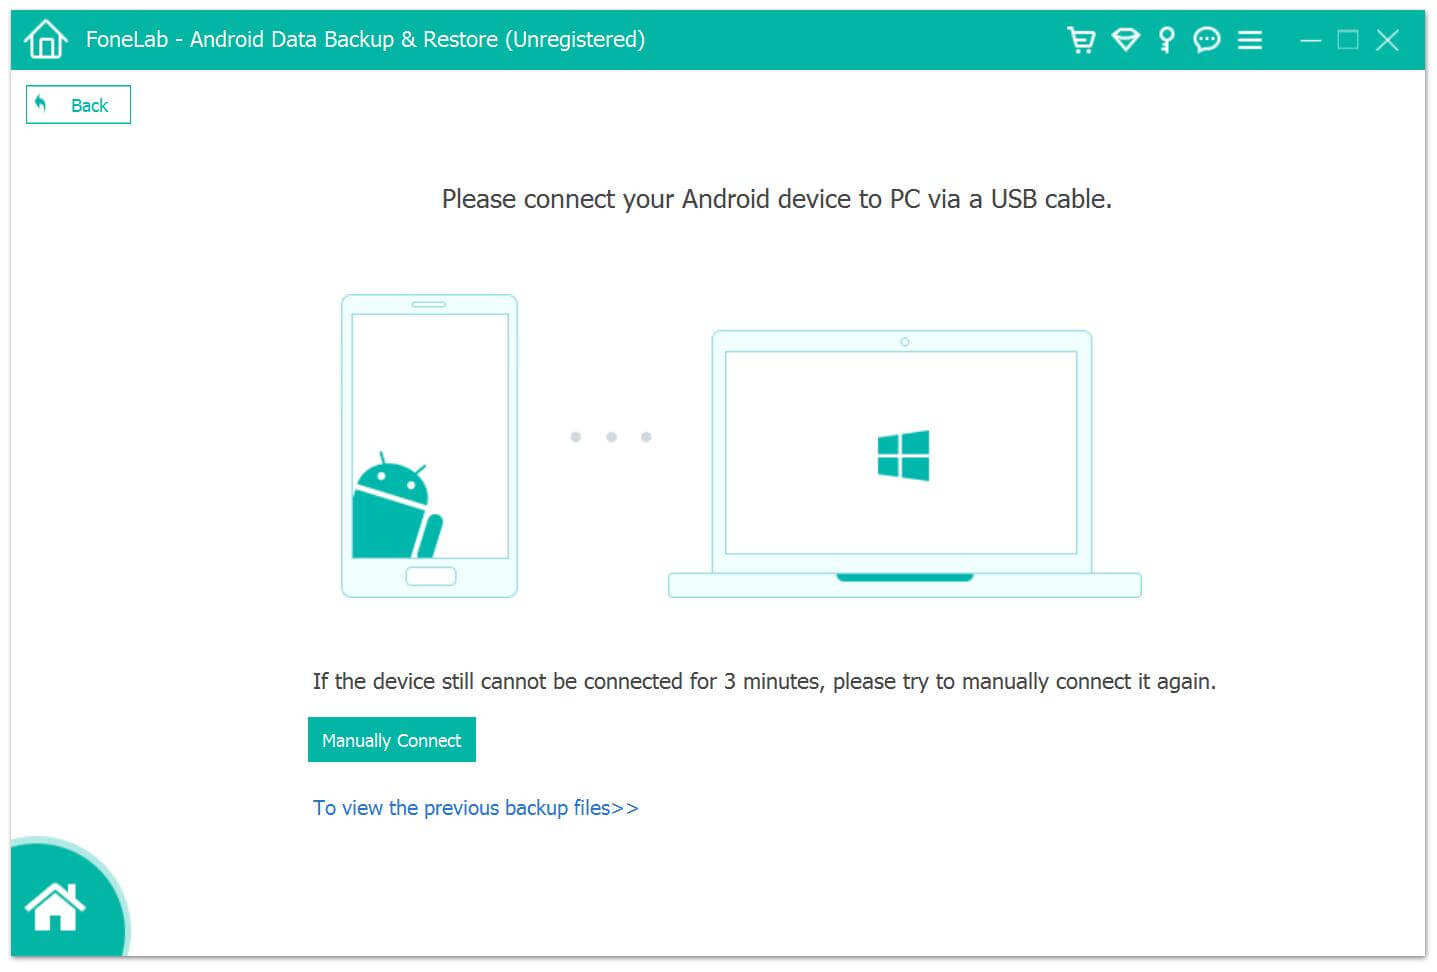
Step 2.Connect Google Pixel 3a to Computer with USB cable
Then, using a USB cable to connect your Pixel phone to the computer, then program will detect it.
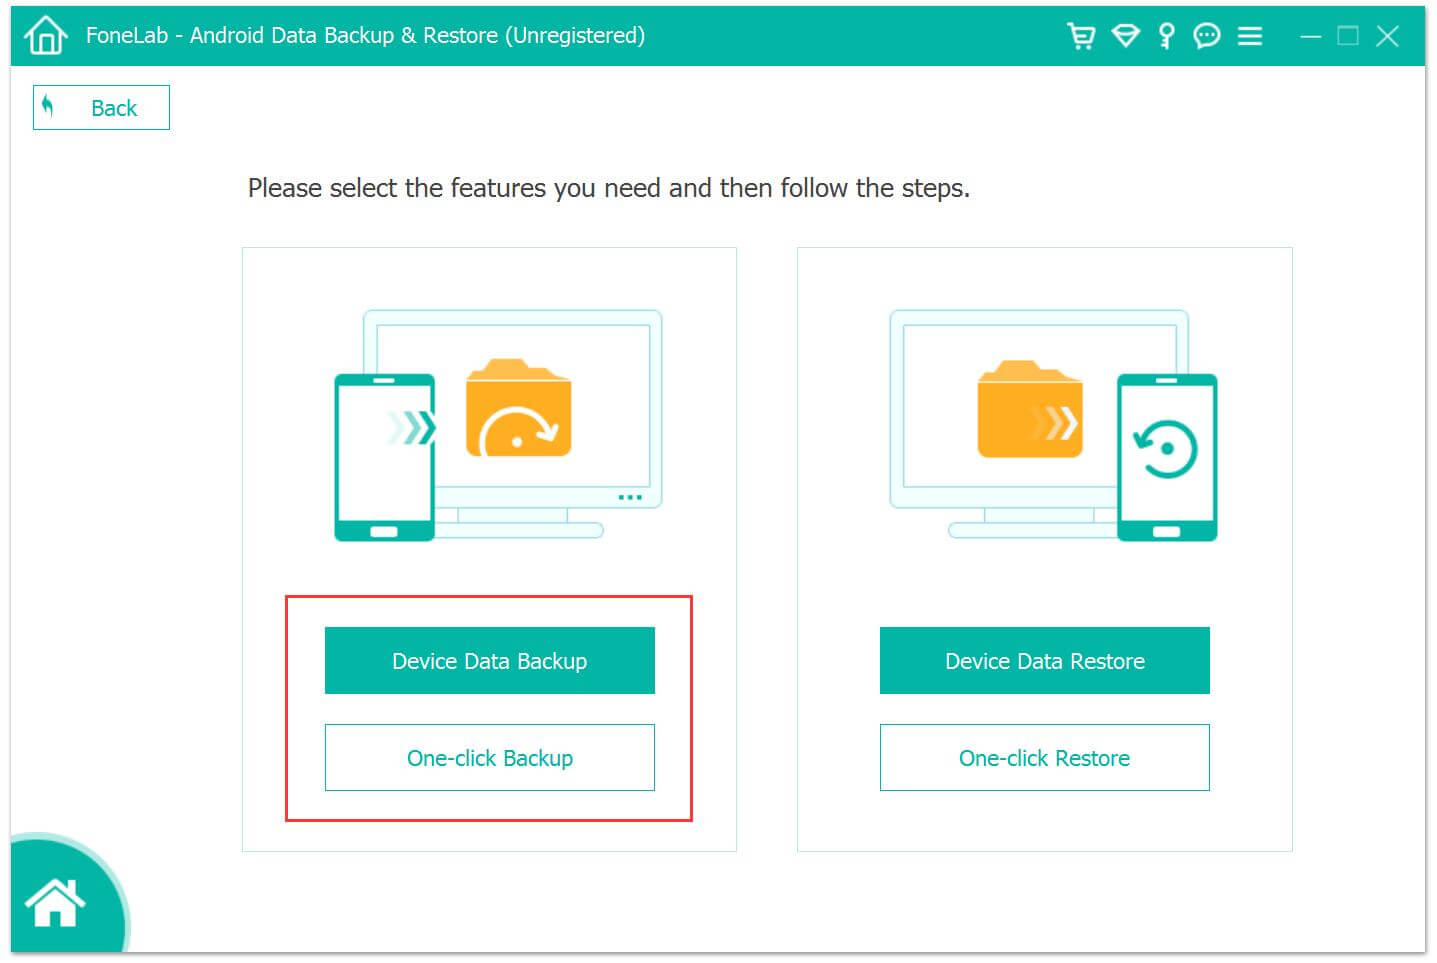
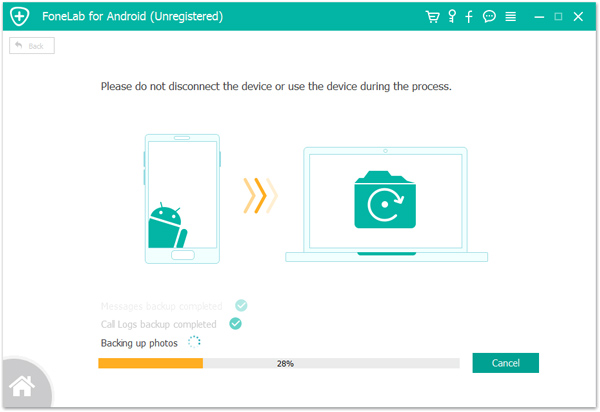
Step 3. Choose a Backup Option
Choose ‘Device Data Backup‘ or ‘One-click Backup‘ option to back up data from Pixel 3a to the computer.
Note: “Device Data Backup” means you can select data type to make a backup while “One-click Backup” lets you back up all data at one time without picking up specific data. After backing up data from Google Pixel to the computer, you can also set a password to protect the backups.
Steps to Restore Backup to your Pixel Phone or other Android phones
Above steps, you have backed up your Google Pixel phone’s data, you can preview and select the data you want to restore. In this part, we will teach you how to restore the backup files to the original Pixel 3a phone or other Android phones. In additional, you can also directly restore Android data to PC/Mac for further use.
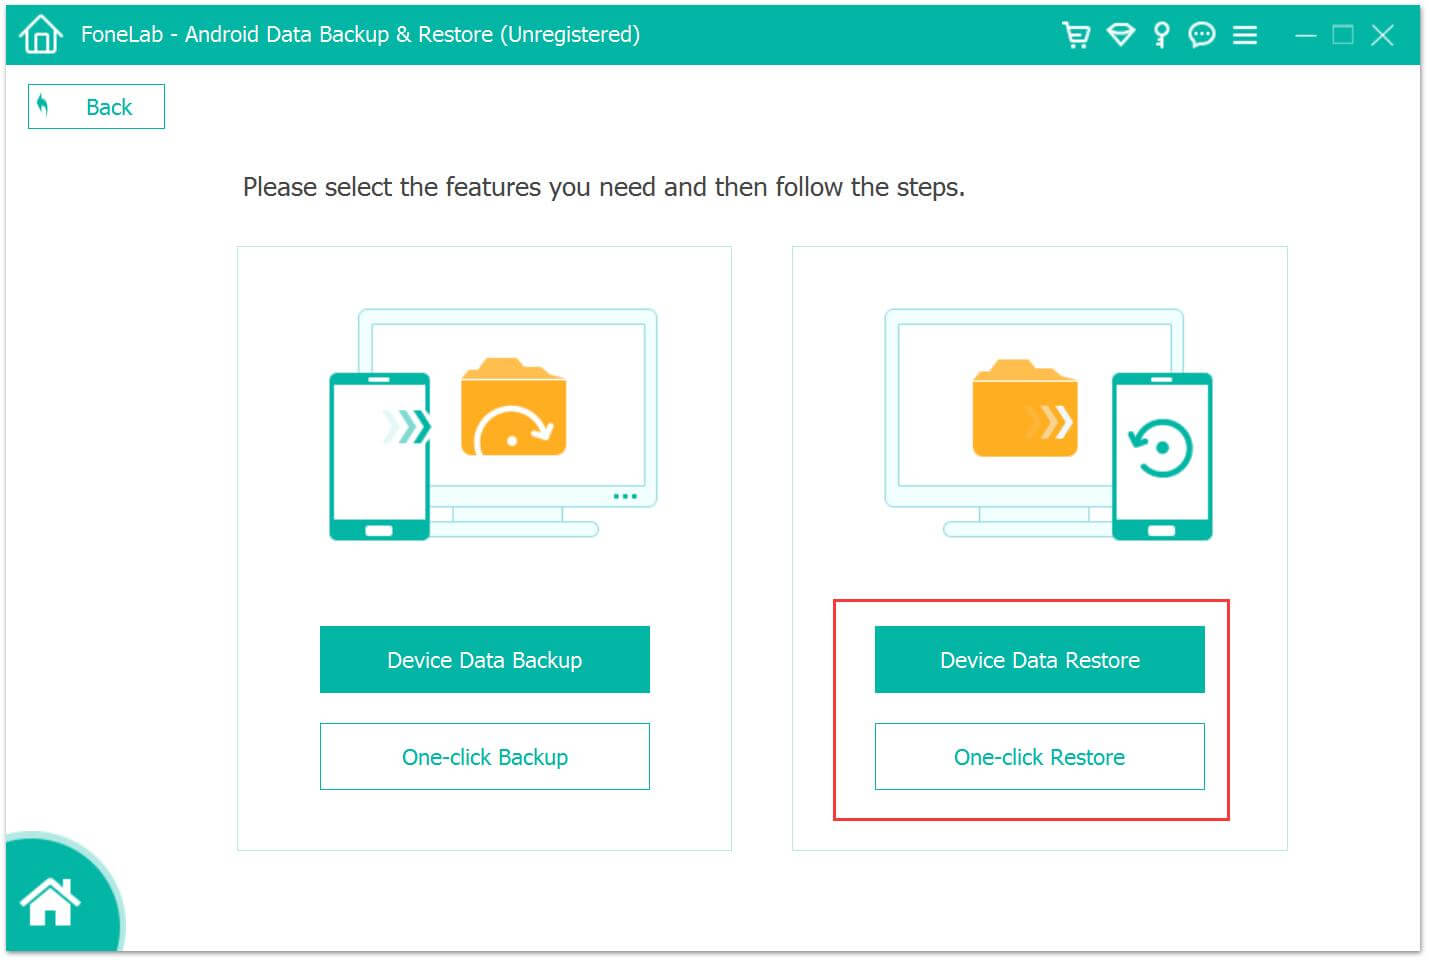
Step 1. Connect Google Pixel or other Android Devices to Computer
If you want to restore all your data, you can back to the main interface and choose ‘One-click Restore‘ option. If you want to choose some certain data, you can click choose ‘Device Data Restore‘ according to your need.
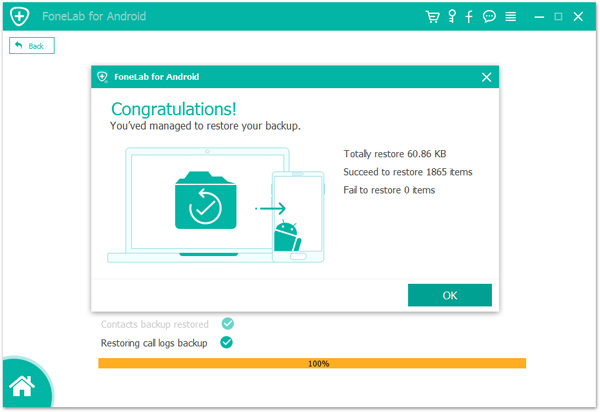
Step 2. Start to Restore Data to Pixel 3a
After connecting your Google Pixel phone to the computer successfully, choose the suitable backup to restore your backed up files to Google Pixel 3a directly.
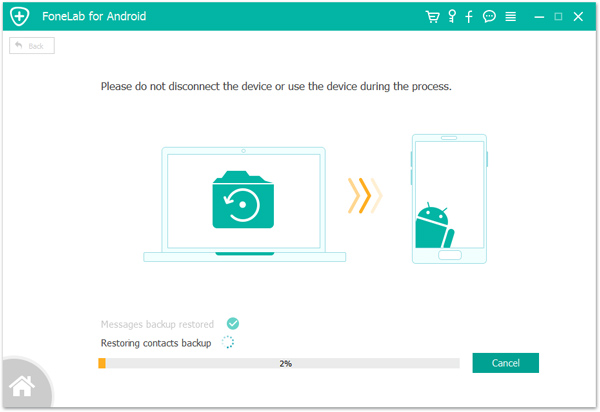
You can also restore your Android phone the other new phone easily in regardless of e data loss for deletion or phone switch.
Related guide: How to transfer data from iPhone/Android to Pixel 3a/3a XL
Download the Android Toolkit – Android Data Backup & Restore and start to backup and restore your Android data easily.
Tips: U.Fone Android Toolkit not only can help you backup restore data on Google Pixel phone, but also can help you recover deleted data from Google Pixel phone.
Part 3:Restore iCloud and iTunes Backup to Pixel 3a/3/2/1(XL) by Android Toolkit
If you use iPhone/iPad/iPod before, and you may have backup iOS data to iCloud or iTunes before. When you have purchased an new Android phone as replace, like Pixel 3/3a(XL), Samsung Galaxy S10/S9/S8/Note 9, Huawei P30/P20/Mate 20/Mate 10, etc. This part will teach you how to restore precious iCloud/iTunes backed up data to Google Pixel phone.
Android Toolkit – Backup & Restore can help you backup your contacts, SMS, photos, videos, WhatsApp data and more Apple data on Android phone and restore them selectively whenever you need. Moreover, it also allows you restore iTunes backup to Android, and restore iCloud backup to Android. Let’s learn how to restore data to Google Pixel from iTunes/iCloud backups.
Download Android Toolkit for Windows and Mac and try to manage your phone’s data easily.
Step to Restore iCloud Backup Data to Google Pixel
With the help of Backup & Resotre (Android), you can easily download, preview, and restore iCloud backup to Google Pixel phone in minutes, the whole restoring process won’t affecting existing Android data and settings.
Step 1. Connect your Google Pixel Phone to PC
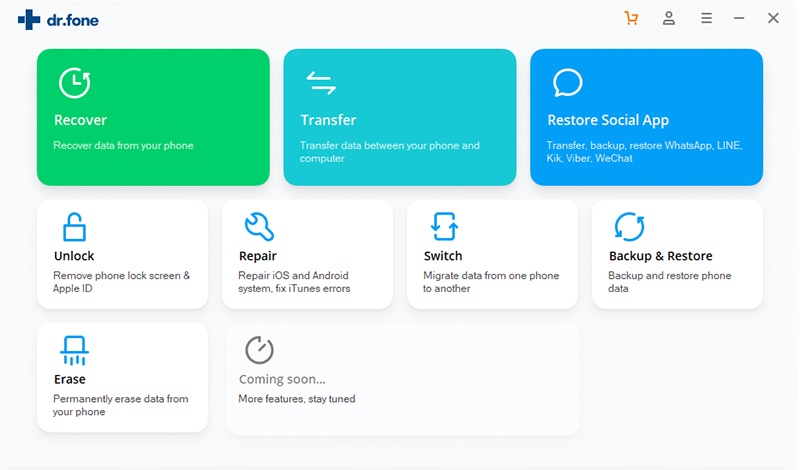
Download, install, and launch the Android Toolkit on your PC. In the main screen, select “Backup & Resotre” function.
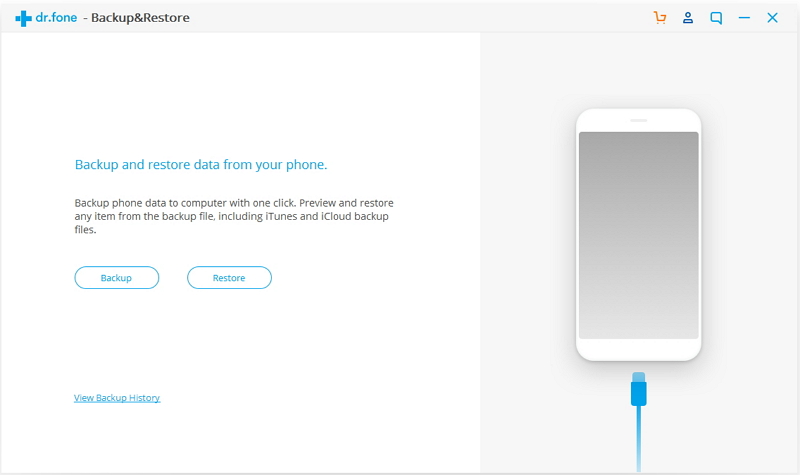
Use the original USB cable to connect Google Pixel phone to the PC. Then click the “Restore” button in the middle of the scren.
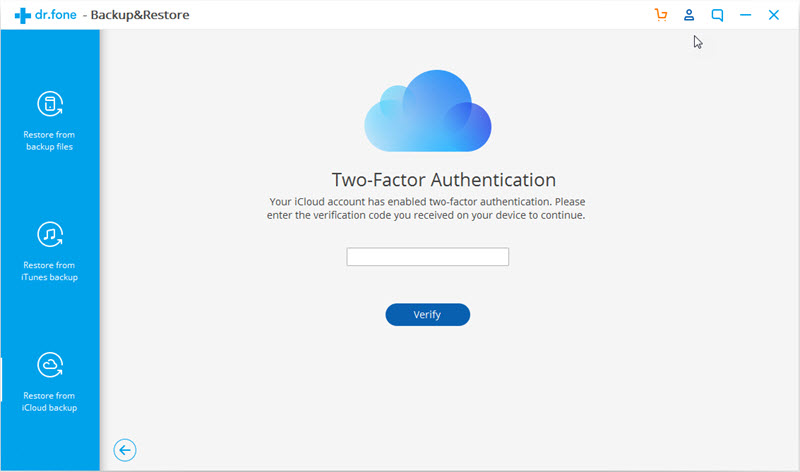
Step 2. Sign in to your iCloud account
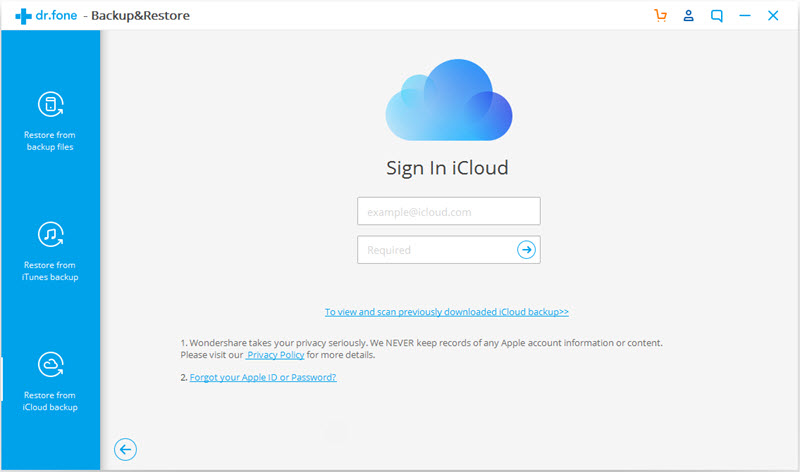
In the next screen that shows up, select “Restore from iCloud backup” from the left side.
You may have enabled the two-factor authentication for your iCloud account. In this case, a verification code will be sent to your iPhone. Find the verification code and input it in in the following screen, and click “Verify”.
Step 3. Restore iCloud Data to Google Pixel
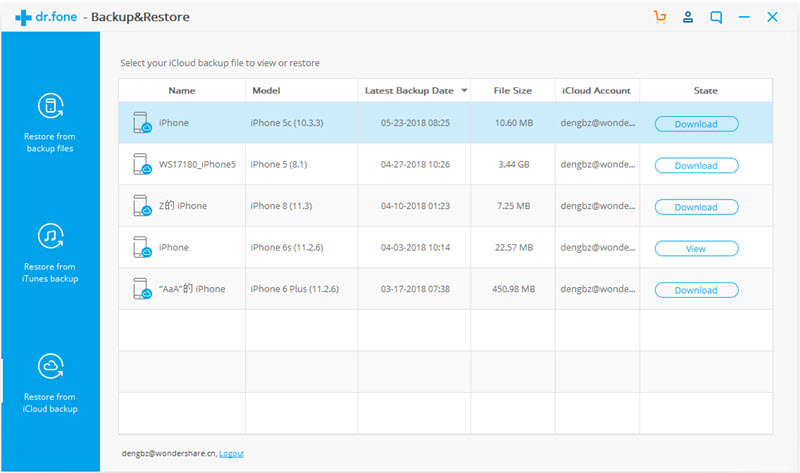
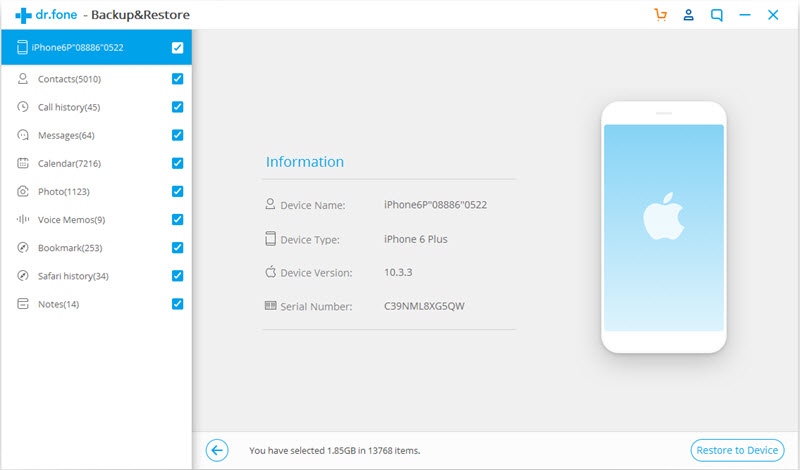
Now you have signed in to your iCloud. All the backup files are listed in the dr.fone screen. Select one of them and click “Download” to save the file to a local directory on your PC.
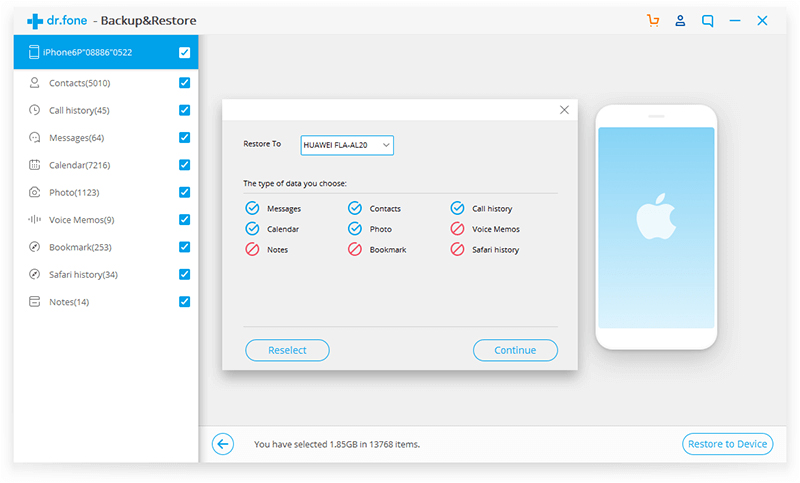
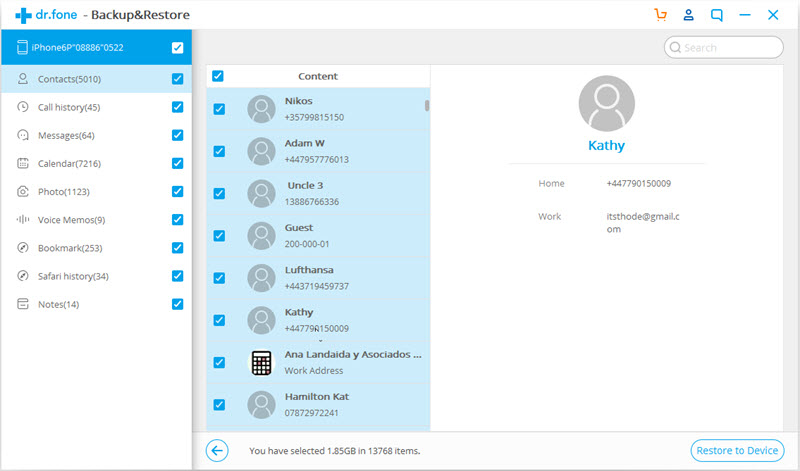
Then the software will read and display all the data from the downloaded iCloud backup file. Click a data type and preview what information is stored in it. Then you can select some or all of the data items and click “Restore to Device”.

In the dialog box that is displayed, select an Android device in the drop-down list, and click “Continue”.
Note: An Android device does not support such data types as Voice memos, Notes, Bookmark, and Safari history.
Step to Restore iTunes Backup Data to Google Pixel
For iOS users, you may frequently back up and restore iPhone or iPad data via iTunes, when you have purchased an new Android phone like Pixel 3a/3(XL), you can directly restore data from iTunes to Android phone. If you iPhone is broken, damaged, lost or stolen, under these circumstances, you still have chance to restore iTunes backup data to Android phone, even if your iPhone or iPad is unavailable or not in hand.
Step 1. Connect the Goolge Pixel Phone to Computer
After downloading dr.fone on your computer, install and start the tool. Then select “Backup & Restore” among all the features.
Then, please connect your Goolge Pixel phone to the computer via USB cable. After the connection is set up, click “Restore” in the center of the screen.
Step 2. Detect iTunes backup files
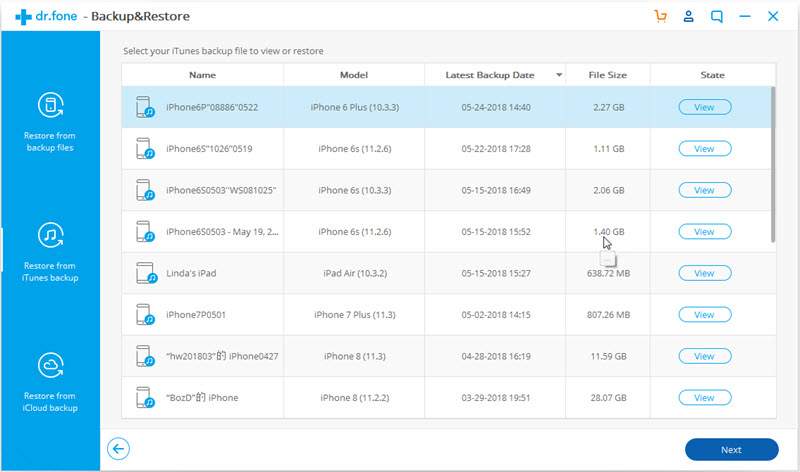
In the next screen, select “Restore from iTunes backup” from the left column. dr.fone will detect the location of iTunes backup files on your computer, and list them one by one.
Step 3. Preview iTunes backup data, and restore to Android.
Select one of the iTunes backup files, and click “View”. The Android Toolkit will read and display all details from the iTunes backup file by data type.
Select all or some of the items, and click on “Restore to Device”
In the new dialog box that pops up, select the desired Android device, and click “Continue” to confirm restoring iTunes backup to Goolge Pixel.
Note: Data cannot be restored if Android does not support the corresponding data types.
Download the Android Toolkit and try to restore data from iTunes/iCloud to your iOS/Android phone directly.
Tips: When you have purchase an new Android phone, you can also follow this method to transfer data from iPhone/iPad/iPod to Android phone. For example, you need to sync data from iPhone to iTunes or upload to iCloud firstly, then use our Phone Toolkit to restore iCloud/iTunes backup to Samsung Galaxy S10/S9/S8/S7/S6/Note 9/Note 8, Huawei, HTC, Sony, LG, Motorola, Google Pixel, Xiaomi and almost of all latest Android smart phones.
Backup and Restore Google Pixel