By Selena KomezUpdated on April 22, 2020
Accidents always happen without expection. In our daily life, you may lose important personal data on your Android device due to accidental deletion, factory reset, ROM flashing, software update, Android system update, virus attack, etc,. Please don’t worrying about it. Android Data Recovery empowers you to recover deleted data from Android efficiently. With this Android Toolkit, you can get back your lost data in a few simple clicks. In addition, it provides you two extra functions to manage your Android data – Broken Android Data Extraction and Android Data Backup & Restore. Let’s see how it works for Android phone or tablet.
Android Data Recovery is an ideal tool helps to restore deleted or lost data from Android due to any data loss circumstances, such as, accidental deletion, factory reset, ROM flashing, software update, Android system update, virus attack, etc,. The recoverable kinds of data including contacts, text messages, photos, videos, audio, call logs, documents, WhatsApp, WhatsApp attachments and more. Most of Android device are compatible with Android Data Recovery, like Samsung(Galaxy S20/S10/S9/S8/S7/S6/S5, Note 10/9/8/5/4), HTC, Lenovo, LG, Huawei, Motorola, ZTE, OnePlus, and so on.
See more Features of Android Data Recovery:

Step 1.Run Program on the Computer and Connect Android to Computer with a USB Cable
Please run Android Data Recovery on the computer, then connect your Android to computer by a USB cable,the program will detect your Android phone successfully very soon.
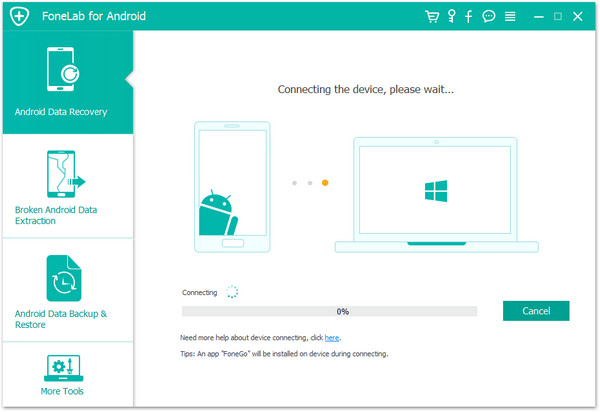
Step 2.Enable USB Debugging on Android Phone
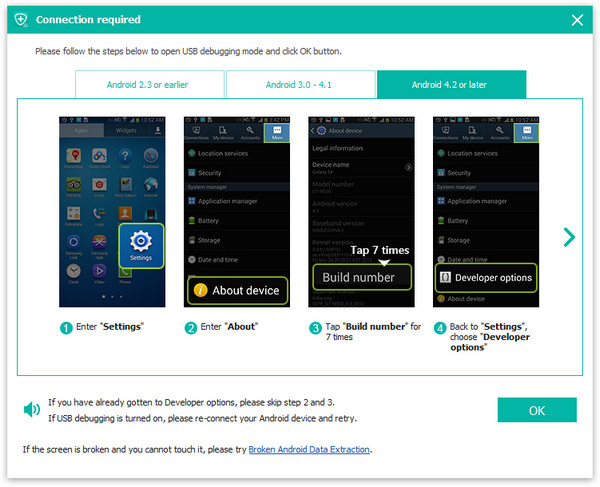
If you are not sure how to enable USB debugging on Android device, please learn more this:
Turn on USB Debugging on Android,you can follow the suitable ones according to your Android OS.
1)For Android 5.0 or newer: Tap “Settings” > “About Phone” to tap “Build number” seven times for “You are now a developer!” signal. Then, move to “Settings” > “Developer options” to turn on “USB debugging” (For Samsung Galaxy S7 users enable USB debugging guide)
2) For Android 4.2 or newer: Enter “Settings” > Click “About Phone” > Tap “Build number” for several times until getting a note “You are under developer mode” > Back to “Settings” > Click “Developer options” > Check “USB debugging”
3) For Android 3.0 to 4.1: Enter “Settings” > Click “Developer options” > Check “USB debugging”
4) For Android 2.3 or earlier: Enter “Settings” > Click “Applications” > Click “Development” > Check “USB debugging”
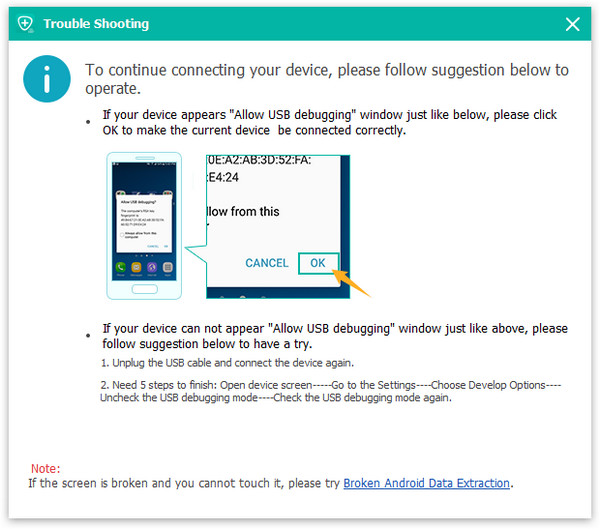
For Samsung Galaxy Note 5/S8/S7/S6 and other Android devices base on Android 4.2.2 or above, your phone will prompt a message for you, please just tap on “OK” to allow USB debugging on it.
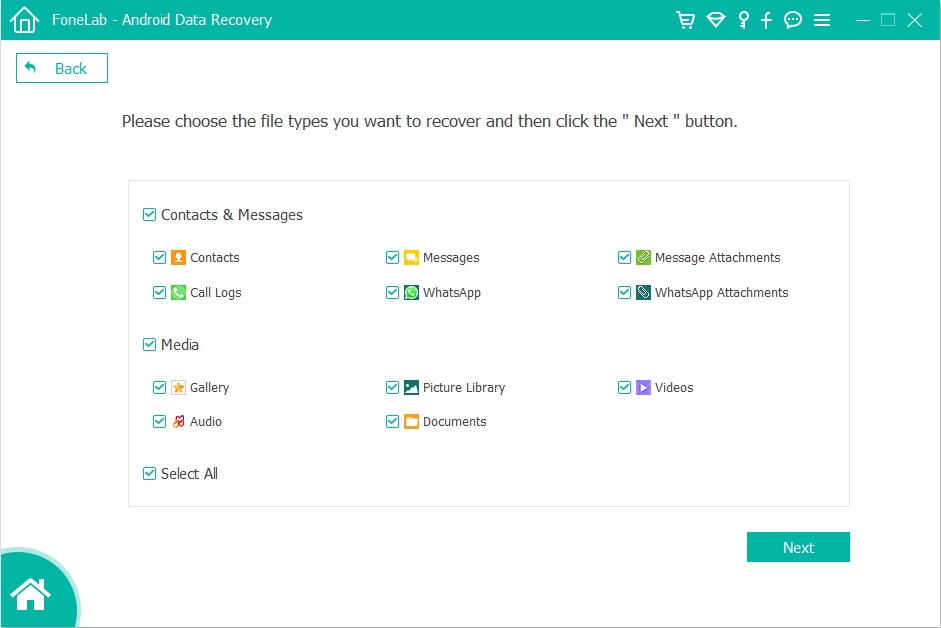
Step 3.Select the File to Scan and Recover from the Andoid
Now the program will list all kinds of files for you to recover,including contacts, message, gallery, videos, whatsapp messages,etc,.
Step 4. Select the Scan Mode and Scan Android for Deleted File
Select the scan mode “Standard Mode” or the “Advanced Mode”,and click “Start” to begin analyzing and scanning your Android.And then you should tap “Allow>>Grant>>Authorize”on your phone to get privilege.
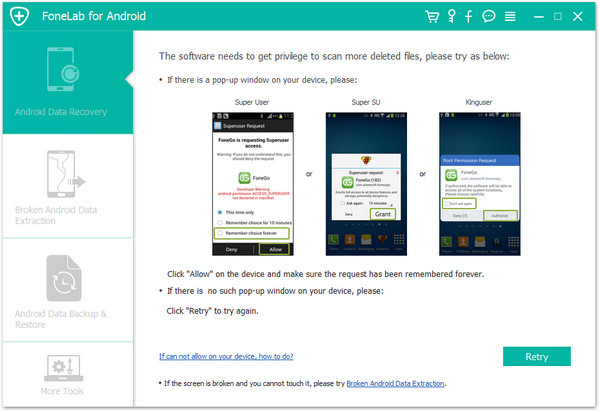
Tips: We recommend you to try the “Standard Mode” first, which works faster. If it doesn’t work, you can try the “Advanced Mode” later.
Step 5. Begin to Scan Android for Deleted Data
After that, Android Data Recovery will begin to scan all deleted files from your Android.
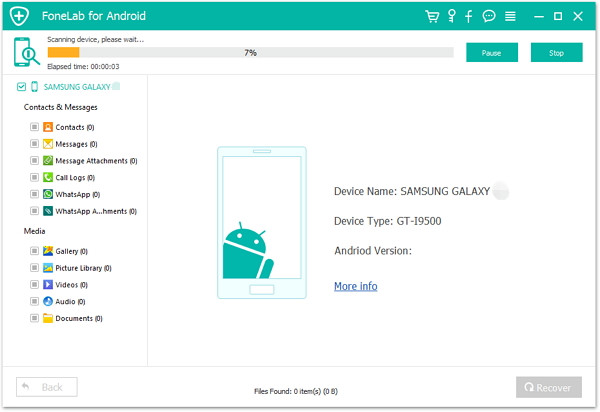
Step 6. Preview and Recover Deleted File from Android
As the scanning result shows to you,all the found messages, contacts, photos, videos, audios, documents and WhatsApp chat history on the Android will be displayed, including the ones have never been deleted.
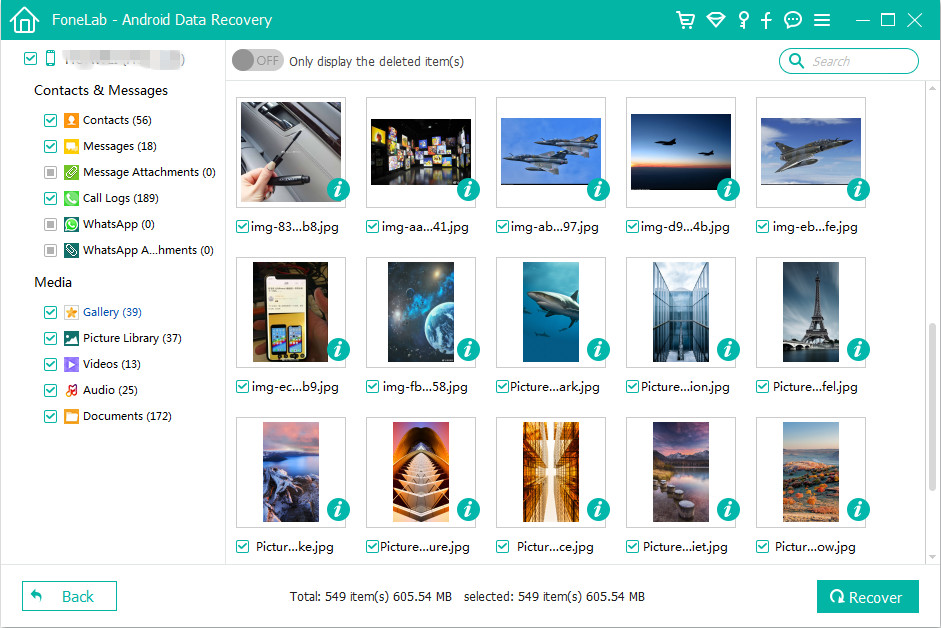
Preview and mark those you want to recover, and click the “Recover” button to recover deleted file from Android and save it on the computer.
Broken Android Data Extraction is another function of Android Data Recovery, it is design for fixing broken Android to normal and extracting data from broken Android phone for any broken Android cases, including stuck in the start loop screen, stuck in the download mode, stuck at black screen, water-damaged, cracked device, device with broken screen and more. It enables to extract several types of data from broken Android, such as, contacts, text messages, photos, videos, audio, call logs, documents, WhatsApp, WhatsApp attachments and more. Broken Android Data Extraction works well for almost all Samsung devices, for instance, Galaxy S6/S7, Note 3/4/5.
See more Features of Broken Android Data Extraction:
Step 1.Connect Android to the Computer
To begin with, please download and run Android Data Recovery on your computer. Connect your broken Android phone to the computer, click on the “Broken Android Data Extraction” option. Then click on the “Start” button to begin the data extract process.

Step 2.Select Phone Model of your Android
You will be asked to select the device model of your Android. Please check on the list of the interface.Then click “Confirm“.

Step 3.Get Android Phone into Download Mode
Once you’ve confirmed your device model, you should get Android into the Download Mode. Following the steps display on the interface below. Hit the “Start” button.

Step 4.Scan and Analyze Data of Android
Now the program will scan and analyze data on your Android device with minutes. You are allowed to preview the data from your device, including gallery, contacts, messages, call history, videos and more.


Step 5.Extract File from Broken Android
After previewing the files you could choose to extract data under file, mark them and click “Recover” to save them on your computer.

Android Data Backup &Restore– Android Data Recovery can help to selectively and flexibly backup and restore Android data on the computer safely, including contacts, messages, call Logs, photos, videos, audio, documents and so on. It enables to backup data from Android to the computer, and restore backup files to Android on the computer. It is compatible to almost all brands of Android device: Samsung, HTC, LG, Sony, Motorola, ZTE, Lenovo, Huawei, Xiaomi, etc,.
See more Features of Android Data Backup &Restore:
Step 1. Run Android Data Recovery on the Computer and Select the Mode
Firstly, run Android Data Recovery on the computer and select “Android Data Backup &Restore” mode. Then click “One-click Backup” feature. Now connect your Android to the computer using a USB.
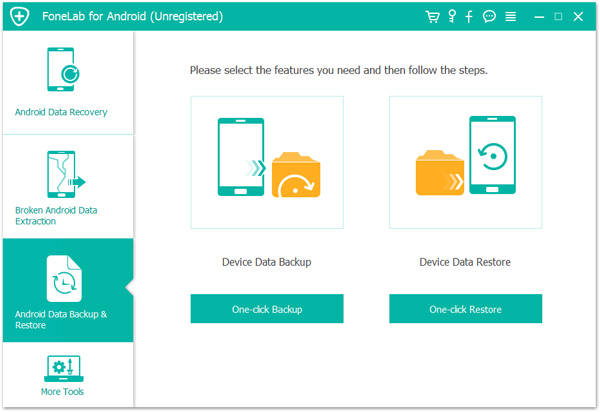
Step 2. Select the File Type to Backup
Select the file or more than one file to backup, contacts, messages,gallery, and more are included. Then click “Start“.

Note: The program will prompt you to set a password for the backup to continue encrypted backup. You can set it or not depend on your situation. After setting the password for the backup file, click “OK” to go on.

Step 3. Begin to Backup Data for Android
The program will begin to backup data for your Android on the computer efficiently, please don’t disconnect the device or use it during the process.
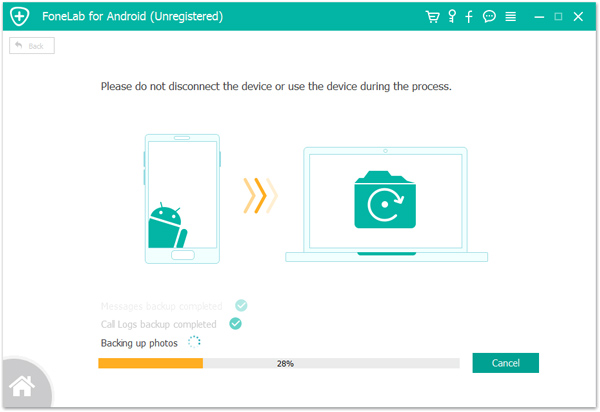
Done. Now you could view the backup file for Android on your computer.

Step 1. Run Android Data Recovery on the Computer and Select the Mode
Firstly, run Android Data Recovery on the computer and select “Android Data Backup &Restore” mode. Then click “One-click Restore” feature. Now connect your Android to the computer using a USB, click “Start”.


Step 2. Select Backup File to Restore
The program will list several backup files for selecting to restore.Select the backup file that you want to restore to the device. Then click “Start” button to preview and restore data from the backup.

Step 3. Begin to Restore Backup File for Android
The program will begin to restore backup file for your Android on the computer efficiently, please don’t disconnect the device or use it during the process.
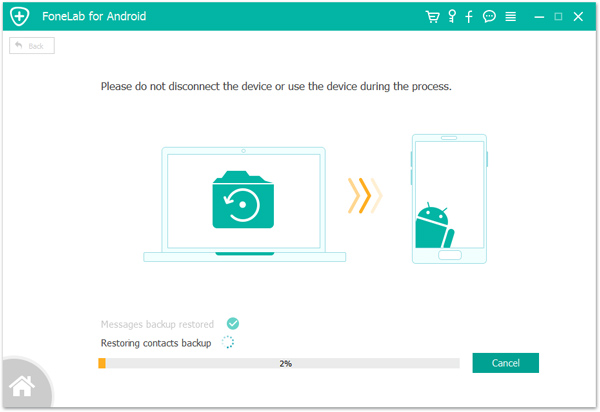
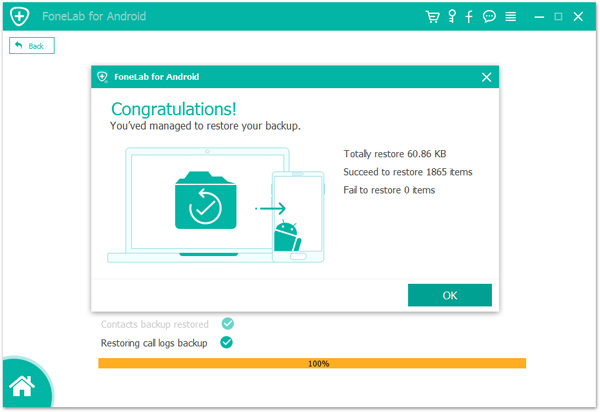
Restored completed. You’ve managed to restore your backup. Click “OK” to end the process.
Now you could view the file for Android on your computer.
Prompt: you need to log in before you can comment.
No account yet. Please click here to register.

No comment yet. Say something...