All posts by DHZ

How to Fix Apple Music Not Playing after iOS 12/13 Update

[Summary]: Having a problem with Apple Music? Is your Apple Music not working properly after updating to iOS 13/12.3/12.2/12? Read this article to learn the most direct and effective way to fix all Apple Music problems on iOS 11/12/13.

“Apple Music won’t play on my iPhone after I updated my iPhone to iOS 12.3. I can’t open it to play any song. How to fix Apple Music not playing properly?”

Some of our iPhone, iPad and Mac users have reported some Apple Music issues after updating iOS to the latest version. Among those Apple Music issues, Apple Music doesn’t work after iOS 12.3 / 12.2 / 12.1 / 12/11 updates, and the latest iOS 13 system is no exception. Actually, there are many possible scenarios where Apple Music is not working properly, including:

Unable to sync.
Unable to login.
unable to download.
The song is skipped randomly.
Can’t play any music.
These songs are gray or skip some songs while playing.
Shuffle does not work properly and you cannot play songs repeatedly.
Apple music cannot be played offline.
“Apple Music” freezes (no response/crash).
Receive “Item not available”, “Unexpected error code 4010” or “This media is not supported” error.
My music can’t load music.
The radio is not working.
Apple Music Library is cleared after iOS 12 update.
Apple Music cannot be used as background music or ringtones.

If Apple Music doesn’t play songs after iOS 11/12/13 update, then the most effective way to fix your iOS system to normal. U.Fone iOS Toolkit – iOS System Recovery is a powerful tool to help you fix iPhone errors without using iTunes or causing any stuck problems or data loss. It’s good at fixing your iOS system issues like app errors, frozen screen, white Apple logo, recovery mode, DFU mode, black/white screen of death, etc. This is its main feature.

Fix iOS devices from recovery mode, DFU mode, headphone mode, Apple logo, etc. to normal state.
Safest way to fix iOS system issues without losing data.
Supports for all iPhones, iPods, iPads & the latest iOS 13.

d_win d_mac
d_win d_mac

Steps to Fix Apple Music Won’t Play on iPhone

Step 1.Install and Launch iOS System Recovery
Download and install the latest version of U.Fone iOS Toolkit – iOS System Recovery, you can launch the program to fix Apple Music not playing on iPhone.
ios system recovery

Step 2.Connect Bricked iPhone to Computer
Select the option of ‘iOS System Recovery’ from the primary window after the software is download completely. Next, Connect your iPhone to your computer with a USB cable. Click “Start”.

connect iphone

Step 3. Select your iPhone Model and Latest Version of the iOS System
You will be asked to confirm the information of your iPhone. Click “Repair” if it is correct, but if not, select the exact information manually before repair.

fix bricked iPhone on iOS 13

Step 4.Download the Latest iOS Firmware for your Bricked iPhone

Now the program will download the required plug-in to fix the issue. Restart the iPhone and check whether the issue has already been fixed.

download the firmware and fix bricked iPhone

d_win d_mac
d_win d_mac

Related Articles:

How Fix iPhone iPad Stuck on Apple Logo on iOS 13

iPhone Stuck on Black Screen after iOS 12 Update, How to Fix

How to Fix iPhone 6s/7/8/X/XS Glitch after iOS 13/12 Update

Top 6 Ways to Backup iPhone/iPad for iOS 13 Update

How to Play Apple/iTunes Music after Canceling Subscription

Fix Apple Music Not Playing on iOS 13/12/11

iPhone Got Bricked after iOS 13 Update? Here’s How to Fix

[Summary]: If you are looking for a way to fix a bricked iPhone after updating to the latest iOS 13, you have come to the right place. You will find the most efficient and easiest way to fix it here.

WWDC 2019 and the grand unveiling of iOS 13 is just over a week away and based on the rumors, it could be one of the biggest iPhone and iPad upgrades ever. Dark Mode, an updated Files, a redesigned volume indicator, iMessage profiles and more are on full display. We all think that iOS 13 is almost perfect, but past experience tells us that it may also have some bugs. Similar to iOS 12 update, severe users have reported about different types of issues with it and one of them was iPhone Getting bricked or freezing. And if your iPhone has got bricked after upgrading to iOS 13 then you might be worried about the date stored on it. Don’t worry, this guide will definitely help you fix iPhone bricked issue after iOS 13 update and there is no data loss here.

Maybe you don’t know what does a bricked iPhone look like. Here are some of the symptoms that your iPhone is bricked:

• iPhone won’t turn on after iOS update
• There is only an Apple logo left on your non-responding screen.
• iPhone gets stuck in boot loop.
• iPhone stuck on the connect to iTunes logo.
• iPhone won’t turn on but it is full charge.
• iPhone bricks microphone.
• iPhone get bricked and get error 53 or iTuens error 53.
• iPhone units with third-party display.
• iPhone screen is black/white/red.
• iPhone is dead and no-responding to your any tap or voice order.
• And more.

What are the factors that cause these symptoms? The reason is various, maybe it’s just an update error; you upgrade your iPhone to an unstable version of iOS; due to heavy application, music, video, photos, etc., there is not enough storage space; firmware corruption or malware attacks; iPhone jailbreak and so on. Whatever the reason, you need to find a way to help you reboot your device. This article is written for you to fix iPhone got bricked after updating to iOS 13/iOS 12.3/iOS 12.2/iOS 12 in the most direct and efficient way.

U.Fone iOS Toolkit – iOS System Recovery may be the best way to deal with any kind of issues or errors occur on iPhone/iPad/iPod Touch. In fact, it is a data recovery tool coming with a feature of “Fix iOS System”. You can use it to recover various types of data or rescue your iPhone from the problems like being stuck in recovery mode, DFU mode, Apple Logo, black screen, white screen and other issues. The software supports all iOS devices and all iOS versions including the latest iOS 13.

d_win d_mac
d_win d_mac

How to Fix Bricked iPhone after iOS 13 Upgrade

Step 1.Run the iOS System & Data Recovery on PC or Mac
Click the link as given above and download iPhone/iPad data recovery on your computer,you can get the windows as below.

ios system recovery

Step 2.Connect Bricked iPhone to Computer
Select the option of ‘iOS System Recovery’ from the primary window after the software is download completely. Secondly,use the USB cable to connect your iPhone to your computer . After a few seconds,the iPhone/iPad will be detection by iPhone/iPad data recovery and display it on its screen. Now, click on the button ‘Start’.

fix bricked iPhone,iPad

Step 3. Select your iPhone Model and Latest Version of the iOS System
You will be asked to confirm the information of your iPhone. Click “Repair” if it is correct, but if not, select the exact information manually before repair.

fix bricked iPhone on iOS 13

Step 4.Download the Latest iOS Firmware for your Bricked iPhone
In this step, the program will download the latest version of your firmware to repair the corrupted system and fix it to normal.

download the firmware and fix bricked iPhone

d_win d_mac
d_win d_mac

Related Articles:

How Fix iPhone iPad Stuck on Apple Logo on iOS 13

iPhone Stuck on Black Screen after iOS 12 Update, How to Fix

How to Fix iPhone 6s/7/8/X/XS Glitch after iOS 13/12 Update

Top 6 Ways to Backup iPhone/iPad for iOS 13 Update

Recover Lost Data from iPhone/iPad after iOS 12/13 Update

Fix iPhone Got Bricked after iOS 13 Update

How Fix iPhone iPad Stuck on Apple Logo on iOS 13

[Summary]: iPhone or iPad stuck on Apple logo after an iOS 13 update? This article will show you the most effective way to fix iPhone stuck on Apple logo screen without losing any data.

Apple’s annual Worldwide Developers Conference (WWDC) kicks off June 3, when we’ll get the first official peek at all the new features coming to iOS 13. These long-awaited features, from the official dark mode, smarter gestures to better third-party support and smarter Siri, iOS 13 is expected to shine in this event. Once iOS 13 is officially launched, many users want to experience its features. However, each upgrade will bring some errors based on past experience, such as apps not working well with iOS 13; hotspot won’t turn off; iPhone/iPad stuck in black or white screen of death; iPhone/iPad stuck in Recovery mode, DFU mode; iPhone looping on start; iPhone error 4013 and so on.

fix iphone stuck on apple logo

Unfortunately, if you encounter one of these errors, how do you fix your iOS device to a normal state? This article is specifically designed to fix iPhone/iPad gets frozen on Apple logo when upgrading to iOS 13.

Reasons for Your iPhone Stuck on White Apple Logo Screen

Maybe you already know that the error was caused by the iOS 13 update. But besides that, there are other factors, they are:

  • iPhone shows an error during a software update.
  • iPhone runs on beta version which is no longer available later on.
  • Your iPhone has been jailbroken.
  • While restoring an iPhone via iTunes or iCloud, it can stuck into Apple logo screen.
  • There is a problem with the hardware of your iPhone.

Best Way to Fix iPhone Stuck on Apple Logo without Data Loss

This iOS System Recovery is your best solution for fixing iPod, iPad and iPhone stuck on Apple logo without any data loss. In addition to the Apple logo screen, it also works effectively to fix iPhone stuck in recovery mode, iPhone freezes problem, iPhone stuck on Black screen, iPhone stuck on White screen, red screen, blue screen etc.

Key Features

  • Fix all iOS problems such as iPhone stuck on Apple logo, recovery mode, DFU mode or headphone mode and so on.
  • Your device will be back to normal with several clicks.
  • Restore an iPhone without iTunes.
  • Full compatible with all iOS devices and iOS versions including iPhone 11/11 Pr (Max) and iOS 13.
  • 放特点

d_win d_mac
d_win d_mac

Fix iPhone Stuck on Apple Logo after iOS 13 Update

Step 1.Run Program and Connect iPhone

To start with, install and run U.Fone iOS Toolkit – iOS System Recovery on the computer. Connect your iPhone which stuck on Apple logo to the computer with a USB cable.

iOS System Recovery home page

Step 2.Select Repair Mode

Select the “iOS System Recovery” option under the “More tools” selection in the home page of program. You will see some notes displayed in the window. If you have no problem with all the notes here, click “Start” button.

select repair mode

Notes:
1.Your iPhone will be updated to the latest version.
2.The Unlocked network will be re-locked.
3.If it is a jailbroken iPhone,it will be updated to a none jail-broken phone.

Step 3. Download Firmware for iPhone

The program will detect your phone model and the iOS version. If it fails to do that, you can manually select them for your device. Then click the “Repair” button.

select your iPhone model

Now the program will begin to download the firmware for restoring iPhone system.

download the firmware for iPhone

Step 4. Fix iPhone Stuck on Apple Logo without Data Loss

The program will start to repair the phone system to normal. Wait for a few minutes. Your iPhone should turn on and get out of Apple logo screen.

fix iPhone stuck on apple logo screen

Done. You can check your device if it return to normal state.

d_win d_mac
d_win d_mac

Related Articles:

How to Fix Bricked iPhone iPad after iOS 11 Update

iPhone Stuck on Black Screen after iOS 12 Update, How to Fix

How to Fix iPhone Stuck in Reboot Loop without Losing Data

Top 6 Ways to Backup iPhone/iPad for iOS 13 Update

Recover Lost Data from iPhone/iPad after iOS 12/13 Update

Fix iPhone Stuck on Apple Logo on iOS 13

6 Ways to Backup iPhone/iPad Data before iOS 15/iOS 14 Update

Summary
Before update to iOS 15/iPadOS 15/iPadOS 14, you must to backup your iPhone/iPad/iPod data to PC or Mac, as you may encounter some unexpected stuck errors. This article will offer top 6 solutions on how to back up data from iPhone/iPad/iPod(touch) to computer before iOS 15/iPadOS 15 upgrade.

iOS 15 and iPadOS 15, Apple’s latest iPhone and iPad mobile operating system is coming soon. As a rule of thumb, every release of iOS (including iOS 15) offers a range of updates and new features on a range of older iPhones and iPads. Normally, you won’t have problems during the iOS 15 software upgrade process. As the saying goes, prevention is better than cure. Before downloading and installing the update, make sure you have backed up your iPhone or iPad, as you may experience some unexpected stuck errors, resulting in data loss. Your iPhone may be stuck on the Apple logo, recovery mode, restart loop and cannot be recovered. Therefore, we strongly recommend you to make a full backup of iPhone/iPad in advance. This article provides top 6 solutions to backup iPhone and iPad data before upgrading to iOS 15 or iPadOS 15, perhaps one of which is what you want.

Part 1: Backup iPhone/iPad with iTunes

When it comes to making backup for iOS device, iTunes is the most common tool. The process is simple:

1. Plug your iPhone or iPad into your Mac or PC.
2. Launch iTunes and choose the iPhone icon in the upper-left corner.
3. Click the Summary tab and scroll down to the Backups section.
4. Click the Back Up Now button and wait for the backup to complete.
5. To verify that the backup worked, open iTunes Preferences and select the Devices tab. If the backup was successful, you’ll see it listed there.

iphone-backup-itunes-mac

Part 2: Backup iPhone/iPad with iCloud

Apple provides 5 GB for free cloud storage for every Apple ID. So, you can leverage these 5 GB to regularly back up your iPhone data. It’s simple to perform this over the Wi-Fi network: Navigate to Settings > Your profile > iCloud > iCloud Backup > Back Up Now.

how-to-backup-restore-iphone-ipa

Part 3: Backup iPhone/iPad via iOS Toolkit – Backup & Restore

iOS Toolkit – Backup & Restore assists you to backup and export iOS device data directly to your computer. Here is a list of features for this iOS Toolkit – Backup & Restore program:

1-click to backup iPhone/iPad data to a computer.
Selectively backs up iPhone data to any Windows or Mac.
Directly backup Social apps on from iPhone/iPad, such as WhatsApp, LINE, Kik, Viber.
Restore data to device from iTunes and iCloud backup.
Export what you want from the backup to your computer.
No data loss on devices during the restore.
Add useful features, such as Recover, Switch, Repair, Erase, Unlock and so on.
Support iPhone XS/XR/8/7/SE/6/6 Plus/6s/6s Plus, etc.
Fully compatible with Windows 10/8/7 or Mac 10.14/10.13/10.12/10.11.

d_win d_mac
d_win d_mac

Step 1. Run iOS Toolkit – iOS Backup & Restore on your computer and you will see its functional section on the window.

Step 2. Choose “Backup & Restore“, connect your iPhone or iPad via USB cable, then click “Backup” button, a list of all supported file types will be displayed.

Step 3. Select data types you like to backup and hit the “Backup” button. Your selected data will be backed up from iPhone to your desktop or laptop instantly.

iTunes music to Android transfer

Part 4: Backup iPhone/iPad by U.Fone iOS Data Recovery

U.Fone iOS Toolkit – iOS Data Backup & Restore is also a one-stop tool for backing up and restoring data on your iPhone and iPad devices. It allows you to back up all your data with one click or select specific data for backup. The following are the specific features of this tool.

Back up any iPhone/iPad data and restore data iOS device easily.
Safely recover deleted files from iPhone and iPad.
Offer 3 recovery modes for iPhone data recovery.
Fix iOS system to normal without any data loss.
Preview data before restoring.
More than 25 data types are supported for backup, like contacts, photos, app data, messages, call history, calendars, voice memos, reminders, etc.
Support IM apps, including WhatsApp, Viber, LINE, Kik, etc.

d_win d_mac
d_win d_mac

Step 1. Open U.Fone iOS Toolkit – iOS Data Backup & Restore and connect your iPhone to PC. Select “iOS Data Backup & Restore” from its home screen.

Step 2. Select the “iOS Data Backup” then tick the boxes beside each file types you want to back up with.

Step 3. U.Fone iOS Toolkit – iOS Data Backup & Restore will start back up your iOS data. When the backup is done, it will display the name and the size of the backup file.

unfone-ios-backup-restore-connect

Part 5: Backup iPhone/iPad by iPhone Data Exporter

iPhone Backup Exporter is a desktop software which helps you to extract data from iTunes and iCloud backup files to computer without any issue.

Main Features:

Flexibly export your data from iPhone/iPad/iPod touch.
Export 18+ types of data, like contacts, messages, photos, music, videos, calendars and more.
Preview data before transfer to get exactly what you need.
Check iTunes backup without restoring it to iOS devices.
Access iCloud data on your own computer at any time.
Extract only the data you need instead of restoring the whole backup.
Compatible with all iOS versions and devices including iOS 13 and
iPhone Xs (Max).

d_win d_mac
d_win d_mac

Step 1. Run iPhone Data Exporter, choose “Export from iOS Device” given at the left panel.

Step 2. Connect iPhone/iPad to PC then select the file types you need to export.

Step 3. Click on “Back Up” and wait for the notification of the completion of process.

export iphone data option

Part 6: Backup iPhone/iPad Using Phone Transfer

Phone Transfer a great handy tool designed to backup your iPhone/iPad with ease. It supports backing up 12 different types of files, including photos, contacts, SMS messages, Notes, Ebooks, call logs, music, videos, etc, and you are allowed to restore the data whenever you want. Let’s see what Phone Transfer can help you with:

One click backup data on your iPhone/iPad/iPod touch, Android phone, or Nokia (Symbian) phone to PC.
Transfer data from iPhone, Android, iOS, iTunes, iCloud to anywhere without any loss.
Easily transfer diverse types of files, including contacts, messages, apps, call logs, photos, videos, etc.
Works perfectly with Apple, Samsung, HTC, LG, Sony, Google, HUAWEI, Motorola, ZTE, and more smartphones and tablets.
Fully compatible with major providers like AT&T, Verizon, Sprint and T-Mobile.
Permanently erase your old Android phone data.

d_win d_mac
d_win d_mac

Step 1. Run Phone Transfer on your Windows PC or Mac.

Step 2. Select “Back Up Your Phone” in the homepage and connect your iPhone/iPad to the computer.

Step 3. All transferable data on your device are displayed. Check those what you wanted, and click on “Start Transfer” to back up them to your computer.

backup mode

Related Articles:

How to Restore iPhone Photos after iOS 12/iOS 13 Update

How to Recover Lost Data on iPhone/iPad after iOS 13/12 Update

Safely Backup iPhone/iPad/iPod Data before iOS 12 Update

Backup & Restore iPhone Data before iOS 11 Update(iOS 10.3)

Install IPSW File on iPhone iPad with/without iTunes

Backup iPhone/iPad Data

How to Fix iPhone Glitch after Update to iOS 13

[Summary]: iPhone met glitch after an iOS 13 update? Here this post will offer top solutions on how to fix iPhone glitch after updating to iOS 12.3/12, even with the latest iOS 13.

We’ll get an official list of iOS 13 features at WWDC 2019. Every iOS update brings new highlights. Similarly, this time Apple did its homework in terms of details. Apple will bring its dark mode to iOS with this latest update. If you want to use your phone at night without blinking, it will come in handy. Also, the new iOS 13 system offers a new slide-based keyboard, the Revamped Health app. Features such as Sleep mode, Home security, iPad multitasking and more have also been optimized in the new iOS 13. If you want to update to iOS 13, please check to see if your device supports the system. The following devices will almost certainly get iOS 13: iPhone XS/XS Max/XR/X/8/8 Plus/7/7 Plus/6s/6s Plus/SE, 12.9-inch iPad Pro (2nd generation), 12.9-inch , iPad Pro (1st generation), 10.5-inch iPad Pro, 9.7-inch iPad Pro, 9.7-inch iPad (2018), iPad Air 4, iPad (2017), iPad mini 5, iPad mini 4.

iPhone Met Glitch after an iOS 13 Update? Like an iOS 12.3/iOS 12.2/iOS 12 update, every update can cause some errors. Some users complained about an iPhone glitch after updating to iOS 13, such as a black screen, a frozen screen, stuck on Apple logo screen or white screen, and so on. There are many reasons for these glitches, but you can easily fix them in many simple ways. Here are some iPhone troubleshooting tips to fix some of the most common iPhone glitches.

Part 1: What You Should Do before Fixing iPhone Glitch

No matter what the circumstances, mobile phone data must be something you don’t want to miss, such as contacts, WhatsApp, news, photos, etc. Therefore, before we show you how to fix iPhone glitch, we strongly recommend that you use iPhone Data Exporter to back up your iPhone. iPhone Data Exporter is designed to transfer data from iPhone, iPad and iPod touch to your computer for extra security. Various data types are supported, namely contacts, messages, photos, music, videos, calendars and more. Plus, iPhone Data Exporter can help you extract and download data from iTunes or iCloud backup without any hassle. If you want to know more, click here.

Here is what iPhone Data Exporter can do for you:

Transfer data from iPhone, iTunes backup, iCloud backup to PC or Mac.
Export iPhone files, like contacts, messages, photos, music, videos, calendars and more.
Import photos, music, videos, ringtones, eBook from PC to iPhone
Restore lost iPhone data due to accidental deletion, broken device, damages, virus infection, jailbreak failure, unsuccessful iOS upgrade, factory reset, frozen device, etc.
You will be able to preview each file before exporting them.

d_win d_mac
d_win d_mac

export iphone data option

Part 2: Fix iPhone Glitch after Update to iOS 13

1. Force Restart Your iPhone

This is the most direct method and a force restart is an activity done at the hardware level and does not affect the software.

iPhone XS Max/XS/XR/X/8 Plus/8:Press and hold the Side and either Volume button until you see the slider appears. Then, drag the slider to turn off your iOS device. Then you can press and hold the Side button again to turn on your iPhone.

iPhone 7/7Plus: Press and hold the Volume button and Side button for about 10 seconds until the Apple logo appears. Then, drag the slider to turn off your iPhone. Then press and hold the Power button to turn on your iPhone.

iPhone 6s/6s Plus: Press the Home and Top/Side buttons, hold them for at least 10 seconds until the Apple logo appears.

2. Fix iOS 13 Glitches by A iOS Repair Tool (No Data Loss)

The focus of the U.Fone iOS Toolkit – iOS System Recovery is entirely on iOS system repair. If you are dealing with any kind of iPhone problem while updating iOS, jailbreaking, it is recommended that you use this iOS System Recovery to get your device back to normal.

Main Features of iOS System Recovery

Easily fix iOS system to normal, such as iPhone stuck in recovery mode, spinning circle, Apple logo, white/black screen of death, frozen screen, iPhone won’t turn on, update failure, forgot lock screen password.
Supports All Models of iPhone, iPad and iPod.
Fix your iOS to normal without any data loss.
Compatible with all iOS versions, the latest iOS 13 supported.

d_win d_mac
d_win d_mac

How to Use iOS System Recovery to Fix iPhone Glitch

Step 1. Install and Run iOS System Recovery
Install and run iOS System Recovery on your computer. Then connect your iOS 13 iPhone to PC with its USB cable.

Step 2.Choose Repair Mode

Select the “iOS System Recovery” option from “More tools“. You will see some notes displayed in the window. If you have no problem with all the notes here, click “Start“.

iOS System Recovery home page

click start to begin

Reminder: Your iPhone will be updated to the latest version after fixing. If it’s a jailbroken iPhone, it will be updated to a non-jailbroken phone.

Step 3.Download the Firmware for Your iPhone

This is automatically done by the program once the model is detected. You can also manually choose the firmware version you like if there is more than one option. Click on “Repair” to download the firmware for your iPhone.

select your iPhone model

After downloading the firmware, the program will start the repair process automatically.

download the firmware for iPhone

Step 4.Fix iPhone Glitch to Normal
After a short while, your iPhone glitches will be removed and your device can work normally again.

restore iPhone system to normal

This all-in-one application can quickly repair various iOS system issues without any data loss, such as iPhone stuck on Apple logo, DFU mode, recovery mode, iPhone i glitch, iPhone screen, keyboard glitch and iPhone FaceTime glitch, etc.

d_win d_mac
d_win d_mac

Related Articles:

How to Restore iPhone Photos after iOS 12/iOS 13 Update

How to Recover Lost Data on iPhone/iPad after iOS 13/12 Update

How to Fix iPhone System to Normal after iOS 12/12.1 Update

How to Fix All iOS Errors on iPhone/iPad without Data Loss

[Fixed]iOS 12/11 Update or Downgrade Stuck in Recovery Mode

Fix iPhone Glitch after iOS 13 Update

How to Transfer Music and Playlist from iTunes to Google Pixel

[Summary]: Want to transfer iTunes library to Google Pixel? Looking for a way to copy iTunes music to Google Pixel Android phone? Read this article and follow the simple steps to transfer songs, Apple Music tracks and playlist from iTunes to Google Pixel 3a/3/2/1(XL).

On the 2019 Google Developer Conference, Google inc has launched two new Android smartphones – Pixel 3a and Pixel 3a XL , both two phones are equipped with Qualcomm Snapdragon 670 processor, built-in 4GB memory, Bluetooth 5.0 support, and 18W fast charge (PD2. 0), the battery is 3000mAh and 3700mAh respectively. The screen sizes of the Pixel 3a and Pixel 3a XL are 5.6-inch and 6.0-inch respectively, all of which are OLED screens, weighing only 147g and 167g, respectively, with a thickness of 8.2mm. On the back of the phone, Pixel 3a and Pixel 3a XL are 12.2 million pixels. Dual-pixel post-camera + capacitive fingerprint recognition, Pixel 3a and Pixel 3a XL run the latest version of Android 9.0 Pie system, Google promises that the two models will be free updated for the new Android system for at least 3 years.

sync itunes music to google pixel

In just a few years, Google has made several upgrades to Pixel phones, Google Pixel modes including Pixel, Pixel XL, Pixel 2, Pixel 2XL, Pixel 3, Pixel 3X and the latest Pixel 3a/3a XL. When if you have purchase an new Android phone to replace your old iPhone, you may want to transfer data from iPhone to Google Pixel, or import music and videos to Google Pixel for enjoying anywhere you like. It’s not difficult to transfer files from old phone/PC/Mac to Android phone, but if you want to sync music from iTunes to Android, including your purchased/downloaded Apple Music songs, how you can transfer music from iTunes to Google Pixel phone?

Today, we will teach you the best method to transfer iTunes music to Google Pixel 3a/3/2/1(XL) or other Android devices by iTunes to Android Transfer tool.

You may want to know how to stream Apple Music to Google Pixel

1 Click iTunes Music to Google Pixel/Android Phone Transfer

To sync music from iTunes library to Google Pixel or other Android devices, you need to use an iTunes to Android Transfer, this iOS & Android Manager and Android Toolkit – Transfer probably is your best choice. You can easily transfer songs, movies, Podcasts, iTunes U and more from iTunes Library to Google Pixel or other Android phones/tablets. In additional, if you want to backup music to iTunes, this program also allows you transfer music and videos from Android to iTunes for backup. Moreover, this Android transfer tool enables you transfer music, videos, photos, contacts from computer to Android if you need that. Let’s see more feature about iOS & Android transfer software.

  • Transfer Music between iTunes and Android devices.
  • Transfer data from Android to PC/Mac, or reversely.
  • Transfer media between iPhone/iPad/iPod and iTunes.
  • Manage your Android phone and iPhone on PC/Mac.
  • Supports the transfer of all data like videos, photos, call logs, contacts, text messages, etc.

d_win d_mac
d_win d_mac

Step-by-Step Guide to Transfer Songs from iTunes to Google Pixel 3/3a(XL)

This guide shows you the detail guide to sync music from iTunes to Google Pixel by Android Toolkit – Transfer, you can also use the iOS & Android Manager to copy songs from iTunes, PC, Mac, Android, iOS to Google Pixel phone, these two software have similar features.

Step 1. Download and Launch Android Toolkit on PC or Mac
Launch Android Toolkit and connect your Android to your Mac or Windows computer, then click “Transfer” section to continue.

iTunes music to Android transfer

Step 2. Click “Transfer iTunes Media to Device”
After entering the data transfer function, then click “Transfer iTunes Media to Device” option, the program will read and load all media files of the iTunes library.

mac android itunes music transfer

Step 3. Connect Google Pixel Phone to Computer
After loading the entire library, then using an Android USB cable to connect your Google Pixel phone to the computer.

sync iTunes music to google pixel

Step 4. Start to Transfer iTunes Music to Google Pixel Phone
You can select the entire library, or select the files which you want to transfer from iTunes to Google Pixel phone. Then hit “Transfer” button to sync songs from iTunes library to your Google Pixel phone.

transfer iTunes music to google pixel

Free download the Android Toolkit and start to sync iTunes music to Android phone.

d_win d_mac
d_win d_mac

Note: This program can’t transfer the Apple Music songs to Android directly, because all Apple Music songs added DRM protection, if you want to transfer Apple Music songs to Android phone for playing offline, you must to remove DRM from Apple Music firstly, then use this Android transfer program to transfer the converted Apple Music songs to your Android phone directly.

Tips to Transfer Apple Music Songs to Google Pixel

Which is the best Apple Music DRM Removal and Apple Music Converter? Here, we recommend the UkeySoft Apple Music Converter, which also is a professional iTunes music converter and DRM audio converter, it can convert Apple Music, iTunes music and audiobooks to MP3/AAC/WMV without DRM protection. After getting the DRM-free Apple Music songs, you can directly import the converted MP3 songs to Android, MP3 player, iPhone/iPad/iPod, Zune, PSP and more.

convert apple music to google pixel

Here, you can learn how to import music from PC/Mac to Google Pixel

Transfer iTunes Music from iTunes to Google Pixel

How to Backup and Restore Google Pixel 3a/3a XL

[Summary]: Want to backup data from Google Pixel 3a/3a XL to computer? This article teach you a easily method to back up your Android data from Google Pixel 3a/3/2/1(XL) to computer, you can also learn how to selectively restore backed up data to your Google Pixel, as well as restore iTunes/iCloud backup to Google Pixel phone.
backup restore google pixel phone

Contents:

Google has released two mid-range smartphones – Pixel 3a and Pixel 3a XL. The Pixel 3a’s screen is 5.6-inch with a resolution of 1080 x 2160, while the Pixel 3a XL phone’s screen is 6-inch screen with a resolution of 2220 x 1080.The Pixel 3a will be powered by a Qualcomm Snapdragon 670 processor with 4GB of RAM and 64GB of storage. The single-core/multi-core runs in Geekbench are 1627 / 5189. The Pixel 3a XL will be powered by the Qualcomm Snapdragon 710 processor with 4GB of RAM and 128GB of storage. The single-core/multi-core runs in Geekbench are 1773 / 6133 respectively.

google pixel 3a backup resotre

In terms of shooting, Pixel 3a and Pixel 3a XL will use a 12.2 megapixel rear lens, equipped with Google Pixel Visual Core image processing unit, which can accelerate the camera’s HDR+ calculation, make image processing faster, and make HDR+ performance better than current 5 times faster. Pixel 3a and Pixel 3a XL will use the Titan M security chip and support fast charging. In terms of price, the Pixel 3a is priced at $399 and the Pixel 3a XL is priced at $479.

If you often take photos and shoot videos by Google Pixel phone, since there are a lot of photos and videos stored on your phone, in order to speed up your Google Pixel phone, you may need to regularly back up your large capacity videos and photos to your computer, and then deleted the photos and videos on your phone. In order to make your data safely, you must to backup contacts, text messages, photos, videos, call logs, calendar, Application and Application data to the computer. In the following cases, you may need to back up your Android data in advance.

Part 1: Why You Need to Backup Android Data Regularly?

Avoiding files deleted by mistakenly.
Before perform factory reset your Android phone.
Avoiding formatting phone’s SD card by careless.
Before updating Android OS.
Avoiding data lost due to virus or malware attack.
Forgot lock screen password password/PIN/pattern.
Before rooting the Android phone
Prevent the phone stuck at white/black/blank screen of death and can’t access data.
Avoid losing data due to water-damaged the phone
Avoiding the phone ROM flashing.
And so on…

If you are looking for some way to backup and restore your Pixel 3a/3a XL and Google Pixel 3/2/1(XL), you’d better read our passage in detail. We recommend you to use Android Toolkit – Backup & Restore and U.Fone Android Data Backup & Restore tool, both can help you backup and restore Android data easily.

Part 2: Backup and Restore Pixel 3a/3a XL Data by U.Fone Android Data Backup & Restore

The U.Fone Android Data Backup & Restore is a part of U.Fone Android Toolkit, which is designed to back up data from Pixel 3a/3/2/1(XL) to computer and even selectively restore backed up data to your other Android device. You can safely and selectively back up your Android data, including contacts, text messages, WhatsApp messages, call logs, gallery, videos, audio and documents. Moreover, you can also set a password for protecting your important backup files.

d_win d_mac
d_win d_mac

Steps to Backup Data from Pixel 3a/3a XL to Computer

Step 1. Launch Android Toolkit on PC or Mac
First of all, please download, install and launch the Android Toolkit on the computer, click “Android Data Backup & Restore” section, you can see the screenshot as below.

google Pixel backup restore

Entering “Android Data Backup & Restore” function and select “Device Data Backup”

backup google Pixel phone

Step 2.Connect Google Pixel 3a to Computer with USB cable
Then, using a USB cable to connect your Pixel phone to the computer, then program will detect it.

connect google Pixel to backup

Step 3. Choose a Backup Option
Choose ‘Device Data Backup‘ or ‘One-click Backup‘ option to back up data from Pixel 3a to the computer.

backup google Pixel data

Note: “Device Data Backup” means you can select data type to make a backup while “One-click Backup” lets you back up all data at one time without picking up specific data. After backing up data from Google Pixel to the computer, you can also set a password to protect the backups.

backup data from google Pixel

Steps to Restore Backup to your Pixel Phone or other Android phones

Above steps, you have backed up your Google Pixel phone’s data, you can preview and select the data you want to restore. In this part, we will teach you how to restore the backup files to the original Pixel 3a phone or other Android phones. In additional, you can also directly restore Android data to PC/Mac for further use.

Step 1. Connect Google Pixel or other Android Devices to Computer
If you want to restore all your data, you can back to the main interface and choose ‘One-click Restore‘ option. If you want to choose some certain data, you can click choose ‘Device Data Restore‘ according to your need.

restore google Pixel data

Step 2. Start to Restore Data to Pixel 3a
After connecting your Google Pixel phone to the computer successfully, choose the suitable backup to restore your backed up files to Google Pixel 3a directly.

restore data to google Pixel

You can also restore your Android phone the other new phone easily in regardless of e data loss for deletion or phone switch.

restore data to google Pixel 3a

Related guide: How to transfer data from iPhone/Android to Pixel 3a/3a XL

Download the Android Toolkit – Android Data Backup & Restore and start to backup and restore your Android data easily.

d_win d_mac
d_win d_mac

Tips: U.Fone Android Toolkit not only can help you backup restore data on Google Pixel phone, but also can help you recover deleted data from Google Pixel phone.

Part 3:Restore iCloud and iTunes Backup to Pixel 3a/3/2/1(XL) by Android Toolkit

If you use iPhone/iPad/iPod before, and you may have backup iOS data to iCloud or iTunes before. When you have purchased an new Android phone as replace, like Pixel 3/3a(XL), Samsung Galaxy S10/S9/S8/Note 9, Huawei P30/P20/Mate 20/Mate 10, etc. This part will teach you how to restore precious iCloud/iTunes backed up data to Google Pixel phone.

Android Toolkit – Backup & Restore can help you backup your contacts, SMS, photos, videos, WhatsApp data and more Apple data on Android phone and restore them selectively whenever you need. Moreover, it also allows you restore iTunes backup to Android, and restore iCloud backup to Android. Let’s learn how to restore data to Google Pixel from iTunes/iCloud backups.

Download Android Toolkit for Windows and Mac and try to manage your phone’s data easily.

d_win d_mac
d_win d_mac

Step to Restore iCloud Backup Data to Google Pixel

With the help of Backup & Resotre (Android), you can easily download, preview, and restore iCloud backup to Google Pixel phone in minutes, the whole restoring process won’t affecting existing Android data and settings.

Step 1. Connect your Google Pixel Phone to PC
Download, install, and launch the Android Toolkit on your PC. In the main screen, select “Backup & Resotre” function.

Restore iCloud Data to Android

Use the original USB cable to connect Google Pixel phone to the PC. Then click the “Restore” button in the middle of the scren.

Restore iCloud Data to Google Pixel

Step 2. Sign in to your iCloud account
In the next screen that shows up, select “Restore from iCloud backup” from the left side.

sign in icloud

You may have enabled the two-factor authentication for your iCloud account. In this case, a verification code will be sent to your iPhone. Find the verification code and input it in in the following screen, and click “Verify”.

verify icloud id

Step 3. Restore iCloud Data to Google Pixel
Now you have signed in to your iCloud. All the backup files are listed in the dr.fone screen. Select one of them and click “Download” to save the file to a local directory on your PC.

download icloud backup file

Then the software will read and display all the data from the downloaded iCloud backup file. Click a data type and preview what information is stored in it. Then you can select some or all of the data items and click “Restore to Device”.

select icloud backup data restore to google pixel

In the dialog box that is displayed, select an Android device in the drop-down list, and click “Continue”.

Note: An Android device does not support such data types as Voice memos, Notes, Bookmark, and Safari history.

confirm to restore to android

Step to Restore iTunes Backup Data to Google Pixel

For iOS users, you may frequently back up and restore iPhone or iPad data via iTunes, when you have purchased an new Android phone like Pixel 3a/3(XL), you can directly restore data from iTunes to Android phone. If you iPhone is broken, damaged, lost or stolen, under these circumstances, you still have chance to restore iTunes backup data to Android phone, even if your iPhone or iPad is unavailable or not in hand.

Step 1. Connect the Goolge Pixel Phone to Computer
After downloading dr.fone on your computer, install and start the tool. Then select “Backup & Restore” among all the features.

Restore iTunes Backup Data to Android

Then, please connect your Goolge Pixel phone to the computer via USB cable. After the connection is set up, click “Restore” in the center of the screen.

Restore iTunes Backup Data to

Step 2. Detect iTunes backup files
In the next screen, select “Restore from iTunes backup” from the left column. dr.fone will detect the location of iTunes backup files on your computer, and list them one by one.

confirm android device to restore to

Step 3. Preview iTunes backup data, and restore to Android.
Select one of the iTunes backup files, and click “View”. The Android Toolkit will read and display all details from the iTunes backup file by data type.

Select all or some of the items, and click on “Restore to Device”

sync iTunes data to google pixel

In the new dialog box that pops up, select the desired Android device, and click “Continue” to confirm restoring iTunes backup to Goolge Pixel.

confirm to restore iTunes to Pixel 3a

Note: Data cannot be restored if Android does not support the corresponding data types.

Download the Android Toolkit and try to restore data from iTunes/iCloud to your iOS/Android phone directly.

d_win d_mac
d_win d_mac

Tips: When you have purchase an new Android phone, you can also follow this method to transfer data from iPhone/iPad/iPod to Android phone. For example, you need to sync data from iPhone to iTunes or upload to iCloud firstly, then use our Phone Toolkit to restore iCloud/iTunes backup to Samsung Galaxy S10/S9/S8/S7/S6/Note 9/Note 8, Huawei, HTC, Sony, LG, Motorola, Google Pixel, Xiaomi and almost of all latest Android smart phones.

Backup and Restore Google Pixel

How to Recover Deleted Data on Google Pixel 3A/3A XL

[Summary]: How to recover deleted data from Google Pixel 3A/3A XL. Use Android Data Recovery Software to recover deleted and lost data from Pixel 3A/3A XL. We also recommend you backup Android data to avoid data loss on Google Pixel 3A/3/2/1(XL).

Recently, Google inc released the Pixel 3a and Pixel 3a XL smartphones, this is a mid-range phone and the cheapest Android phone in the Pixel series, the Pixel 3A starts at $399, while the 3A XL is priced at $479. The back of the Pixel 3a is not glass, but polycarbonate, which is plastic. Although it’s plastic, the Pixel 3a feels pretty good overall. The Pixel 3A’s screen uses a 5.6-inch OLED screen with a resolution of 2220*1080, and the Pixl 3A is 6.0 inches, but the resolution is only 2160*. 1080. Pixel 3a/3a XL are equipped with Qualcomm Snapdragon 670 processor with 4GB of running memory, It is a good choice to buy a mid-range Android smartphone in this low price.

You may want to know:

How to transfer data from iPhone/Android to Pixel 3a/3a XL

How to backup and restore Android Data

Do you often use Google Pixel phone to take photos or shot videos? If you deleted or lost photos on your Pixel phone, how can you recover deleted photos, videos on Pixel phone? Have you lost contacts, SMS, call logs after factory reset Google Pixel phone? Do you uninstall and reinstal the WhatsApp app and found all WhatsApp data lost? Though the Google Pixel 3A smartphones has high ends features and specification, loss or deletion of data still occurs on these smartphones.
what are the causes for the loss of data and how users delete their files from Google Pixel 3A/3A XL/3/3XL/2/2XL and Pixel/XL?

Below causes for the data missing or deleting from Google Pixel phone.

How Data Gets Deleted Or Lost From Google Pixel 3A/3/2/1(XL)

Deleted files on Pixel phone by careless.
Restore to factory setting.
Formatting the SD card inside of the Pixel phone.
Failed update Android OS without backup phone’s data.
Virus or malware attack.
Forgetting screen lock password/PIN/pattern lock.
Failed rooting the Android phone without backup.
Android phone stuck at blank/white/black screen of death.
Water-damaged.
ROM flashing.
And so on…
Those are the common causes for the data loss or deleted on Android phones.

Don’t worry! In this article you are going to learn effective methods that will help you to recover lost or deleted data from your Google Pixel 3A/3A XL, including photos, videos, contacts, text messages, WhatsApp messages and more documents.

So, keep reading the detail guide – How to recover lost data and deleted files from Google Pixel 3A/3/2/1(XL), let’s take restore deleted photos from Pixel 3A as example.

Recover Data From Pixel 3A/3A XL by Use Android Data Recovery Software

U.Fone Android Data Recovery is a powerful and perfect Google Pixel 3A/3A XL Data Recovery Tool that will help you to effectively recover the erased, lost, deleted or missing data from Google Pixel 3A/3/2/1(XL) without backup, all recoverable data including text messages, contacts, photos, videos, audio, call history, documents, voice/call recordings, WhatsApp messages, documents and many other files.

This powerful Google Pixel 3A/3A XL Data Recovery software is available for both Windows and Mac computer. So, you need to download this Android data recovery software on PC or Mac, then using this software to scan and recover lost data from phone’s internal storage, external SD Card, not matter data lost due to mistakenly deletion, factory reset, rooted/unrooted and other unexpected situation.

d_win d_mac
d_win d_mac

In addition, the Broken Android Data Extraction feature also can help you fix Android system to normal and extract data from broken Android phone. So, you can use this function to recover data from damaged, screen broken, locked, water damaged, virus infected, black/white screen, factory reset, rooted/unrooted, ROM flashed .

Also Read: Recover Data From Broken/Damaged Samsung Galaxy S6/S5/S4
How to Fix a Black Screen Android phone

Now let us learn the complete guide to restore deleted data from Google Pixel 3a/3a XL by using U.Fone Android Data Recovery Software.

Step-by-Step To Recover Deleted or Lost Data From Pixel 3A/3A XL

Note: Before using our Android data recovery software to recover your lost data from Android phone, ensure don’t import/transfer data to the phone, or don’t using your Android phones after you lost or accidentally delete data on it. It is because if you add any new data on it, the new data will overwrite and replace the deleted data, it may greatly reduces the possibility of file recovery. Please use an profession Android data recovery software to recover your Android lost and deleted data as soon as possible.

Step 1. Launch Android Toolkit and Click “Android Data Recovery” Section
Download, install and run our Android Toolkit on PC or Mac, then click “Android Data Recovery” section go to recover your Android lost data.

Recover Google Pxel phone's Data

Step 2. Connect the Pixel 3A/3A XL Phone to PC
After launching the program, then using a USB cable to connect the Pixel phone to the computer.

Retrieve Data from Pixel 3A

Enabled USB debugging

Now, if you have not enabled USB debugging, you will need to follow this. Otherwise, skip to “Step 2”.

1) For Android 5.0 or newer: Tap “Settings” > “About Phone” to tap “Build number” seven times for “You are now a developer!” signal. Then, move to “Settings” > “Developer options” to turn on “USB debugging”

2) For Android 4.2 to 4.4.4: Move to “Settings” > “About Phone” > Tap “Build number” for several times until “You are under developer mode” appears > “Settings” > “Developer options” > Check “USB debugging”

3) For Android 3.0 to 4.1: Enter “Settings” > “Developer options” > Tick “USB debugging”

4) For Android 2.3 or earlier: Go to “Settings” > “Applications” > “Development” > Tick “USB debugging”

Restore Files from Pixel 3A

Step 3. Select File Types to Scan Google Pixel Phone
On this interface you are able to choose which kinds of data are to be scanned. So, please select the types of file you want to recover. And then press “Next” to scan your phone.

Recover Lost Files from Pixel

You should go to your Galaxy phone and tap “Allow” on the pop-up box until it disappears and the scanning will start.

allow to scan Pixel 3A XL

The program will start to analyze the phone.

Recover lost data from Google Pixel 3A

Step 4. Preview the Result and Recover Data from Pixel 3A/3A XL
Now, you can view the data you want to get back. Tick all of them and click “Recover” to save the deleted files onto the computer.

Retrieve Photos on Pixel 3A

d_win d_mac
d_win d_mac

Well done! You have restored lost and deleted data from Pixel phone, if you want to transfer the retrieved files back to the original phone for viewing or using, you can use this phone transfer & manager to transfer your Pixel phone’s lost content from PC to the original phone, you can also use this phone manager tool to transfer Android phone’s lost data from PC to iPhone/iPad directly.

Bonus Tips: Avoid Data Loss On Google Pixel 3A/3A XL

In order to avoiding data lost on your phone again, we recommend you should backup your Android data to computer regularly. Our Android Toolkit – Android Data Backup & Restore section allows you backup and restore data from 3A/3/2/1(XL) and almost all Android devices, all backupable data including contacts, messages, call logs, gallery, videos, audio and documents. In addition, you are able to set a password for protecting your important backup.

Recover Data from Pixel 3a

How to Transfer iOS/Android Data to Google Pixel 3A/3A XL

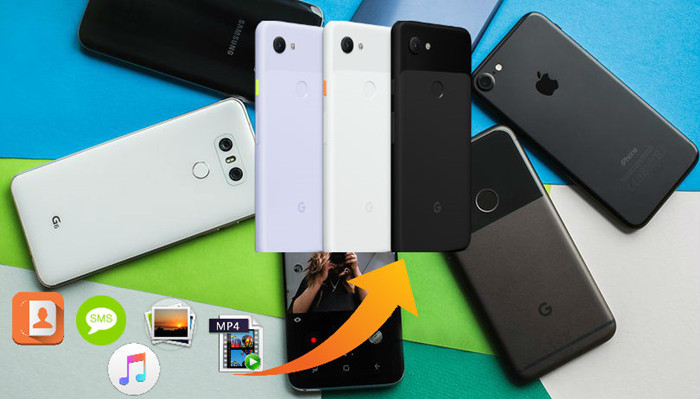
[Summary]: Do you want to transfer data from old phone to Pixel phone? This article teach you two ways to transfer data including contacts, messages, photos, videos, music and App data from Android, iPhone to Google Pixel 3A/3A XL with Google Quick Switch Adapter and Phone Switch.

transfer data to gooogle pixel 3A/3A XL

People also read:

* Transfer WhatsApp Messages from iPhone to Pixel 3A/3/2/1(XL)

* Restore deleted data from Pixel 3A/3/2/1(XL)

* Backup and restore data on Pixel 3A/3/2/1(XL)

* Import Music, Photos, Videos to Pixel 3A/3/2/1(XL)

* Transfer Music (Apple Music) from iTunes to Pixel 3A/3/2/1(XL)

Google released the cheap version of Google Pixel, Pixel 3A/3A XL, at the I/O 2019 Developer Conference on May 8. Also a Pixel phone, the Pixel 3A series broke the past high-priced flagship style, Pixel 3A is only half the price of Pixel 3: The Google Pixel Pixel 3A is priced at $ 399. The larger screen version of the Pixel 3A XL is available for $479, bringing two more intimate options to the Pixel model. Below is the detail specs of Pixel 3A/3A XL:

Google Pixel 3A/3A XL specs and price:

CPU: Qualcomm Snapdragon 670 processor
RAM: 4GB
ROM: 64GB
Screen; 5.6-inch 222×1080 OLED(Pixel 3A), 6.0-inch 2160×1080 OLED(Pixel 3A XL)
Camera; front: 8MP wide angle, F/2.0 rear: 12.2MP, unit pixel size 1.4μm, F/1.8, electronic image stabilization
System; Android 9.0 Pie
Battery capacity: 3700mAh(Pixel 3A), 3000mAh(Pixel 3A XL)
Body material: Plastic(Polycarbonate)
Features: Google Assistant, Night Shift, Live Relay

Google’s Pixel 3A/3A XL, many of us don’t seem to be particularly perfect in its eyes. In its target market, it is a very competitive product, only half the price of Pixel 3, so cheap! It almost the same photo performance as the previous models – Pixel 3/2/1(XL), the color design and Native Android support, such a high-profile mobile phone, I believe it is popular with many consumers. The Pixel 3A is available from Sprint, T-Mobile, Verizon and Google Fi. AT&T is not carrying these phones. You can also go to googlestore.com. The Pixel 3A starts at $399, while the Pixel 3A XL starts at $479.

Have upgraded from your old Android or iPhone? While buying a new Pixel 3A/3A XL, Pixel 3/3 XL, or Pixel 2/2 XL is exciting, transferring data can be boring and take a lot of time. To transfer data from old iPhone/Android to Pixel 3A/3A XL or Pixel 3/2/1(XL), you can use Quick Switch adapter to copy data from old phone to Google Pixel 3A/3A XL, if you looking for the easiest and fastest way to transfer iOS/Android data to Google Pixel, you need a specific phone data transfer app. This article teach you two method to copy data to Pixel 3A/3A XL from Android phone, such as Samsung Galaxy, old Google Pixel phone, Huawei Mate/P, Sony, HTC, Motorola, LG, ZTE, Xiaomi, etc. You can also follow the same steps to transfer data from iPhone to Pixel 3A/3A XL, transferable data includes contacts, text messages, photos, music, calendars, apps and more.

Part 1: Transfer Data from Android to Pixel 3A/3A XL with Google Quick Switch Adapter

Quick Switch Adapter is developed by Google™ inc, which is designed to transfer contents from old phone to Google Pixel phone, it not only allows you transfer data from your current Android device to your Pixel 3A/3/2/1(XL) phone, but also copy data from iPhone/iPad to Google Pixel phone, but during the entire transfer process, you must connect to a cellular or Wi-Fi network.

More you need before transfer content from old Android phone to Pixel 3A/3A XL with Google™ Quick Switch Adapter:

1.Google Pixel phone and old Android phone (Samsung, Huawei, HTC, LG, etc.)
2.USB cable provided with your old Android device
3.Google Quick Switch adapter
4.Sign your Google account on both mobile phones
5.A cellular or Wi-Fi network connection
6.Ensure both devices have more than 50% charge before getting started.

Let’s shows you the step-by-step guide on how to copy data from Samsung Galaxy to Pixel 3/3A XL via Google Quick Switch Adapter.

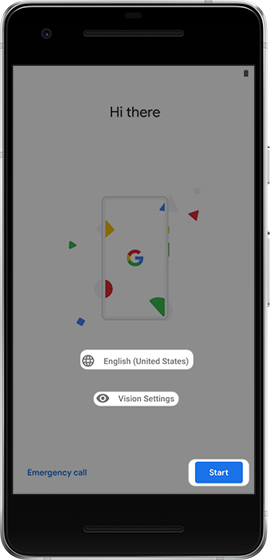
Step 1. Connect Wi-Fi network or cellular on Pixel 3A
Firstly of all, please tap Start on your Google Pixel 3A phone and follow the on-screen prompts to connect to a cellular or Wi-Fi network, and then tap Copy your data.

google quick switch adapter from Android

Step 2. Tap ‘Copy apps & data’ on Pixel Phone’s Screen
From the ‘Copy apps & data‘ screen, tap NEXT to transfer your data.

google quick switch adapter transfer to pixel 3A

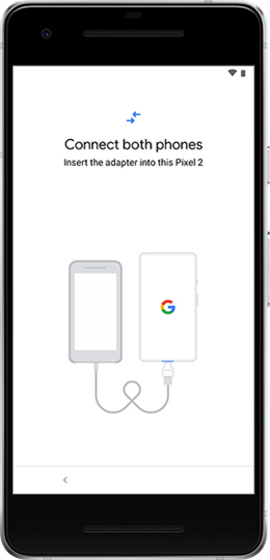
Step 3. Connect your Android Samsung and Pixel 3A Phone via Quick Switch Adapter
Turn on and unlock your Samsung Galaxy phone, then plug your Samsung Galaxy phone into the Quick Switch Adapter and plug the adapter into your Google Pixel phone.

google quick switch adapter transfer to pixel 3A xl

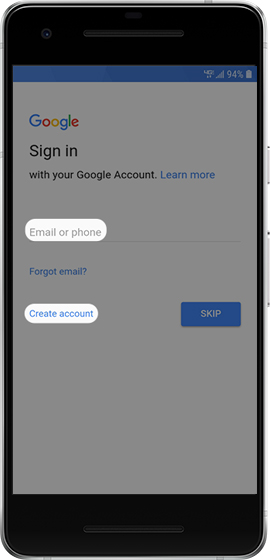
Step 4. Sign in to Google on Two Phones
When prompted, sign into your Google account or create a new Google account on your two Android phones.

google quick switch adapter move to pixel 3A

Step 5. Copy Data from Samsung to Pixel 3A
After signing your Google account, it will prompt the ‘Choose what to copy‘ screen on the Samsung phone’s screen, just select the types of contents that you want to copy and tap ‘Copy‘ to continue.

google quick switch adapter copy to pixel 3A

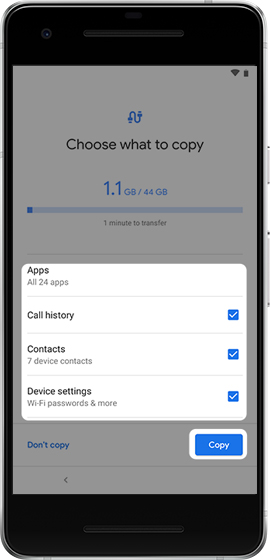
On your Google Pixel 3A phone, you’ll see a list of your data, please tap ‘Copy‘ to copy all your selected data from Android Samsung phone to Pixel 3A.

Step 6. Completed Samsung to Pixel 3A Data Transfer
When the transferring process done, you’ll get a notification, please tap Continue to set up your Pixel phone completely or tap Leave & get reminder to set up later.

google quick switch adapter copy samsung to google pixel

Just tap Done when you see the ‘Your phone’s almost ready’ screen then disconnect the cable when the transfer is finished. Now, you can see all copied contents be moved to your new Pixel 3A smart phone, you can use or view those copied contents on Pixel phone.

Notes:
Using Google Quick Switch Adapter to move contents from old phone to Google Pixel 3A/3/2/1(XL), make sure your Android phone running Android 5.0 (Lollipop) or later, and is performed during initial device setup.
In addition, please ensure the two phone’s battery is charged to at least 50% before connecting.

Part 2: Transfer Data from iPhone/Android to Pixel 3A/3A XL with Phone Switch

If you looking for a easy and quick way to transfer data from any old phone to Google Pixel 3A/3/2/1(XL), you can use a third-party mobile phone transfer tool, like Phone Toolkit – Switch, Phone Transfer or iOS & Android Transfer, all phone transfer tools can help you transfer contacts, SMS, photos, videos, music, call logs, calendar and Apps data from Android/iOS to Pixel 3A/3A XL directly, no need for a cellular or Wi-Fi network connection!

Phone Switch is a part of Phone Toolkit, it works on Windows and Mac computers, it can help you transfer data from Android to Android, iOS to Android, Android to iOS, and iOS to iOS phone, the phone switch compatible with Android 2.1 to 9.0 or later OS and iOS 5 to 12 or later. So, you can use this Phone Switch to transfer all kinds of data from iPhone/iPad/iPod/Android to Google Pixel phone directly, including text messages, contacts, photos, call logs,, videos, documents, calendar, music, and App data. What’s more, the “Restore Social App” function can help you transfer WhatsApp messages from iOS/Android to Pixel 3A/3/2/1(XL), as well as backup and restore WhatsApp data on Android phone. If you want to backup and restore your Android data, the “Backup & Restore” function allows you selectively backup Android data to computer with one click, so you can preview and restore the backup files to any Android/iOS devices.

Free download this Phone Toolkit – Swtich, and try to switch files from iOS/Android devices to Google Pixel phone directly.

d_win d_mac
d_win d_mac

More Features:

1-Click Phone to Google Pixel Transfer
Transfer photos, videos, calendar, contacts, messages and music from Android/iPhone/iPad to Google Pixel phone within 5 minutes.
Copy data from Huawei, HTC, Samsung, Nokia, Motorola, Nokia and more Android brands to Google Pixel phone.
Transfer data to Google Pixel phone from iPhone X/8/7/SE/6s (Plus)/6 Plus/5s/5c/5/4S/4/3GS that run iOS 12/11/10/9/8/7/6/5.
Fully compatible with major providers like AT&T, Verizon, Sprint and T-Mobile.
Fully compatible with Windows 10 or Mac 10.14

Step-by Step Guide to Transfer iOS/Android Data to Pixel 3A/3A XL

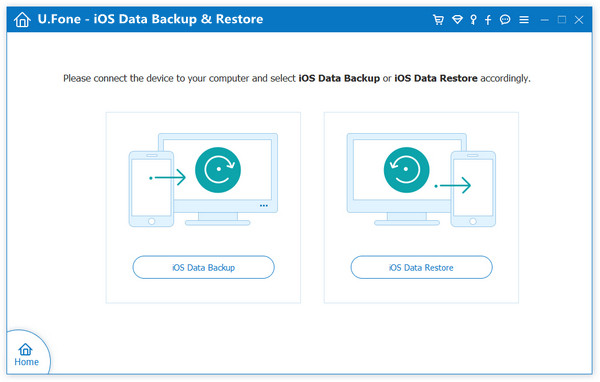
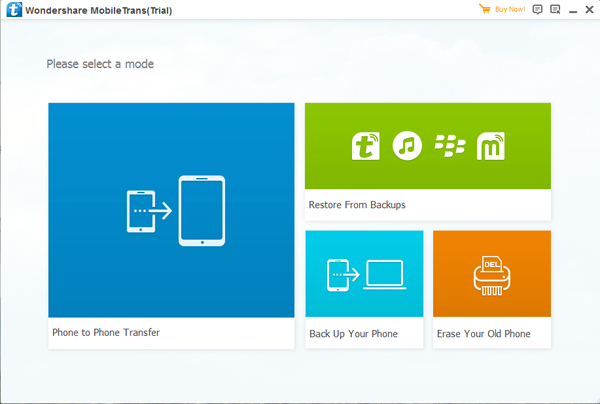
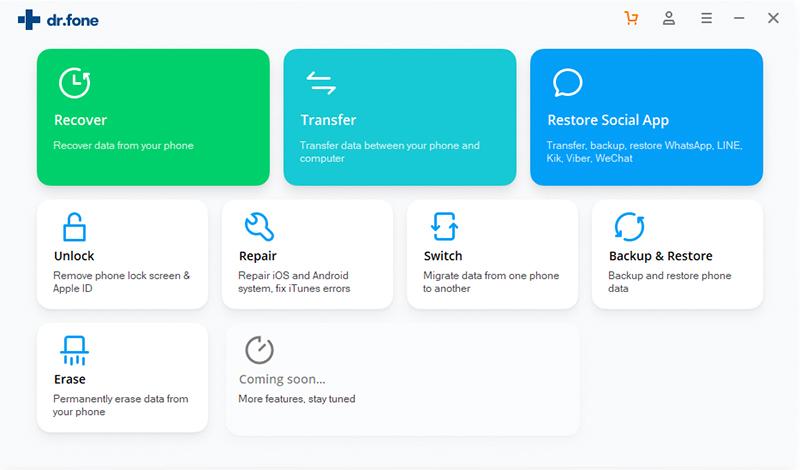
Step 1. Run Phone Toolkit- Switch
Launch Phone Toolkit on your Windows PC or Mac. In its homepage, choose the “Switch” option and click on it.

iphone to google pixel 3A transfer

Step 2. Connect iPhone and Pixel 3A to the Computer
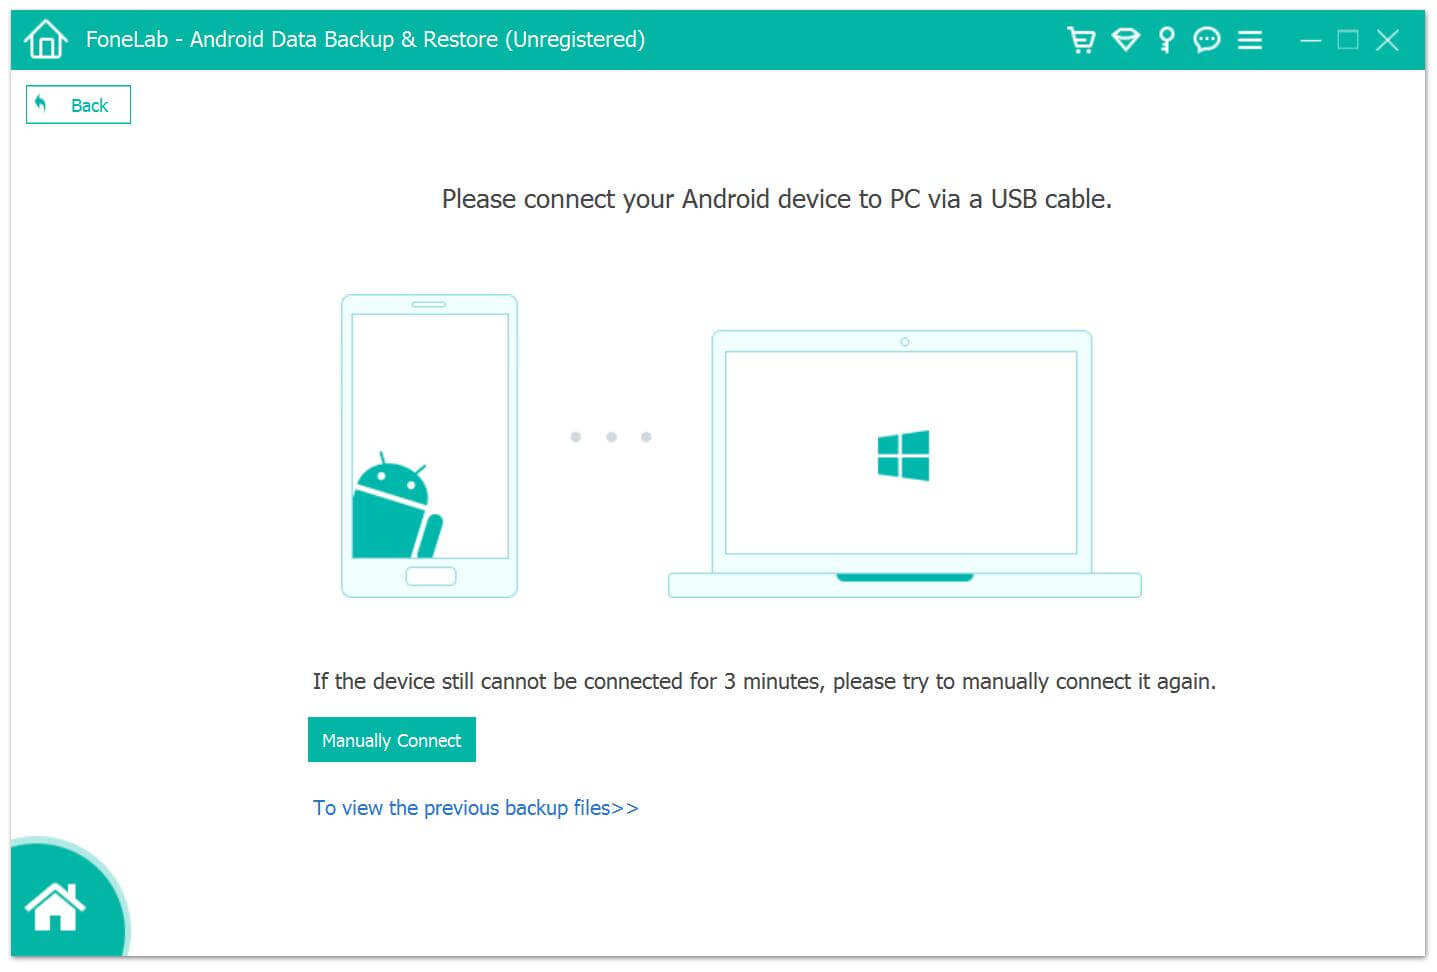
Connect Your iPhone and Google Pixel 3A smart phone to the computer with USB cables, two mobile phones will be soon detected and shown in the window below.

For: iPhone to Android Transfer

transfer iphone data to pixel 3A

Tips: If you want to transfer data from old Android phone to Pixel 3A/3A XL, please connect your Android phone to the computer via USB cable.

For Android to Android Transfer

transfer android data to pixel 3A

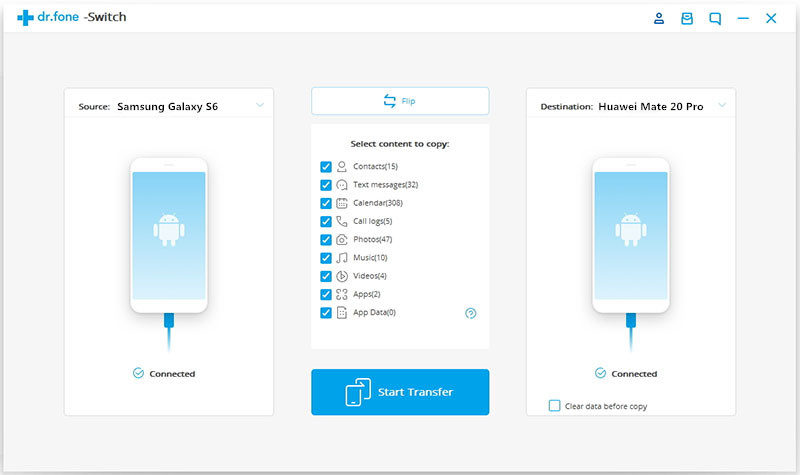
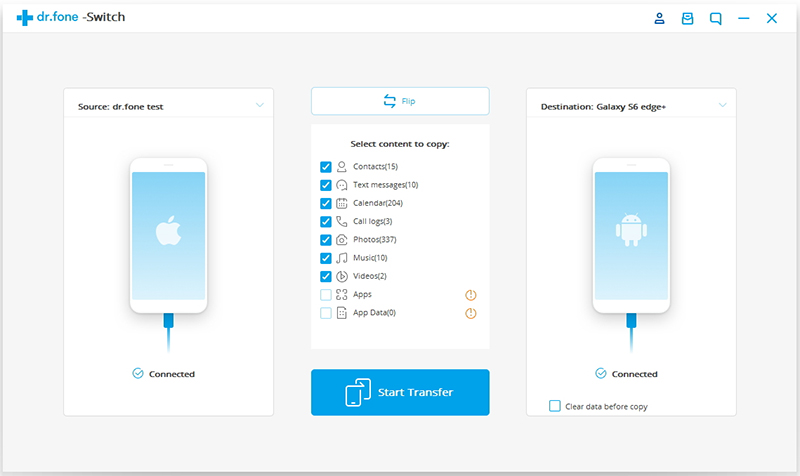
Step 3. Select Contents and Transfer from iPhone to Pixel 3A/3A XL
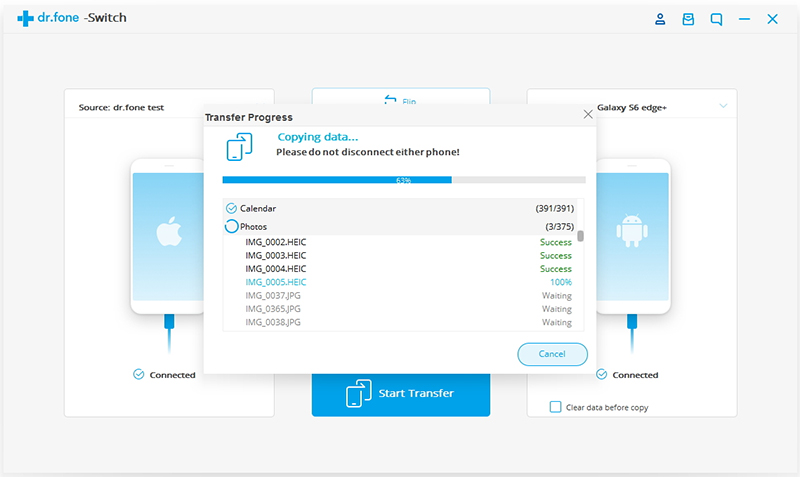
After being detected and scanned the iPhone by Phone Toolkit – Switch, the program will show all transferable data, including Contacts, Text messages, Calendar, Call logs, Photos, Music and Videos. For Android to Android Transfer, the program also supports transfer App and App Data. Just select the type of data you want to transfer, and then click “Start Transfer” button start to move data from iPhone to Pixel 3A.

transfer iphone data to google pixel 3A

Tips: If your have many useless files on your Pixel 3A smart phone, you can check “Clear data before copy”.

More Tips:
1. Transfer Contacts in accounts: To transfer contacts in Facebook, Twitter, Google and any accounts on your old Android/iPhone to Pixel phone or Android phone/tablet, you should sign in the accounts on your old phone.

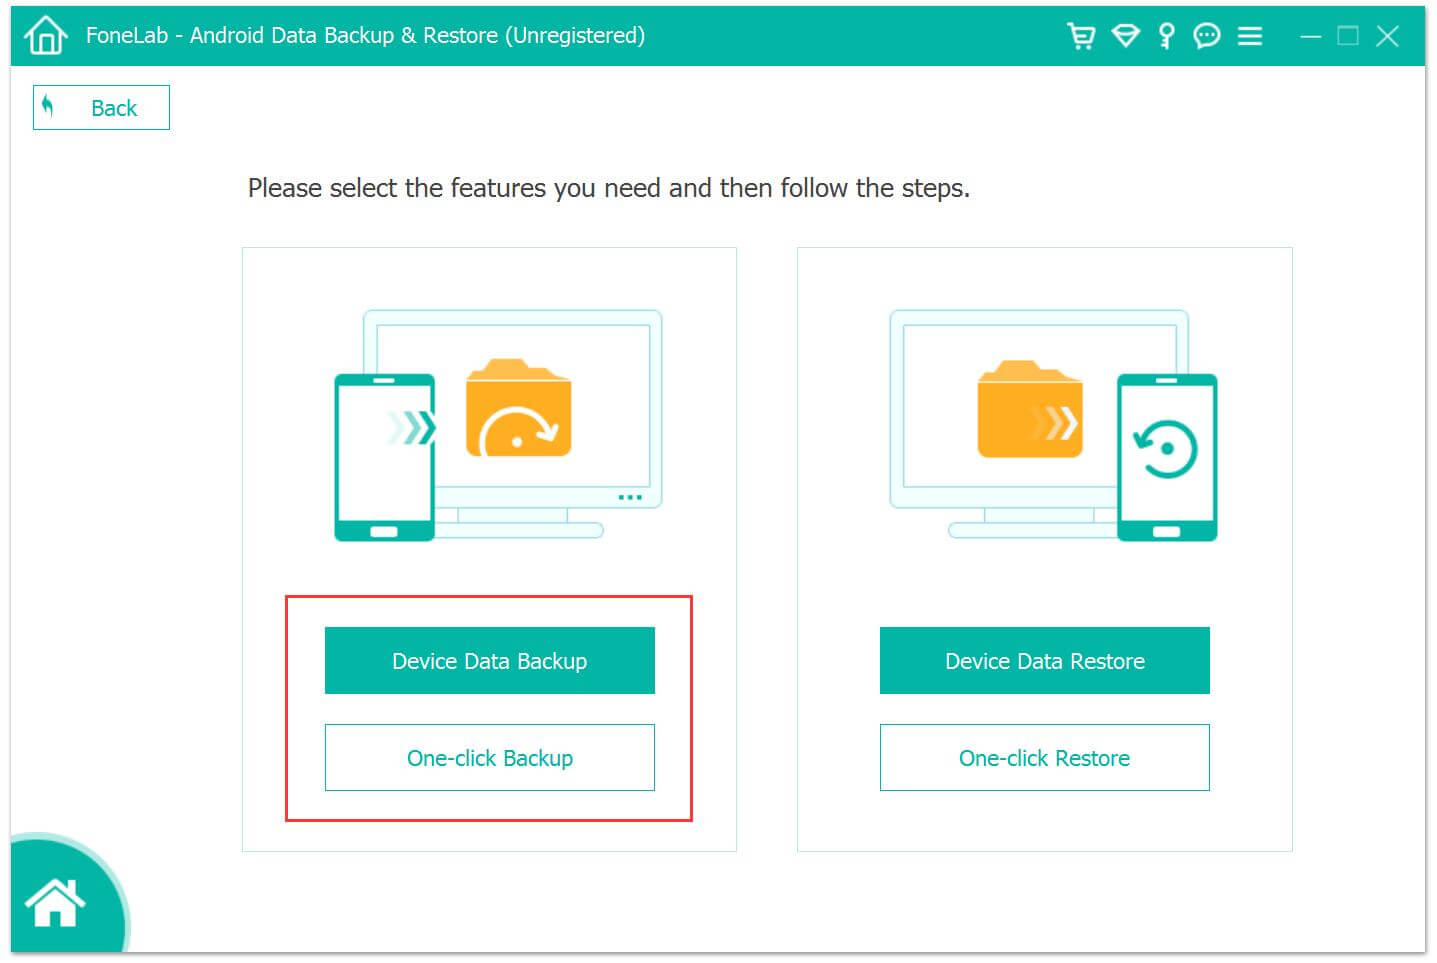
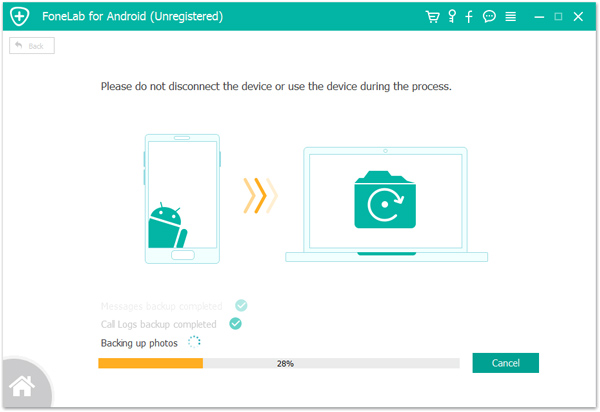
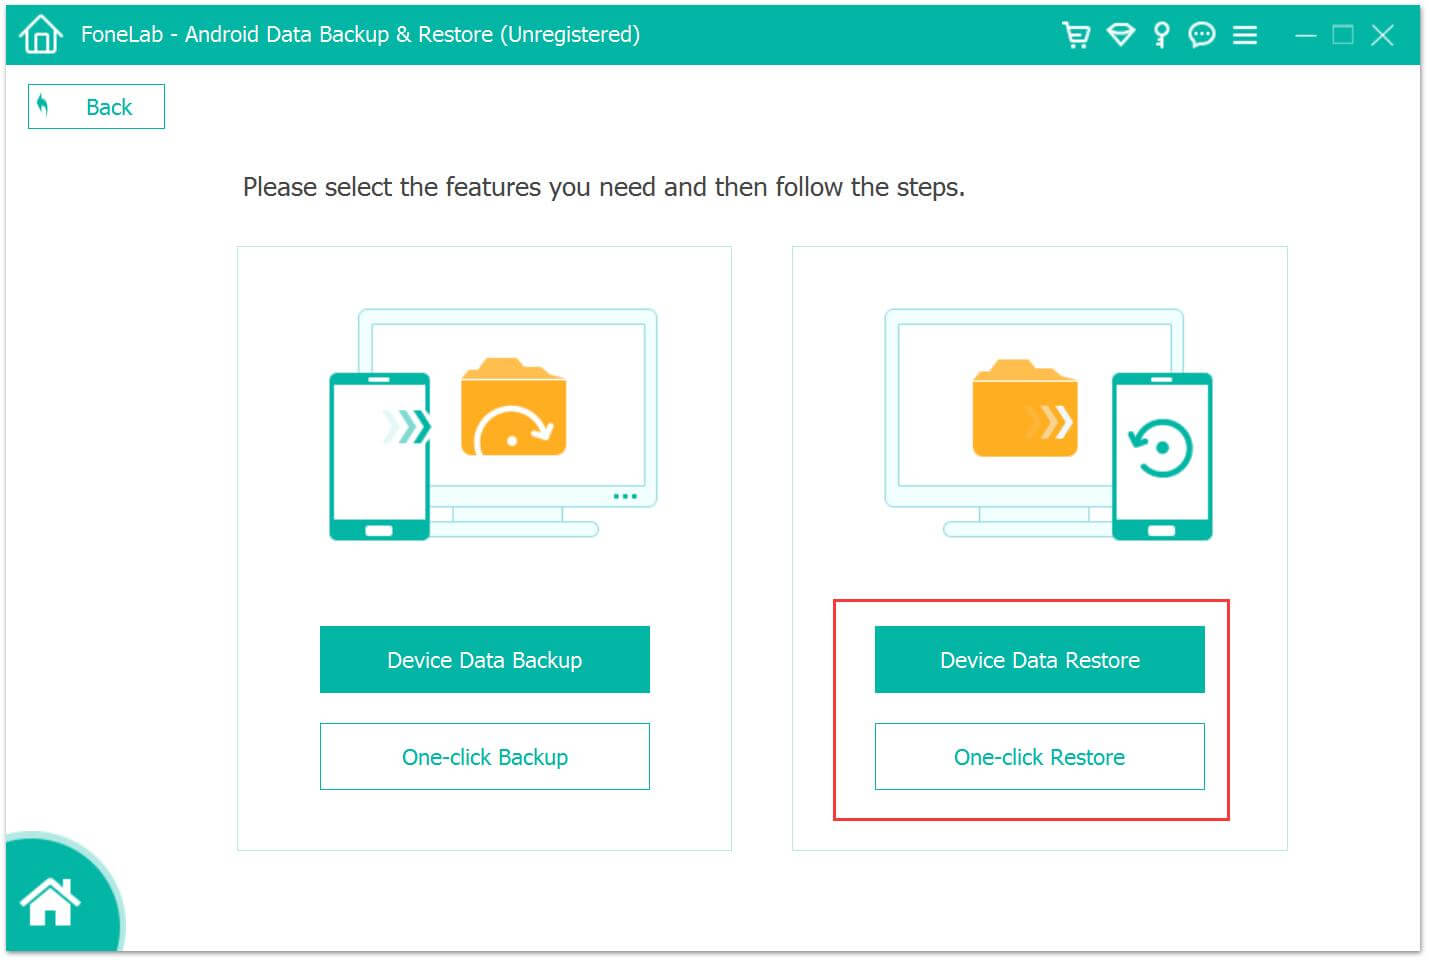
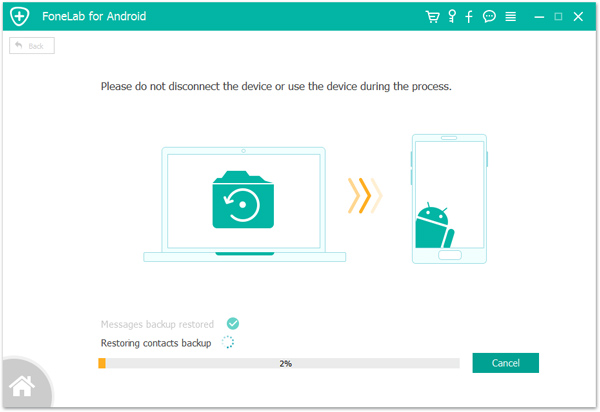
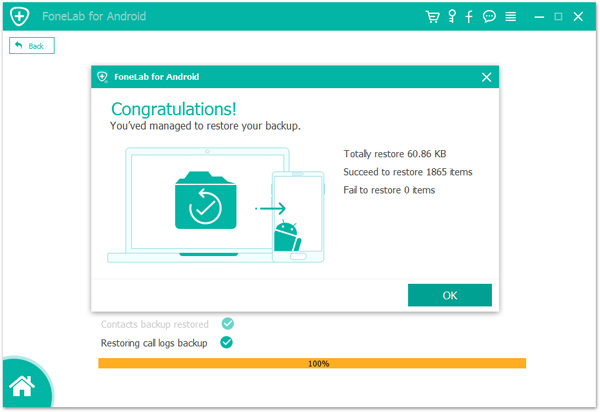
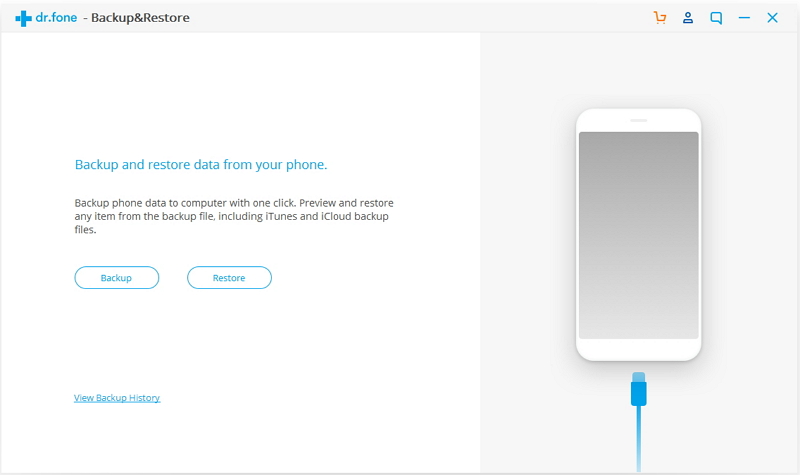
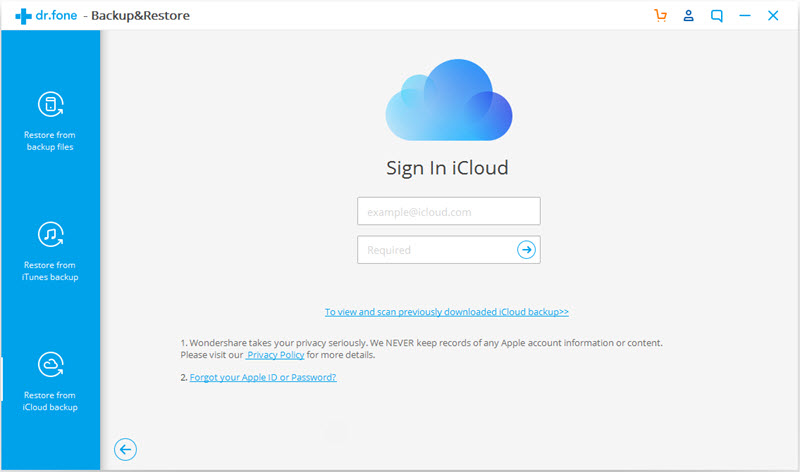
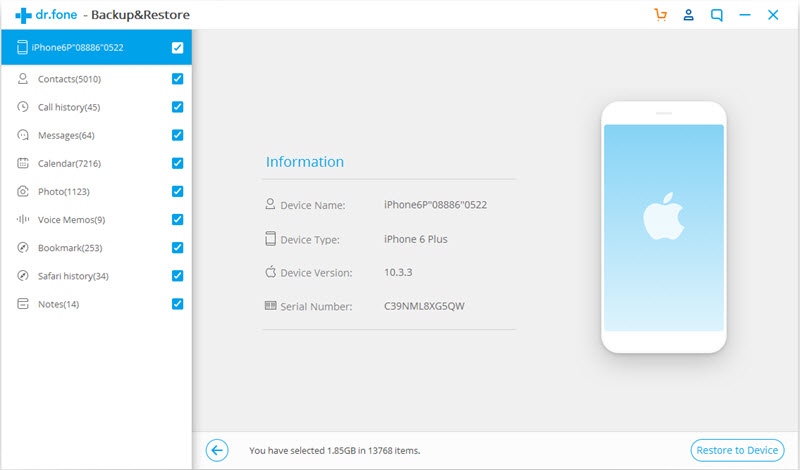
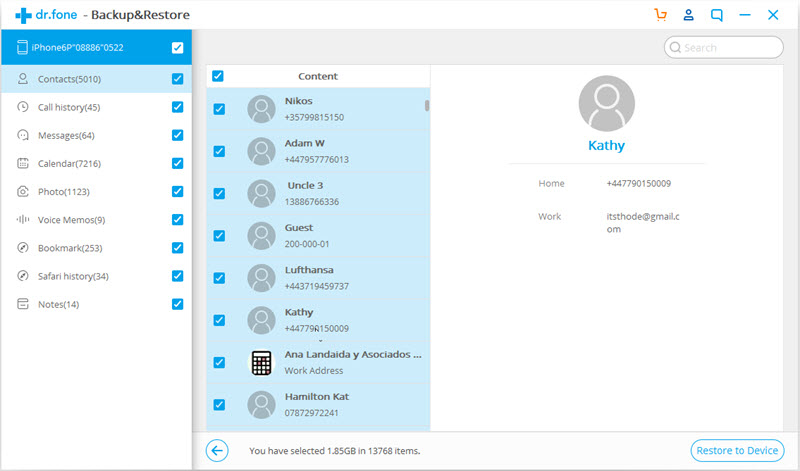
2.Backup and restore: This function allows you backup data from iPhone/Android to computer, and then restore to your Android Pixel phone directly.

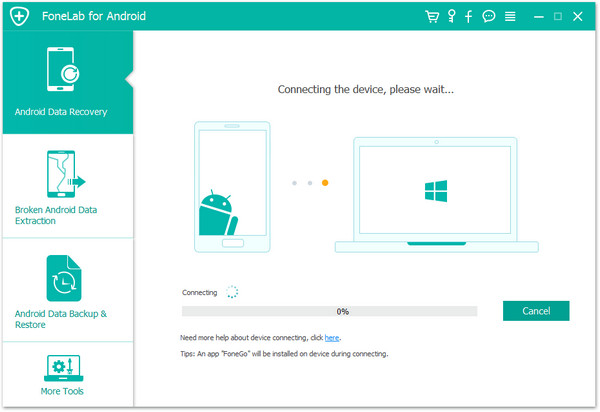
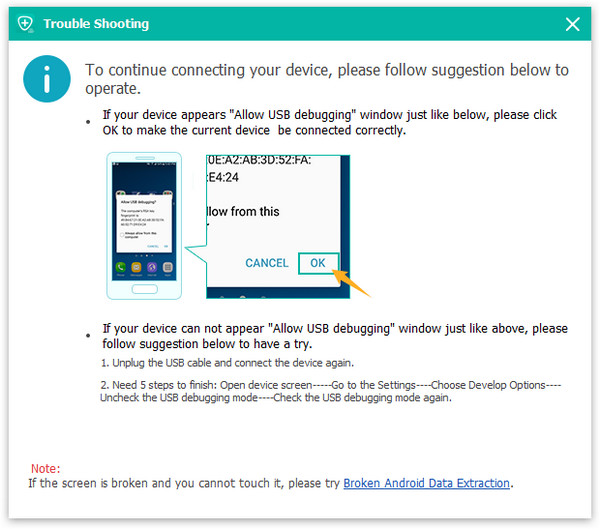
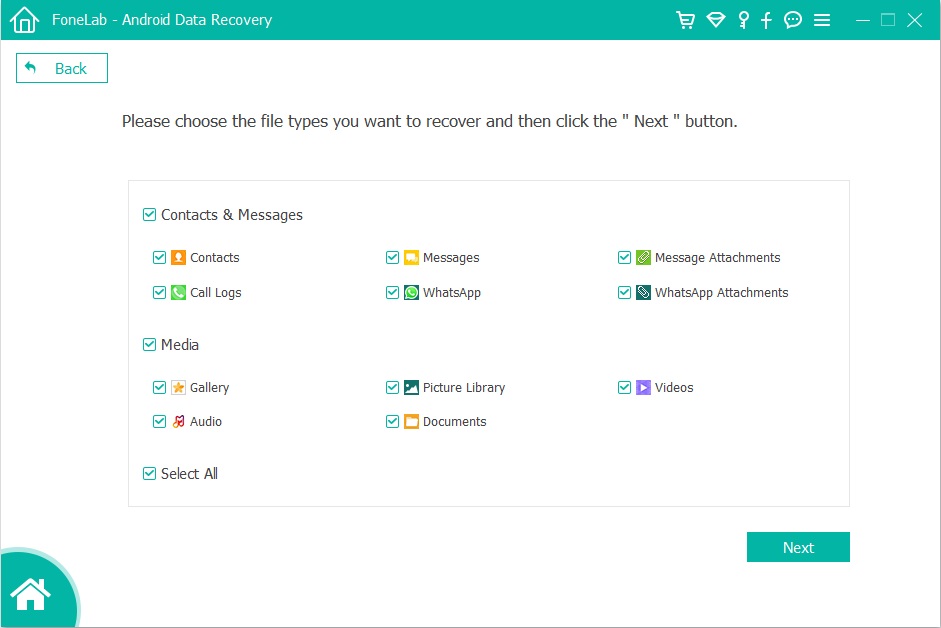
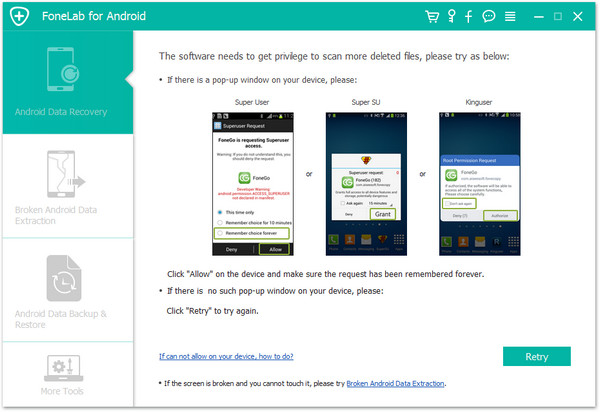
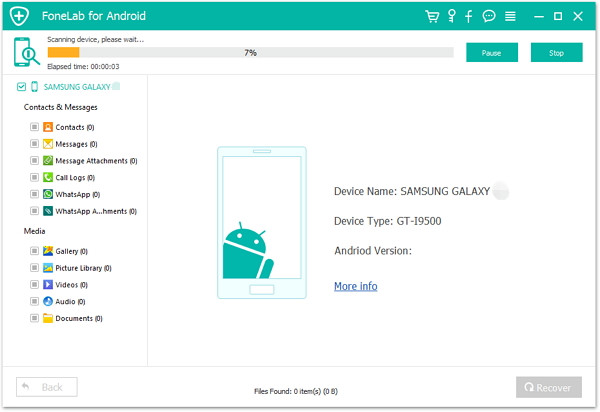
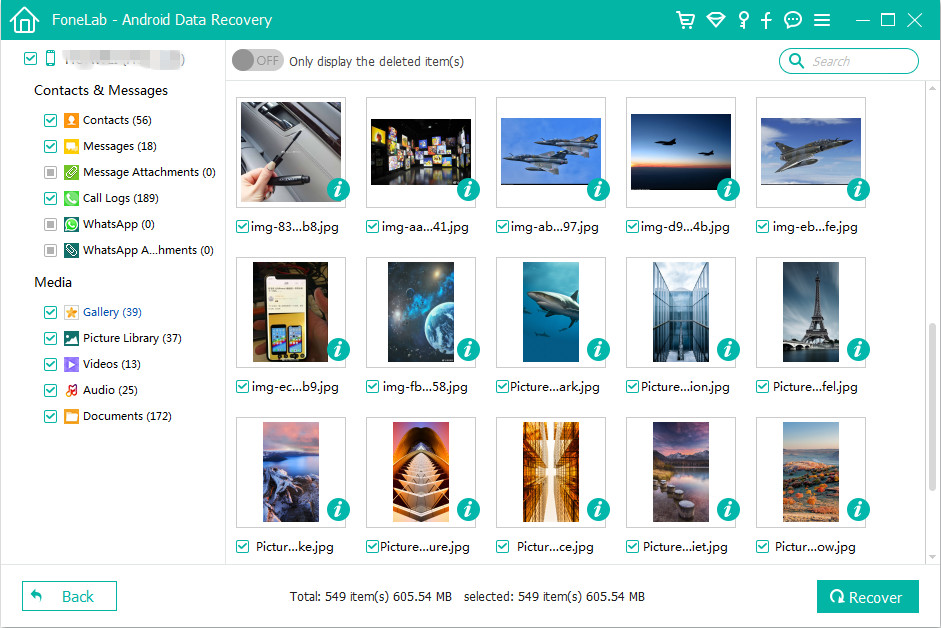
3.Android Data Recovery & iOS Data Recovery: This functions can help you recover lost and deleted data from Android phone and iPhone, including contacts, SMS, photos, videos, notes, call logs, WhatsApp messages and more.

4.Unlock Android & Unlock iPhone: If you forgot the locked screen of your phone, this feature can help you remove PIN, Password, Fingerprint & Pattern of Android phone to unlock your phone, as well as unlocking screen passwords from iPhone and iPad, no data lost at all.

d_win d_mac
d_win d_mac

Transfer Data to Pixel 3A/3A XL

How to Recover Lost Apple Music Songs from iPhone

[Summary]: iPhone Apple Music songs disappeared suddenly? Here are the incredible ways to recover lost Apple Music songs from iPhones and iPads.

A question from the Apple Forum: My Apple Music library has disappeared from my iPhone (6s) but my entire Music library is still intact on my iPad (iPad Air 2).

I can understand you. This issue can actually occur without any human input. For example, one day you are on the road, you feel that it is time to listen to music and relax. When you took your phone out of your pocket, you found all Apple Music songs disappeared. This kind of thing is very common among iPhone users. The most widely reported iteration of this issue is that iTunes basically “delisted” your music — it’s still there on your device taking up storage space, but iTunes doesn’t recognize it as music. Anyway, how to get back lost Apple Music songs is your first thing to consider. In this article, 2 methods have been listed and you can choose one of them according to your wishes.

CONTECT

Part 1: Restore Lost Apple Music Library Using iCloud Music Library

To get your music back and ready to be heard, just follow these simple steps.

Step 1. Go to Settings > Music > iCloud Music Library.

Step 2. Enable iCloud Music Library by moving the slider to green.

enable-icloud-music-library-iphone

Now, head back over to your Music app and check your Library. Your playlists, albums, and songs should all be there.

Part 2: Recover Apple Music Disappeared from iPhone and iPad

iOS Tooklit – Transfer is an extraordinary transfer software, supports you to copy files between iDevice, PC/Mac and iTunes. Also, you can use it to recover lost Apple Music songs from iPhone XS Max/XS/XR/X/8/7/6S/6/5S/5, iPad 2/Pro, etc. With just a few clicks, you can retrieve all lost music easily. Let’s take a look at the main highlights of iOS Transfer:

Transfer Music, Video, Photo, Apps, Ebook, Contacts, Messages and More on iOS devices.
Backup, edit, transfer, manage your media files.
Export certain or all of your photos from iPhone to computer.
Rebuild your iTunes library with one click.
Transfer music between iTunes and iPhone.
Manage songs & albums in iTunes Library or iPhone.

d_win d_mac
d_win d_mac

Steps to Retrieve Missing Apple Music Songs from iPhone

Step 1. Launch iOS Tooklit – Transfer on Your Computer

Free download the iOS Tooklit – Transfer software on your computer. Install and run it and its main page is as shown in the picture. In order for the program to detect your device, don’t forget the connection between the computer and your iPhone by using a USB cable. Navigate to the Transfer function to start.

u.fone ios toolkit - transfer

Step 2. Select Transfer iTunes Media to iDevice Options

You should see the “Transfer iTunes Media to iDevices” feature on the main screen. Choose it.

Transfer iTunes Media to iPhone Xs

Step 3. Recover Music from iTunes to iPhone

Next, a window pops up and you will see all iTunes content, such as music, videos, downloaded, ringtones, purchased, and more. Check “Music” and then click “Transfer”, all iTunes music including Apple Music will be transferred to your iPhone directly.

scan iPhone music

sync iTunes music to iPhone

If you only want to restore some Apple Music songs, find the “Music” tab from the top of the window and click tap “Add”, you can choose “Add File” or “Add Folder”. Now you only need to select the Apple Music songs you want to restore. Done!

d_win d_mac
d_win d_mac

Recover Apple Music Songs from iPhone