By Selena KomezUpdated on May 18, 2020
Samsung Galaxy is the most popular series of Samsung smartphones. Samsung Galaxy, a widely-used model among Android phones. There are so many people like to use Samsung Galaxy phone. However, sometimes Samsung users get despaired searching for an easy way to recover lost messages on Samsung Galaxy S9. The deleted SMS could be information send from your business partner or from your beloved ones, girlfriend, for example. Accidentally deleted text messages Android phone like Galaxy S9/S8/Note 9/Note 8, HUAWEI Mate 20/P20, Google Pixel 3 XL, do you looking for a way to get the deleted SMS back? Here in the following, we will show you how to deep scan the device and recover deleted and lost SMS from Galaxy S9/S9+ with an efficient and simple way.
You May Like:
Let’s teach you how to recover deleted SMS from Samsung Galaxy S9/S9+, as well as Samsung Galaxy S20, S10, S8, S7, S6, Note 10, Note 9, Note 8, Note 5, etc.
Actually the messages are not immediately wiped out from the SIM card or internal memory of device once you delete them on your device. This deleted data becomes invisible and replaceable. If you continue to use your device or adding the new files on it, the deleted data would be overwritten and you could not able to retrieve it any more. As the data still exist on your device, you can restore it with some Android recovery tool such as the famous Android Data Recovery.
In this way, once you find out that you delete the data carelessly and want to get them back, the first thing you need to pay attention to is to prevent the deleted data to be overwritten. In the other word, please stop using your device and try to recover them as soon as you can.
Samsung devices are coming with in-built feature “Samsung Cloud”, this is an online data backup service available for Samsung users to backup messages, contacts, photos, videos, gallery, calendar and notes to Samsung cloud. If you had the messages backed up to Samsung cloud during the time that the text messages were on your Samsung Galaxy S9 phone. It’s easier to get the messages back to your Samsung phone. Let’s teach you how to restore lost/deleted messages to Galaxy S9.
Step 1. Unlock your Samsung Galaxy S9 and open Settings app.
Step 2. Tap Accounts and backup > Samsung Cloud > Restore.
Step 3. Tap on Messages to select it.
Step 4. Tap Restore Now to restore the lost messages to Messages app.
Only few seconds, all of the lost or deleted messages and attachments will be appear in the Messages app.

Note: If you had’t the messages backed up before, you need to use a Samsung SMS Recovery to recover them. Once your deleted text messages or other files on your Samsung Galaxy S9/S9+, remember that stop using your phone,as any new generated data will overwrite the deleted contents and lead to them disappearing forever.Just using a professional Samsung SMS Recovery to find the lost texts and get them back,as soon as possible.
Android Data Recovery is specialized in recovering deleted data on Android, with help of it, you can directly recover deleted SMS and WhatsApp messages from Samsung Galaxy S9. In addition, Android Data Recovery also support to restore several types of data from Android, including contacts, photos, videos, audio, call history, WhatsApp messages, etc,. This program can be applied to restore deleted Android due to any data loss situations, such as, deleted accidentally, Android system update, Android system room, restore device to factory reset, virus attack, and more. And it works on most of Samsung smartphones such as Galaxy S20/S10/S9/S8/S7/S6/S6,Galaxy A9/A7/A5 and Note 9/8/5/4.
Step 1.Run Program and Connect Samsung Galaxy S9 to the Computer
First of all, run the Android Toolkit program on the computer.
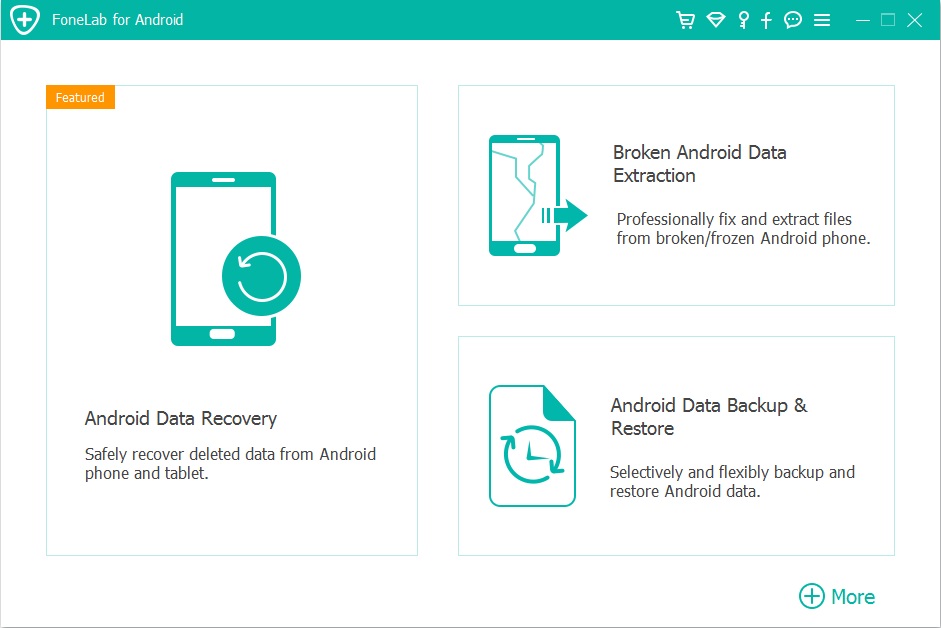
Then click”Android Data Recovery” option in the interface of program.Connect your Samsung Galaxy S9 phone to the computer via an USB cable.
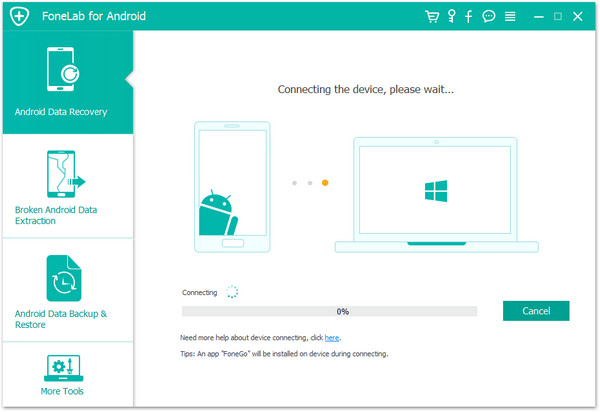
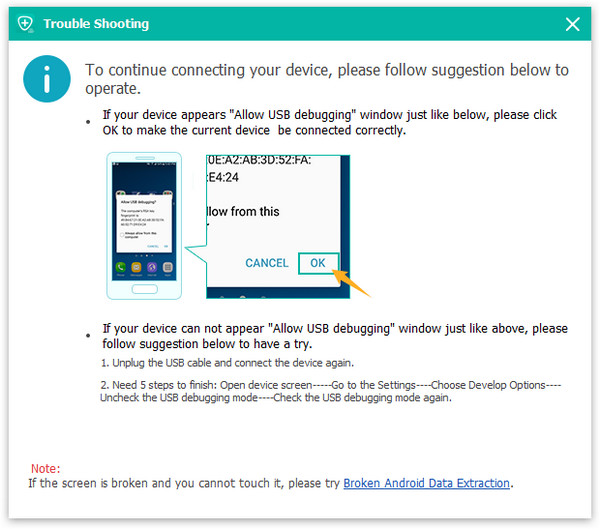
Step 2.Allow Program Connect Samsung to the Computer
Please click “OK” on the phone and go on, allow the program detect your device on the computer.
Step 3.Select SMS Files to Restore from Samsung
Now select “Messages” & “Message Attachments” files then clicking “Next” to enter the next step.
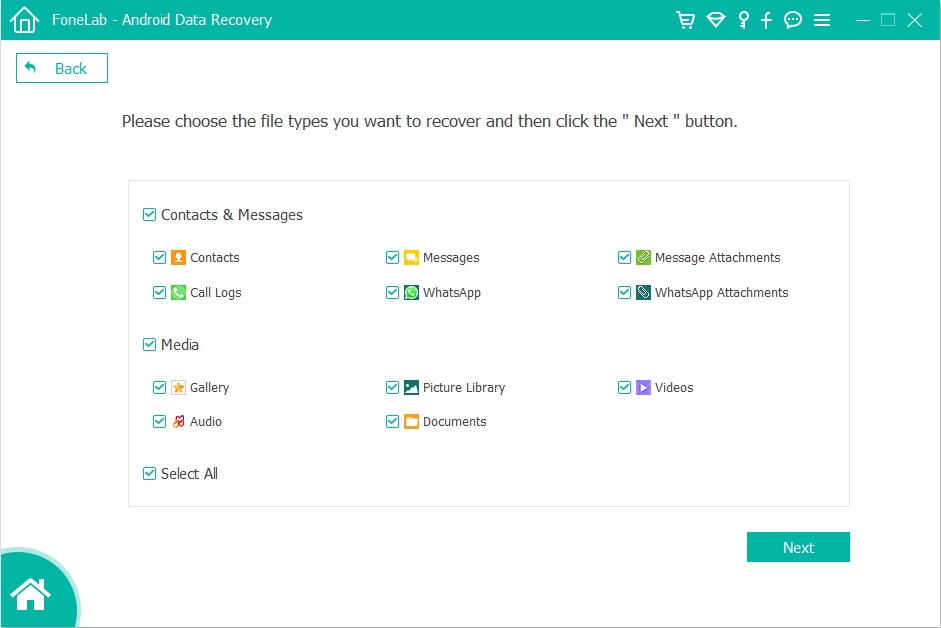
Tips: You can click “Select all” to have all your Samsung data scanned.
Step 4.Allow Scanning and Analyzing Data on Samsung
You’ll get a window as follow on your device after your device is detected by the program.Tap “Allow” on your device to enable the program to scan your device for deleted data.
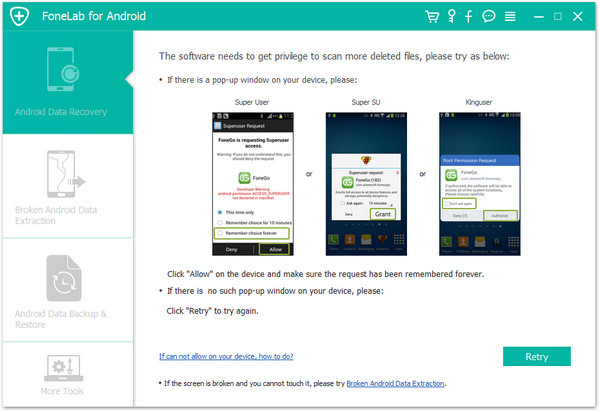
Note:Please make sure that your phone battery is more than 20% charged and keep the connection between your phone and the computer.
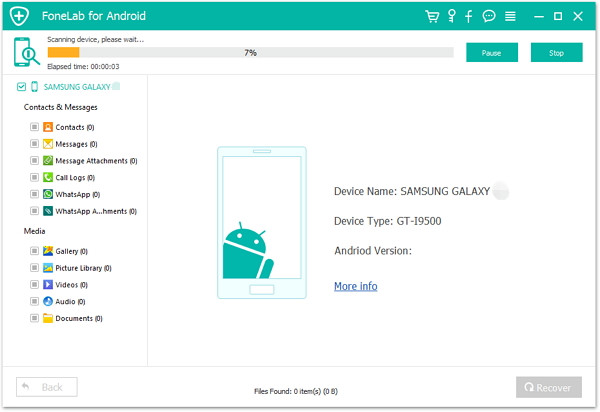
Step 5.Scan Samsung for Deleted Data
In this step the program will start to scan data on your phone.The scanning process will take you only minutes.
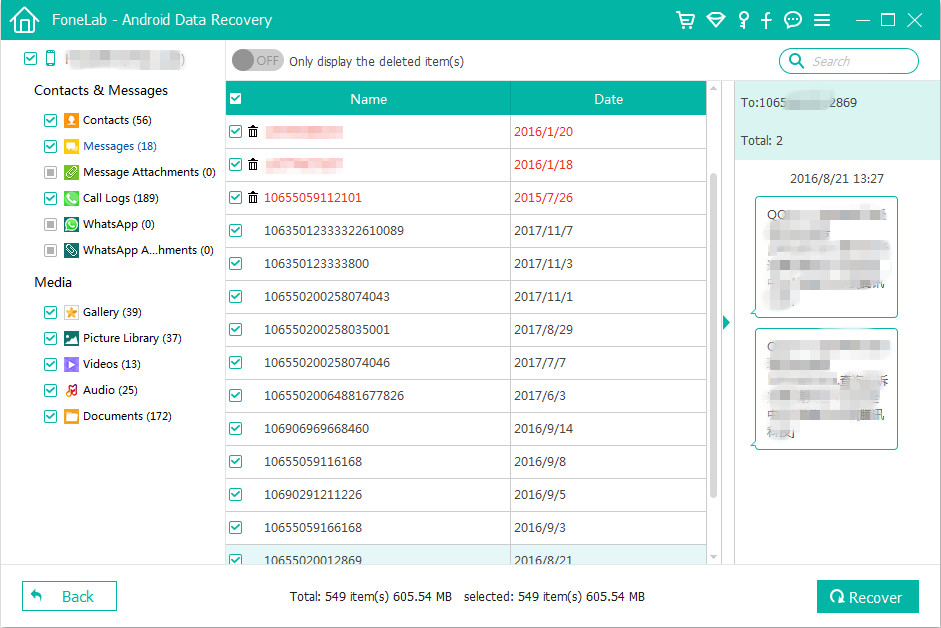
Step 6.Recover Deleted SMS from Samsung Galaxy S9
When the scan is completed, you could preview all data found on your phone, including SMS, contacts, photos, etc,. Preview then retrieving the data you want to restore by clicking “Recover” button under the “Messages” & “Message Attachments” files to save them on the computer.
Video Guide: Retrieve Deleted Contacts and Messages from Samsung Galaxy
To avoiding text messages, contacts, call logs, photos, videos and other important data loss,you should backup your Android data regularly.You can back up with Samsung Official PC Suite like Smart Switch, Samsung Kies; Back Up with Third-party Android backup software like Android Data Backup Restore tool, Android Transfer,etc; Backing up your Android data to Cloud Storage like Samsung Cloud, Google Drive, OneDrive,et.

Read the guide:
How to Backup Text Messages on Samsung Galaxy S9/S8/S7
Step 1.From a Home screen, swipe up or down from the center of the display to access the apps screen.
Note:These instructions only apply to Standard mode and the default Home screen layout.
Step 2.Navigate: Settings Settings ![]() > Accounts > Backup and restore.
> Accounts > Backup and restore.
Step 3.From the Google account section, tap the Back up my data switch to turn on Switch on ![]() or off Switch off
or off Switch off ![]() .
.
Note:If turned off, existing backups are deleted from Google’s servers.
Step 4.When turned on, ensure the appropriate account is listed in the Backup account field.
Note:To change the backup account:
1)Tap Backup account.
2)Select the preferred account.
3)Tap Automatic restore to turn on or off.
Prompt: you need to log in before you can comment.
No account yet. Please click here to register.
