All posts by DHZ

How to Transfer WhatsApp from iPhone to Galaxy S20, S10, S9

[Summary]: The most simple method here regarding transferring WhatsApp messages from iPhone to your new Samsung Galaxy S20/S20+/S20 Ultra, as well as coping WhatsApp data from iPhone/iPad to Samsung Galaxy S10/S9/S8(Plus).

WhatsApp is an instant-messaging service to communicate with other cellphone users on any variety of smartphones. When you have got a new Samsung Galaxy S20 smart phone, the first thing you need to do is installing WhatsApp on your Galaxy S20 for chat with others. However, how to transfer WhatsApp chat history from old phone to Galaxy S20? Especially transferring data from iPhone to Samsung Galaxy, including contacts, messages, WhatsApp messages, photos, videos and music.

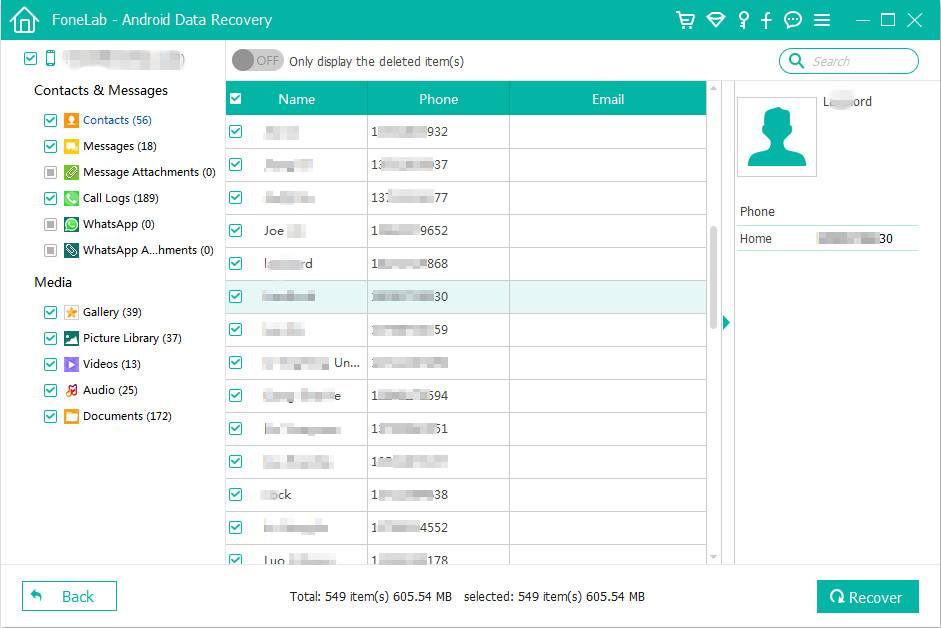
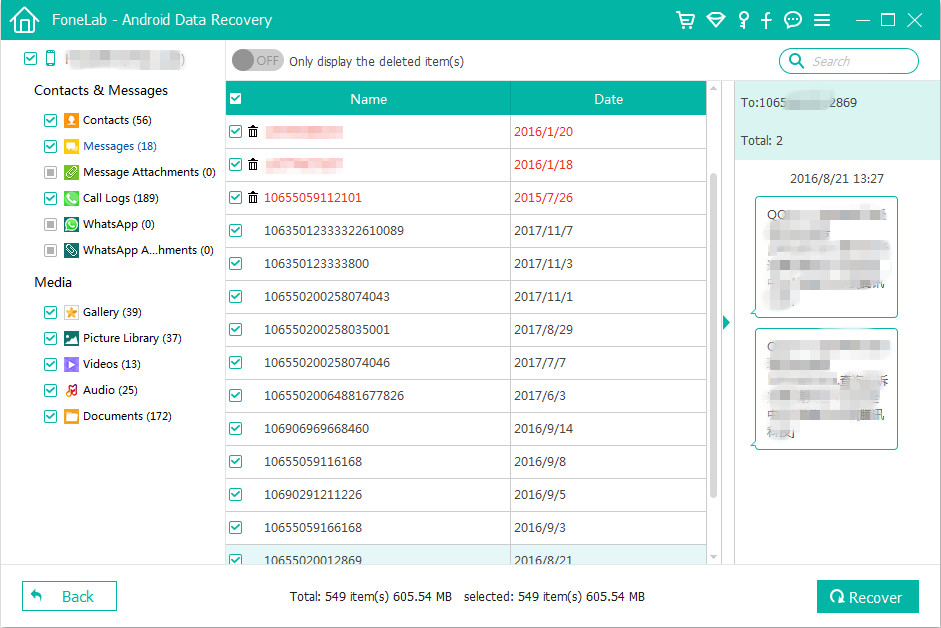
If you want to transfer contacts from iPhone to Galaxy S20, you can use a third-party iPhone to Samsung Galaxy S20 transfer tool, like Phone Transfer or iOS & Android Manager. But, if you want to transfer messages from WhatsApp app between iPhone and Android, you need to use a professional WhatsApp messages transfer & manager too.

In this article, we discuss how you are able to transfer WhatsApp messages from iPhone to Galaxy S20, Galaxy S10, Galaxy S9, Galaxy S9 Plus, S10 with the help of the Phone Toolkit – WhatsApp Transfer.

iPhone WhatsApp to Samsung Galaxy S20 Transfer
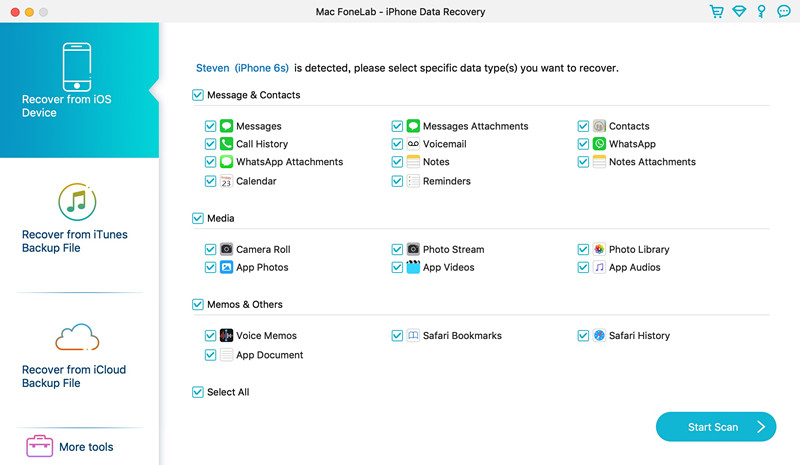
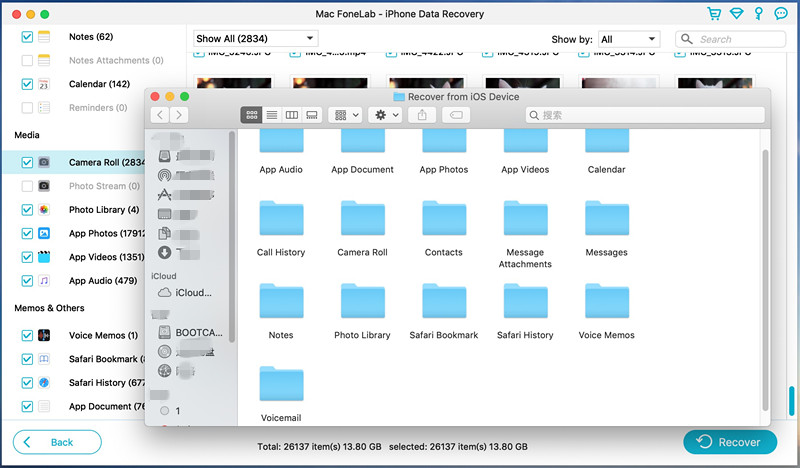
Phone ToolkitWhatsApp Transfer is a powerful App data backup & restore tool, it not only helps you backup and restore App data like chats and attachments of Viber, Kik, WeChat, WhatsApp, and LINE etc. But also enables you transfer WhatsApp messages from iOS to Android, iOS to iOS, Android to Android. So, you can back WhatsApp data from iPhone to computer and later restore it to your respective device or to the new Samsung Galaxy S20/S20+/S20 Ultra. If you just want to transfer WhatsApp messages from iPhone to Galaxy 11, you can directly copy WhatsApp chat history from iPhone to Samsung directly. Let’s show you how to transfer WhatsApp messages from iPhone to Galaxy S20 at easy steps.

d_win d_mac
d_win d_mac

Part 1: How to Transfer WhatsApp Messages from iPhone to Samsung Galaxy S20

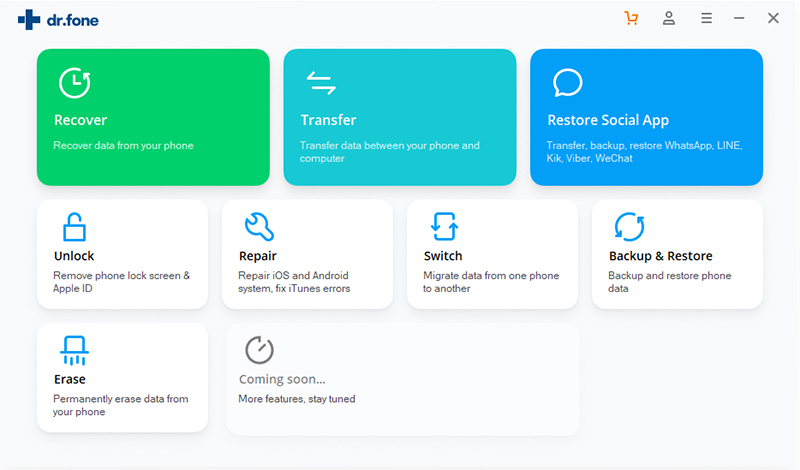
Step 1.Download and Launch Phone Toolkit on Computer
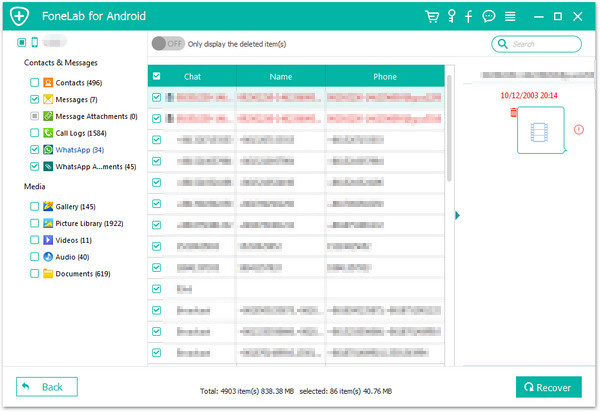
At first, run Phone Toolkit on your computer right after installing it. Tap over “Restore Social App” and tap the ‘WhatsApp Transfer’ tab afterwards.

iPhone WhatsApp to Samsung S20 transfer

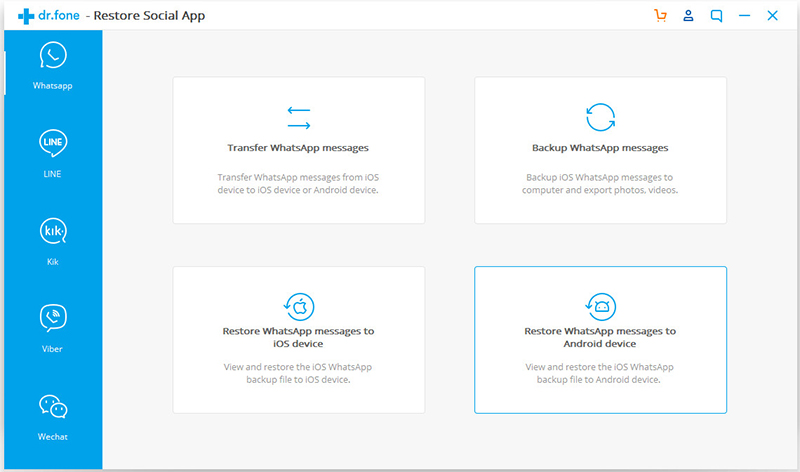
Step 2.Select Transfer WhatsApp Messages
From the left panel, press the ‘WhatsApp’ over the following window. Now, you got to click over the ‘Transfer WhatsApp messages’ tab on the application interface.

WhatsApp messages transfer

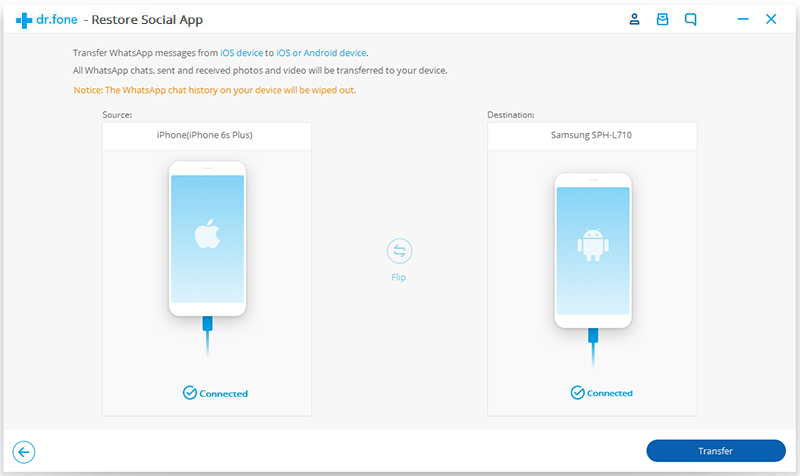
Step 3. Connect iPhone and Samsung S20 with Computer
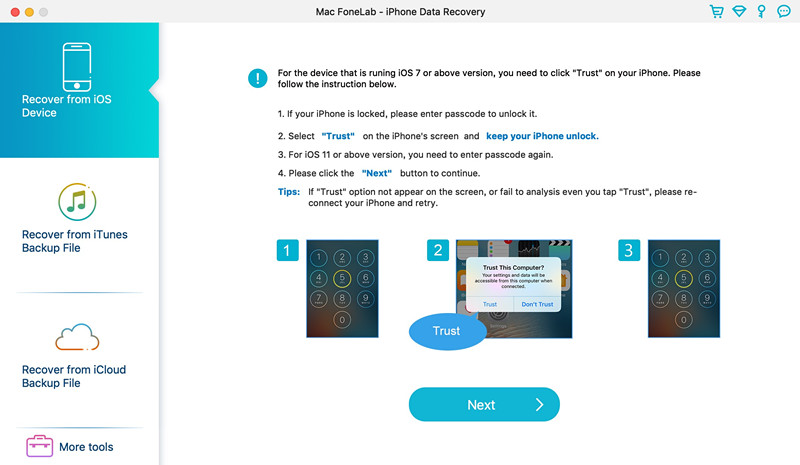
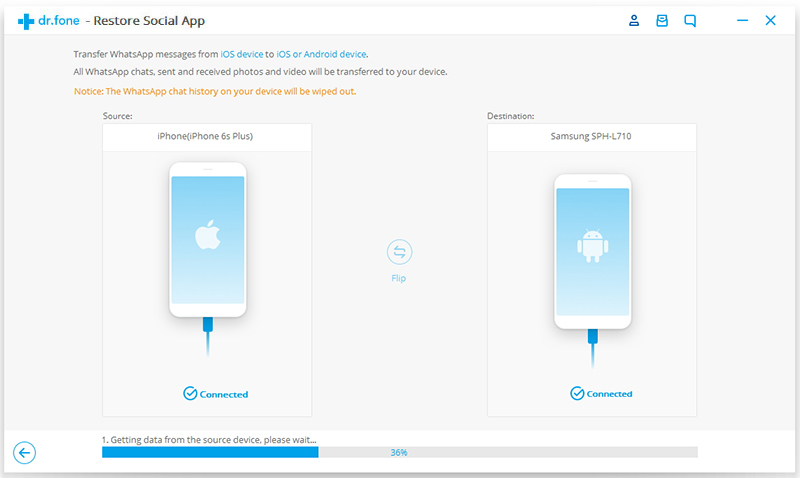
Next, plug in your iPhone to the PC using only an authentic lightning cable. Once the tool detects your iDevice, plug in your Samsung Galaxy S20 into another USB port. Let the software recognize this device too.

transfer iPhone WhatsApp messages to Galaxy S20

Step 4. Start Transfer iPhone WhatsApp to Samsung Galaxy S20
As soon as your devices are detected, they’ll be visible on your screen. Hit the ‘Transfer’ button on the bottom right of the interface.

Copy WhatsApp Messages from iPhone to Samsung Galaxy S20

Step 5. iPhone WhatsApp to Samsung S20 Transfer
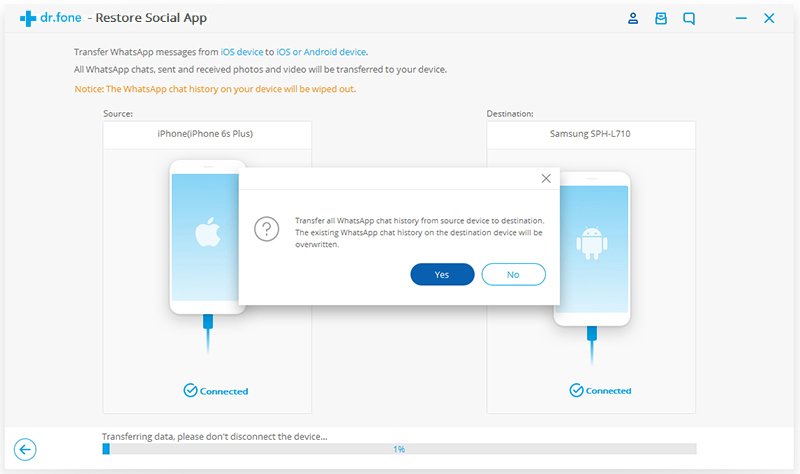
Lastly, you need to confirm your actions to proceed further by hitting ‘Yes’ button. This is because the transfer of WhatsApp chats from iPhone to Samsung Galaxy S10 will wipe off existing WhatsApp data on target device.

transfer WhatsApp Messages from iPhone to Galaxy S20+

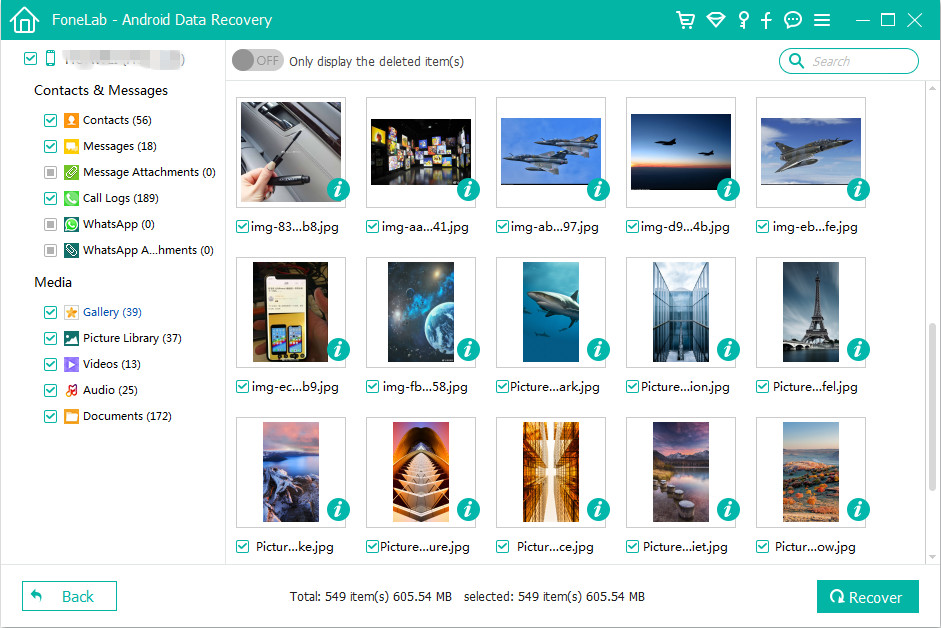
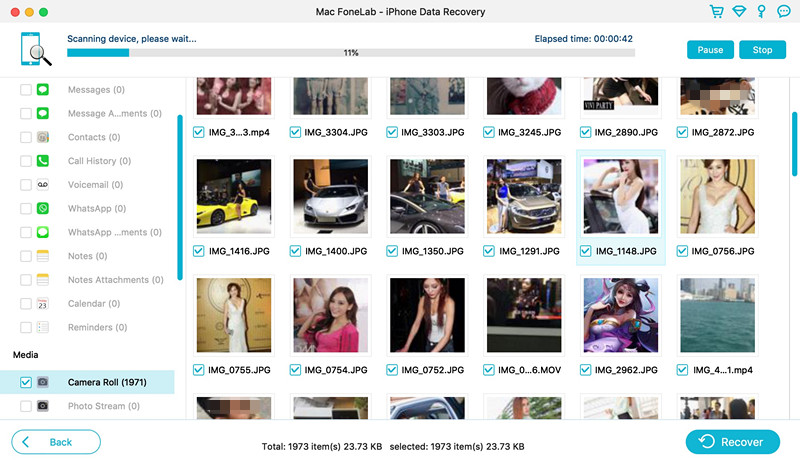
The software start to transfer WhatsApp chats from iPhone to Samsung Galaxy S20, it will get completed within few minutes. You can then disconnect two mobile phone from the computer and check for the transferred WhatsApp messages over your Samsung Galaxy S20.

copy WhatsApp Messages from iPhone to Samsung phone

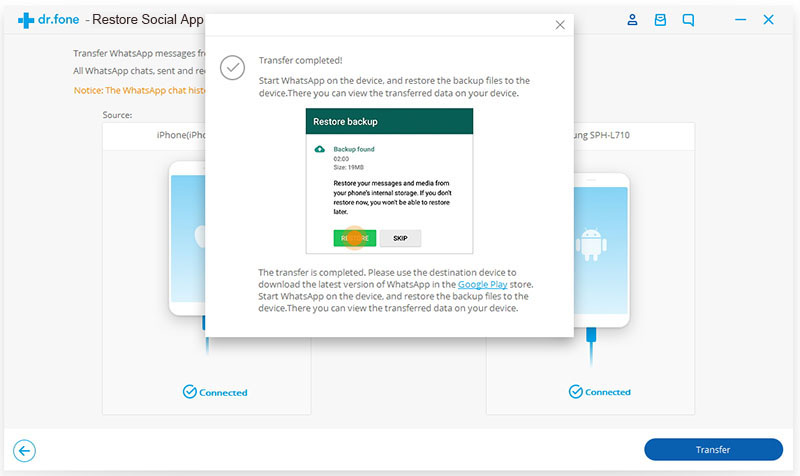
Please open WhatsApp app on your Samsung Galaxy S20, you will find the transferred messages appears on your WhatsApp app.

d_win d_mac
d_win d_mac

Part 2: Transfer WhatsApp Messages from Android to Samsung S20 via Google Drive

Above is the simple steps to transfer WhatsApp messages from iPhone/iPad/iPod Touch to Samsung Galaxy S20, if you want to transfer WhatsApp chat history to Samsung S20 from Android phone, like Samsung, Huawei, HTC, Sony, Motorola, Google Pixel, Xiaomi, etc. You can backup WhatsApp data from old Android phone to Google drive firstly, then restore them to your new Samsung Galaxy S20.

The WhatsApp for Android version, the WhatsApp data for Android devices allow backed to Google drive, then you can transfer WhatsApp from Android to Google Drive, then restore the backups from Google Drive to Samsung Galaxy S20 directly.

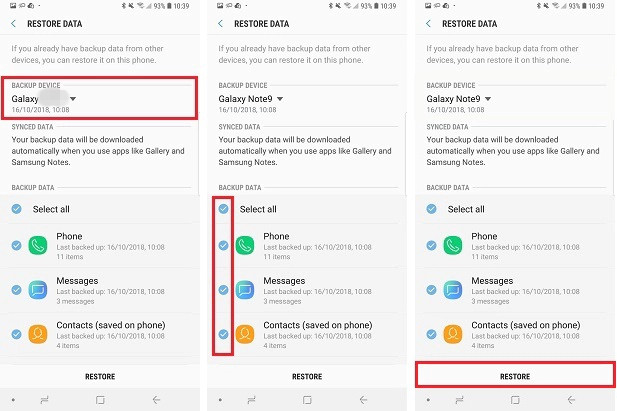
Step 1. Open WhatsApp on your old Android phone. On the main interface, navigate to Menu button > Settings > Chats > Chat backup where you can view the backup options under Google Drive settings.

Step 2. Click on Back up to Google Drive and choose a backup frequency (Daily, Weekly or Monthly) other than Never to back up WhatsApp automatically to Google Drive. If you need to back up now just tap Back Up. All of WhatsApp chats will be backed to WhatsApp cloud server.

backup android whatsapp with google drive

Step 3. After backing up WhatsApp chats to cloud server, install WhatsApp on your new Samsung Galaxy S10. If WhatsApp was installed on your S10 before, uninstall it then reinstall it.

Step 4. Launch WhatsApp on your Samsung Galaxy S20 then verify your phone number. You will be prompted to restore chats and media from Google Drive. Follow the instructions. After the restoration process is complete, tap Next and your chats will be displayed once initialization is complete. After restoring your chats, WhatsApp will begin restoring your media files. Just wait with patience and keep the internet connection stable.

Note: If you change your Google account, you will not be able to access your backups that are linked to a different Google account.

Above are two methods about how to transfer WhatsApp data to Samsung Galaxy S20, if you want to transfer contacts, SMS and more data to your Samsung S20, there is an program which helps you to transfer contacts, call logs, messages, music, photos, videos, App data from an old iOS/Android device to Samsung Galaxy S20/S10/S9/S9/S7/Note 10, do you want it? Phone Transfer can help you copy all types of data between iOS and Android, please free download and try to transfer data from old device to Galaxy S20.

Transfer Music, Video, Photos to Samsung Galaxy S20/S20+/S20 Ultra

[Summary]: Transfer music, video, photos and more files from PC, Mac, Android and iOS to Samsung Galaxy S20 will be a super easy thing under the help of iOS & Android Manager tool.

Regarding the naming of Samsung Galaxy S20, it may be named Galaxy S20, which represents a new era in 2020. The Samsung Galaxy S20 series (renamed to Samsung Galaxy S20 for the time being has not yet been confirmed, S11 for the time being) has three different sizes of models, that is, Samsung Galaxy S20 Ultra, Samsung Galaxy S20 and Samsung Galaxy S20 + which have been exposed before. According to previous exposure news, the screen size of the Samsung Galaxy S20e may be between 6.2 inches and 6.4 inches, the screen size of the Samsung Galaxy S20 may be 6.5 inches, and the screen size of the Samsung Galaxy S20 + may reach 6.9 inches. From the exposed protective film, we can also see the specific differences in size of the three models. With regard to other aspects of the Samsung Galaxy S20 series, according to media reports, Samsung Galaxy S series products will continue to use Exyons processors in all European markets, and all other markets will switch to Qualcomm Snapdragon processors.

Whether the new Samsung Galaxy phone named Galaxy S20 or Galaxy S20, it will be revealed in February 2020. When the new Samsung Galaxy S20 released, many Samsung fans will buy a new one to enjoy music, videos, movies with Galaxy S20. However, how to put media files to Samsung S11 easily? Many users want to add music, videos, photos or all kinds of data to Samsung Galaxy S20, many users may ask how to transfer files from computer, Android or iOS to Samsung Galaxy S20. Don’t worry, this article shows you a simple way to import video, music, photos from computer to Samsung Galaxy S20, as well as transferring contacts, messages and media files from Android, iPhone to Samsung Galaxy S20/S20+/S20 Ultra.

This Samsung Galaxy S20 Manager & TransferiOS & Android Manager and Phone Toolkit – Android Transfer, both are recommended to you, which can perfectly transfer audio, music, videos, movies, photos from computer to new Samsung Galaxy S20, or backup data from Samsung to computer. What’s more, it enables you transfer data from old Android/iOS device to new Samsung Galaxy S20, including contacts, SMS, call logs, photos, videos and music.

Download the iOS & Android Manager tool on PC or Mac:

d_win d_mac
d_win d_mac

  • Transfer files between Android and computer, including contacts, photos, music, SMS, and more.
  • Manage, export/import your music, photos, videos, contacts, SMS, Apps etc.
  • Transfer iTunes music, video to Android (vice versa).
  • Manage your Samsung Galaxy phone on computer.
  • Fully compatible with Android v10 (Q) operating system.

Kind Tips: Want to download HD videos from YouTube? 4kFinder Online YouTube Downloader is the ultimate one-click downloader that can easily download YouTube HD videos to MP4 format without quality loss. 4kFinder supports batch download and faster download speed. With its help, you can play YouTube videos offline on any HD media player. Other than YouTube, it also supports Facebook, Twitter, Dailymotion, Bilibili, NicoNico and many other sites.

Get ready to know more about how to import songs, photos and videos from PC to Samsung S11? Keep reading.

How-to: Put Music, Videos and Photos to Samsung Galaxy S20

Step 1. Launch Phone Toolkit on Computer
Download, install and run the phone toolkit on your computer, then click “Transfer”option if you want to import files from computer to Android device.

transfer files to samsung Galaxy S20

Step 2. Connect Samsung Galaxy S20 to Computer
Connect your Galaxy S20 device to your computer using a USB cable.

transfer files to samsung Galaxy S20

Step 3. Click Music, Videos and Photos
At the top, click the “Music”, “Videos”,“Photos”option and you’ll see the software start to compile all the music/video/photo folders on your device.

transfer music from computer to s11

Step 4. Add Music to Samsung Galaxy S20
Click the Add button to add a file or folder with music into your Phone Tookit. You’ll need to navigate your computer in order to find the music you want to transfer.

Finally, when you click OK, this will add all those music files you selected to your Samsung Galaxy S20, and you’ll be ready to play music, videos on your Samsung Galaxy S20.

d_win d_mac
d_win d_mac

How to Recover Deleted WhatsApp Messages on Samsung S20/S20+

Summary
Want to know how to recover deleted WhatsApp messages on Samsung Galaxy S20/S20+? Read this post to recover deleted WhatsApp Messages on Samsung S20 with or without backup.

WhatsApp brings a lot of convenience to our lives, we can use WhatsApp to communicate with their family, friends or colleagues in daily life. When you have got an new Samsung Galaxy S20, S20+, S20e, the first time you may do is installing a WhatsApp App on Samsung S20, so that you can free to send messages, photos, and videos to others. So it is hard to imagine how disastrous it would be when deleting WhatsApp messages by accident. However, such a thing happens indeed to Samsung users. Then, When you deleted WhatsApp messages on Samsung Galaxy S20, how to recover deleted WhatsApp messages from Samsung S20?

Yesterday when I was cleaning up WhatsApp useless messages in batches on my Samsung Galaxy S20, I accidentally deleted some important WhatsApp photos and videos, I want to know how to recover deleted WhatsApp chat history on Samsung Galaxy S20? Thanks to help.

Method 1. How to Recover Deleted WhatsApp Messages on Samsung S20 with Backup

WhatsApp automatically creates a backup of your chat history every day and saved them in your phone memory or SD card for 7 days. If you accidentally deleted WhatsApp messages, you can recover recent deleted WhatsApp messages from local backup easily. Let’s learn how to retrieve deleted WhatsApp messages from backups.

Step 1. Uninstall WhatsApp on your Samsung phone > Reinstall WhatsApp and sign in with your account.

Step 2. After the verifying process completes, you will be prompted to retrieve deleted WhatsApp messages >Tap Restore when asked.

Warm suggestion: If you are also an iOS user and want to recover deleted messages, WhatsApp messages, and iMessages from iPhone, iPad, or iPod touch, please read the guide on how to recover deleted WhatsApp messages from iPhone.

Note: However, if the newest WhatsApp messages that have not been backed up yet and the messages older than 7 days will not be able to retrieve via this way. If you want to recover all WhatsApp messages at once, simply follow to Method 2 to make restore WhatsApp messages without backup.

WhatsApp Messages Recovery for Samsung Galaxy S20/S20+

Don’t worry, when your important WhatsApp messages was deleted or lost. Actually, you can easily recover deleted WhatsApp messages from Android phone. Today, we will show you how to recover deleted WhatsApp messages on Samsung Galaxy S20, S10, S9, S8, S7, S6 etc. with a powerful Android WhatsApp Messages Recovery, no matter you have a backup or not. In addition, you also can learn how to recover deleted messages, contacts, photos, videos, call logs from Samsung phone, let’s learn more about the Android data recovery.

To recover deleted WhatsApp messages on Samsung Galaxy S20/S20+ without backup, a professional Android data recovery can be the most reliable and safest way to finish the task.

This Android Data Recovery software can help you recover deleted WhatsApp messages and attachments from almost all Android devices, such as Samsung, Huawei, OnePlus, HTC, LG, Sony, Google Nexus, Google Pixel, Motorola,Sony, Sharp, Xiaomi and and other brands with the latest of Android OS. So, you can directly scan and recover deleted WhatsApp messages from Samsung Galaxy S20/S20+/S20e. What’s more, this Android data recovery also enables you retrieve lost or deleted photos, messages, messages attachments, contacts, call logs, videos,audio files, from Samsung Galaxy S20 and SD cards inside your Samsung device.
It enable you to directly recover deleted WhatsApp messages from Samsung phone with full information such as name, chat messages, attached pictures, attached videos and more. And saving the deleted WhatsApp messages as CSV, HTML for your use or print.

d_win d_mac
d_win d_mac

More Features:

  • Directly scan and recover deleted WhatsApp messages and attachments from Android.
  • Preview these deleted WhatsApp messages and attachments before recovery.
  • Recover other data from Samsung phones/tables, including WhatsApp data, photos, videos, contacts, music, messages,call logs, etc.
  • Recover Samsung data lost due to mistaken deleting, factory resetting, OS upgrade, system crash, forgotten password, flashing ROM, rooting, ect.
  • Recover data from almost all Samsung devices, such as Samsung Galaxy S4/S5/S6/S7/S8/S9/S10/S20, even the latest Samsung Galaxy S10/S9, Note 4/5/8/9/Edge, Note 10/Note 10+, J7/J6/J5/J4/J3/, Sol 2 as well as other Samsung phones and tablets.
  • Recover data from broken Samsung galaxy S4/S5/S6, as we all Galaxy Note 5/Note 4/Note 3 and Samsung tablets.
  • Fix bricked Android system to normal and get your Samsung phone back to normal status, like frozen, crashed, black-screen, virus-attack, screen-locked.
  • Backup and Restore Data from Samsung devices.

Method 2. How to Recover Deleted WhatsApp Messages on Samsung 20 without Backup

Go further to read the tutorial and figure out the procedures to recover lost or deleted WhatsApp messages from Samsung Galaxy S20. Let’s begin.

Step 1.Launch the Android Toolkit on Computer
Download, install and run the program, then click “Android Data Recovery”if you want to recover Samsung lost data.

WhatsApp Messages Recovery for Samsung Galaxy S20

Step 2. Connect Samsung S20 to Computer
Plug your Samsung Galaxy S20 into computer with Android USB cable.Then the Android data recovery software will detect your Samsung S20 automatically.
If the device can not be detected, turn to allow USB debugging. Follow the steps as below:

For Samsung S20: Navigate to “Settings”, tab “Build number” for 7 times. Go back to “Settings” and select “Developer options” > Check “USB debugging”.
Also see detailed instructions about how to turn on USB debugging on Android.

usb debugging Samsung Galaxy S20

After enable the USB debugging mode, continue to follow the next step.

Step 3. Choose to scan WhatsApp Data from Samsung internal memory
After debugging mode, the software will provide you with the file types that can be recovered. Here you can just check “WhatsApp” and “WhatsApp attachments” to reduce the recovery time.

choose WhatsApp to recover

Step 4. Gain Root Permission to Get Full Access to Phone Memory
As soon as the scan process starts, it will first conduct a checking of device information and then a further analyzing.

After that, you’ll be prompted to root the device for a deep scan the internal storage of your Samsung Galaxy S20. So, you need to click the “Advanced root” button, the software tells you to download KingoRoot on computer, then let it root your Samsung S20 firstly.It’s safe, you can unroot the Android device again after a end of your data recovery task.

Also read: How to safely root and unroot an Android device

root samsung Galaxy S20

After the successful root access, please click “Retry” button, the program will start scanning your Samsung S20 deeply for the deleted stuff. This will take some time.

Step 5. Preview and Recover deleted WhatsApp Messages on Samsung S20
After the scanning is completed, you will get a list of all recoverable WhatsApp data as shown in the screenshot below.

To quickly find deleted WhatsApp messages on Samsung phone, please click “WhatsApp” and “WhatsApp Attachments” category on the side bar, and then turn on “Only display the deleted item(s) button” on the top bar.

recover deleted WhatsApp messages on Samsung S20

Finally, select the lost or deleted WhatsApp messages and WhatsApp attachments pictures & videos that you want to recover, then click the “Recover” button to save them onto the computer. Only few minutes,your deleted messages will be as HTML or CSV file format.

Android Toolkit – Data Recovery is designed to retrieve lost or deleted data from Android, please free download it and try to scan Android internal memory, you can easily to recover deleted WhatsApp messages, text messages, contacts, call logs, pictures and more from Android devices, even you haven’t backed up before.

d_win d_mac
d_win d_mac

How to Recover Deleted Photos from Samsung Galaxy S20/S20+/S20 Ultra

Summary
Want to recover photos from Samsung S20 /S20+? This article teach you three effective methods to recover deleted and lost photos, videos from Samsung Galaxy S20/ S20+/ S20 Ultra, as well as recovering files from Samsung Galaxy S10/S9/S8/S7/S6/S5, etc.

Google Photos and Samsung Cloud is a photo sharing and storage app. Permanently deleted photos from your Samsung Galaxy S20 remain in the trash of Google and Samsung Cloud, but if you have deleted backed up photos to Google Photos or Samsung Cloud, you still have change to recover deleted photos from Samsung Galaxy S20/S20+/S20 Ultra without backup.

samsung galaxy s20 photo recovery

How to Recover Deleted Photos on Samsung Galaxy S20?

Hi, I accidentally deleted some photos from my new Samsung Galaxy S20+, how to recover deleted photos from Samsung Galaxy S20+? Can I restore Samsung photos without root?” — Jamnet

Yesterday, I have reset my phone to factory settings, I found all photos were losing, how to recover lost photos from Samsung S20 android internal memory for free?

Samsung Galaxy S20 series comes with HD camera and advanced processor, many user like using Samsung S20 to take photos and shooting videos. If you just lost or deleted some important photos, videos from your Samsung Galaxy S20? Never fear! Actually, the lost photos are not really gone, instead, they still exist in your phone and can be recovered before being overwritten by the new data. Thus, do not use your phone to take new photos, then take effective measures to get them back.

Photos Recovery for Samsung Galaxy S20 / S20+

No matter you save the photos and videos in Gallery, DCIM folder, Micro SD card or internal storage of device, you still haven chance to recover deleted photos from Samsung Galaxy S20. Here are three Samsung Galaxy S20 photo recovery methods recommended for you!

Method 1: Recover deleted photos from Trash folder on Samsung S20

There is a Trash (Recycle bin) function in Samsung Galaxy S20, if the deleted photos moved to Trash folder less than 15 days, you can view and restore the deleted photos within 15 days, this is the most simple and free method to get backup the deleted photos on Samsung Galaxy S20, as well as Samsung Galaxy S10, S9, S8, S7, Note 10, Note 9 and Note 8. Let’s learn how to restore photos from the Samsung Cloud Recycle Bin.

Step 1. Open the Gallery app on your Galaxy phone.

restore photo from samsung cloud recycle bin

Step 2. Tap the three dots in the top right corner.

restore photo from samsung cloud recycle bin

Step 3. Tap Trash (or Recycle bin).

samsung cloud recycle bin recover deleted photo

Step 4. Tap Edit.
Step 5. Select the pictures you want to restore.

samsung cloud recycle bin restore photo

Step 6. Tap Restore button to get the deleted photos back to your phone’s Gallery folder.

Method 2: Recover Samsung S20 deleted photos from Google Photos app

If you have synced your photos from Samsung Galaxy S20 to the Google Photos app(Google Cloud) for backup previously, no matter the photos are lost or deleted, you can quickly restore them from the recycle bin, this Google Cloud restore feature allows you recover deleted photos within 60 days. Let’s teach you how to recover deleted photos from Google Cloud:

Step 1. Unlock your Samsung Galaxy S20 and open the Google Photos app.
Step 2. Tap “Trash” from the top-left menu, all the lost photos will be listed in appear.
Step 3. Select the photos that you want to recover, then tap “Restore” to restore deleted photos from Google Photos app to your Samsung Galaxy S20.
The lost or deleted photos and videos should be in the Gallery app.

recover samsung photos from google photos app

Tips: If you haven’t backup photos or videos to Samsung Cloud or Google Photo app, you can directly scan and recover deleted files from Samsung phone, please keep reading the below guide:

Method 3. Recover Deleted Photos and Videos from Samsung S20 without Backup

If you haven’t backup photos to local or Cloud, don’t worry, you still have chance to directly recover deleted photos, videos and other files from Samsung S20 after rooting. What you need is a professional Samsung Galaxy S20 Photo Recovery.

This Android Data Recovery not only can recover deleted photos, music, videos but also can recover deleted contacts, messages, call logs, documents, WhatsApp messages and Viber conversations, etc., from Samsung S20, it also can help you recover deleted data from Samsung Galaxy Galaxy S10/S10+, Samsung Galaxy S9/S9+, Samsung Galaxy Note 8, Samsung Galaxy S8/S8+, Samsung Galaxy S7/S7Edge, Samsung Galaxy S6/S6 Edge, and other and other brands of Samsung phones directly. Now, let’s see how to recover deleted photos from Samsung S20 without backups.

d_win d_mac
d_win d_mac

How to Recover Deleted Photos, Videos from Galaxy S20

Step 1: Run Android Toolkit and connect Samsung S20 phone
To recover photos and videos, connect the Samsung Galaxy S20 mobile phone to computer through a USB cable and launch the program. Then go with the “Android Data Recovery” mode on the interface.

Samsung S20 Data Recovery

Step 2. Connect and Enable USB Debugging mode
Then connect Samsung phone to the computer via a USB cable, a wizard that appears on screen will walk you through the steps on setting the device to USB Debugging mode.
For Samsung Galaxy S20, please open Settings > About phone > Build number, tap it for 7 times to enable the Developer options. Then go back to Settings > Developer options, and scroll down the screen until you find the USB debugging switch, toggle it to ON position.
Also see detailed instructions about how to turn on USB debugging on Android

usb debugging Samsung Galaxy Note 10

Step 3. Select Pictures and Videos to Recover
Once the connection has been built. Next, you’ll get a screen to ask you to choose the type of data you’re looking to recover. In this example, check “Gallery“, “Picture Library” and “Videos” and click Next button.

choose data types to recover

Step 5. Root the Phone for Deep Scanning
To scan and recover more deleted files from Android, you have to root the phone so that the software can go deeper into the memory and scan the deleted files. The software recommends a powerful and effective rooting tool, just click Rooting Tools button, it will open a website, please download KingoRoot on your computer and let it root your Samsung S20 firstly.

root samsung S20

Tips: Please don’t worry, you can get your phone back to it’s original non-rooted state after recovering data completed.
For more information, please consult the article: how to safely root and unroot an Android device.

Once rooted, just click “Retry” button, the program continues scanning the deleted files from Galaxy S20. This will take some minutes.

Step 6. Recover Photos and Videos from Samsung S20 Gallery and Picture Library
After the scan completed, all found pictures and videos appear on the window, you can view the pictures and video before recovery.

During the process, please keep your phone well connected to the computer.

recover photos from Samsung Galaxy S20

Finally, please tap “Recover” button to retrieve deleted photos and videos on Samsung S20.

More About Android Data Recovery Software

There are many Android data recovery software and Samsung phone data recovery software in market, we highly recommend this Android data recovery software after we tests too many times, which with a high recovery success rate.

This Android Toolkit – Data Recovery software can recover data from most Android phones, such as Samsung Galaxy, Huawei, HTC, LG, Motorola, OnePlus, Google Pixel, Xiaomi, Redmi, OnePlus, ZT and other Android phones. Furthermore, this Android data recovery software compatible with both Windows and Mac platforms. In addition, this Android Toolkit also can help us fix bricked Android OS and extract data from broken Samsung phone, as well as backing up & restore data easily.

d_win d_mac
d_win d_mac

How to Recover Deleted Contacts and SMS from Samsung Galaxy S20

Summary
Do you want to recover deleted contacts and messages from Samsung S20? This article will tell you an easy way to recover deleted text messages and contacts from Samsung Galaxy S20. You can download the Android data recovery program for free to have a try!

I am looking for a way to retrieve text messages on my Samsung S20, I tried to restore the disappeared texts from the Samsung Cloud, but when the restore was complete, the message threads don’t come back. How to recover deleted messages on Samsung Galaxy S20? I haven’t backup my Samsung phone before.

Yesterday, I have reset my phone to factory setting, but I found all contacts were loss, is it possible to recover lost contacts on Samsung S20 Plus?

samsung Galaxy S20 data recovery

Accidentally deleted your messages and contacts from Samsung Galaxy phones, like S5, S6, S7, S8, S9, S10 and Galaxy S20? Actually, when the deleted files is missing, it doesn’t go to the trash or the recycle bin, because there isn’t a trash or a recycle bin on your Samsung as on the computer. And it’s only marked as useless information and can be overwritten by new data. Therefore, the deleted contacts and message only turns to be invisible, and you can recover deleted contacts and SMS from Samsung Galaxy S20 until being overwritten.

Regardless of the reasons, you still stand a good chance of retrieving SMS and contacts on Samsung S20 phone (S20 Plus, S20e), let’s shows you two ways to retrieve deleted contacts and messages on Samsung Galaxy S20.

Method 1: Recover Contacts and Messages from Samsung Cloud

If you have backed up contacts and messages to Samsung Cloud, you can directly restore deleted contacts and SMS from Samsung Cloud, only few steps to restore text messages and contacts(phone numbers) on Galaxy S20, as well as S10, S9, S8, S7, Note 10, Note 9, etc.

Step 1. Unlock your Samsung Galaxy S20 and go to Settings app.
Step 2. Tap Accounts and backup > Samsung Cloud > Restore.
Step 3. Tap on Messages and Contacts to select it.
Step 4. Tap Restore Now to restore the lost messages and contacts.

restore data from samsung cloud

The lost or deleted contacts, messages and attachments should be in the Messages app and Contacts app.

Tips: If you haven’t backup contacts and messages to Samsung Cloud, you can directly recover contacts, messages, photos, videos, WhatsApp, etc. from Samsung Galaxy S20. Please keep reading the below guide, you may need a third-party Samsung Galaxy S20 Data Recovery for help.

Method 2: Recover deleted Contacts and Messages from Samsung Galaxy S20 without Backups

To recovery deleted data from Galaxy S20 without any backups, you can use this Android Data Recovery software, which can help you recover deleted SMS, pictures, videos and contacts from Samsung Galaxy S20. In addition, it also enables you recover data from SD card.

More Features:

  • Save the deleted messages as CSV, HTML for your use or print.
  • Save the deleted contacts as VCF, CSV or HTML for your use, import or print.
  • Recover photos, videos, audio files, contacts, messages, messages attachments, call history, whatsApp, documents from Samsung phone.
  • Recover Android data lost due to accidentally deleting, factory resetting, system crash, forgotten password, flashing ROM, rooting, ect.
  • Recover data from dead/broken Samsung phone.
  • Fix Samsung phone, for example: frozen, crashed, black-screen, Samsung logo-screen, virus-attack, screen-locked.
  • Recover data from Samsung, HTC, LG, Huawei, Sony, Sharp, Motorola, OnePlus, Google Pixel and more Android devices.
  • Works well with Windows and MacOS computer

d_win d_mac
d_win d_mac

How to Recover Lost Contacts and Messages on Samsung Galaxy S20

Step 1. Launch Android Toolkit on Computer
Launch the Android Toolkit, choose “Android Data Recovery” mode.

Samsung Galaxy Note 10/Note 10+ Data Recovery

Step 2. Connect Phone to Computer and turn on USB debugging
Then, connect Samsung Galaxy S20 to computer.
On your phone, turn on USB debugging. Follow on-screen steps to do this.
Open Settings > About phone > Build number, tap it for 7 times to enable the Developer options. Then go back to Settings > Developer options, and scroll down the screen until you find the USB debugging switch, toggle it to ON position.
Also see detailed instructions about how to enable USB debugging on Android phone

usb debugging Samsung Galaxy Note 10

Step 3. Choose Messages and Contacts to Recover
In this step, you’ll see the kinds of data listed that the software can recover. Click “Messages” and “Messages Attachments” and “Contacts” item, then click “Next” button to go on.

choose data types to recover

Step 4. Root for Deep Scanning
If you want to extract the existing data, please skip this step. If you want to deep scan more deleted and lost data, you need to root the device firstly. Click Rooting Tools button, and the pretty safe KingoRoot utility will get this done.
Also read: How to root and unroot an Android phone or tablet

root samsung S20

Once rooted, just click “Retry” button, the program continues scanning the deleted files from Galaxy S20. This will take some minutes.

Step 5. Preview and Recover Contacts, SMS from Samsung S20
After scanning complete, you can see the scanning results interface, if you want to recover deleted messages and contacts, please select the contacts and messages that you want to retrieve.

Recover deleted contacts from Samsung Galaxy S20/S20+

recover contacts from Samsung Galaxy S20

Recover deleted messages from Samsung Galaxy S20/S20+

recover SMS from Samsung Galaxy S20

Finally, click Recover button to save text messages and contacts in CSV & HTML onto computer.

d_win d_mac
d_win d_mac

Prevent Contacts and SMS Loss Again

To avoiding data loss again, we recommend you should backup data regularly, it’s easy to backup photos and videos from Samsung to computer, but it’s difficult to backup text messages and contacts from Samsung Galaxy S20 to computer. Don’t worry, we have an extended guide on how to back up Android phone to computer with Android Data Backup & Restore software, you can easily view and back up contacts, messages, call logs, photos, videos, audio and documents from Android to PC/ Mac. In addition, you are able to set a password for protecting your important backup.
Related article: How to backup and restore Android data

Of course, if you just want to back up your SMS messages and contacts with this powerful Android Backup & Restore, it allows you backup SMS (text) messages (in CSV, HTML format), and save contacts as VCF, CSV or HTML format for your use. Once disaster strikes, you can quickly restore messages and contacts back to Samsung or other Android phone for viewing and using.

How to Restore Deleted iMessages on iPhone without Backup

[Summary]: Many iPhone/iPad users want to know the way to recover deleted iMessages from iPhone iPad, is it possible to recover iMessages with or without backup? Now follow the guides step-by-step, you can easy to recover lost or deleted iMessages from iPhone, iPad and iPod touch.

Apple inc. offers iMessages app for Apple users to free send text, pictures, videos, sound, location, and more between your iPhone, iPad or Mac, we can use message effects with iMessage on iPhone, iPad, iPod, Apple Watch or Mac via Wi-Fi or cellular data connection. On your iPhone, iMessage lives alongside SMS and MMS, so you can keep in touch with non-Apple friends from the same app. Many iPhone users send messages to chat with friends, colleagues, lovers, family, etc. But, if you deleted iMessages on iOS devices, is it possible to recover iMessages from iPhone? Many users will ask how to recover deleted or lost iMessages on iPhone.

Have deleted or lost iMessages on iPhone? Don’t worry, we can recover lost iMessages from iPhone, even we haven’t backed up before. What you need is a professional iMessages recovery for iPhone.

Using the iPhone iMessages Recovery Software

This iPhone Data Recovery is a powerful iPhone iMessages recovery tool, it not only can help you recover deleted iMessages and iMessages attachments from iPhone, iPad and iPod, but also enables to recover text messages, messages attachments, WhatsApp messages, WhatsApp attachments , Kik messages, Viber messages, Wechat messages, Skype messages, etc. What’s more, this iPhone data recovery is special designed to recover photos, contacts, videos, SMS, notes, call history, safari bookmark and more from iPhone, iPad and iPod touch. It works well with the latest iOS 13, so you can recover deleted iMessages from iPhone 11, iPhone 11 Pro, iPhone 11 Pro Max, or recover lost iMessages and messages from iPhone after iOS 13 update.

More Features:

  • Recover iMessages and Text Messages from iPhone, and saved them as CSV, TEXT, or HTML format to computer for your use.
  • Recover all iPhone data with/without backup due to deletion, device smashed or broken, device loss, jailbreak, iOS upgrade or device reset etc.
  • Recover Deleted iPhone iMessages and Text Messages from iTunes Backup
  • Recover Deleted iPhone iMessages and Text Messages from iCloud Backup
  • When your iPhone encountered some system errors so that you can’t access the system, the iOS System Recovery function can help you fix iPhone stuck at apple logo, recovery mode, white/black screen, start up exception and other issue.
  • iOS Data Backup & Restore functions can help you backup and restore all types of data, such as WhatsApp messages, notes, call logs, contacts, text messages, photos, videos and more.

d_win d_mac
d_win d_mac

3 Simple Steps to Recover Deleted iMessages on iPhone Without Backup

Here’s how to use the iPhone data recovery(Mac) program to recover deleted iMessages from an iPhone without backup. For Windows users, you can download the iPhone data recovery for Windows to recover iPhone iMessages and text messages on Windows 10 | Windows 8.1 | Windows 8 | Windows 7 | Windows Vista | Windows XP – 32 bit and 64 bit.

Step 1. Download, Install and Launch iOS Toolkit on Computer
Firstly of all, please download, install and launch the iOS Toolkit on your computer, if you want to recover data from iPhone, iTunes or iCloud, please click “iPhone Data Recovery” section, you will see the software provides three recovery modes: Recover from iOS Device, Recover from iTunes Backup Files and Recover from iCloud Backup File.

iPhone Data Recovery for mac

To recover deleted iMesaages from iPhone without backup, please select “Recover from iOS Device”, and then connect your iPhone to the computer via USB cable.

iPhone iMessages recovery

Step 2. Select Messages and attachments
To recover text messages and iMessages from iPhone, please “Messages” and “Messages Attachments”, then click “Start Scan” button to scan all deleted, lost or existing messages from iPhone.

Scan iMessages from iPhone

Step 3. Preview and Recover lost iMessages from iPhone
After the scan is over, the iMessages and attachments on iPhone will be displayed in scan result, you can view all messages including the existing and deleted one, find the ones you want to recover and mark them one by one or select all, click the “Recover” button to save them on your computer.
Note: Except messages, you can also select all file type to scan and recover other data like photos, videos, contacts and more in the simple way.

recover iMessages from iPhone

Above simple steps shows you how to restore iPhone iMessages and text messages without backup. If you have backed up the device with iTunes or iCloud, you can choose “Recover from iTunes Backup Files” or “Recover from iCloud Backup File” modes to selectively restore messages from iCloud/iTunes backup to computer.

d_win d_mac
d_win d_mac

Related Article

How to Recover Deleted Text Messages on iPhone

How to Recover Deleted Contacts on iPhone

How to Recover Deleted Photos on iPhone

How to Recover WhatsApp Messages on iPhone

iMessages Recovery for iPhone iPad

How to Recover iPhone 11 Data Without iTunes/iCloud Backup?

[Summary]: Is it possible to recover lost data from iPhone 11/11Pro (Max) without any backup? Sure! This article shows you three effective method to recover iPhone data without iTunes, Finder or iCloud backup. You can also learn how to restore iPhone data from iTunes/Finder or iCloud backups.

How can I recover iPhone data without iCloud or iTunes backup?

I accidentally deleted messages and contacts from my iPhone 11, and I haven’t enable iCloud automatic backup service and forgot to backup my iPhone with iTunes. Now, I need them urgently, but I’ve heard that there is no way to recover deleted files on an iPhone except through backup. Is that really? Is it possible to recover iPhone lost data without iTunes or iCloud backup? Please help! Thanks in advance.

If you have backed up your iPhone with iTunes or iCloud, restoring from backup file is the simple way to recover your iPhone data, but to be honest, not everyone will backup data regularly. Once you lost data without any backup in Finder (or iTunes) and iCloud, is it possible to recover lost data from iPhone directly?

If you deleted or lost data on iPhone accidentally, you should use a professional iPhone Data Recovery software to recover them back as soon as possible in case the lost files are overwritten by new data. In this guide, we’ll walk you through the steps you need to restore iPhone data without backup. We’ll also explain how to recover lost data from iTunes or iCloud backup if you have made before.

Part 1: iPhone Data Recovery: Recover iPhone Data without Backup

This iPhone Data Recovery can help you recover all data such as photos, messages, videos, contacts, Voice Memo, Notes, WhatsApp messages and more from iPhone, iPad and iPod. It not only allows you directly recover deleted data from iPhone without backup, but also enables you restore lost data from iTunes backup; or extract iPhone data from iCloud backup. So, if you ever backup your iPhone data to iTunes or iCloud, you can extract your lost data from backup iTunes/iCloud files. But, if you never backup your iPhone, you can scan and recover deleted data from iPhone directly. What’s more, the iPhone Data Recovery won’t overwrite the current data, which is different for using iTunes or iCloud restoring method.

  • Recover deleted photos, video, contacts, messages, notes, etc. from iPhone without any backups.
  • Extract and preview all content in iCloud/iTunes backup files.
  • Selectively restore data from iCloud/iTunes backup to computer.
  • Preview all deleted files in detail before recovery.
  • Never cover the existing iPhone data, 99% recovery rate.
  • Support the latest iOS 13, iPhone 11, iPhone 11 Pro, iPhone 11 Pro Max, etc.

d_win d_mac
d_win d_mac

Note: When you deleted data on iPhone, it is not really lost immediately and the data is still saved on the device, until other new overwritten it for multiple times. If you find the data lost or deleted, you had better stop to use your iPhone and try to recover deleted data as soon as possible.

How to Directly Recover iPhone 11 Lost Data on Mac?

Below are the instructions on how to recover lost data from iPhone 11 without a backup using the iPhone data recovery software. This guide shows you how to recover lost data on iPhone 11 on MacOS computer, such as Mac: Mavericks – 10.9 | Yosemite – 10.10 | El Capitan – 10.11 | macOS Sierra – 10.12.1/ 10.12.2/ 10.12.3/ 10.12.4/ 10.12.5/ 10.12.6 | macOS High Sierra – 10.13.1/ 10.13.2/ 10.13.3/ 10.13.4/ 10.13.5/ 10.13.6 | macOS Mojave – 10.14.1/ 10.14.2/ 10.14.3/ 10.14.4/ 10.14.5/ 10.14.6 | macOS Catalina – 10.15. You also can download the Windows version to recover iPhone data on Windows laptop/PC, including Windows 10 | Windows 8.1 | Windows 8 | Windows 7 | Windows Vista | Windows XP.

Step 1. Download and Launch iPhone Data Recovery on Mac
Download the iPhone Data Recovery(Mac) on Macbook, then install and launch it, you will will it’s main interface as below screenshot. In order to recover lost photos, contacts, SMS and more from iPhone 11 without backup, please choose“iPhone Data Recovery” feature.

iPhone Data Recovery for mac

Step 2. Connect iPhone 11 to Macbook
The software can help you directly scan and recover deleted data from iPhone without backup, if you want to directly recover iPhone lost data, please connect the device to computer via USB cable.

connect iPhone 11 to Macbook

Step 3. Select the Types of Data to Scan
When the software detects it, please select what data types you want to retrieve by checking the boxes next to data name and click the “Scan” button to initiate a deep scan on iPhone for searching for lost data files.

Scan iPhone 11 data

Step 4. Start Scanning Lost Data from iPhone 11
The iPhone data recovery start to scan all lost data from your iPhone device, then be patient while the scan is going on. The progress bar on the screen will show you the progress of the scanning activity, the total time for this scan may vary for different people depending on the amount of data stored in your iPhone. After the process is over, all found files are displayed on the screen.

Scan deleted files from iPhone 11

Step 5. Preview the Lost Data
In this step, you can preview all types of content that you want to restore by clicking the specific category on the left pane to expand the list. For example, click “Camera Roll” category to view the scanned photos and videos. You also can just view the deleted files, please tap “Show Deleted Only”, it will shows you all deleted photos and videos. Then, tick the boxes next to each file name to choose files you want to retrieve.

recover iphone data without backup

Step 6. Recover iPhone Data without backup
Now, just click “Recover” button on the bottom right corner. In the opening box, specify a location, the program starts recovering data from your iPhone storage and save the data onto computer.

Recover iPhone Data without backup

Step 7. Import Files Back to iPhone
After recovering your iPhone data completed, all data save onto your computer folder. If you want to transfer the recovered files to iPhone, iPad or iPod touch for viewing and using, you can use this iPhone iPad iPod Manager(Windows/Mac) to import them back to the device directly.

view the recovered data

You see how simple and easy it is on how to recover iPhone data without iTunes or iCloud backup? The iPhone Data Recovery also allows you selectively recover what you want from iCloud/iTunes backup, it won’t cover the existing iPhone data.

d_win d_mac
d_win d_mac

If you have created iPhone backup with iTunes or iCloud, let’s shows you how to restore data from backup with iTunes or iCloud if you have made before.

Part 2: Recover iPhone Data from iCloud Backup

If you have ever backup iPhone with iCloud, it is easy to recover your iPhone previous data from iCloud backup. However, you need to verify that an iCloud backup exists firstly. Go to Settings > [Your Name] > iCloud > iCloud Backup. If you can see there is a last backup history was made, please follow the below simple steps to erase your iPhone to restore data from iCloud backups.

Step 1. On your iPhone, please go to Settings > General > Reset, then tap Erase All Content and Settings.
Step 2. On the Apps & Data screen, tap Restore from iCloud Backup.
Step 3. Login to iCloud with Apple ID.
Step 4. Select from a list of available backups in iCloud, just restore them.

restore iphone data from icloud backup

Note: This method will erase existing iPhone data, it means the previous backed up content will cover the existing content. So, we recommend you use a iPhone data recovery to restore data from iCloud backups, this method is 100% safe.
Also read: Download iCloud backup – Selectively Recover iPhone data from iCloud backup

Part 3: Recover iPhone Data from iTunes/ Finder Backup

Apple inc. offers Finder or iTunes (Mac with 10.14 or earlier, or on PC) for Apple users to manage, backup, convert or sync files. If you have backed up iPhone data with Finder or iTunes (Mac with 10.14 or earlier, or on PC), you can restore the previous data to iPhone from iTunes/ Finder backups. Let’s learn how to restore iTunes data to iPhone steps-by-steps:

Step 1. Launch the iTunes or Finder that you have created backups before.
Step 2. Connect your iPhone to computer and open Finder or iTunes.
Step 3. Select iPhone device icon on the window.

finder restore iphone data

Step 4. Click Restore from Backup.
Step 5. Choose the backup data that contains your lost data.
Step 6. Click Restore. Please wait patiently, all your backed data will restore to iPhone soon.

Recover iPhone data from iTunes

But, you will found all existing iPhone data was lost, because iTunes/ Finder restore method overwrites the existing data. So, we recommend you use a third-party iPhone data recovery to extract data from iTunes/ Finder backups, then import them to the devices.
Also read: Extract iTunes backup – Recover iPhone data from iTunes backups

Recover iPhone Data Without Backup

How to Recover Data from iPhone 11/11 Pro after Factory Reset

Summary
Do you want to recover lost data after factory reset iPhone 11, iPhone 11 Pro and iPhone 11 Pro Max? Read this article to restore iPhone 11 lost data after the factory reset, you can recover lost contacts, SMS, photos, videos, notes and more from iPhone 11 after factory reset.

Tags: iPhone 11 data recovery, restore iPhone data after reset, iphone data recovery after factory reset without backup, recover data from iPhone after factory reset, recover photos after factory reset iPhone without backup, can iphone data be recovered after reset, how to recover data after factory reset iPhone, how to recover photos from iPhone after factory reset, iphone factory reset data recovery, recover data from iPhone after factory reset without backup

The iPhone 11 series is the latest Apple mobile phone, more and more Apple fans update their old iPhone to iPhone 11, iPhone 11 Pro or iPhone 11 Pro Max. The iPhone 11 Pro offers a telephoto camera to get closer to your subject. The 11 comes with a new ultrawide-angle camera, Night Mode for low-light photography, Deep Fusion processing for better indoor shots, faster autofocus and overall sharper images with more accurate color reproduction. Many people like to taking photos or shooting videos with iPhone 11 Pro.

If there is a software errors or setup issues with your iPhone, just simple reset iPhone to factory settings or reset all settings, then restart iPhone, your iPhone will restore to normal status.

How to Restore iPhone 11 to Factory Settings or Reset All Settings?

To restore your iPhone 11 to factory settings, go to Settings > General > Reset and then select Erase All Content and Settings.

To reset all settings on iPhone 11, go to Settings > General > Reset and then tap Reset All Settings. If presented, enter the password. Tap Reset All Settings to confirm.

If you don’t have any backup before factory reset iPhone, you may lost photos, contacts, messages, videos, notes, etc. Many users don’t know how to recover lost from iPhone 11 after the factory reset. Many people have been search on Google to find the solution about, “How to restore iPhone 11 lost data after reset?” If you are also asking the same question, then this article will teach you an effective solutions to recover data from iPhone 11 after factory reset, you also can follow the same steps to recover deleted data from other iOS 13 devices, such as iPhone XS, iPhone XR, iPhone 8, iPhone 7, iPhone 6S, iPad and iPod touch.

What Reason Causes Data Loss on iPhone?

Except for factory resetting, there may be several possible reasons may cause data lost on your iPhone.

  • Accidentally deletion of files due to wrong operation
  • Delete all photos and videos on “Recently Deleted Album” Folder of Camera Roll
  • Update or downgrade your iPhone
  • iPhone gets broken or crashed or smashed
  • Water damaged
  • Phone stolen or dropped somewhere
  • Jailbreaking failure
  • Data transmission interrupted during transferring data between iPhone and computer, iPhone to iPhone, etc.

How to Recover iPhone 11 Lost Data After Factory Reset without Backup

There are many free ways to restore lost data after factory reset iPhone without backup when you have already backed up all your iPhone data to iTunes or iCloud. If you don’t have any backup and you lost data after factory reset iPhone 11. Don’t worry, you can recover the iPhone lost  data is by scanning with a professional iPhone 11 Data Recovery software – iOS 13 Data Recovery.

This iPhone Data Recovery can help you recover lost or deleted data from iPhone 11 devices, iCloud backup and iTunes backup due to factory reset, it enables to recover iPhone 11 lost photos, videos, audios, SMS, Call History, Calendar, Notes, Voice Memos, Voice Memos, iBooks reading, Reminders and Safari Bookmarks etc. In addition, the iOS data recovery also allows you recover data from iPhone/iPad/iPod, even the files lost due to deletion, device crashed, smashed or broken, jailbreak, iOS upgrade or device reset etc.

d_win d_mac
d_win d_mac

Tips: The iPhone Data Recovery offers three different recovery modes: “Recover from iOS Devices directly”, “Recover from iTunes Backup Files” and “Recover from iCloud Backup Files”. If you haven’t backup your iPhone, please follow the below steps to recover lost data from iPhone after factory reset.

Guide: Recover iPhone Lost Data after a Factory Reset without Backup

This part shows you how to recover lost data from iPhone 11 on Mac with the help of use iPhone Data Recovery(Mac), you also can download the Windows version and follow the same steps to recover lost data from iPhone 11/11 Pro (Max) in Windows 10/8/7/XP.

Step 1. Launch iOS Toolkit and Choose “iPhone Data Recovery”
Download, install and run the iOS Toolkit on your Mac computer, if you want to recover lost photos, contacts, SMS and more from iPhone 11 after factory reset, please select “iPhone Data Recovery” function.

iPhone 11 Data Recovery

Step 2. Connect iPhone 11 to Mac via USB cable
Using a Apple USB cable to connect your iPhone 11 with the computer, the software will detect it automatically.

connect iPhone 11 to recover data

Please tap “Trust” to let the device connected with the computer.

trust on iphone 11

Step 3. Select Data to Scan
Then, please select the type of data you wish to recover, then click “Start Scan” button.

Scan lost data from iPhone 11

Step 4. Start Scanning Lost Data from iPhone 11
Then the iPhone data recovery software begins scanning your iPhone 11 automatically for lost data, and you’ll get the interface as follow. If you find the files that you want, you can click “Stop” button to end scanning process.

Scan deleted photos from iPhone 11

Step 5. Preview the Scanned Files
Once the scan is complete, all found data are displayed in categories, please preview the data and see if you can find any of the lost data, including contacts, text messages, message attachments, call history, camera roll, photo stream, photo library, calendar, notes, reminders, voice memos and safari bookmark, the software allows you preview full contents before recovery. If you just want to view the deleted files, please select “Show Deleted Only”, it will display all deleted contents.

recover iphone 11 lost data after factory reset

Step 6. Start to Recover Lost Photos/Data from iPhone 11
For example, to recover lost photos from iPhone 11 after factory reset, click “Camera” and “Photo Library” to preview, you can mark the pictures you want to get back and click “Recover” button to save all the photos on your computer with one click.

restore data from iPhone 11 Pro after reset to factry settings

Step 7. Transfer the Recovered Files to iPhone (Option)
After saving the data to your computer, you can quickly locate the recovered files. If you want to import the recovered contents to iPhone 11 for using and viewing, you can use this iPhone Manager tool, which allows you transfer the recovered contacts, photos, videos, music, etc. from computer to iPhone directly.

save iPhone data

Free download the iPhone 11 data recovery and try to recover lost data from iPhone 11 without backups.

d_win d_mac
d_win d_mac

Above guide shows you how to directly recover lost data after resetting iPhone to factory settings, the iPhone data recovery software also enables you selectively recover lost data from iTunes/iCloud backup after factory reset.

Tips to recover Recently Deleted photos and videos from “Recently Deleted” Folder

When photos are deleted within 30 days, all deleted photos be removed to “Recently Deleted” folder, you can using Recently Deleted in your iPhone’s Photos app.

Step 1. Go to the Photos app.
Step 2. Go to the Recently Deleted folder.
Step 3. Tap Select in the upper-right corner.
Step 4. Select the photos or video that you want to recover, then tap on “Recover” button and your photos will be restored.

In fact, the other way is to check your iPhone trash folder as you can find your deleted pictures within 30 days. This technique works when your iPhone is running on iOS 13/12/11/10/9/8.

Recover iPhone Data after Factory Reset

How to Unlock iPhone with Forgotten Passcode

Summary
How to unlock iPhone if you forgot the passcode, password or code? Your iPhone now is disabled/locked? Don’t worry, this article teach you how to remove the passcode on an iPhone if you forgot your phone screen passcode.

If you forgot the screen passcode on your iPhone 6/6 Plus, 6S/6S Plus, 7/7 Plus, 8/8 Plus, XXS/XR/XS Max, iPhone 11/11 Pro/Pro Max or your device is disabled, the phone will tips you that your device is disabled/locked, if you forgotten your passcode for iPhone, you’ll need to unlock iPhone passcode. Restoring iPhone by iTunes, it will erase all data and settings, including the passcode. Unless you backed up the device to iTunes or iCloud before you forgot your passcode, there isn’t a way to save the data on your device. Follow the steps below to unlock iPhone if you forgot the password.

unlock iphone passcode

The easiest and most recommended way to unlock iPhone without passcode is using a third-party iPhone unlocking tool – UkeySoft Unlocker or Dr.Fone iOS Unlock. Both not only can help you easily to remove iPhone passcode, but also to remove Apple ID and iCloud account from a any iPhone/iPad/iPod without password.

UkeySoft Unlocker Features:

  • Remove iPhone 4/6-digit passcode, Face ID, Touch ID.
  • Unlock an iPhone if you forgot the screen passcode.
  • Unlock a disabled, lock or black-broken iPhone, iPad or iPod touch.
  • Unlock Apple ID if you forgot the password, as well as unlocking iCloud account.
  • Remove Apple ID without erasing data and settings.
  • High success rate is guaranteed to unlock iPhone from any lock.
  • Works for all models of iPhone, iPad and iPod touch.
  • Fix iPhone stuck on recovery mode, DFU mode, black screen issues, etc.
  • Unlock a broken screen iPhone.
  • Fully compatible with the latest iOS 13.

d_win d_mac
d_win d_mac

Guide: How to Remove A Forgotten Passcode on iPhone?

Step 1. Launch the iPhone Unlock tool on Computer
First of all, please download, install and run the UkeySoft Unlocker on computer, then select “Unlock Screen Passcode”.

unlock iPhone

Then connect your iPhone to the computer via USB cable, the software will detects it.

Unlock Screen Passcode

Step 2. Put iPhone into DFU mode or Recovery Mode
In the new window, you need to follow the instructions to enter the DFU mode or recovery mode.
Read more: how to put iPhone into recovery mode.

put iPhone into recovery mode

Step 3. Check the information of your iPhone
In order to unlock iPhone without passcode, you need to download the matching IPSW files,the iPhone unlock software will detect your iPhone information such as the iOS version, device number and generated code etc. Just cross check the information and click “Download” button to download firmware package for your iPhone.

confirm iphone information

The iPhone unlock software start downloading firmware package for your iPhone, please keep connecting your iPhone with the computer.

download firmware package for iPhone

Step 4. Click “Start” to Confirm Unlock your iPhone
Once the firmware package downloaded completed, the UkeySoft Unlocker will proceed to remove your passcode.

firmware package downloaded completed

Tips: For that, you would have to click the button “Start Unlock” as shown in the image below. Then you need to confirm the erasing operation as this will erase your iPhone data and settings.

start unlock iPhone screen

Step 5. Start Remove iPhone Screen Passcode
The software start to remove a forgotten passcode on iPhone.

Remove iPhone Screen Passcode if forgotten passcode

Step 6. iPhone Passcode Removal Completed
Within a few minutes your iPhone passcode will be removed and the device will restart as a newly bought iPhone without lock screen display.

unlock iPhone passcode

Now, you can set up the device and access the system, the unlocked iPhone looks like a new one, this software could be used to erase all iPhone data and settings before selling.

remove passcode on iphone completed

d_win d_mac
d_win d_mac

Samsung Galaxy S20 Data Recovery – Recover Lost Data from Galaxy S20

Summary
Samsung Galaxy S20 Data recovery can help you recover deleted or lost data including photos, gallery, videos, photos, contacts, WhatsApp messages etc. from Galaxy S20, S20+, S20 Ultra, and you’ll also learn to back up the device safely in case the loss.

The Samsung Galaxy S20 is one of the most top smartphone in 2020, the Samsung Galaxy S20 comes with a larger screen. There are 5 models of the Galaxy S20 series: 3 sizes of 6.4 inches, 6.7 inches, and 6.9 inches, 5G and LTE will be supported on Galaxy S20 6.4 and 6.7 models, while Galaxy S20 6.9 inches will only support 5G. Samsung Galaxy S20 series all have curved edge display.

As we know, some people may accidentally delete data on their Samsung phone, if those data are very important that they want to recover them.

As a matter of fact, there is an effective way to recover lost data from Samsung Galaxy S20.

1. You need a third-party tool to directly scan and recover data from your Samsung Galaxy S20.
2. If you’ve synced your Samsung with Samsung Kies, you also can regain your deleted data by extracting your Samsung Kies backup file.
3. If you synced your Samsung S20 with Samsung Cloud before, you can recover deleted data from Samsung Cloud backup file.

samsung galaxy s20 data recovery

You may want to read:

How to recover deleted data on Samsung S10

How to transfer iPhone data to Samsung S10/S11

When we are using the Android phone, data loss is common for many reasons. For example, deleting by accident, system crash, factory reset, etc.. When this happens, how to recover lost data on Samsung phone? Here is a tool for you.

Data Recovery for Samsung Galaxy S20, S20+ & S20 Ultra 5G

This Samsung Galaxy S20 Data RecoveryAndroid Data Recovery is the useful Samsung data recovery tool to recover deleted data from Galaxy S20 series. It enables you to recover deleted contacts, text messages, videos, photos, call logs, WhatsApp, documents, etc. It can recover files from the internal storage and from the SD card without backup. It can be your effective Samsung Galaxy S20 Data recovery, as well as recovering data from Samsung Galaxy S10, S9, S8, S7, S6, S5, etc.

d_win d_mac
d_win d_mac

How to Use Samsung Galaxy S20 Data Recovery to Recover Lost Data?

Step 1: Run the Android Toolkit on PC or Mac
Download and install the Samsung Galaxy S10 data recovery to your Windows (or Mac) computer firstly, install it. To recover deleted files on Galaxy S20, please choose “Android Data Recovery” mode.

Samsung Galaxy Note 10/Note 10+ Data Recovery

Step 2: Connect Samsung Galaxy S20 to Computer and allow USB Debugging on it
Connect your Samsung Galaxy S20 to the computer via USB cable, tap “Allow” when prompted on the phone, then the program will detect your Samsung phone automatically.

If it’s the first time you connect your iPhone with the computer, you’ll be required to open USB debugging mode on the Samsung S11. Follow the on-screen instructions to enable it.
Operating procedure on your Samsung Galaxy S20 handset: Open Settings > About phone > Build number, tap it for 7 times to enable the Developer options. Then go back to Settings > Developer options, and scroll down the screen until you find the USB debugging switch, toggle it to ON position.
Also see detailed instructions about how to enable USB debugging on Android phone

usb debugging Samsung Galaxy Note 10

Step 3: Choose types of data files to scan
In this step, please choose what you’d like to scan for the lost files in the Galaxy S20 storage, then click Next button and go on.

choose data types to recover

Step 4: Root for Deep Scanning
Now the tool starts to analyze the Samsung phone and then scan it for all your files.

You should be prompted to root the device for a deep analysis of the lost stuff. To do this, press Rooting Tools button and get KingoRoot app on a browser webpage.

Read “How to root and unroot an Android Device” for full tutorial.

root Samsung Galaxy Note 10

Once rooted, just click “Retry” button, the program continues scanning S11. This will take some minutes.

Step 5: Preview and Recover deleted Data from Samsung Galaxy S20 memory
Finally, when the scanning is over, you can find the recoverable files on the left panel, mark the files you need, including contacts, messages, photos, videos, WhatsApp messages, call logs and documents, if you only want to view the deleted files, please switch on “Only display the deleted items”, the software will shows all deleted contents, please select the data you want and hit on “Recover” button to recover deleted data from Samsung Galaxy S20.

recover deleted data from Samsung Galaxy Note 10

The Samsung Galaxy S20 Data Recovery will get back the files and save them locally. Done!

Step 6: Transfer the Data from Computer to Samsung Galaxy S20(Option)
Well done! All deleted files save onto your computer folder, you can use this iOS & Android Manager tool or Android Transfer tool to import the files to your Galaxy S20 easily, the Android transfer also can help you backup data from Samsung Galaxy phone to computer.
Also read: How to transfer files to Samsung Galaxy

d_win d_mac
d_win d_mac

Tips: Backup Up My Samsung Data to Google Cloud

Most Samsung users use Samsung Cloud and Smart Switch to backup their data, the Google cloud backup service also is a great service for backing up Android data over the air. Once it’s backed up, you no worry when losing the device or Android data is corrupted or disappeared.

Google cloud enable us easily to back up data from Samsung phone to Google account: apps, app settings, contacts, photos & videos, call logs, Wi-Fi passwords, account data, and other files. How to backup data from Samsung Galaxy S20 to Google Cloud?

Step 1. On Samsung S11 screen, swipe up or down to get to the apps screen.
Step 2. Tap Settings > Accounts and backup > Backup and Restore.
Step 3. In Google Account section, toggle on “Back up my data” as well as “Automatic Restore”.
[Read Also: 4 Ways to Backup and Restore Android Data]