By Selena KomezUpdated on July 10, 2017
“My old Samsung Galaxy S4 fell down from the stairs. The phone still boots up and I am able to do anything on it. I will bought a new Galaxy to replace, how to export the photos from this broken Samsung to my new Galaxy S7 phone?”
Photos are important data on our mobile phone and losing them would risk serious loss to our work or personal life. However, many times unwanted events can cause of the photos loss from mobile device. One of the most common is breaking of the phone. It can happen it physical level or on the software level. To transfer data between two mobile devices you could try to use Phone Transfer, which is a wonderful data transfer tool to switch files between two devices directly, contacts, SMS, photos, call logs, videos, calendars, music, apps are included. On the other hand, to transfer data from broken Samsung to Galaxy phone, you should focus on the other two programs we are going to recommend for you. This post is going to show you how to transfer the photos from broken Samsung to Galaxy S6/S7.
Broken Android Data Extraction is a ideal data extraction program for exporting photos from broken Samsung directly. Besides photos, this program enables to extract several of data from broken Android device, including contacts, SMS, videos, audio, call logs, documents, WhatsApp & WhatsApp Attachments, etc,. Broken Android Data Extraction helps to extract data from Android under any broken situations, like device with broken screen, device with black/white screen, device get water damaged, device get into stuck loop or others. Most of Samsung Android are compatible with the Broken Android Data Extraction, such as, Samsung (Galaxy S6/S7/S8, Note 3/4/5), HTC, Motorola, Lenovo, LG, Sony.
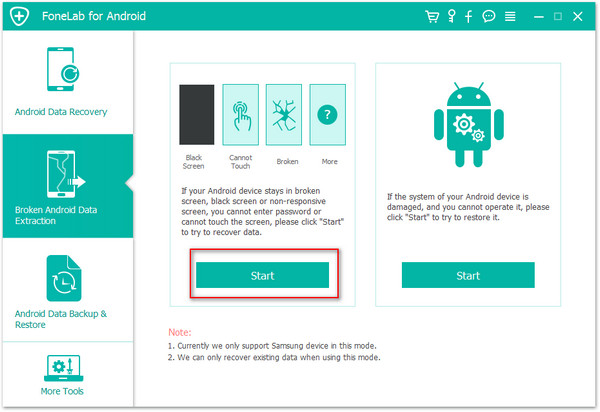
Step 1. Connect Broken Samsung to the Computer
First of all, please connect the broken Samsung to the computer, now you should connect your broken Samsung to the computer. Click “Start“.
Step 2. Select the Photo File to Export
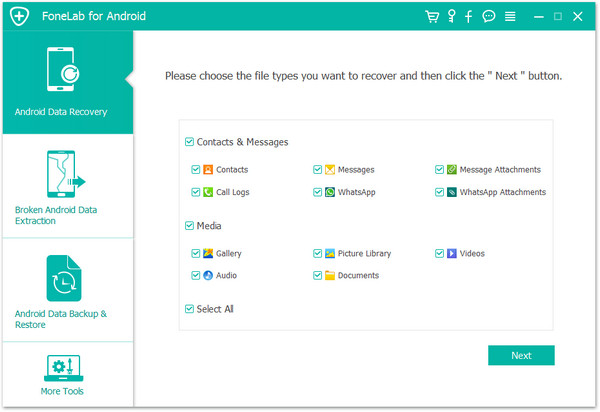
Now click the option which is the type data name that you want to export. If you want to recover all files at once, please click on “Select All”. For photos recovery, you should click “Gallery”. Then click “Next“.
Step 3. Select the Fault Type of Your broken Samsung
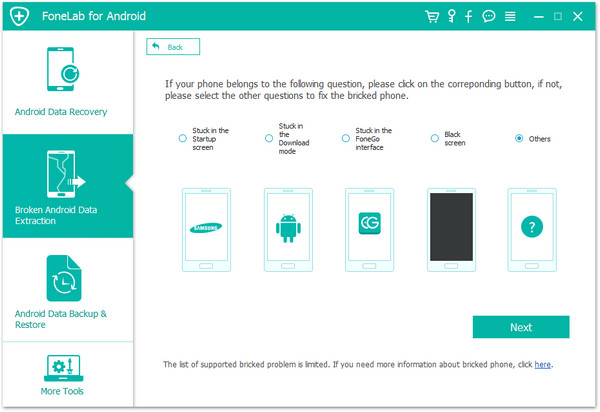
In this step, the program will guide you to another screen, select one situation depend on your broken Samsung. Then click “Next“.
Step 4. Select Your Broken Samsung Device Model
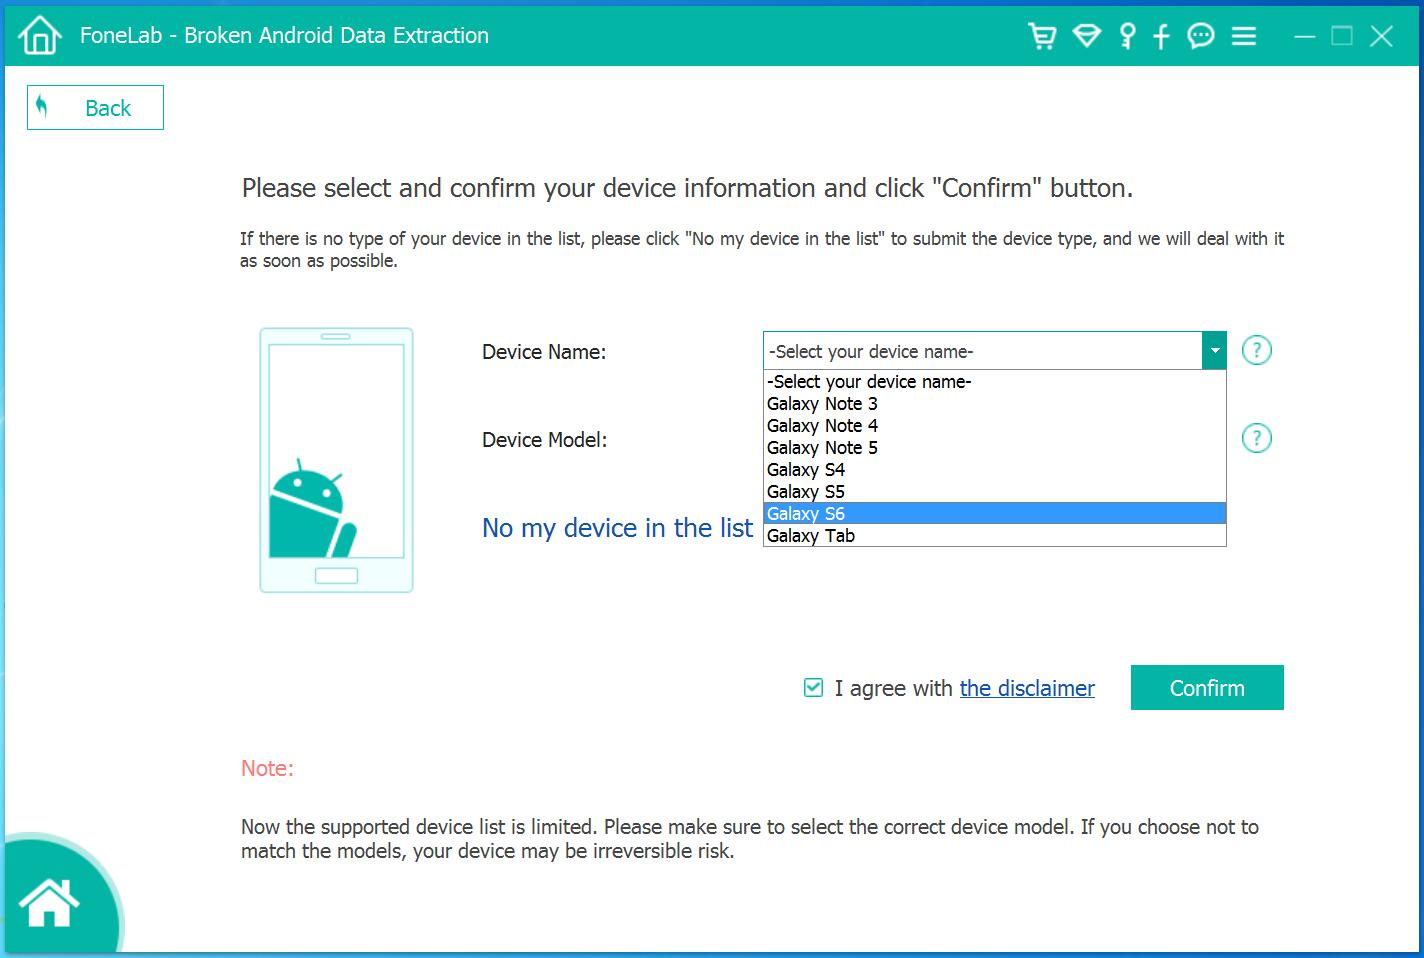
According to option to select the brand and model of your phone. If you are not sure what model of your Samsung device, please click the “How to confirm the device model” option.
Step 5. Enter Download Mode for Broken Samsung
In this step, you will follow different steps to enter your phone into download mode.
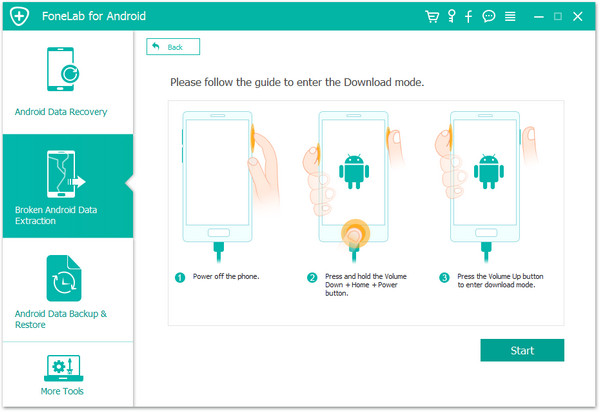
Note: During the process of getting device into “Download mode”, remember keep connecting your broken Samsung to the computer via USB cable.
Step 6. Fix Broken Samsung and Analyze Data on Samsung
After entered the “Download mode”, the program will start downloading “recovery package” to restore your Samsung phone and then analyze data on your device with a short time.
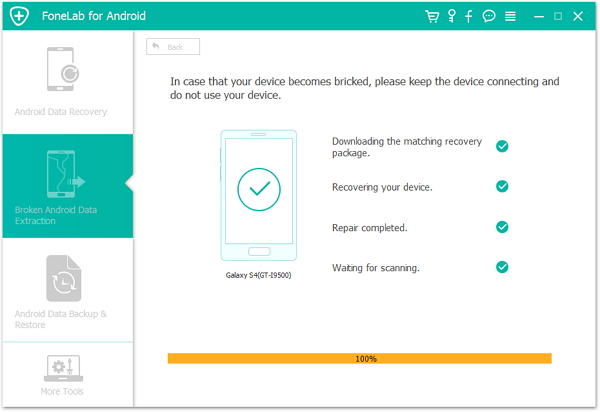
When the downloading finished, the selected data stored in the device will scanned out.
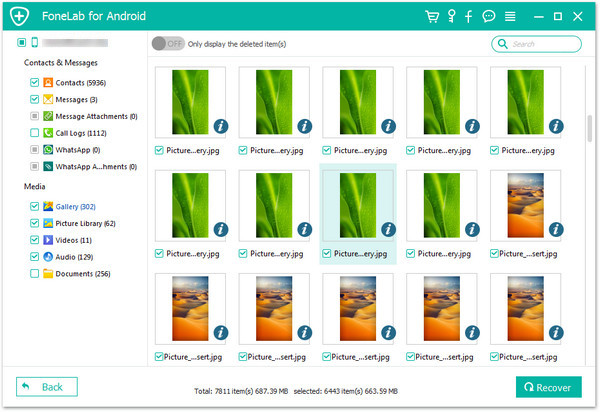
Step 7. Preview and Export Photos from Samsung
Once finish scanning the your Samsung, you are allow to preview and export selected photos from Samsung to the computer. Just simply click “Recover” button at the lower-right corner and save them on the computer.
Now you should use the Android Manager to help to transfer photos from computer to Samsung Galaxy S6/S7. Android Manager is a ideal manage tools for Android device, helps to transfer & manage Android on the computer freely, including photos, videos, music, contacts, SMS, apps. With using Android Manager, you could easily transfer data between Android and computer, transfer data between Android and iTunes, transfer data among Android device and iOS device.
Step 1. Connect Samsung to the PC
Firstly, connect your Samsung phone to the computer via a USB cable.
This program works well in Windows 10/8/7/2003/XP/Vista. When your Samsung is detected, all contents on your device will be displayed in the primary window.
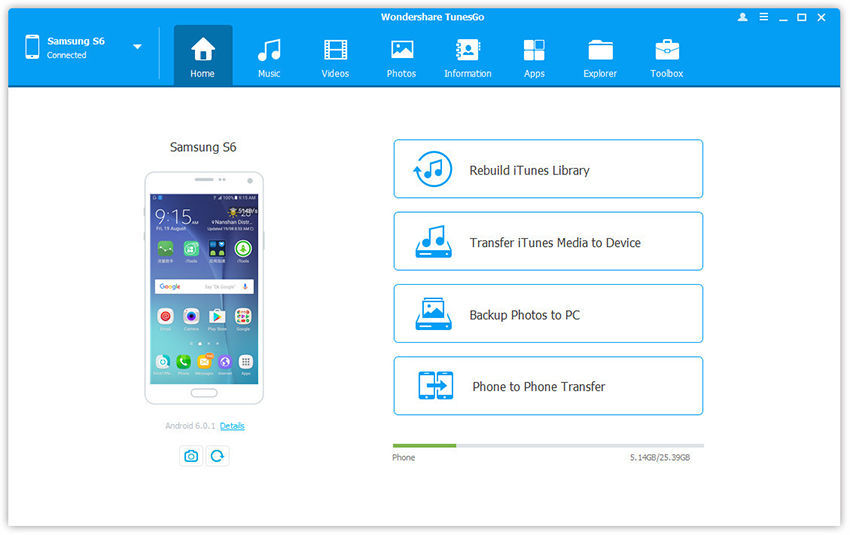
Step 2. Transfer Photos from Computer to Samsung
In the primary window, click “Photos” from the top menu. All albums on your Samsung show up. Choose one album to save the importing photos.
Then, click “Add” and choose “Add file” or “Add folder“. When the file browser window pops up, find your desired photos or photo album and then import them.

That’s the simple steps on how to move photos from computer to Samsung Galaxy S6/S7.
Related Article:
How to Tranfer Videos from Broken Samsung Phone to Galaxy S6/S7
How to Transfer Contacts from Broken Samsung Phone to Galaxy S6/S7
How to Recover Photos from Broken Samsung Phone S6/S7
How to Recover Data from Broken Samsung Galaxy S6/S7
How to Recover Deleted Data from Samsung Phone
How to Recover Deleted Photos from Samsung Galaxy S6/S7
Prompt: you need to log in before you can comment.
No account yet. Please click here to register.
No comment yet. Say something...