“I want to find a manager program to help me administrate and transfer files for my Samsung Galaxy S9 on my computer. Any ways to manage my data stored on Samsung Galaxy S9 directly?What should I do?”-Tom
You may like:
* How to Transfer WhatsApp Messages to Galaxy S9/S9+
* How to Backup & Restore Data on Samsung Galaxy S9
Samsung Galaxy S Series has occupied the Android market for nearly a decade of dominance. Recently,Samsung has announced that it will hold a new product launch event at MWC in 2018 and will launch its annual flagship Galaxy S9 / S9 +. As the release date is approaching, more information about the Galaxy S9 / S9 + is also being uncovered. It is reported that the Samsung S9 will use 5.8 inches QHD + Super AMOLED full-color curved screen, the screen will reach an astonishing 90%, equipped with Snapdragon 845 mobile platform, supplemented by 4GB + 64GB / 128GB storage combination. Samsung S9 + screen size will be 6.2 inches, the same processor as the Snapdragon 845, the memory is 6GB, body storage also has 64GB and 128GB two. Running Android 8.0 system, support for MicroSD card expansion to 256GB, support for iris recognition, 3D facial recognition, post-fingerprint recognition, support for wireless charging, NFC, fast charge and other functions.
Although the Samsung Galaxy S9/S9 + create many new features for us to use. Unfortunately, we often encounter problems that we do not know how to manage the mobile data with a simple solution. Some useless personal files takes up space on our mobile phone. On the other hand, how to back up the useful personal data can also be a trouble. Based on these above troubles, you need a mobile management software to help you manage and transfer files for Samsung Galaxy S9/S9 +.
Best Samsung Galaxy S9 Manager for PC/Mac
Samsung Galaxy S9 Manager – iOS & Android Manager is a prefect app for transferring and managing files for Samsung Galaxy S9/S9 + with ease. It can be used to back up contacts, photos, music, text messages, apps and more for Android device. You can use it to back up, transfer and manage imported files, in addition,it can help you identify and delete unwanted or infrequently used files to free up some space on your phone. This Samsung Galaxy S9 Manager as a Must-Have Phone Manager worth using because:
-Transfer all your media around freely between your devices without iTunes.
-Help you export and transfer files, convert live photos, static photos, and videos to GIFs.
-You can manage and backup Contacts & SMS in a safer and simpler way.
-Drag and drop music, videos, and other files into third-party Android apps,create shortcuts for easy access.
-Root your Android for more options.
-Save your mobile data with more efficient app management.


Tip: This Samsung Galaxy S9 Manager can fully compatible with Android 8.0 or lower. Besides to Samsung models, it is applicable to almost all Android models, like HTC, Lenovo, Motorola, LG, Huawei, ZTE, Google Pixel, etc,.
Manage and Transfer Files to Samsung Galaxy S9/S9 + Simply:
Part 1.Samsung Galaxy S9 Manager: Transfer and Manage Music on Galaxy S9/S9+
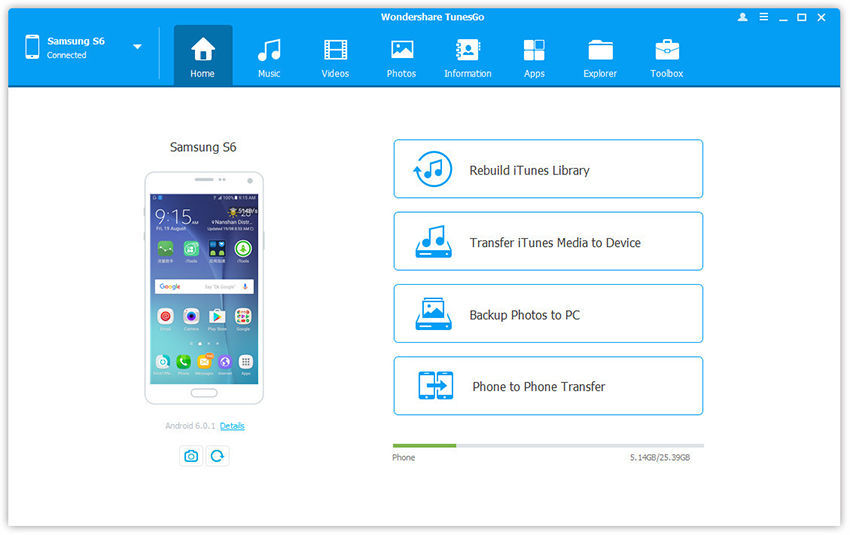
Step 1.Run the Samsung Galaxy S9 Manager
Launch Samsung Galaxy S9 Manager on your PC and connect your Samsung to the computer.

Step 2.Select Music Files to Transfer
Choose Music tab and find the Add option.Click Add > Add File or Add Folder.
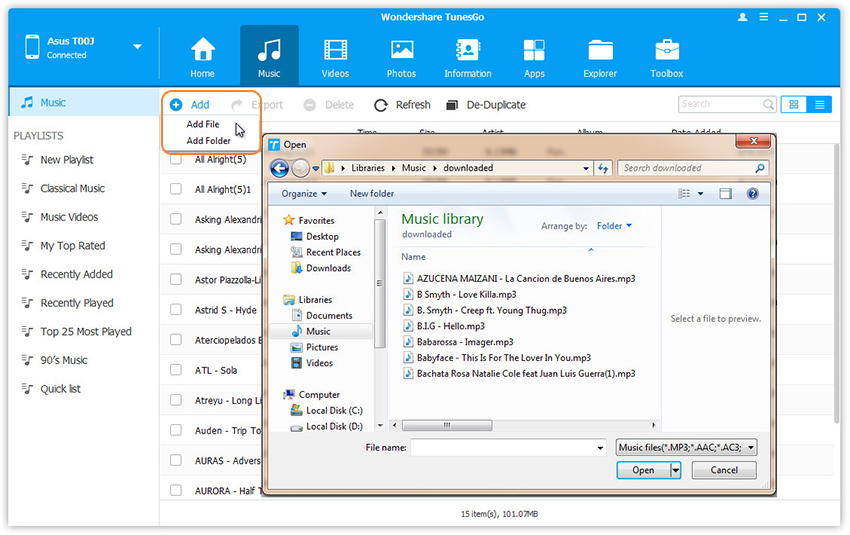
Step 3.Start Transfer to Your Samsung
Now you can select songs to export on the file browser window from your computer.And you can also create new playlist by right clicking Music to save the imported songs.Drag and Drop music files simply from computer to your Samsung.
Part 2.Samsung Galaxy S9 Manager: Transfer and Manage Photos on Galaxy S9/S9+
Step 1.Run the Samsung Galaxy S9 Manager
Launch Samsung Galaxy S9 Manager on your PC and connect your Samsung to the computer.
Step 2.Select Photos Files to Transfer
Choose Photos tab and find the Add option.Click Add > Add File or Add Folder.
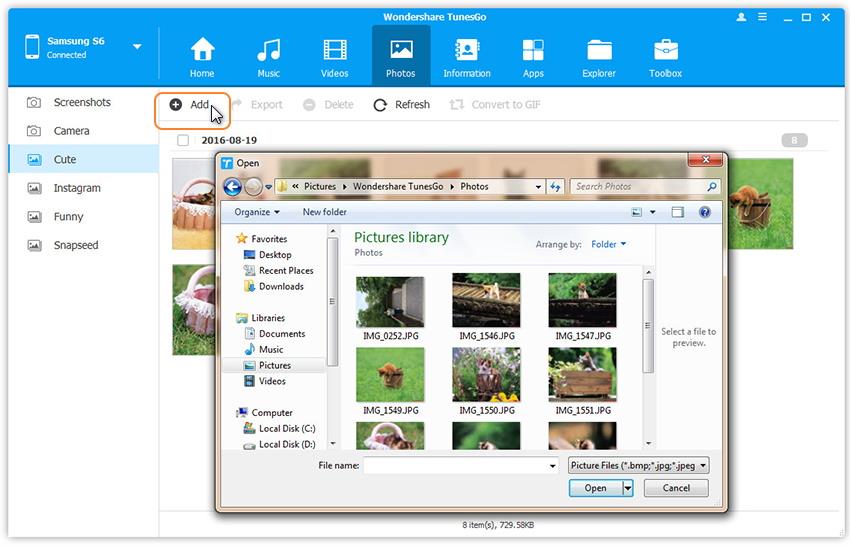
Step 3.Start Transfer to Your Samsung
Now you can select images to export on the file browser window from your computer .And you can also create new playlist by right clicking Photos to save the imported pictures.Drag and Drop Photos files simply from computer to your Samsung.
Part 3.Samsung Galaxy S9 Manager: Transfer and Manage Contacts on Galaxy S9/S9+
As the essential data on your phone, contacts should be taken good care of. Samsung Galaxy S9 Manager can easily add and edit contacts, group contacts, merge duplicate contacts and delete useless contacts in batches.Allows you to manage contacts on your Phone, SIM card, iCloud, Exchange, Yahoo and other accounts.
Step 1.Run the Samsung Galaxy S9 Manager
Launch Samsung Galaxy S9 Manager on your PC and connect your Samsung to the computer.
Step 2.Select Contact Files to Transfer
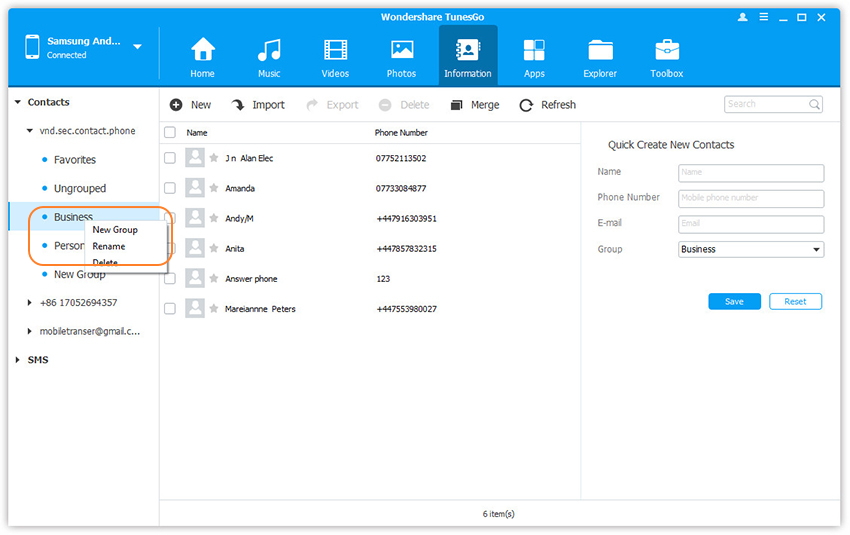
Select and expand account from which you want to add and edit contacts, including your phone Contacts, SIM Contacts and Google Contacts in the contact management window.Click “Business” on the left side and you can create New Group, Rename Group, or Delete Group.
Step 3.Start Transfer to Your Samsung
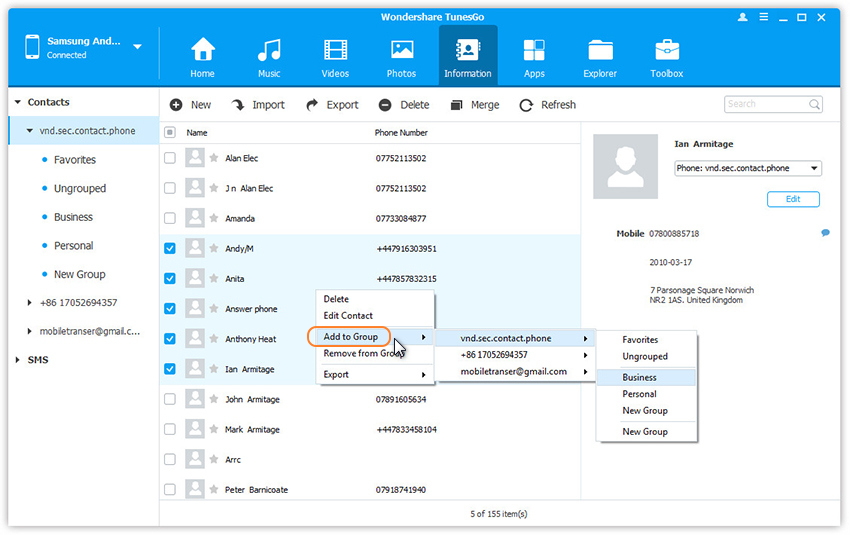
Right-click on selected contacts, you can add contacts to specified group.
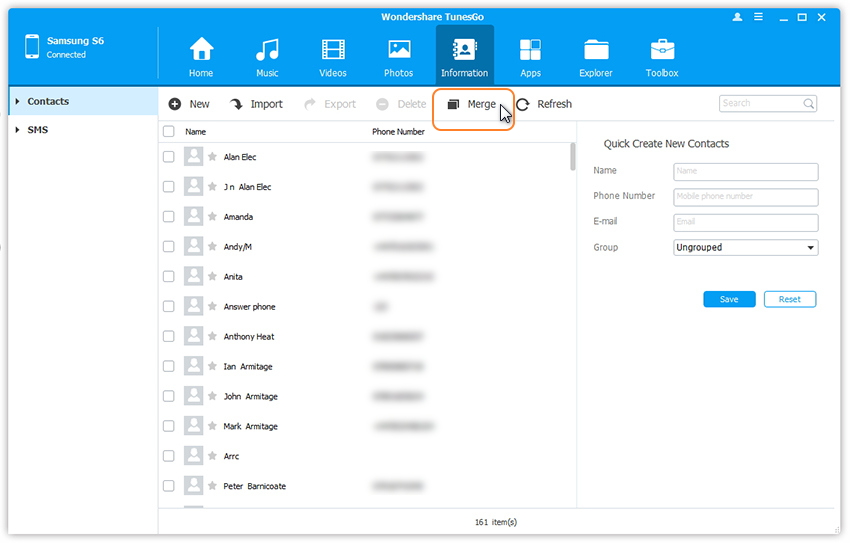
Merge Duplicates
Step 1. Click Information tab.
Find “Merge” option in the contact management window.
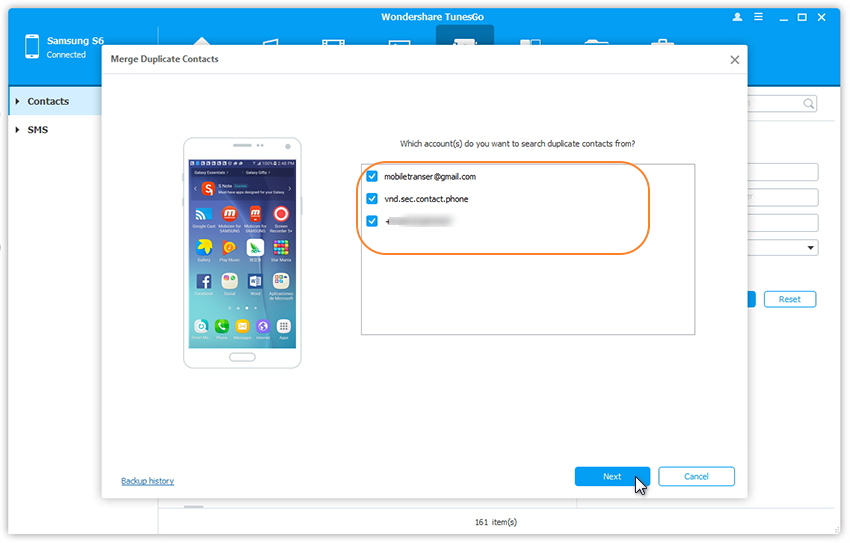
Step 2. Select account(s) You want
In this step you can choose account(s) from which you want to search duplicate contacts, including your phone Contacts, SIM Contacts and Google Contacts.
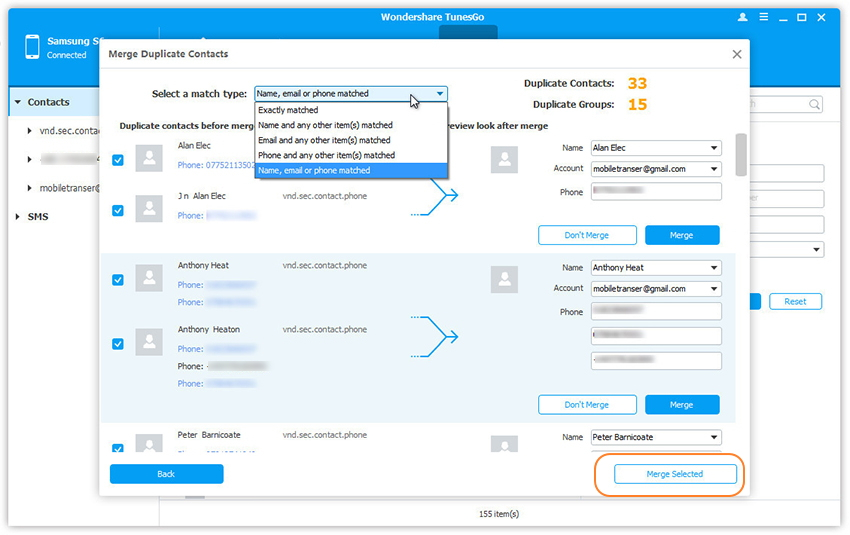
Step 3. Select a match type to find duplicate contacts.
All duplicate contacts that have the same name, phone number or email will appear for your review.Select a match type to find duplicate contacts.
Step 4. Click Merge Selected
Now you can merge all the contacts or merge selected contacts by clicking Merge Selected.
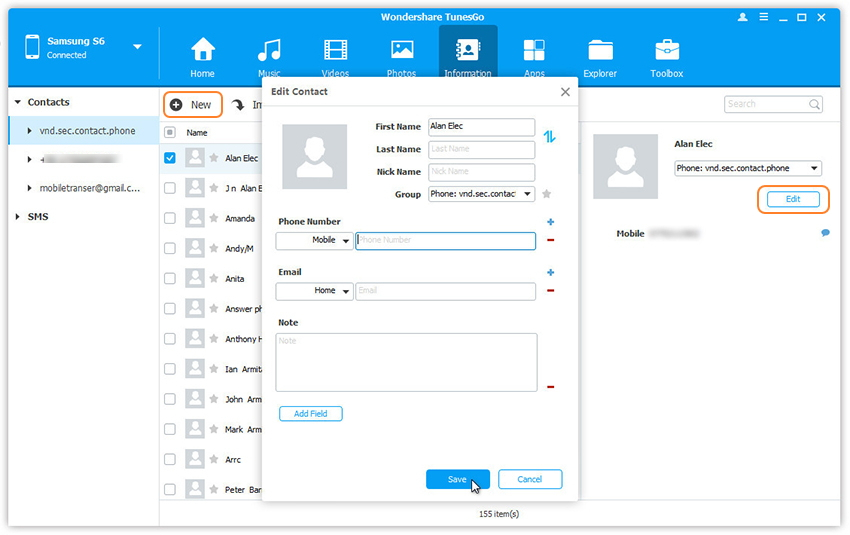
How to Add & Edit Contacts
Step 1. Click Information tab.
In the contact management window, select account and group from which you want to add and edit contacts, including your Phone Contacts, SIM Contacts and Google Contacts.
Step 2. Click New to open the Add to contact window.
You can add names, emails, phone numbers, websites, addresses, middle names, etc. to your contacts window. In addition you can search and edit selected contacts.
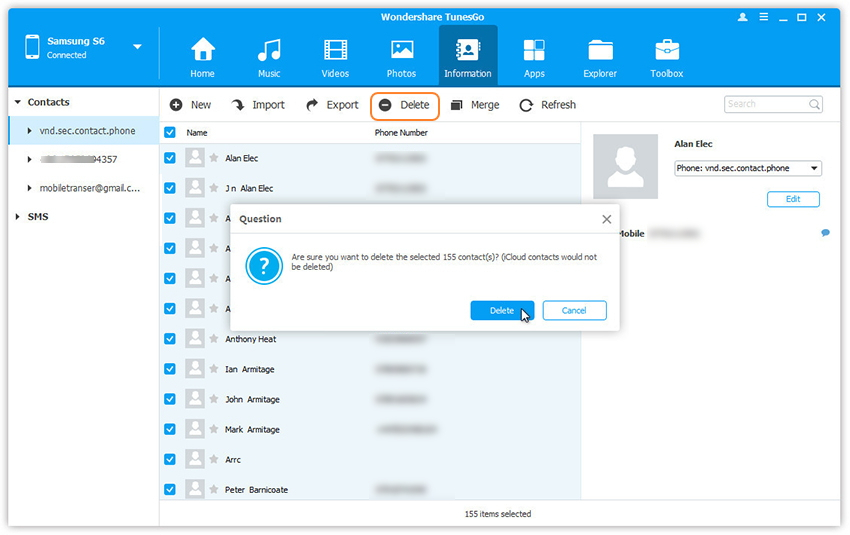
Delete Contacts in Batches
Step 1. Click Information tab.
In the contact management window, you can delete unwanted contacts from select group, including your Phone Contacts, SIM Contacts and Google Contacts.
Step 2. Tick Contacts you want to delete
Now tick contacts you want to delete the click Yes in the pop-up dialog .
Part 4.Samsung Galaxy S9 Manager: Transfer and Manage SMS on Galaxy S9
Step 1.Run the Samsung Galaxy S9 Manager
Launch Samsung Galaxy S9 Manager on your PC and connect your Samsung to the computer.
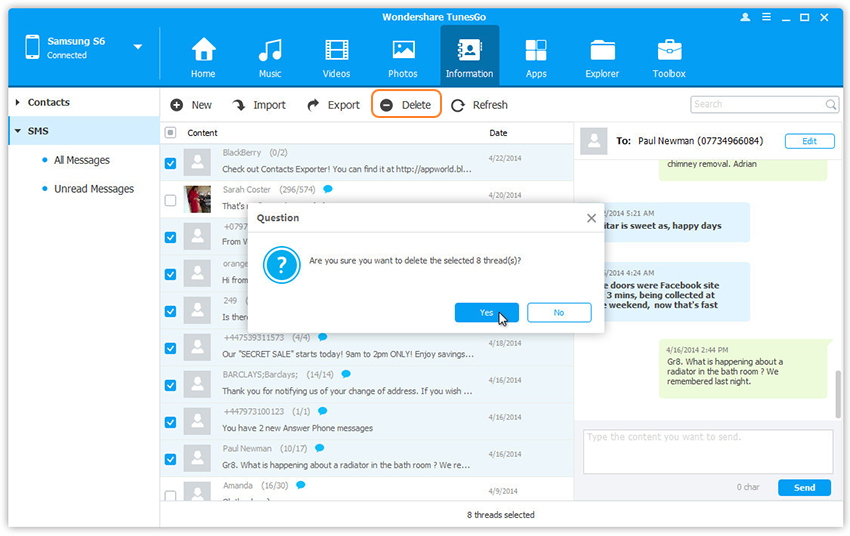
Delete Messages in Batches
Step 1. Click Information tab.
Select SMS on the left panel. All messages will be shown on the right.
Step 2. Tick Messages
Once you have ticked messages you want to delete ,then click Delete.
Step 3. In the pop-up dialog, click Yes.
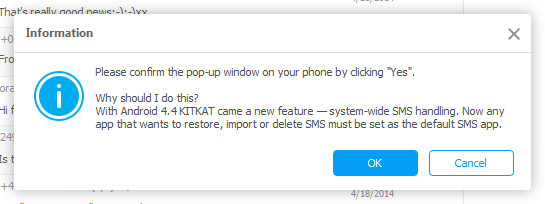
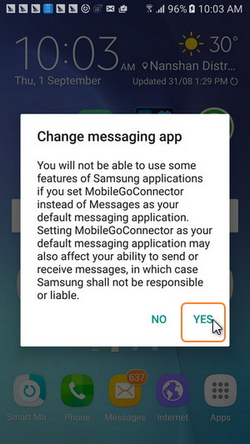
Note: The program may ask you to set MobileGoConnect as your default messaging application, as shown below.Choose Yes button on your device first, and then confirm it on your computer.
Send Messages via PC
Step 1. Click Information tab.
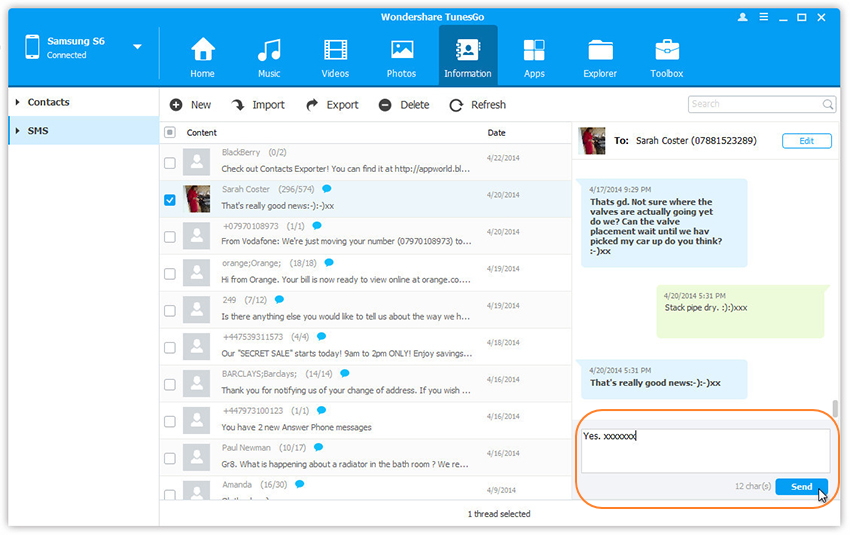
Now you can see SMS button on the left panel.Once you click it ,all messages will be shown on the right.
Step 2. Search and read selected messages.
Simply type the content and click “Send” button to send messages via program on the computer.
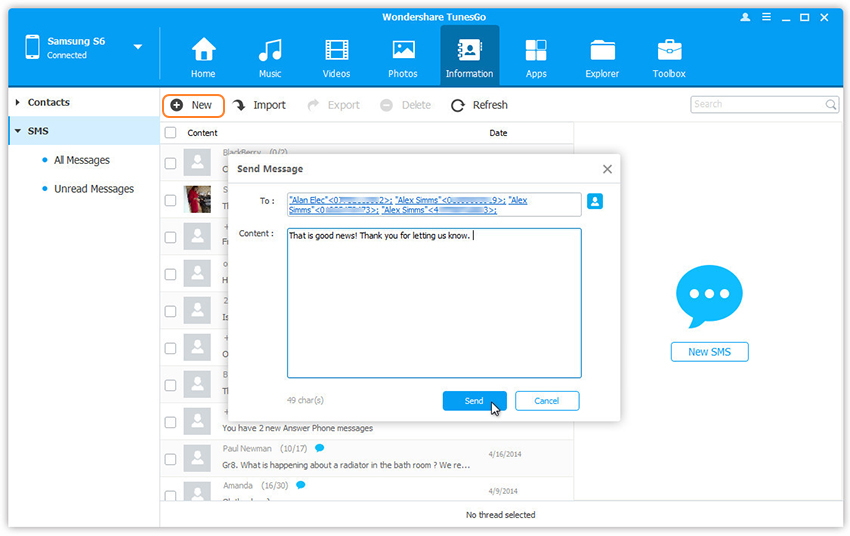
If you want to send a message to multiple recipients , you can click New SMS on the right column to create and send a new message.
Part 5.Samsung Galaxy S9 Manager: Transfer and Manage Apps on Galaxy S9/S9+
Step 1.Run the Samsung Galaxy S9 Manager and connect your Samsung to the computer.
Install the Apps
Click “Apps” on the top menu and then click “Install”. Navigate to the location of the .apk file stored.

Uninstall the apps
Click the “App” tab then click “Uninstall” and choose “System apps” or “User apps” from the drop-down on the right. Tick the apps to remove and click “Uninstall”.

Exports the apps
Select the apps you can then backup Samsung Galaxy S9/S9 + apps to computer.

Part 6.Samsung Galaxy S9 Manager: Transfer iTunes Music to Galaxy S9
Step 1.Run the Samsung Galaxy S9 Manager and connect your Samsung to the computer.
Firstly,download the program and connect the Samsung Galaxy S9/S9 + by using the USB cable on the computer. The program will show the different options displayed in the menu bar then you should choose Transfer iTunes Music to Device.
Step 2.Select the Media Types
Once you have choose the “iTunes Media to Device” option,wait a few minutes.The program will scan all available iTunes files. After the scan is completed, the media is displayed based on categories such as movies, songs, podcasts, and more.To begin transferring the selected category, press “Transfer.”

Step 3.Transfer music from iTunes to Samsung Galaxy S9/S9+
At this part you just have to wait a few minutes and ensure the connection with no disruption.After it finished,the program will display successful completion message. Then you can end the operation by clicking the OK button.

Part 7.Samsung Galaxy S9 Manager: Safely Root Samsung Galaxy S9/S9+
Step 1.Run the Samsung Galaxy S9 Manager and connect your Samsung to the computer.
As long as you have installed the Samsung Galaxy S9 Manager on your PC, just run it and then connect the Samsung Galaxy S9 to the computer using a USB cable.
Step 2.Select “One click Root” to get full-control
Navigate to the top menu of the main program window to find the “Toolbox” tab. Click on the “Other Tools” section under the “Toolbox” option and select “One click Root” for full control over your Samsung Galaxy S9/S9 +.

Step 3.Get Root Access
Then the screen will show a warning message saying that after rooting you will gain full access to your phone system and that rooting may affect your device warranty. Just click “Root” from that warning box to continue rooting your Galaxy S9/S9 +.

Wait for the app to get root access and please do not disconnect the device. The phone may restart in the root process, but don’t worry. Once the root process is complete, you will receive a success message that gives you full access to your phone system.
What’s More Samsung Galaxy S9 Manager can Do for you
-Provide a variety of apps to select and download freely.
-Download the new apps uninstall seldom used apps to release space.
-Backup all the apps from your Android phone to computer and restore them when you need.
-One click to share apps through Twitter, FaceBook, Google+ or SMS easily.
-One click to transfer apps to SD card to speed up your phone.
Related Articles
How to Recover Deleted Data from Samsung Galaxy S9
How to Recover Deleted Photos from Samsung Galaxy S9
How to Transfer iTunes Music to Samsung Galaxy S9
How to Transfer iTunes Videos to Samsung Galaxy S9
How to Transfer iPhone Data to Samsung Galaxy S9
How to Stream Apple Music on Samsung Galaxy S9
Best Samsung S9/S9+ Manager Tool