“Please help. All my data stored on the smartphone were gone. I don’t know what’s wrong with it? It is related to the rooting? How to restore all the lost data from my phone? Please send me your idea as soon as possible. Thanks so much.”
What is Android Rooting
Root, at least the way we’re talking about it here, is the superuser. You are a user when you sign in, and you are allowed to do certain things based on your user permissions. Apps you install are also given a type of user ID, and they all have permissions to do certain things – you see those when you install them on older versions of Android, or you are prompted to allow them on Marshmallow or higher – in certain folders with certain files. Root is also a user. The difference is the root user (superuser) has permissions to do anything to any file any place in the system. This includes things we want to do. When you’re doing things with superuser permissions, you have the power to do anything.
Android Rooting May Lead to Data Loss
If you’ve researched anything about Android on the internet, you’ve probably seen and read about “rooting” one. There was a time when many of the Android phones available didn’t live up to their potential, and root was the answer. More and more Android users choose rooting to have more control over many settings, features and performance of their phones or tablets. It means that you will get more authority after rooting your phone. However, the improper rooting may lead to data loss on your Android device. Mostly it will result in contacts/photos/SMS disappear or all data loss. In fact, to recover lost data from Samsung phone after rooting is not a hard job if you get the help of a smart data recovery tool.
Recover Lost Data from Rooted Samsung Galaxy Note 5
U.Fone Android Data Recovery makes it possible to restore lost data from rooted Samsung Galaxy Note 5. All types of data including photos, videos, messages, contacts, call logs, WhatsApp messages and so forth can be found and recovered. Besides to Android rooting, it supports to recover lost data from Android under any data circumstances, like accidental deletion, Android OS update, factory reset restoring, etc,. What’s more, this all-in-one program enables you to extract data from broken Android device, backup & restore Android safely. All popular Samsung phone models and Android models are compatible with this superior program.


How to Restore Lost Data from Rooted Galaxy Note 5
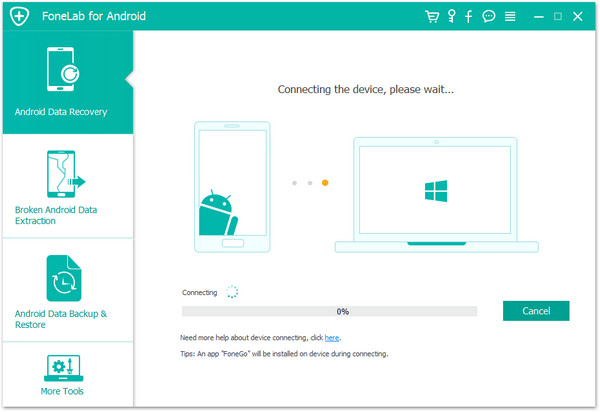
Step 1.Install Program & Connect Rooted Samsung
Users need to download and install U.Fone Android Data Recovery on computer, then connect your rooted Samsung phone to the computer via its USB cable.
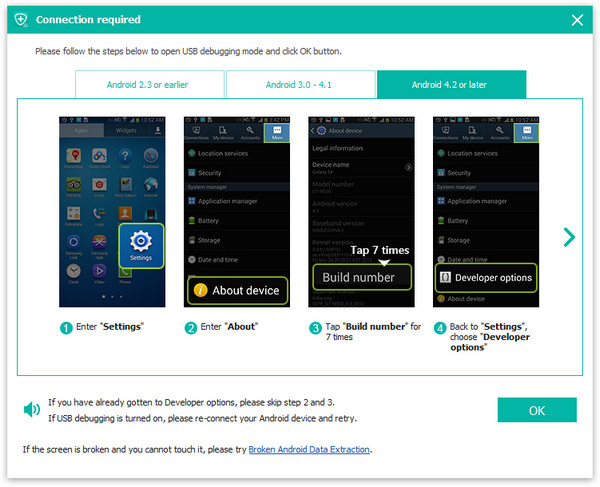
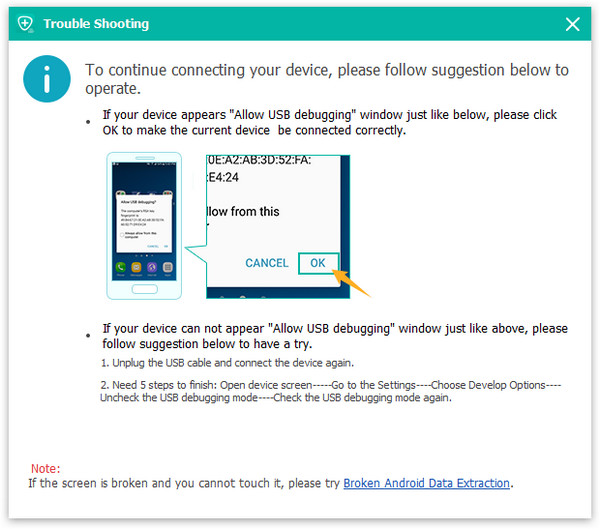
Step 2.Enable USB Debugging on Samsung
Unlock your phone, go to Settings > Developer options > Allow USB debugging mode. If you have already allowed the USB debugging mode, you will see a pop-up window on the screen, mark “Always” from this computer and click “OK“.
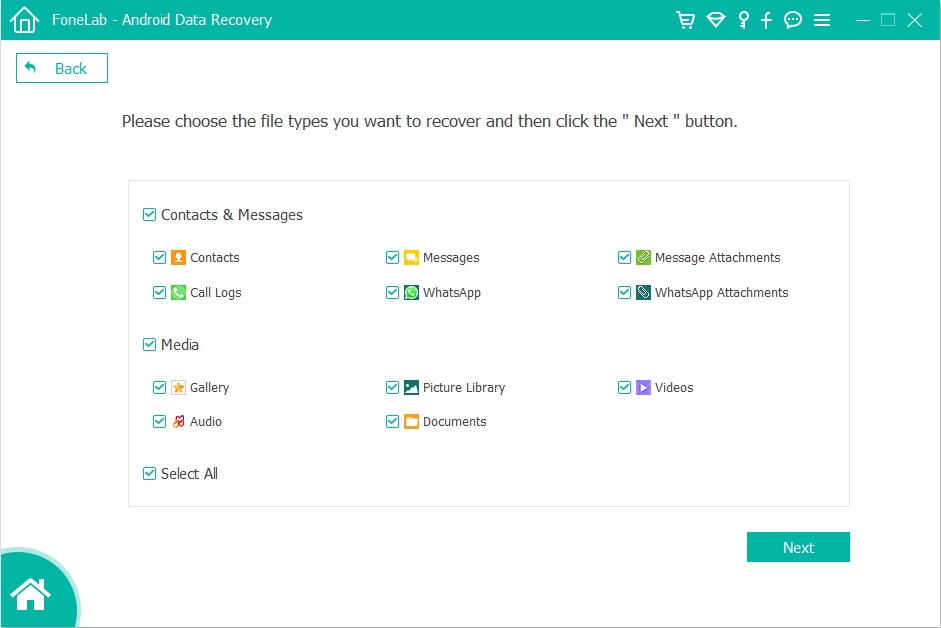
Step 3.Select Files to Recover from Rooted Samsung
Now, select the files contain the data you want to scan and recover. If you not only want to scan and recover the lost part of data from your phone, please tap “Select All” and tap “Next” to continue.(If you just wanna recover the lost data from device, you should click “Only display the deleted items”.)
Step 4.Scan & Analyze files on Rooting Samsung
When you get the window as below, please turn to your phone and tap the “Allow” button.
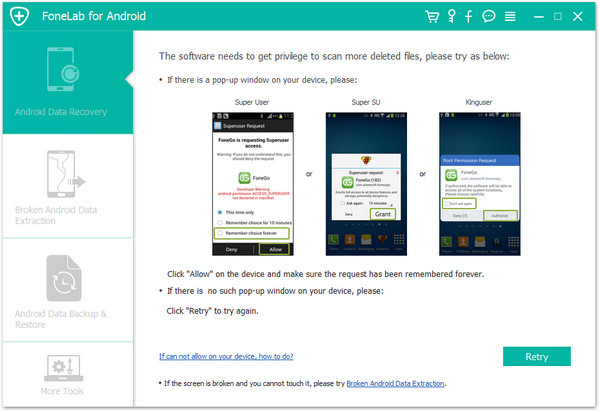
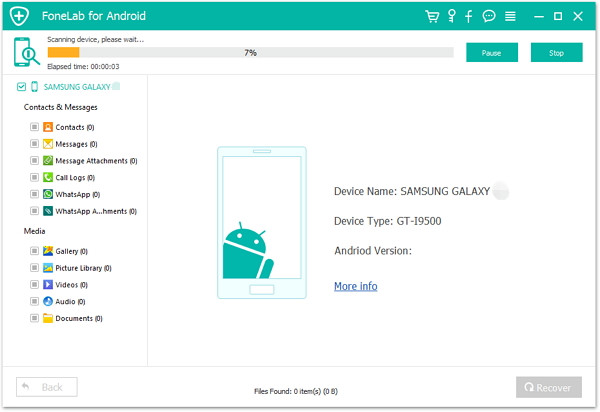
Begin to scan data stored on your rooted Samsung phone.
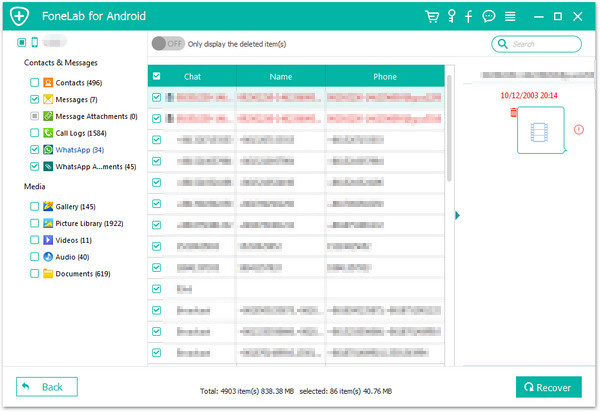
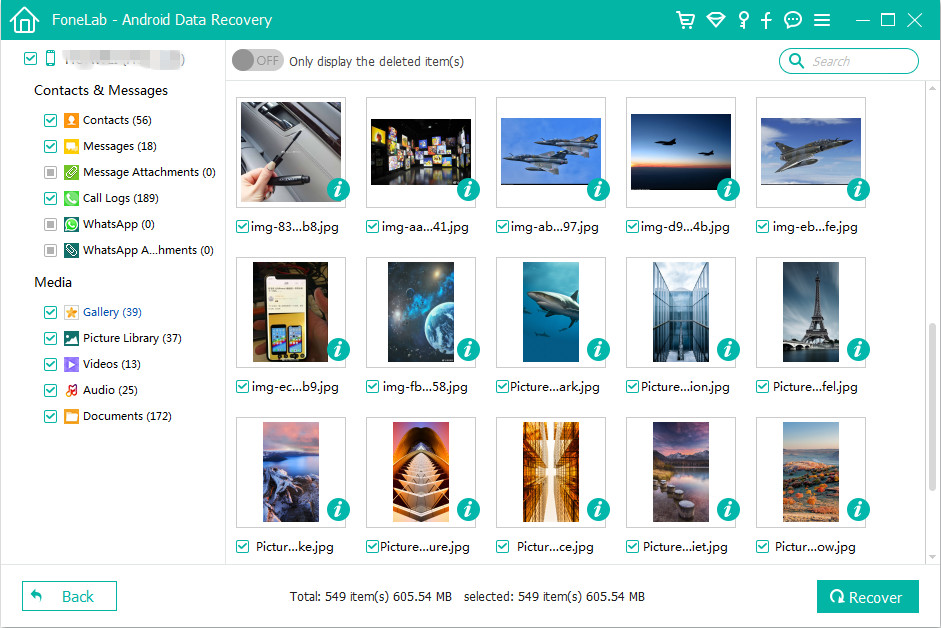
Step 5.Preview and Selectively Recover Lost Data from Rooted Samsung
After scanning, you’re supposed to click the items in the left sidebar to show all data, you’re allowed to preview the data and decide to which one for recovery. Click “Recover” to restore all selected data on the computer. Done.
Related Samsung Data Recovery Guides:
How to Recover Lost Photos from Samsung Galaxy Note 5
How to Recover Lost Data from Broken Samsung Galaxy
How to Recover Data from Frozen Samsung Galaxy
How to Backup & Restore Samsung Galaxy Note 5
How to Manage Samsung Galaxy on the Computer
How to Stream Apple Music to Samsung Galaxy
Android Data Recovery
Recover Your Lost Data from Android
Now, Even Device Broken
Compatible with Android 8.0 Oreo/7.0, etc.