All posts by DHZ

Apple iOS 13 New Features on iPhone

Apple has released the latest OS system – iOS 13, the iOS 13 is available for iPhone XS Max, iPhone XS, iPhone XR, iPhone X, iPhone 8 Plus, iPhone 8, iPhone 7 Plus, iPhone 7, iPhone 6s Plus, iPhone 6s and iPhone SE. Now, you can install the public beta of iOS 13 on iPhone via OTA update, or installing iOS 13 public version via iTunes, the final version of iOS 13 is expected to roll out in September.
Also read: how to install iOS 13 on iPhone

iOS 13 is the “next big release for iOS“, what’s the new features in iOS 13? We’ve downloaded the early public beta to take it for an early spin and find out what’s defferent between iOS 13 and iOS 12, and to see the top new features of iOS 13.

Apple official plans to roll out the IOS 13 system in the fall, and now we can experience the public beta in advance. It is said that IOS 13 not only took the system response speed, but also opened the app twice as fast as before, and added the dark mode. Especially for the iPhone using Liu Haiping, in the dark mode, the ugly bangs can be completely hidden.

Above iOS 13 Public Beta Version

For iPhone X, iPhone XS, iPhone XS Max users, the most worthy of upgrading is the dark mode, of course, in the black background, not only can perfectly block the bangs, but also improve the battery life, after all, are equipped with OLED The screen, more importantly, the face recognition speed is also increased by 30% under the system blessing.

Address: https://beta.apple.com/sp/de/betaprogram/

However, this is not recommended for general users to try, it is said that this version is a very poor version of the experience, a lot of BUG.

Simply include high-frequency app crashes (such as own memos), poor performance, some apps in dark mode become completely illegible and actionable (mail, Instagram, etc.) and some weird audio problems (AirPlay, AirPods Siri, etc.). Both well-known developers Marco Arment and Guilherme Rambo have made strong suggestions. If it is not necessary for development purposes, don’t try to install it. The main use is even more impossible.

ios13-features

New Style, More Smoother

At present, iOS 13 is displayed on Apple’s official website in China: “New style, new out world.” This time, iOS 13 launched a new look, bringing major updates to many everyday apps and adding new methods. Helping you protect your privacy, and made a number of improvements to the entire system, making the iPhone more enjoyable and enjoyable.

darkmode ios13

Portrait Light Effect control

In addition to the dark mode, the portrait function has also undergone a relatively large upgrade, allowing you to adjust the more personalized photo style. Photography is an art of light, and portrait lighting control allows you to adjust to a more artistic effect.

iOS 13 Portrait Light Effect control

Photos: New Photo Tab

Updated picture browsing, new browsing interface, and select your wonderful moments according to the day, month and year.

Photos: What's New in iOS 13

Powerful Photo and Video Editing

Every tool and effect you use on your photos, including rotation, cropping, and auto-enhancement, can be applied to video editing. A variety of new tools that allow you to control the extent of the adjustments and the effects of the filters, and refine the photos.

iOS 13 Powerful Photo Video Editing

Apple Map: Look Around Screen

On the map side, IOS 13 will also usher in a major update, and the addition of the live map is very cool. 360-degree view, smooth and seamless tour of the street, immersively explore the city in a three-dimensional perspective.

apple ios 13 look around screen iphone

Of course, as a large version of the IOS system iteration, there are many more functions for system optimization or upgrade. They are not listed here. Interested friends can apply for trials according to the URL provided above.

According to Apple’s announced time, the official version of iOS 13 will be officially launched in the fall of this year.

Read More

How to Backup iPhone before iOS 13 Update

How to Recover iPhone Lost Data after iOS 13 Update

How to Recover Lost Photos from iPhone after iOS 13/12 Update

How to Recover Lost Contacts from iPhone after iOS 13 Update

How to Recover Lost SMS from iPhone after iOS 13 Update

How to Recover Lost Data from Tecno L8/L8 Plus/L8 Lite

[Summary]: Get the best way to recover lost data from Tecno L8/L8 Plus/L8 Lite without any data loss. Use U.Fone Android Data Recovery software to restore deleted and lost photos, videos, audios, contacts, text SMS, WhatsApp conversation and other documents with ease.

Do you own a Tecno L8, L8 Lite or L8 Plus phone in which you have lost some important files like contacts, images, text messages, call history and others?

Are you looking for an efficient way to recover deleted data from Tecno L8/L8+/L8 Lite smartphone?

If yes then you have landed on the right webpage. This article is intended to provide the most accurate way for those who wish to retrieve lost or deleted images, videos, messages, contacts, call history or other files from the Tecno L8/L8 Plus/L8 Lite smartphone.

But before entering any recovery solution, let’s take a look at how data gets lost or deleted from the Tecno L8 / L8 Plus / L8 Lite in most cases?

Accidental deletion on your Tecno L8/L8 Plus/L8 Lite;
Restore Tecno phone to factory resetting;
Formatting your Tecno phone;
Forgotten screen lock pattern;
Screen broken/cracked/smashed;
Your phone gets stuck on Recovery mode, blue or black screen;
Virus or malware infection;
Water damaged;
ROM flashed;
Rooting your Tecno L8/L8 Plus/L8 Lite;
And more.

As you can see, there may be many other reasons behind data loss. However, you still have the opportunity to recover lost data from Tecno L8 +, L8 or L8 Lite.

U.Fone Android Data Recovery is such a data recovery software that meets all your requirements. U.Fone helps Tecno Android Phone users to achieve hassle free data recovery. As U.Fone Android Data Recovery software is able to get back deleted/lost data, like images, contacts, videos, audios, call history, text SMS, WhatsApp conversations, music, call/voice recording, voice memos, calendar, documents and much more from Tecno L8 +, L8 or L8 Lite phone without backup.

The best part of this program is to extract files from the phone’s internal memory and external SD card and easily restore data. It works on both “Window” and “Mac” computers, and supports all Tecno Android phones such as Tecno Camon i4, Tecno Camon Tecno iSky 3, Tecno Camon iAce 2X, Tecno Camon i2X, Tecno L8, Tecno L8 Plus, Tecno L8 Lite, Tecno i5 Pro, Tecno i3 Pro, Tecno i5, Tecno i3, Tecno i7, etc, as well as other Android brand phones. For details on how it works, please continue to review the detailed steps.

d_win d_mac
d_win d_mac

A Detailed Guide to Recovering Deleted Data on Tecno L8/L8 Plus/L8 Lite

Step 1. Download U.Fone Android Data Recovery
Download and install U.Fone Android Data Recovery on your computer. There are two available versions, one for Mac and another for Windows.

ufone android data recovery main page

Launch it when the installation is completed. And then, plug in your Tecno L8/L8 Plus/L8 Lite phone to your computer via a USB cable. Select “Android Data Recovery”.

connect Tecno L8 to pc

Step 2. Enable USB Debugging
To make data recovery possible, you will need to allow USB debugging. You can do that by doing the steps below on your Tecno L8/L8 Plus/L8 Lite.

Tap Build Number for several times until you see a message saying that your phone is in developer mode.

Go to “Settings”, select “Developer” option, and tap “USB debugging”. Hit “OK”. A prompt will appear on the software. Click “OK”.

enable usb debugging

Step 3. Select File Types to Recover
The U.Fone Android Data Recovery will display the file types that its support to recover. Choose the data types that you wish to retrieve, click on “Next”.

select data to scan

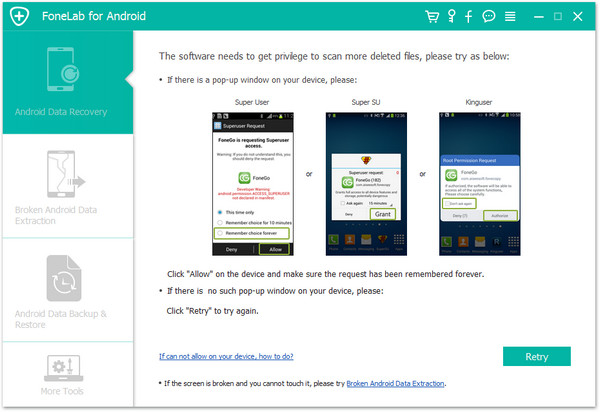
After that, you will see there a pop-up window asking for your permission for the program to access your phone. Tap on “Allow” or “Grant” or “Authorize”.

allow to scan Tecno L8

Step 4. Preview and Recover Deleted Data on Tecno L8/L8 Plus/L8 Lite
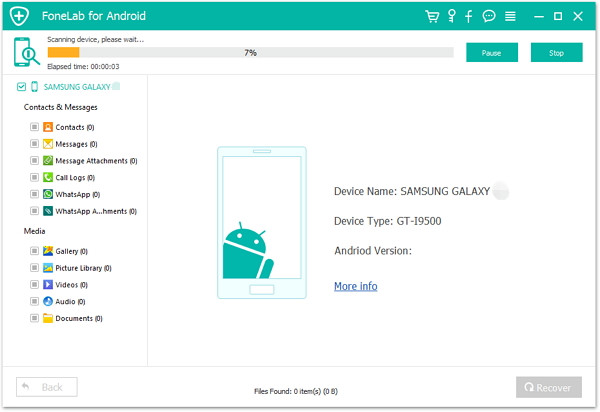
The program now will scan your data and you will be able to see the progress of scanning your phone by looking at the progress bar at the top of your screen.

preview data

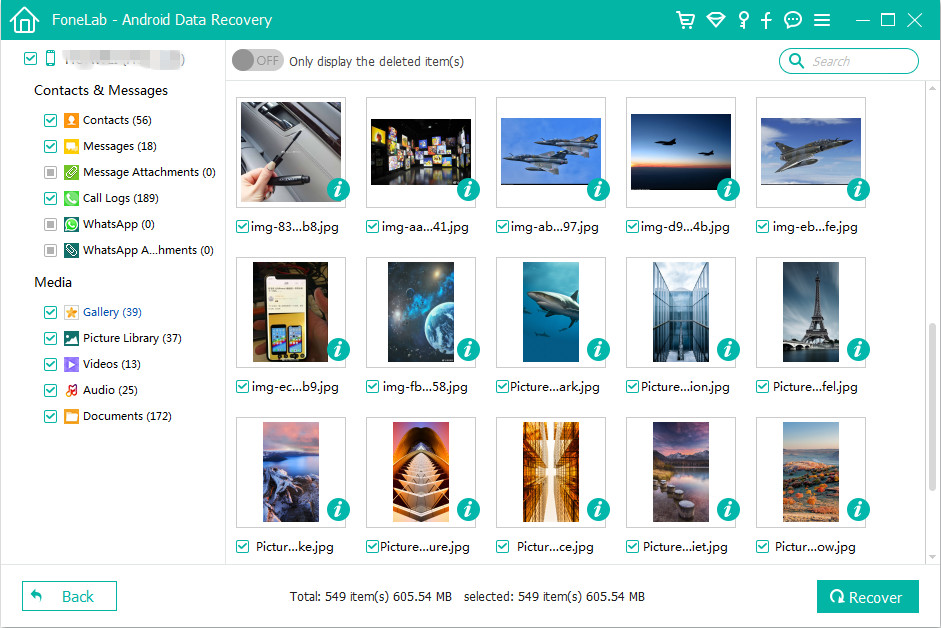
Once done, you can view your files one by one to help you choose which one to recover. Simply tick the box beside the files of your choice. After choosing the deleted files you want, click on “Recover” to get back your lost or deleted files to your computer.

Retrieve deleted data from Tecno L8

d_win d_mac
d_win d_mac

Related Articles:

Ways to Restore Deleted Photos from Android Phone

How to Recover Lost/Deleted Data from Android

How to Recover Deleted Files from ASUS Zenfone 6

How to Recover Lost Data from Android SD Card

LG Data Recovery – Recover Photos Contacts SMS from LG Phone

Android Data Recovery

How to Recover Deleted Data from OnePlus 7/7 Pro

[Summary]: Want to recover deleted contact, pictures, SMS, call history, videos, WhatsApp, etc from OnePlus 7/7 Pro phone? Get the best method to deal with data loss situation on OnePlus 7 or OnePlus 7 Pro without backup.

When we talked about OnePlus phone, although it has only launched a few phones so far, its amazing features have always attracted its users. It has now been updated to OnePlus 7 and OnePlus 7 Pro. If you have deleted your valuable data from OnePlus 7/7 Pro by mistake and now you wish to retrieve those deleted data, then just relax! This article will help you to recover deleted data from OnePlus 7 or OnePlus 7 Pro at ease, including photos, audios, contacts, videos, text messages, WhatsApp chats, call logs, voice or call recordings, voice memos, calendar, notes, documents, etc.

But before going into any recovery solution, let’s take a look at an overview of the latest OnePlus 7 Pro phone.

Wth the exception of, say, a foldable display, the OnePlus 7 Pro has enough features du jour to keep its fans enticed. The OnePlus 7 Pro mobile features a 6.67″ (16.94 cm) display with a screen resolution of 1440 x 3120 pixels and runs on Android v9.0 (Pie) operating system with 6 GB of RAM. It has 4000 mAh and a 48MP + 16MP + 8MP camera Exmor RS sensor supporting a resolution of 8000 x 6000 Pixels and the front snapper is powered by a Exmor RS sensor. For graphical performance that can make games run smoothly, this phone has got a Adreno 640 GPU.

Is It Possible To Recover Lost or Deleted Data From OnePlus 7/7 Pro?

Of course you can. When your data is removed from your OnePlus 7/7 Pro phone, you think they have disappeared forever, but they will remain on your OnePlus phone. The deleted data becomes invisible and creates space to save new data. In other words, if you want to retrieve deleted data on OnePlus 7/7 Pro, you need to make sure the deleted files are not overwritten by new data. You need to stop your smartphone immediately. Also, you must turn off mobile data or Wi-fi connections to your phone.

Here, I will provide you with the best solution for recovering deleted/lost data from your OnePlus 7/ 7 Pro phone.

Whether you have a backup or not, U.Fone Android Data Recovery software is an excellent choice. This program will help you to recover any data loss no matter for whatever reason. This tool easily restore files like contacts, photos, call history, videos, text messages and many others. It supports not only OnePlus 7/7 Pro but other OnePlus phones and other brands as well such as Samsung, Redmi, Oppo, Huawei, Nokia, LG, Sony, and many others.

d_win d_mac
d_win d_mac

Here’s a step-by-step tutorial on how to use the software to recover deleted data from your OnePlus 7/7 Pro.

Steps to Recover Deleted Data from OnePlus 7/7 Pro Without Backup

Step 1. Install U.Fone Android Data Recovery
Download, install and launch U.Fone Android Data Recovery on your computer. Select “Android Data Recovery” to begin the recovery pocess.

ufone android data recovery main page

The next step is to connect the OnePlus 7/7 Pro phone to the computer using a USB cable.

Tip: If this is the first time the Android device is connected, you might need to install necessary drivers to proceed.

connect oneplus 7 pro to pc

Step 2. Enable the USB debugging on OnePlus Phone
You should allow USB debugging on your OnePlus phone so that your computer will have the access to recognize your handset.

enable usb debugging

Step 3. Select File Types to Recover
The next step is for you to choose the file types you need to recover. Here you can see contacts, call history, text messages, photos, videos, music, and much more. Click on “Next”.

select data to scan

In order for data recovery to proceed smoothly, you need to authorize the program to access your phone. Tap on “Allow” or “Grant” or “Authorize”.

allow to scan oneplus 7 pro

Step 4. Preview and Recover Deleted Data on OnePlus 7/7 Pro
All you need now is to wait until the program has finished scanning. It may take some time depending a total load of data and network connection.

preview data

When the scanning is completed, you can now preview all the recoverable data. Go over each of the recovered items and verify if what you needed is really in there. Finally, select the data you want to get back and click the ‘Recover’ button.

recover lost data from oneplus 7 pro

d_win d_mac
d_win d_mac

Related Articles:

How to Recover Deleted Files from OnePlus 6

How to Recover Deleted Data from Nokia 8/7/6

How to Recover Deleted Pictures, Videos from OnePlus 6

How to Recover Deleted SMS,Text Messages on OnePlus Phone

Restore Deleted WhatsApp Chat History from OnePlus Phone

U.Fone Android Data Recovery

How to Recover Deleted WhatsApp Messages on iOS 13/12 Devices

[Summary]: You can recover deleted WhatsApp messages on iPhone and iPad, even it’s running iOS 12 or iOS 13! The article guides you to recover deleted WhatsApp chat history no matter you have backed up on.

Now, more and more people use WhatsApp to chat with their families, friends and workmates. As a hot and popular free online chat app, we can use WhatsApp to contact with each other more and more conveniently via text messages, pictures and voice. But, when you delete all WhatsApp chat history by accident, how to recover deleted WhatsApp messages from iPhone or Android phone?
Related article: How to recover deleted WhatsApp messages from Android

Can we recover deleted WhatsApp from iPhone XR/XS/XS Max/X/8/8 Plus/7/7 Plus/SE/6S Plus/6S/6 Plus/6/5S/5C/5/4S/4/3GS? Of course “YES“! Lots of people asking for help to recover their deleted WhatsApp chat history. Actually, there’s a way to recover deleted WhatsApp messages directly from iPhone, no matter our devices running iOS 13, iOS 12, iOS 11 or the older version. If you’ve ever synced your iPhone with iTunes/iCloud before, you can restore WhatsApp data from iTunes/iCloud backup for all iPhones including iPhone XS and iPhone XR. You just need the help from an iPhone WhatsApp recovery tool.

Best WhatsApp Messages Recovery for iPhone

Well. If you want to recover your deleted WhatsApp messages from iPhone directly, you need the help of an iPhone recovery software: U.Fone iPhone Data Recovery, which is a professional WhatsApp data recovery tool for iPhone users to recover WhatsApp messages from iPhone, iTunes or iCloud. What’s more, this iPhone data recovery software also can help you other types of texts content from iPhone and iPad, including notes, call logs, contacts, text messages, MMS messages, iMessages, Line messages, WebChat messages, Viber messages, Kik messages, Skype messages and message attachments, Reminders and Safari Bookmarks etc, as well as media files: Photos, Videos, App pictures, App videos, audios, Voice Memos, Voice Memos and iBooks reading.

Let’s shows you three useful ways to retrieve your iPhone WhatsApp messages: Recover deleted WhatsApp messages from iPhone directly, Recover WhatsApp messages from iTunes backup and Recover them from iCloud backup. Keep reading the detailed steps below, you will know how easy to directly recover deleted WhatsApp conversations from iOS 13/12 devices.

d_win d_mac
d_win d_mac

How to Recover Deleted WhatsApp Messages from iOS 13/12 Directly

The following instruction shows how to recover deleted WhatsApp messages from iPad, iPhone X/8(Plus)/7/SE/6s and other iOS 13/12 devices with U.Fone iPhone data recovery within just three steps. Please note that the program works even for the device running iOS 12.3 and the latest iOS 13.

Step 1. Launch the iPhone WhatsApp Data Recovery program
Firstly, launch the program and select “iPhone Data Recovery” feature.

iPhone WhatsApp Messages Recovery

Step 2. Connect iPhone to Computer
Then, connect your iPhone to computer, you will see the interface as follows, if you want to directly scan and recover deleted WhatsApp messages from iPhone, please choose “Recover Data from iOS Device” mode.

recover whatsapp on ios 13 devices

Step 3. Start Scan iPhone to Find the Deleted WhatsApp Data
Please click “Start Scan” button on the interface. Please click the “Start Scan” button to scan your iPhone after connecting your device to the computer.

retrieve WhatsApp data from iPhone ios 13

Please keep connecting your iPhone device to the computer during the scanning processs, if you find the WhatsApp data you need, you can stop it by clicking “Stop” button.

restore WhatsApp data from iPhone ios 13

Step 4. Preview and Restore WhatsApp Messages from iOS 13/12 Devices
After the scanning, you will find all found data will be listed in order. You allow to choose “WhatsApp Messages” button to preview the detailed of your lost WhatsApp messages. Just choose these chat history you want and click “Recover” button to save them on your computer or back to your iOS 13/12 devices.

recover deleted whatsapp messages on ios 13/12 devices

Above is the simple method to recover deleted and lost WhatsApp messages from iOS 13/12 devices, if you have created your iPhone backup to iTunes or iCloud, you can selectively recovering iPhone WhatsApp messages from iTunes backup via “Recover from iTunes Backup File” mode, or selectively recovering iPhone WhatsApp messages from iCloud backup via “Recover from iCloud Backup File” method.

d_win d_mac
d_win d_mac

Related WhatsApp Solutions

How to Backup and Restore WhatsApp Data from iPhone

How to Recover Deleted WhatsApp Messages from iPhone XS/XS Max/XR

How to Transfer WhatsApp Messages from Old iPhone to iPhone

How to Transfer WhatsApp from iPhone to Samsung Galaxy

Recover WhatsApp Messages on iOS 12/13 Devices

How to Recover WhatsApp Messages from iPhone after iOS 15/14 Update?

Summary
Lost WhatsApp text messages, image and voice messages after iOS 14.8, iOS 14.7 or iOS 15 update? Don’t panic, this article teach you how to recover lost WhatsApp chat history from iPhone after iOS 15/iOS 14 update.

Every upgrading, the major issue experienced so far is data loss due to iOS 15 upgrade. If you are in such a situation, then how to recover lost data after iOS 15/iOS 14.8 update? Many iPhone data recovery support recover deleted photos, contacts, notes and SMS from iPhone, but few iPhone data recovery software supports recover social apps data and app document, such as Viber, Wechat, Skype, Line, Kik, Facebook Messenger, especially the WhatsApp data, do you know how to recover lost WhatsApp messages from iPhone and iPad?

Have you updated your iPhone/iPad to iOS 15 but found your WhatsApp messages, image and voice messages were all gone? Well! You don’t have to worry about that at all. Through this article, we are going to show you an effective method to recover WhatsApp messages from iPhone after iOS 15 upgrading, you can also follow the same steps to recover deleted WhatsApp chat history on iOS 15/14/13/12 devices, such as iPhone 13(Pro), iPhone 12, iPhone 11, iPhone XS, iPhone XR.

When WhatsApp data are “deleted” on iOS device, they are not really removed from your device, until other data overwrites them. So, you still have chance to recover deleted and lost WhatsApp data from iPhone, what you need is an professional iPhone WhatsApp Recovery.

U.Fone iPhone Data Recovery tool can help you to recover the lost Whatsapp messages under various tough circumstances, such as WhatsApp chat history deleted by accident, iPhone lost, damaged or broken, iDevices attacked by viruses, iPhone jailbreak, iOS upgrade or factory reset, iPhone locked by forgotten passcode, etc. So, you can use this powerful iPhone data recovery to restore WhatsApp chat history after iOS 15 update. What’s more, it can support recover lost photos, text messages, contacts, videos, notes, call history, Line messages, Skype messages, Kik messages, WeChat, Viber and more after iOS 15/iOS 14/iOS 13 upgrading. In additional, you can recover your WhatsApp messages in 3 methods – from the iOS device, from iTunes backup, and iCloud backup. Let’s show the the detail guide to recover lost WhatsApp messages from iPhone without any backups.

d_win d_mac
d_win d_mac

How to Recover WhatsApp Messages from iPhone after iOS 15 Update

Step 1. Run the iPhone Data Recovery software on your computer
Download, install and launch the iOS Toolkit on your computer and select “iPhone Data Recovery” function.

iPhone WhatsApp Recovery

Then, connect your iPhone to the computer via USB cable.

recover whatsapp after ios 13 update

Step 2. Select the Recovery Mode and Scan Your iPhone
Chose the “Recover from iOS Device” tab and click on “Start”. Connect your iPhone to the computer via USB cable. Now, select the types of files that you intend to recover. After the program detects your phone successfully, click “Scan” button to go on.

scan WhatsApp data from iPhone

Step 3. Preview and Recover WhatsApp Messages from iPhone
When the scan is completed, you can find those found data are displayed in different types. To recover lost Whatspp messages, mark the lost “WhatsApp messages” you want and then click “Recover” button to save them onto the computer.

recover whatsapp messages from iPhone

d_win d_mac
d_win d_mac

Tips: If you have backed up WhatsApp data from iPhone to iTunes or iCloud before upgrading, you can selectively recover WhatsApp data from iTunes or iCloud backups via “Recover Data from iTunes Backup File” and “Recover Data from iCloud Backup File” modes.

Related Articles:

How to Recover Lost Messages on iPhone after iOS 13/12 Update

How to Recover Lost Data on iPhone/iPad after iOS 13/12 Update

How to Recover Deleted WhatsApp Messages on iOS 13/12 Devices

How to Recover Lost Contacts from iPhone after iOS 13/12 Update

How to Restore iPhone WhatsApp History after iOS 11 Downgrade

iPhone WhatsApp Recovery

How to Recover Lost SMS from iPhone after iOS 15/14 Update

Summary
Lost text messages after iOS 15 or iOS 14.8/14.7 update? Check out these article to learn how to restore lost messages from iPhone after iOS 15 update, here provides three iPhone SMS recovery solutions to helps you recover lost text messages and iMessages from iPhone after iOS 15 update.

On iOS 13, the Messages app got an update to include something a bit more fun in Memoji and Animoji integration. You can add your Memoji or Animoji to your contact card and see your contacts’ better in the app. Memoji stickers will let you send Bitmoji-esque stickers of your face to anyone with Messages, but Apple says it will work with third party messaging apps like WhatsApp. It also said these stickers will work across all iOS devices with an A9 chip or later (iPhone 6s and above). In 2021, the Apple inc. has released the laest iOS system – iOS 15.

The iOS 15 will be available on iPhone 6s or later (including iPhone SE), here is the iOS 15 compatible device:
iPhone SE (1st generation), iPhone SE (2nd generation), iPod touch (7th generation), iPhone 6s, iPhone 6s Plus, iPhone SE, iPhone 7, iPhone 7 Plus, iPhone 8, iPhone 8 Plus, iPhone X, iPhone XR, iPhone XS, iPhone XS Max, iPhone 11, iPhone 11 Pro, iPhone 11 Pro Max, iPhone 12, iPhone 12 Mini, iPhone 12 Pro, iPhone 12 Pro Max, iPod touch (7th gen).

Before upgrading iPhone to iOS 15, you need to know whether the iOS 15 available for your iPhone. Once lost data after iOS 15, don’t worry, you can use a iOS 15 Data Recovery to recover lost data from iPhone after iOS 15 update, including the text messages, contacts, photos, videos, WhatsApp messages, etc.

How to Recover Lost Messages from iPhone after 15/14 Update?

A lot of iPhone users noticed their messages are gone after iOS 13 updating, when you find messages lost or disappear due to iOS 15 upgrading failed, how to recover lost messages after iOS 15 update. Luckily, if you have backed up device to iTunes, you can easily get lost messages back from iTunes backups. In this article, you will learn how to recover lost messages after iOS 15 update using iTunes, you can also use a third-party iPhone data recovery tools to recover lost SMS from iPhone, iTunes and iCloud after iOS 15/14 upgrading.

Part 1: How to Fix Messages Disappeared after iOS 15/14 Update?

Lost important text messages after iOS 15 or iOS 14.8 update? Don’t worry, you can try to force restart the iPhone device or restart the message app, these two methods may help you reload all the SMS on messages app, you can find if the messages are appear on your iPhone.

Method 1.Restart the Message App on iPhone/iPad

For iPhone/iPad users, please tap the ‘Home’ button and enable the ‘App Switcher’, then slide the ‘Messages’ app for force quitting it.

Method 2: Force Restart Your iPhone and Restart the Message App

If the above method can’t help you get back the messages, you can also try force restarting the iPhone/iPad to fix messages missing issue.

Force Restart iPhone 8/X or later:
1. Press and hold the side ‘Sleep/Wake’ button and either ‘Volume Up’ button + ‘Volume Down’ button until the power off slider appears.
2. Drag the slider to turn your device completely off.*
3. After your device turns off, press and hold the ‘Sleep/Wake’ button again until you see the Apple logo.

Force Restart iPhone 8/X/XR/XS/XR Max

Force Restart iPhone 7/7 Plus:
Hold down the ‘Volume Down’ and ‘Sleep Wake’ buttons and wait for Apple logo to glow.

Force Restart iPhone 7/7 Plus

Force Restart iPhone 6/6S/6 Plus/iPad/iPod Touch and older:
Press and hold the top ‘Sleep/Wake’ and ‘Home’ buttons until you see the Apple logo.

Force Restart iPhone 6/6S/6 Plus/iPad/iPod Touch

Part 2: Recover Lost Messages after iOS 15/14Update using iTunes

iTunes application not only can sync data to devices, but also supports backup and restore iOS devices. If you have backed up your iPhone data to iTunes before iOS 15 upgrading, you can restore data to iPhone from iTunes backups. However, this works by recovering the entire backup file without an option to selectively retrieve certain data. So, you can’t selectively to restore messages from iTunes backups. Worse, this iTunes restoring method will erase all existing data of your iPhone, If there haven’t other important data on your device, you can refer to this method. Let’s follow the step-by-step guide on how to using iTunes to restore lost data, including messages, contacts, notes and photos.

Step 1. Run the iTunes application on your computer and connect your iPhone device to your computer via USB cable.
Step 2. Once your iPhone device connected and detected, click the iPhone icon at the top left corner, click Summary.

Restore lost messages from iTunes backup

Step 3.  Then, click the “Restore Backup…” button located at the Backups section.

restore sms from iTunes

Step 4. Click “Restore” button, your iPhone device will show “Restore in Progress” while iTunes app will show you a progress bar.

restore itunes data to iPhone

Wait for the restore process to be completely finished before disconnecting your iPhone device. After the restore processing done, you can find all backed contents be restored to your iPhone, then you can find the those previously backed up messages on iPhone, but you will found all existing data be erased.

Note: Using iTunes to restore iTunes backups to device will wipe all existing data, we recommend that you should use a third-party iOS Data Backup & Restore tool to back up your existing data firstly. If you want to restore iTunes backups to device without erase the existing data, please use a third-party iPhone Data Recovery tool, like U.Fone iPhone Data Recovery, iOS Data Recovery and iOS Toolkit – Data Recovery, these professional iPhone/iPad/iPod data recovery can help you recover data from iPhone, iPad, iPod touch, iTunes and iCloud, no data erased at all!

Part 3: Recover Lost Messages from iPhone, iTunes and iCloud after iOS 15/14 Update

To recover lost or deleted text messages from iPhone after iOS 15/14 upgrading, you can also use a third-party iPhone SMS Recovery app.

U.Fone iOS Data Recovery tool which not only allows you to directly recover lost messages from iPhone afer iOS 15/14 update, but also can help you extract SMS from iTunes or iCloud backups. What’s more, it allows you recover lost photos, contacts, messages, notes, call logs, videos, WhatsApp messages, Viber messages, Kik messages, facebook messages, Skype messages, Wechat messages, etc. caused by file deleted, phone reformatting, a factory reset, phone jailbreak failed, or iOS update.

More Features about iPhone Messages Recovery:

  • Directly recover deleted text messages from iPhone, even if you haven’t created any iTunes or iCloud backup.
  • Selectively extract messages from iTunes backups and save them on computer.
  • Download iCloud backups and selectively extract text messages.
  • The recovered SMS content includes name, phone number, email, message, date and more.
  • Recover the lost/deleted messages and saved them as CSV, TEXT, or HTML formate to computer for your use.
  • Recover lost text messages under various tough circumstances, such as the SMS deleted or lost by accident, iPhone stolen, lost, damaged or broken, iPhone attacked by viruses, iPhone jailbreak, iOS upgrade or factory reset, iPhone screen-locked, etc.
  • Support the latest iOS 15 and iPadOS 15/14/13, compatible with all windows and mac computer.

Free download the trial version and try to recover lost messages from iOS 13/iOS 12 devices.

d_win d_mac
d_win d_mac

Now, let’s see how to recover deleted messages from iPhone with U.Fone iPhone Data Recovery, you can also recover text messages from iTunes or iCloud backup by using “Recover from iTunes Backup File” and “Recover from iCloud Backup File” modes.

4 Steps to Recover SMS from iPhone after iOS 15/14 Update

Step 1. Download, Install and Launch iOS Toolkit on Computer
Please download, install and run U.Fone iOS Toolkit on computer, to retrieve lost messages and other data from your iPhone, please click “iPhone Data Recovery” function and continue go to next step.

Recover SMS from iPhone after iOS 13 update - Step 1

Step 2. Connect your iPhone to the computer
Using a USB cable to connect your iPhone to the computer, after connecting your iPhone and detected by the iPhone data recovery tool, you just need to click the “Start Scan” button to scan your iPhone, then you will see the scanning window.

Recover SMS from iPhone after iOS 13 update - Step 2

Step 3. Start Scanning Your iPhone
In this step, you’ll see this scanning window immediately after clicking the “Start Scan” button. Please keep connecting your iPhone device with the computer during the scanning process, if you find the missing messages you want, you can click “Stop” button to end the scanning process.

Recover SMS from iPhone after iOS 13 update - Step 3

Step 4. Preview and Recover Lost Messages from iPhone
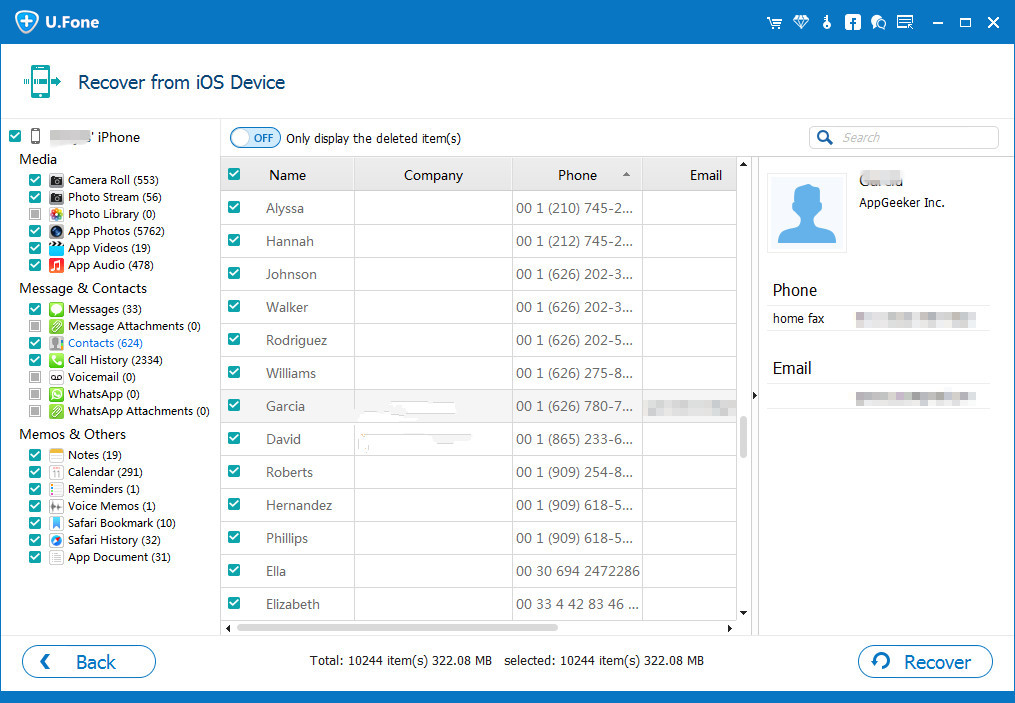
When the scan is completed, all found data will be listed in clear, organized categories. Choose “Messages” to preview the detailed content, you can the text messages full information, including phone number, name, message contents, email, date and more. If you only want to recover the deleted text messages, please click the toggle button “Only display the deleted itme(s)” at the top left of the software interface. Finally, select those you want and click “Recover” to save the deleted messages on your compute with one click.

recover sms on iPhone after iOS 15 update

Tips: This iOS Data Recovery software also can help you to recover lost contacts, photos, video, notes, call history, voice memos, voicemail, whatsapp messages, Viber messages, Wechat messages and more from iPhone, iPad and iPod touch.

d_win d_mac
d_win d_mac

Transfer the Recovered Messages to iPhone

Well done, above simple steps you have recover lost messages and save them on the computer, all retrieved messages be saved as CSV, TEXT, or HTML file, if you want to import the restored messages back to iPhone devices for using or reading, please save the messages as CSV format, then use this iPhone Transfer Tool to import the restore messages back to iPhone device, this iPhone Transfer tool also can help you transfer contacts, photos, videos and music from computer/iOS/Android devices to iPhone directly.
Read the guide: How to Import Files to iPhone

Conclusion

The U.Fone iPhone Data Recovery programs above can all help you recover lost text messages, whatsApp messages, facebook messages, Kik messages, Viber messages, Wechat messages, Skype messages, Line messages, etc. If your device is lost, stolen, broken or water-damaged, you can also recover data from iTunes/ iCloud backup selectively, even if your device is not in your hand. What’s more, this iOS Toolkit also can help you 1-click to backup your iOS data to the computer, you can restore iOS data backup (text messages, contacts and notes) to your iOS Device directly.

Related Articles:

How to Recover Lost Data on iPhone/iPad after iOS 13/12 Update

Recover Lost Contacts from iPhone after iOS 13/12 Update

How to Recover Lost Photos from iPhone after the iOS 13/12 Update

iOS 13 Data Recovery – Recover iPhone Lost Data after iOS 13 Update

How to Recover Lost SMS from iPhone after Jailbreak

Recover SMS after iOS 15 Update


iOS Data Recovery

Recover Your iPhone Lost SMS
Now, Even without Backups

Compatible with iOS 15 & iOS 14.8

Recover Lost Contacts Now

Restore Lost/Disappeared Contacts on iPhone after iOS 13 Update

[Summary]: If your contacts numbers missing, lost or disappeared after iOS 13/iOS 12.3.1 update on iPhone XS/XR, iPhone X, iPhone 8/7, etc., don’t worry.  This guide will teach you how to recover lost contacts from iPhone after iOS 13 or iOS 12/12.1 update, you can also follow the same steps to recover lost messages, photos, notes, WhatsApp chat history and more after iOS 13/12 upgrading.

Lost contacts on my iPhone X after iOS 13 beta update. How can I restore lost contacts due to iOS 13 beta update error? I have backed up my device to iTunes to iCloud, can I recover lost contacts from iPhone without backup?

After the 2019 WWDC developer conference, iOS 13 has been confirmed to be the next iPhone system right after iOS 12.3.1. And the iOS 13 beta version is already available for iPhone XS, iPhone XR, iPhone X, iPhone SE, iPhone 8/8 Plus, iPhone 7/7 Plus and iPhone 6S/6S Plus, you can install iOS 13 IPSW on your iPhone now, to avoiding data loss, we recommend you should backup iPhone before upgrading to iOS 13. If you lost data contacts after iOS 13 update, this article will teach you how to restore lost contacts after iOS 13 upgrading, you can also recover missing photos, get back losing messages, etc.

If you have backed up your iPhone with iTunes or iCloud before iOS 13 or iOS 12.3.1 update, then you can easily get back lost contacts by restoring from the backup, you need to restore all backe up data including contacts, messages, photos and more. In another world, you can’t just select “Contacts” type to recover it, worse, these two restore methods will erase all existing data and settings on iPhone. So, restoring from iTunes or iCloud backup is not the best choice. If you want to recover lost contacts from iPhone without erasing iPhone data, you need to use a third-party iPhone Contacts Recovery, such as U.Fone iPhone Data Recovery, iOS Data Recovery and iOS Toolkit – Data Recovery.

Let’s shows you three method to recover lost contacts from iPhone after iOS 13 upgrading: restore lost contacts from iTunes backup; restore contacts from iCloud backup; recover deleted/lost contacts from iPhone/iTunes/iCloud backup selectively by U.Fone iPhone Data Recovery.

Method 1. Restore lost Contacts from iTunes backup after iOS 13 update

If you have created data backups in iTunes before upgrading to iOS 13, you can restore lost data contacts from iTunes backup. Let’s see how to get your missing contact numbers back from iTunes backups.
You may want to know: How to Restore Contacts from iTunes Backup without Erasing Data

Step 1. Install the latest version of iTunes application on your PC/Mac and connect your iPhone to your PC.

Step 2. Launch iTunes application and click your iPhone icon, click Summary.

Restore lost contacts from iTunes backup

Step 3. After your iPhone device detected by iTunes application, then select “Restore Backup…” in iTunes.

restore contacts from iTunes after ios 13 update - Step 3

4. Here, you can see the all backed up history with each backed up time, please select the most recent backup of your lost contacts, and then click “Restore” button start to restore lost iPhone data from iTunes backup, including the lost contacts.

recover contacts from iTunes

Please keep your iPhone connected to your computer during the whole restoring process, it will restore iTunes backups to iPhone devices. After this, you can disconnect your iPhone and use your lost contacts on your iPhone again.

Note: Using iTunes to restore backup contents to device will erase all existing data, to recover lost contacts from iPhone, iTunes or iCloud without erasing existing data, the U.Fone iOS Data Recovery solution will be the best choice.

Method 2: Restore Contacts after iOS 13 update from iCloud backup

If you have backed up your iPhone wit iCloud before iOS 13 update, then you can easily restore lost contacts from iCloud backup, but this method will erase all data and settings on iPhone. If there are not other important data on your iPhone, you can choose this method. In additional, if you want to restore only Contacts from iCloud backup without erasing data, you can also use U.Fone iPhone Data Recovery to download and restore lost contacts selectively, as well as restoring deleted and lost data from iPhone without backup.
You may want to know: How to Restore Data Contacts from iCloud Backup without Erasing Data

Let’s learn the detail guide about how to contacts from iCloud backup with erasing existing data.

Step 1. Backup iPhone data before restoring data from iCloud backup.
As we all know that to restore backups from iCloud backup would reset or erase all iPhone data. To avoiding data erased, so here we’d like to suggest you our U.Fone iOS Data Backup tool to backup iPhone data to computer firstly.

Step 2. Turn on your iPhone > Go to Settings > General > Reset > Tap Erase all content and settings option.

restore contacts from icloud after ios 13 update

Step 3. Reach the Apps & Data screen and tap Restore from iCloud Backup > Sign in to iCloud > Choose backup > choose the recent backup of your contacts that you have created, then click “Restore” button start to restore data from iCloud backups.

restore contacts from icloud

Step 4. Restore backup data to iPhone device again.
After your lost contacts be restored back to your iPhone from iCloud backups, if you have backup your iPhone to computer via U.Fone iOS Data Backup & Restore, now you can restore all the backups to iPhone device.

Note: Restoring data contacts from iCloud backup method will erase all iPhone data and settings, if you have backed up your iPhone to iCloud, please follow the method 3, you can easily recover lost contacts from iPhone, iTunes backups and iCloud backups without wiping your iPhone data and setting.

Method 3: Selectively Recover Lost Contacts from iPhone, iTunes and iCloud after iOS 13 Update

U.Fone iPhone Data Recovery, with its highest success rate, has successfully helped millions of iOS users recover lost contacts from iTunes/iCloud backups selectively. Besides recovering contacts from iTunes/iCloud backups, this iOS 13/12 data recovery software can also help to scan and retrieve contacts directly from your iPhone XR/XS/XS Max/X/8/8 Plus/7/7 Plus/SE/6s/6s Plus/6 Plus after iOS 13 upgrading. It supports previewing and selecting the lost contacts before the recovery process. Now, let’s check its detailed steps about how to recover lost contacts from iPhone after iOS 13/12.3 update.

More Features:

  • 1. Recover deleted and lost contacts from iPhone without backup, you can get back contact number, job title, address, companies, email and more which you store on contact app. You can recover and save the lost contacts on computer as VCF, CSV or HTML file.
  • 2. Selectively restore data from iTunes and iCloud backups, you can preview the details of backup file and select which you want to restore, it’s more advantages than iTunes. Unlike iTunes, it won’t erase the existing data on iPhone.
  • 3. Support recover all kinds of data from all iOS devices (the latest version of 13 is included), including photos, videos, contacts, text messages, iMessages, mms, notes, call history, safari bookmark, voicemail, voice memos, as well as third-party social app data like WhatsApp, WebChat, Viber, Kik, line, Skype etc.
  • 4. Backup and restore iPhone data selectively, or one click to backup your all iPhone data to computer.
  • 5. Fix iPhone to normal after your phone stuck at apple logo/ recovery mode, white/black screen, DFU mode and other iOS system issue. For example, repair iPhone stuck in recovery mode after failed upgrading to iOS 13/12.

You can download the free trial version below to have a try.

d_win d_mac
d_win d_mac

Steps to Recover Lost Contacts from iPhone after iOS 13 Update

If your iPhone in hand, please follow this simple steps to recover lost contacts from iPhone directly, you can also use this iPhone Data Recovery program to extract data contacts from iTunes or iCloud backup selectively.

Step 1. Run iPhone Data Recovery on PC or Mac
Firstly, please download, install and launch the iOS Toolkit on your computer, then go to “iPhone Data Recovery” section.

Recover Contacts from iPhone without Backup - Step 1

Step 2. Connect iPhone to Computer via USB Cable
Connect your iPhone to the computer via a USB cable > Choose “Recover from iOS Device” mode > Click “Start Scan” to continue.

Recover Contacts from iPhone without Backup - Step 2

Tips: If you wan to restore data from iTunes/iCloud backups, you don’t need to connect your device to the computer, please choose “Recover from iTunes Backup File” or “Recover from iCloud Backup File” to scan your backups.

Step 3. Scan Your iPhone
The program will automatically begin scanning your iPhone for lost contacts after you doing the steps accordingly.

restore contacts from iPhone after ios 13 update

Step 4. Preview and Recover Lost Contacts from iPhone Directly
When the scan is finished, you can preview all found data before recovery. Choose “Contacts” to preview, mark it and click “Recover” to save all the selected contacts on your computer with one click, you can export all contacts as several format like VCF, CSV or HTML for viewing, printing or using, if you want to import the retrieved contacts to iPhone for using, you should save them as VCF format.

recover contacts from iPhone ios 13 update

Step 5. Import the Retrieved Contacts to iPhone(Option)
Well done, you have recover lost contacts from iPhone devices, or restore lost contacts from iTunes/ iCloud backup. Not matter which recovery modes you using, all lost contacts be save onto the computer, you can keep them forever. If you want to transfer those restored contacts back to your iPhone devices, you can use this iPhone Transfer & Manager to import the contacts from computer to iPhone directly, this iPhone transfer also allows you backup all data from iPhone to computer, as well.
Read the guide: How to Import Contacts to iPhone

Now, please download the iOS Data & System Recovery and try to recover lost contacts from iPhone, iTunes and iCloud.

d_win d_mac
d_win d_mac

iPhone Contacts Recovery


iOS Data Recovery

Recover Your iPhone Lost Contacts
Now, Even without Backups

Compatible with iOS 13 & iOS 12.3

Recover Lost Contacts Now

How to Recover Data from iPhone after iOS 15/14/13 Update

Summary
Lost data after upgrading iPhone to iOS 15 or iOS 14? Don’t worry, these 3 iPhone data recovery methods will help you recover lost data after iOS 15/iOS14 update, including contacts, SMS, photos, videos, notes, WhatsApp and more.

Although the beta version of iOS 15 is yet to come, many of iPhone users already upgraded their devices to the iOS 15 beta to enjoy it’s new features: dark mode, performance boost, new editing tools and more in Photos app, new privacy features, new app to find missing devices and track loved ones, revamped reminders app, quick path keyboard, maps app gets more refined data and new features, memoji stickers expansion and more features. After upgrading your iPhone to iOS 15, you can use the new features in iOS 15. But, the latest iOS 15 beta still comes with some unexpected bugs. One big issue is that you may lose some important contacts or other types of data after upgrading to iOS 15.

Recently, lots of iPhone users can’t wait to try out the new iOS 15 beta to enjoy the new features. But while updating to the iOS 13 beta, some people met problems and bugs and then lost important data from their iPhone, such as contacts, messages, photos, notes and more. If your lot data on your iPhone after iOS 13 update also, you can follow the below 3 most effective methods to recover iPhone lost data after iOS 15 upgrading.

Three iOS 15 Data Recovery Solution

Once you lost data on iPhone after iOS 15 update, if you backed up your iPhone data to iTunes or iCloud before upgrading to iOS 15/iOS 14, you can easily restore data from iTunes or iCloud backup, please learn the Method 1 and Method 2. If you never backup devices before upgrading to iOS 15, you can go to method 3 to recover lost data from iPhone after iOS 15 upgrading, you need to use a professional iOS 15 Data Recovery to get back the lost data. Let’s check.

Method 1: Recover iPhone Data from iTunes Backup After iOS 15/14/13 Update

If your have backed up your iPhone device with iTunes before updating to iOS 15, then you can follow the steps below to recover iPhone lost data from iTunes backup. Please follow the detail guide about how to restore lost data after iOS 15 update from iTunes backup.

Step 1. Run iTunes on PC/Mac and connect your iPhone to the computer with USB cable.

Step 2. Click your iPhone icon when it appears in iTunes.

restore data from iTunes after ios 13 update - Step 2

Step 3. Click Summary > Click “Restore Backup”.

restore data from iTunes after ios 13 update - Step 3

Tips: “Find My iPhone” must be turned off before restoring your iPhone, please go to iCloud setting on your iPhone and turn off “Find my iPhone”.

turn off find my iphone

Step 4. The iTunes application will pop up an new windows, please select a backup history that you made before you upgrade your iPhone device to iOS 15. If you forgot when you have backed up your devices, please choose the latest backed up history and click “Restore” button start to restore iTunes data to iPhone.

restore itunes data after ios 13 update

Note: If your have backed up your iPhone to iTunes, you can choose this method to restore from iTunes backups. But this method will erase all the existing data on your iPhone. So, we recommend you should use a third-party iOS 15 Data Recovery software to recover lost data from iPhone device directly, that won’t cause data loss. Such as the third method we mentioned, please keep reading the below methods.

Method 2: Restore iPhone Data from iCloud Backup After iOS 15/14/13 Update

If you backed up your iPhone to iCloud before updating to iOS 15, then you can follow the detail guide to restore your iPhone lost data from iCloud backup.

Note: Before restoring data from iCloud backup, you should know that this method also will erase all contents and settings of your device. If you don’t want to do so, you can recover data from iCloud without resetting by using a third-party iCloud/iPhone data recovery tool.

Step 1. On your iPhone, go to Settings > General > Find and tap Reset > Tap on Erase All Content and Settings > Enter your password. Then your iPhone will be reset to factory settings.

recover icloud data after ios 13 update

Step 2. After restoring your iPhone to factory setting. When you reach on the “Apps & Data” screen, tap “Restore from iCloud Backup”.

restore icloud backup

Step 3. Sign-in to your iCloud account. Tap “Choose backup” and then select the backup history you made before upgrading to iOS 13, finally just tap “Restore” option in iCloud start to restore iCloud data to your iPhone device.

Method 3: Recover Lost Data from iPhone iPad After iOS 15/14/13 Update

Above two methods can help you restore lost data from iTunes or iCloud backup, but restoring data from iCloud or iTunes backup will to erase all existing data of your device. However, what if there’s no backup? Don’t worry, you still have chance to recover lost data after iOS 13/iOS 12 update without any backup, what you need is a professional iOS 15/14/13 Data Recovery software, you can download the best iPhone iPad data recovery tools here.

Since the missing/lost/deleted data is only hidden somewhere in the device and easily to be covered by new data, once you find the data is lost, you must to use a professional iPhone data recovery software to recover lost data from iPhone as soon as possible. In additional, please don’t add new data to the devices, in order to avoiding the deleted data be overwritten, let’s teach you how to recover lost/deleted data from iPhone iPad after iOS 15 update with iOS 15 Data Recovery, even without backup.

U.Fone iPhone Data Recovery is specifically designed to recover lost data from iPhone, iPad and iPod devices that base on iOS 15/iOS 14/iOS 13/iOS 12/iOS 11/iOS 10/iOS 9/iOS 8. It can scan your iOS device’s memory directly and recover up to 18 types of data, including contacts, SMS, photos, videos, notes, call logs and App data (WhatsApp, Messenger, Kik, Line, Viber, WeChat supported), etc.

Now we can view more features of iOS Data Recovery software.

  • Recover lost data from iPhone devices, iCloud backup and iTunes backup due to deletion, device crashed, smashed or broken, jailbreak, iOS upgrade or device reset etc.
  • Extract unreadable iTunes and iCloud backup, preview the details of backup file and choose the ones you need to restore, avoid the newly created data being overwritten.
  • Recover data from third-party app data without backup, such as WhatsApp, WeChat, Viber, Kik, Skype, etc.
  • Fix iOS system to normal without erase any data after your iPhone stuck at apple logo, recovery mode, DFU mode, white/black screen of death and other iOS system issue.
  • Support all iPhone iPad iPod running all iOS versions and all Windows and Mac computer, the latest version of iOS 15.
  • Backup and restore data from your iPhone, iPad and iPod touch.

d_win d_mac
d_win d_mac

How to Recover iPhone Lost Data after iOS 15 Update

Follow the detail guide about how to recover lost data from iPhone 13/12/11/XR/SE/XS/XS Max/XR/X/8/8 Plus/7/7 Plus/SE/6S Plus/6S after upgrading to iOS 13, you can also retrieve deleted and lost data from iOS 12 devices. Let’s learn how to restore iPhone data without backup.

Step 1. Download and Launch U.Fone iOS Toolkit on PC or Mac
Download, install and run U.Fone iOS Toolkit on your Windows or Mac computer, then go to “iPhone Data Recovery” feature.

iOS 15 Data Recovery: Recover Data from iPhone without Backup - Step 1

Step 2. Connect your iPhone to the computer
Then, please connect your iPhone device to the computer via USB cable. To recover deleted data from iPhone device, just select “Recover from iOS Device” mode, the program also supports “Recover from iTunes ” or “Recover from iCloud”.

iOS 15 Data Recovery: Recover from Data iPhone without Backup - Step 2

Step 3. Scan Lost Data from iPhone
After your iPhone device connected and detected by the software, just click “Start Scan” button, then the software begins scanning your device automatically for lost data, and you’ll get the interface as follow.

iOS 15 Data Recovery: Recover from Data iPhone without Backup - Step 3

The iPhone data recovery will scan all media files and text contents from iPhone. During the scanning process, if you find the file you want, you can stop the scan processing by clicking the “Stop” button.

scan data from iPhone

Step 4. Preview and Selectively Recover Data from iPhone
After the scan, all found data are displayed in categories, like call history, camera roll, photo stream, photo library, contacts, text messages, message attachments, calendar, notes, reminders, voice memos and safari bookmark. You can preview those scanned data one-by-one.

iOS 15 Data Recovery: Recover  Data from iPhone without Backup - Step 4

Please select those you data you want to get back and click “Recover” button to save them on your compute with one click.

recover messages from iPhone after ios 13 update

Step 5. Transfer the Recovered Data to iPhone(Option)
The files including SMS, message attachments, contacts, call history, camera roll, photo stream, photo library, notes, calendar, reminders, voice memos and safari bookmark are retrieved to the PC/Mac. If you want to import the recovered data back to iPhone devices, iOS Transfer and Mobile Sync is a great partner to cooperate with U.Fone iPhone Data Recovery, both can help you easily copy files between PC/Mac and iPhone/iPad/iPod Touch easily.
You may want to read: How to Add Files to iPhone

We have teach you how to recover lost data from iPhone after iOS 13 upgrading(without backup), you can also use this U.Fone iPhone data recovery to recover lost data from iTunes backup and restore lost data from iCloud backup without easing all settings and contents.

Now, download this powerful program to recover your iPhone/iPad/iPod data after iOS 13 or iOS 12.3 update.

d_win d_mac
d_win d_mac

The Bottom Line

Above 3 methods can help you restore lost and deleted data from iPhone after iOS 15/iOS14 update, you can also recover deleted files on any iOS 15/iOS 14/iOS 13 devices, no matter you have a backup or not. Besides data loss, iOS upgrades can also cause a number of other problems, such as the iPhone stuck on recovery mode, stuck on Apple logo, iPhone stuck on black screen of death, etc. Fortunately, U.Fone iOS System Recovery also can help you fix ios system to normal without data loss. Let’s take how to fix iPhone stuck in recovery mode after iOS 15 update as an example.

Recover Data after iOS 15 Update

How to Install iOS 13/iOS 12.4 on Your iPhone Safely

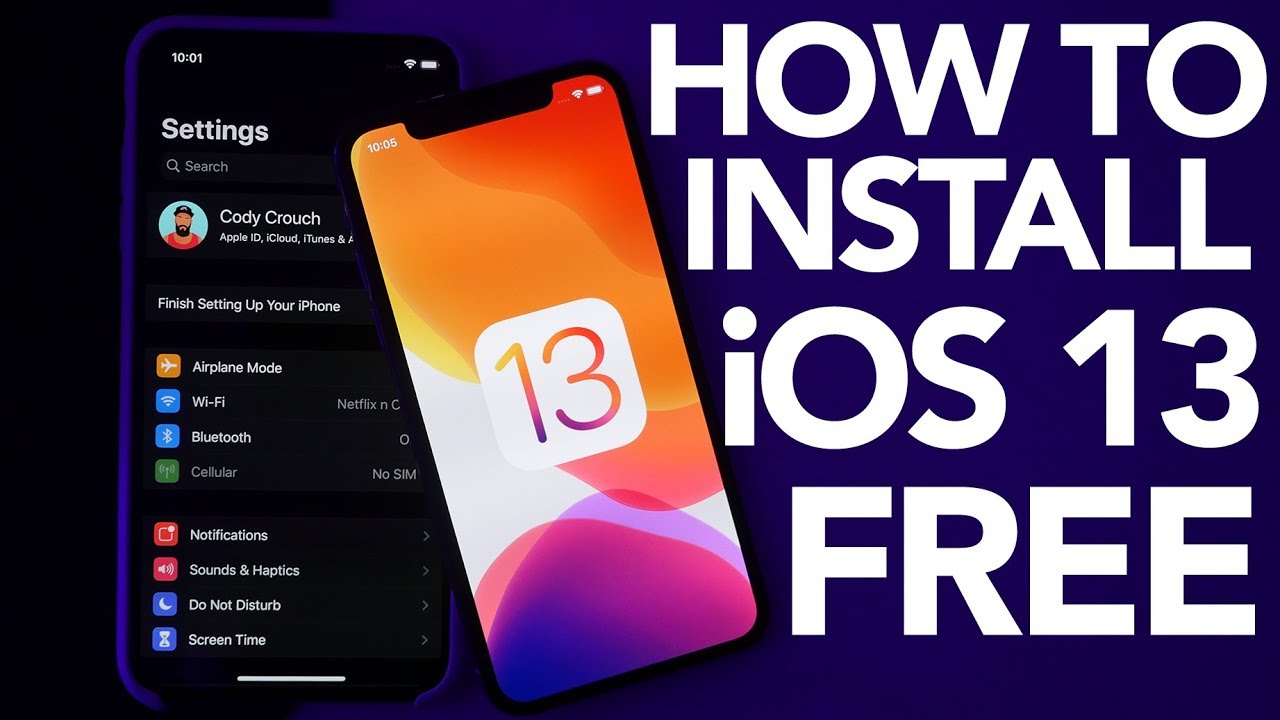
[Summary]: Want to upgrade your iPhone/iPad to iOS 13 Beta / iPadOS? This page provides iOS 13 Beta IPSW download links for iPhone and guide you how to install iOS 13 beta on iPhone using iTunes or OTA Updates (Over-the-Air Updates). Here, you also can learn how to downgrade iOS 13 to iOS 12.4 safely.
install ios 13

You may want to know:

* How to Fix iPhone Stuck in Recovery Mode After iOS 13 Update

* How to Recover Deleted Data on iPhone 11/11 Pro/XS/XR/X

CONTENTS

At WWDC 2019, Apple unveiled the new version of iOS 13, the new features of iOS13 are compelling. Apple claims that iOS10 is the biggest change in the history of iOS, and many of the changes are to make iOS closer to user habits. There are main 10 features in iOS 13.

ios 13 dark mode iPhone

1.Overall performance optimization. Face ID face unlocking speed increased by 30% in iOS, software update will be reduced by 60%, and software speed will be increased by 2 times.

2. Dark Mode in iOS 13. The new black mode is supported in iOS13, and the overall system color matching will match the new black mode. At the same time, music will also support black mode.

2.Rebuild Apple Map. The map features built into iOS 13 are optimized. At the end of 2019, Apple will complete all streets cape maps in the United States. The new map will be modeled in 3D. At the same time, the details of the street scene in the map are preserved.

4. Privacy and Security. There are a lot of privacy details in the new iOS13. Content related to personal privacy is prompted when using the app. Signing in to FaceBook and Google with Face ID will protect a lot of personal privacy. Face ID will continue to support third-party software logins with open APIs.

5. Shooting interesting enhancement. There are more fun features in shooting. The picture supports the timeline function view. The album will automatically recognize the shooting content in the same scene, which is more suitable for the user to view the photo scene.

6. HomeKit will support home monitors. The monitor recorded video will be encrypted and uploaded to iCloud.

7. Memoji will join iOS. Memoji will support Apple devices with A9 processors and above.

8. Apple family audio configuration features increased. AirPods supports Siri to read and voice-convert text responses. Sharing music to other phones is easier. HomePod will support more than 100,000 stations.

9. The new Carplay interface supports more information, while the new Carplay supports Siri.

10.Compared with iOS 12, Siri pronunciation on iOS13 is more like human, and voice interaction is no longer cold.

Apple update to the iOS 13 with performance and security enhancements for your iPhone or iPad, do you want to upgrade your iPhone to iOS 13 beta to feel the latest design? Apple has offers developer beta of iOS 13 for iPhones, iPads, iPod touchs to developers, the iOS 13 public beta version is still a few weeks away, and the iOS 13 developer beta version is available for developers now. If you want to install iOS 13 to your iPhone, you should make sure that your iPhone is compatible with iOS 13.

iOS 13 supports the iPhone models including iPhone XS Max, iPhone XS, iPhone XR, iPhone X, iPhone 8 Plus, iPhone 8, iPhone 7 Plus, iPhone 7, iPhone 6s Plus, iPhone 6s and iPhone SE. So the iPhone 6/6 Plus and other old iPhone models doesn’t compatible with iOS 13.

Here, you can download the match iOS 13 beta IPSW for your iPhone, just click the download links below:

iOS 13 (iPhone 6s): Download iOS 13 Beta iPSW File from Google Drive
iOS 13 (iPhone 6s+): Download iOS 13 Beta iPSW File from Google Drive
iOS 13 (iPhone SE): Download iOS 13 Beta iPSW File from Google Drive
iOS 13 (iPhone 7): Download iOS 13 Beta iPSW File from Google Drive
iOS 13 (iPhone 7+): Download iOS 13 Beta iPSW File from Google Drive
iOS 13 (iPhone 8): Download iOS 13 Beta iPSW File from Google Drive
iOS 13 (iPhone 8 Plus): Download iOS 13 Beta iPSW File from Google Drive
iOS 13 (iPhone X): Download iOS 13 Beta iPSW File from Google Drive
iOS 13 (iPhone XS): Download iOS 13 Beta iPSW File from Google Drive
iOS 13 (iPhone XS Max): Download iOS 13 Beta iPSW File from Google Drive
iOS 13 (iPhone XR): Download iOS 13 Beta iPSW File from Google Drive

Part 1: Back up iPhone Data to Computer before upgrading to iOS 13

Before installing iOS 13 Beta on iPhone, you should backup data from iPhone to computer firstly, including photos, videos, contacts, messages, notes, call logs, WhatsApp data and other App data. After backup your iPhone data to computer, you should backup each and every single file and setting on your iPhone, iPad or iPod touch via iTunes or iCloud, after full backup your iPhone data, settings and more information to computer, iTunes or iCloud, you no longer worry about data loss, even if the upgrade fails, and will come in handy later whenever you decide to downgrade back to iOS 12, you can easily to restore data back to your iPhone. Please, do not skip this step otherwise you have the potential to lose all your photos, videos, settings and personal files due to an unforeseen event. However, let’s teach you how to backup all data from iPhone to computer via a third-party iOS Data Backup & Restore tool.

1-click backup iPhone/iPad Data without using iCloud and iTunes before iOS 13 Update

You can backup iPhone/iPad/iPod touch via iCloud and iTunes, but iCloud backup requires network, and it’s not convenient to restore the backup to your device which needs you to reset your device. For using iTunes backup, it will take you lots of time during the backup and restore process, and it’s easy to make some unexpected mistakes.
You may want to read: 6 Ways to Backup iPhone/iPad Data before Upgrading to iOS 13

U.Fone iOS Data Backup & Restore is a profession iPhone to computer backup tool, it can help you backup iPhone/iPad/iPod touch to your computer with one click, including Contacts, Messages, Notes, Photos, Calendar, Reminder, Voicemail, WhatsApp & attachments, Voice memos, Safari bookmarks, Safari history, Call history, App photos, App video, App audio, App’s document, and more. After backup your iPhone data to computer via this iOS Data Backup & Restore tool, then you can safely upgrade your iPhone to iOS 13, and then selectively preview and restore any item from the backup to iPhone devices.

More Features:

  • Unlike iTunes and iCloud, it won’t overwrite existing data.
  • Back up and restore iPhone/iPad/iPod data to computer without iTunes.
  • Restore from backup to any iOS device.
  • Restore from backup to Windows or Mac computer.
  • Password protect your backup data on computer.
  • One click or selectively to back up your iPhone/iPad data to computer.
  • Supports all iOS devices (iPhone XS Max, iPhone XS/XS Max/XR/X/8/7/6/5, iPad Pro, iPad mini, iPod touch, etc.)

Download the iOS Toolkit – iOS Data Backup & Restore for Windows and Mac, then backup your iPhone data to computer before upgrading to iOS 13.

d_win d_mac
d_win d_mac

One Click to Backup iPhone Data to Computer before iOS 13 Upgrading

Step 1. Install U.Fone iOS Data Backup & Restore
To backup your iPhone data to computer with 1 click, please download, install and run the iOS Toolkit on your computer immediately.

launch U.Fone iOS Toolkit

Choose “iOS Data Backup & Restore” feature from the interface. Then locate on iOS Data Backup.
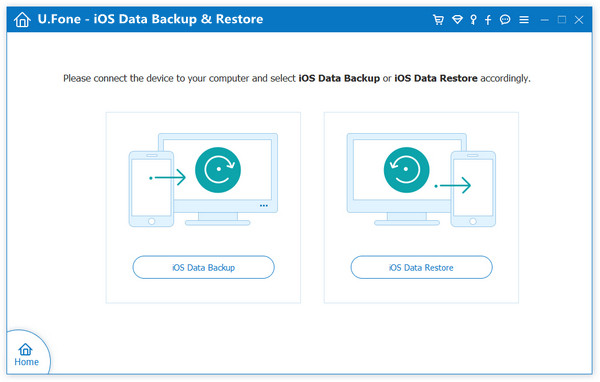
go to ios data backup & restore

Step 2. Connect iPhone to PC or Mac
According to the next window tips, please connect your iPhone to PC or Mac. There are two backup modes on the screen: Standard backup and Encrypted backup. Tick Standard backup then click Start button to enter the process.

connect iPhone to computer

Note: With Encrypted backup, you will need to enter the password you created when you want to restore the backup.

Step 3. Choose Data to Backup
You can see the various data types are supported, you can select the data you want or check all based on your needs. Then click “Next” to start backing up your iPhone data.

select data to backup

Step 4. Complete iPhone Data Backup
Now the software is backing up your data, please be patient.

backup iPhone data to PC

Once the backup is successful, you can easily view the backup specific information, including backup time, backup size, device name and so on.

view backup files

d_win d_mac
d_win d_mac

After you have backed up your iPhone data to computer with this iOS Toolkit – iOS Data Backup & Restore, you can optionally restore data from the backup data to iOS devices after iOS 13 upgrading or downgrading successfully, you can also restore the backups to Windows or Mac PC for your future use.

Part 2: Install iOS 13 Beta Using OTA

Good news: iOS 13 Public Beta 2 Has Be Released as an OTA Update
OTA Updates (Over-the-Air Updates, also know as wireless updates) were introduced with iOS 13. iOS 13 Beta 2 is available for downloading to iPhone devices directly, I believe many of friends can’t wait to experience the latest iOS 13.

The first beta version of iOS 13 has been online for half a month. Since there is no official description file, it can only be upgraded with the help of a computer. Many of the small partners who want to upgrade feel too much trouble and give up. Now, the second beta version of iOS has come out, and this beta version officially provides a description file!

Now, you can upgrade iPhone to iOS 13 without a computer! If your iPhone model compatible with iOS 13, now you can update on your iPhone directly.

Very simple, download the iOS 13 Developer preview beta 2 description file, you can directly to install iOS 13 Beta 2 on iPhone XS / XS Max/XR/X8/8 Plus/7/7 Plus/6s/6s Plus/SE and iPod Touch 7th via OTA updates:

How to Install iOS 13 Beta Using OTA or Over-the-Air Update for Free

Follow the steps below to update your iDevice running on iOS 12 or later to iOS 13 beta using OTA update for free:

Step 1. First of all, you need to launch Safari web browser on your iPhone.
Step 2. Visit page and download the iOS 13 Developer Preview beta 2 description file
iOS 13 Developer Preview beta 2 description file download link:
https://dl.ifanr.cn/ifanr/iOS_iPadOS_13_Beta_Profile.mobileconfig
Step 3. Tap “Allow” on your iPhone.
Step 4. Step Your device will need to be restarted after installing the profile.
Step 5. Once profile is installed, go to General -> Software Update. There, you will be able to see iOS 13 Beta 1 update as OTA update.
Step 6. Select the “Download & Install” option and wait for it to get completed.

update-ios-13-beta-2-ota

Step 7. Once the downloading is completed, tap on Install now option to start the process.
Your iPhone will restart during the process and it will take sometime before iOS 13 is completely installed on your iDevice.

The key benefit of using OTA or Over-the-Update feature is that you won’t lose any of your existing iOS 12 setting or data and it will remain same on your iPhone device.

Part 3: Install iOS 13 Beta on iPhone with iTunes

After downloading the iOS 13 beta 1 IPSW File and backing up your iPhone data, now follow the simple steps to install iOS 13 on iPhone by iTunes. Once the Apple release the public beta of the iOS 13 such as iOS 13.1 , you can directly download and install iOS 13 on iPhone(via over-the-air (OTA) method). For a jailbroken iPhone, you must to use iTunes to install iOS 13 to iPhone/iPad/iPod Touch on your Mac or Windows PC, otherwise, the device will stuck in recovery mode, white Apple logo screen, black screen of death and other unknown system error.
Also read: how to fix iPhone stuck in recovery mode after iOS upgrading

Let’s shows you the guide to install iOS 13 beta 1 IPSW to iPhone by using iTunes on PC or Mac. For Mac users, your Mac computer must have Xcode 11 beta or macOS 10.15 beta installed. Here, you can directly download Xcode_11_Beta.xip

Step 1: Launch iTunes and connect your iPhone to your Mac or PC. If it’s the first time you connect the iPhone with the computer, please enter the passcode and allow connection.

Step 2: After your iPhone devices detected by iTunes, please tap on the iPhone logo on the top-right corner of the sidebar.

update iphone to iOS 13 on itunes

Step 3: From the Summary panel, hold down the SHIFT [ Windows ] or ALT [ Mac ] key and click the “Update” button. In the window that opens, select the iOS 13 beta 1 IPSW file that you have downloaded before.

update iphone to iOS 13 via itunes

Then, open the downloaded iOS 13 IPSW File and load into the iTunes application.

open ios 13 ipsw file on mac

Step 4: Now, the installation process will now start. Your iPhone will restart during the process. Once done, go through the initial setup process and set up your iPhone again. Make sure your iPhone is connected to the internet for activation purposes.

ios 13 beta on iPhone

After complete installing iPhone to iOS 13, your iPhone device will reboot into the new iOS 13 UI interface.

iphone ios 13

Part 4: Downgrade iOS 13 to iOS 12.3 via iTunes or iOS System Recovery Tool

However, if you think it just doesn’t work out well for your device after upgrading to iOS 13, or there was a bug in the update itself or you have an older device that just made the cutoff to receive the update. Don’t worry, you can downgrade iPhone from iOS 13 to iOS 12.3.1 or an earlier version of iOS, follow the two methods to downgrade iOS 13 to iOS 12 by using iTunes or iOS System Recovery, we recommend you use a third-party tool to safely downgrade your iPhone/iPad/iPod touch to an earlier version of iOS.

What you need to do before downgrading to an earlier version of iOS

1.Download iOS 12 Firmware for iPhone, iPad or iPod Touch on at ipsw.me, this is a site that specializes in hosting these IPSW files. You’ll need to perform this step on a Mac or PC.

2.Put your iPhone in recovery mode
Before downgrading to an earlier version of iOS by using iTunes or iOS System Recovery on PC/Mac, you need to put your iPhone or iPad into Recovery Mode, follow the simple steps to get your devices into recovery mode.

Step 1. Power off your device, then connect the iPhone/iPad to your Mac or PC.

Step 2. Put device into recovery mode
This step depends on what device you’re use.

iPhone 8/X/XS or newer: Press and release the Volume Up button, press and release the Volume Down button, then press and hold the Side button until the connect to iTunes screen appears.
iPhone 7/7 Plus:Press and hold Side and Volume Down buttons until the connect to iTunes screen appears.
iPhone 6s or older, iPad, or iPod Touch: Press and hold Home and Top (or Side) buttons until the connect to iTunes screen appears.
iPad Pro 11-inch or iPad Pro 12.9-inch: Press and release the Volume Up button, press and release the Volume Down button, then press and hold the Top Button until the connect to iTunes screen appears.

Method 1. Downgrade Your iPhone from iOS 13 to iOS 12 via iTunes

After putting your iPhone into Recovery Mode, iTunes should have opened up automatically on your computer and prompted you; if not, open it yourself and you should be greeted with a Restore prompt.

Below is the screenshot for iTunes for Windows, hold down Shift kep and click “Restore iPhone…” button.

restore iPhone to iOS 12/iOS 11

Let’s show you the detail guide on how to downgrade the iPhone from iOS 13 to iOS 12 on Mac computer.

1. Hold down Shift (PC) or Option (Mac) and click the “Restore” button.

downgrade iphone by itunes

2. Find the IPSW file that you downloaded earlier, select it and click Open.

downgrade iphone by itunes

3. Click “Restore” to install and restore your iPhone to iOS 12

downgrade iphone by itunes

Method 2. Upgrade or Downgrade iOS 13 via iOS System Recovery

Above steps, you have downloaded the iOS 12/13 IPSW files on your computer, after get device into recovery mode, you can use this iOS System Recovery to manually install iOS 13 or iOS 12 IPSW file to iPhone safely, it means this software can help you upgrade iPhone/iPad/iPod touch to iOS 13, but also can help you downgrade iOS 13 to iOS 12 or earlier version. Moreover, The iOS System Recovery is an professional iPhone/iPad fix tool, it can help you fix with all kinds of iOS system issues like black screen of death, stuck in recovery mode, white Apple logo, boot loop, etc. So, you can use this iOS System Recovery to fix your iOS system without data loss.

More Features:

  • Easily to download and install iOS firmware on iPhone/iPad/iPod without data loss
  • Fix your iPhone/iPad/iPod to normal status(iOS 13 supported), no data lost at all.
  • Fix a disabled iPhone after unlock failure.
  • Fix iPhone loop restarting status.
  • iPhone cannot turn on normally.
  • Fix iPhone stuck in verifying update.
  • Fix iPhone stuck in Apple logo/recovery mode/black screen/red screen/blue screen issues.
  • Fix a frozen iPhone to normal status.
  • Unlock iPhone when the iPhone touch screen is not working.
  • Upgrade and downgrade your iOS system, no data loss at all.
  • Optimize iOS system performance to speed up your iPhone/iPad/iPod.
  • Provides all IPSW firmware to download, including iOS 13, iOS 12, iOS 11, iOS 10, iOS 9 and previous iOS version.
  • Quickly and easily find the suitable firmware for your iPhone, iPad and iPod(touch).
  • Compatible with Windows and Mac computer.

Download the iOS System Recovery on Windows and Mac.

d_win d_mac
d_win d_mac

Guide: Install iOS 13 on iPhone without Data Loss

Step 1.Run iOS System Recovery and Connect iPhone to Computer
Above step, you have downloaded iOS 12 IPSW file or iOS 13 IPSW file on computer.

connect iPhone to computer

In order to install iOS firmware on iPhone, you need to put your iPhone into recovery mode firstly, then launch the iOS Toolkit and click “iOS System Recovery” function.

iOS System Recovery

The software will pops up an new window, you can see the software not only can help you fix iPhone stuck on recovery mode, headphones mode, DFU mode, etc. but also enables you upgrade or downgrade iOS system. To go on, hit the “Start” button at the lower right corner to go on.

Step 2. Select Standard Mode or Advanced Mode
Please select “Standard Mode” or “Advanced Mode” to install iOS firmware package on your iPhone, I recommend you choose the advanced mode only if the standard mode fails.

install mode

Step 3. Optimize iOS System
The software will detect and analyze your iPhone device and shows all information of the device, if your iPhone is working properly, you will get the screenshot as below:

Optimize iOS

Tips: If you want to enjoy better iOS performance, you can continue to optimize your iPhone, please click “Optimize” button to download iOS 13 fireware and install it on your iPhone without data loss.

Step 4.Select iOS 13 Fireware and Start Downloading
The tool automatically detects the model type of your iDevice and displays available iOS system versions. Select the iOS 13 version and click on “Next” to download iOS 13 fireware .

Select iOS 13 Firmware

Tips: If you have download the IPSW file before, just click “Select” button to choose and load the downloaded iOS 13 IPSW file. So you can also load the iOS 13 IPSW file to the software, it means that you can install iOS 13 to iPhone via this iOS System Recovery tool, in other word, this is another safely method to upgrade iPhone to iOS 13 without iTunes.

Step 4. Start to Download iOS 13 Firmware(Option)
Above steps, you have downloaded the firmware to the computer, it will skip to the downloading process.
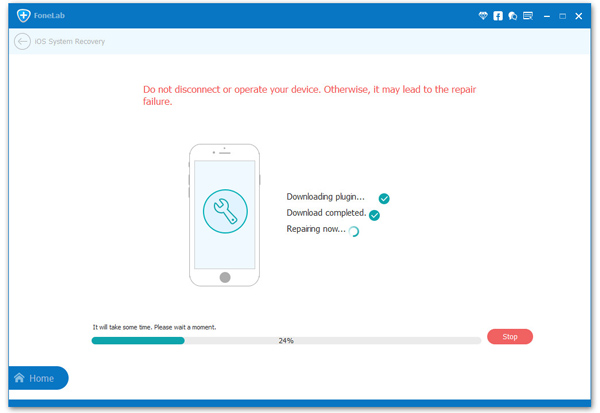
The software helps you download the iOS firmware. Since the firmware we need to download is large, it will take some time to complete the download. Make sure your network is stable during the process, when the software start download iOS 13 firmware package, please do not disconnect or operate your device during the download processing.

Download iOS 13 IPSW files

Tips: If the firmware is not download successfully, you can also click on “Download” to download the firmware using your browser, and click on “Select” button to select the downloaded firmware.

Step 5. Verify and Install iOS 13 on iPhone
In a few minutes, the install process successfully. Just grab your iPhone device and wait for it to start up. You can find your iPhone be restored to iOS 13 or an earlier version of iOS.
upgrade iPhone to iOS 13

Tips: You can also follow the same steps to upgrade iPhone to iOS 13 by using this profession and useful iOS System Recovery tool.

Related Articles

How to Recover Lost iPhone/iPad Data after iOS 13/iOS 12 Update
If you lost data on iPhone/iPad/iPod after upgrading to iOS 13 Beta / iPadOS, learn this tutorial, you can easily recover lost photos, contacts, messages, notes, videos, WhatsApp messages and more App data from iOS devices after iOS 13 update, you can also easily to recover deleted data from iOS 12/iOS 11/iOS 10 devices.

How Fix iPhone iPad Stuck on Apple Logo after iOS 13 Update
Failed to upgrade your iPhone to iOS 13 and stuck on white Apple Logo? Don’t worry, you can follow this guide to fix iPhone stuck in Apple Logo issues, no data loss at all.

How to Fix Apple Music Not Playing after 13 Update
Having a problem with Apple Music after upgrading to iOS 13? If your Apple Music app not working properly after updating to iOS 13/12.3/12.2/12? Follow this guide to fix all Apple Music problems all OS version.

How to Fix iPhone Stuck in Recovery Mode in iOS 13/iOS 12?

[Summary]: Your iPhone stuck in recovery mode and looking for a way to fix iPhone stuck in recovery mode? No matter you use iPhone XS/XR, iPhone 8, iPhone 8 Plus or iPhone X in iOS 12 or the iPhone you recently update to iOS 13 stuck in Recovery Mode, you can follow the easy guide to fix the iPhone Stuck in Recovery Mode after iOS 13 upgrading.

You may want to read:

* Recover lost data from iPhone/iPad after iOS 13/iOS 12 Update

* Transfer data from old iPhone to new iPhone XS/XR/X

iOS 13 will be released on June 3 (Pacific Time) at the WWDC 2019 Global Developer Conference. iOS 13 will only support iPhone 7 and above models, including iPhone XS(Max), iPhone XS, iPhone XR, iPhone X, iPhone 8/8 Plus, iPhone 7 and iPhone 7 Plus, in another word, the older models such as iPhone 6s/6s Plus and iPhone 6/6 Plus will no longer be supported. iOS 13 will appear “dark mode”, similar to the “dark mode” on the current macOS Mojave, this night mode in the iOS 13 system will greatly increase the battery life. It is rumored that the new iOS 13 system will improve the interface of the CarPlay in-vehicle system, and it will also make some updates for the iPad, such as optimizing the device’s file management system and multi-tasking interface, and the new iOS 13 will bring a new system interface.

Here is a case about iOS 13 stuck in recovery mode:

Hey! My iPhone 7 is stuck in recovery mode after iOS 13 update. But, I do not want to restore with iTunes to prevent erase all data. However, I have connected my iPhone to my computer but it is not recognized by iTunes as well. How can I fix iPhone 7 stuck in recovery mode after iOS 13 update? I don’t want to erase all data off my iPhone after restoring the iOS system. Help Me!

I believe that when iOS 13 is released, many Apple users will upgrade their iPhone, iPad to iOS 13 for the first time to experience the newest UI and the latest features. But when if your iPhone stuck in white apple logo, stuck in recovery mode, or stuck in black screen of death after iOS 13 update failure, how you can fix your iOS 12/iOS 13 system without data loss?

This is a common issue that the iPhone stuck in recovery mode after iOS 13/iOS 12 update. That is the reason why I wrote this tutorial to help you fix iPhone stuck in recovery mode/Apple Logo/Boot Loop/Black Screen of death and more OS issues without losing data. But, before teaching you an effective method to fix the iPhone stuck in “recovery mode” while iOS update failed, you need to know why the iPhone stuck into recovery mode during iOS upgrading, so that you can avoid similar accidents when you plan to upgrade the phone OS next time.

Part 1: Reasons cause iPhone into recovery mode during iOS update

Generally, your iPhone/iPad /iPod could suddenly stuck into recovery mode during OS upgrading for the below reason:

1.Not Enough Battery: The battery is not sufficient for the complete installation of the upgrading process. Under normal circumstances, you are be suggested that the remaining power cannot be less than 50%, so you better connect the iPhone to the power supply during the whole upgrading process.

2.Update Jailbroken iPhone: Your jailbroken stuck at “Checking for Updates” status when you using OTA update method. This is because modern jailbreaks have the OTA updates disabled beforehand. Eventually, the jailbreak will get disabled and the jailbreak firmware not allowed to download directly. So, when you try to update on iPhone directly, the iPhone will crash and get stuck in recovery mode status. To update a jailbroken iPhone, you can use iTunes to update the iPhone or you can restore jailbroken iPhone without iTunes, the details are available below.

3.Other Unknown Reasons: A wrong operation or failure during iOS upgrading can cause the iPhone stuck in recovery mode.

Part 2: Force Restart iPhone to Get iPhone Out of Recovery Mode(Data Loss)

If your iPhone is stuck in Recovery Mode during/after iOS 13 or iOS 12 upgrading, you can try to force restart your iPhone to get it out o recovery mode, but this method will cause data loss. If you ignore data loss, please follow the detailed steps below to force restart your iPhone varies according to the iPhone models. You can easily reboot the iPhone when it stuck in recovery mode/white Apple Logo issues.

For iPhone 6 or earlier, hold and press both Sleep/Wake button and Home button until you see the Apple logo. (Sleep/Wake button is also called Side button.)

For iPhone 7/7 Plus, hold and press both Sleep/Wake button and Volume Down button until the Apple logo appears.

For iPhone XS/XR, iPhone X, iPhone 8 and iPhone 8 Plus, please press and release the Volume Up button, quickly press and release the Volume Down button and then press and hold the Sleep/Wake button until you see the Apple logo.

Part 3: Fix iPhone Stuck in Recovery Mode by iOS System Recovery(No Data Loss)

If you don’t want to erase the data after force restarting the device, you can use a professional third-party iOS System Recovery software.

U.Fone iOS System Recovery is designed to fix various iOS problems on your iPhone/iPad/iPod touch and restore your device back to normal status, you can easily fix iPhone stuck in recovery mode, Apple logo, black screen, etc. after iOS 13/iOS 12 update, even no data lost at all. Just connect your iPhone to the computer, the U.Fone iOS System Recovery helps you download a corresponding firmware package and install it on your iPhone quickly, after installing and restoring your iPhone successfully, the iPhone will restart and return to normal status. Moreover, you will find that all previous data is still in the phone. In additional, the “iPhone Data Recovery” feature also can help you recover deleted or lost data from your iPhone after iOS 13/iOS 12 update, including Photo, Contacts, Text Messages, Call Logs, Notes, Videos, Calendar, Media, WhatsApp Messages and more. But in this case, I will show you the detail guide about how to fix iPhone stuck in recovery mode in iOS 13.

Download the iOS System Recovery firstly, it is available on both Windows PC and Mac.

d_win d_mac
d_win d_mac

Step-by-Step to Fix iPhone Stuck in Recovery Mode after iOS 13 Update

Step 1. Download and Install the iOS Toolkit
First, you have to download and install iOS Toolkit, it is available for Windows and Mac as well. To fix ios system to normal, please go to “iOS System Recovery” feature.

U.Fone iOS System Recovery

Step 2. Connect iPhone to Computer
After entering into the “iOS System Recovery” function, you will get an new interface as below, then connect your iPhone to the computer with USB cable. After the program detects your device, you will get a message on the screen that your phone is in recovery mode, please click “Start” to continue.

connect iPhone to computer

Step 3. Select Device Firmware
Follow the instructions to select the firmware that matches your device.

Select Device Firmware

Step 4. Download Device Firmware
In this step, the iOS System Recovery tool will help you download firmware version according to your device mode. When the download finishes, the software will automatically install the newly downloaded firmware to your iPhone.

Download Device Firmware

Step 5. Start to Fix iPhone to Normal Mode
After downloading the plugin package complete, the program will start to fix iOS system to normal and restore iPhone to normal status. A few minutes later, your iPhone will restart and get into normal mode.

Get iPhone out of recovery mode

d_win d_mac
d_win d_mac

Besides fixing iPhone/iPad/iPod stuck in recovery mode after iOS update, this program can also fix iOS issues for many common scenarios, such as black screen, DFU mode, white screen of death, iPhone boot loop issues, frozen issues, iPhone keeps restarting issues and more. After fixing iOS system to normal, it won’t damage your device, and all original data and settings are preserved. In addition, the iOS Toolkit also can help you backup and restore iPhone/iPad/iPod data, and recover deleted or lost data from iOS 13/iOS 12/iOS 11/iOS 10/iOS 9 devices.

Although our software can help you fix iOS system and recover lost data, we strongly recommend that you should back up your phone data regularly, just in case of unexpected damages to the device. If you think this guide is helpful for you, please share this article to Facebook or twitter for your friends.

iOS System Recovery