Summary:Check out this article here we will teach you easy methods to transfer music/songs from computer/iTunes/Android/iOS devices to iPhone 7/7 Plus,we also recommend you Apple Music Converter to remove DRM from Apple Music songs and transfer to your iPhone/Android devices for playing for free with more freedom and convenience,once the subscription service is canceled.
As cool as the new iPhone 7 is, one thing that lots of people didn’t find cool was the fact that Apple ditched the 3.5mm headphone port. This meant that to use your old headphones you had to resort to an adapter. The catch is that if you want to listen to music with the headphone adapter and needed to charge your device at the same time, you had to choose one or the other.However,even though the iPhone 7 is a bit different from the previous iPhone,most iPhone fans like to enjoy music on it,for its advanced music system design.
iPhone 7 is a fully-featured music player.To add music to iPhone 7, you can purchase it from iTunes,add music files from computer to device,even share songs between mobile devices and iPhone 7.In order to freely listen to music on iPhone 7 anywhere anytime,here we are going to introduce three solutions selectively to transfer music to iPhone 7 that will cost you a little time.
How to Export Music to iPhone 7
iOS Manager,which is strongly recommended for you to transfer music between computer and iPhone 7,transfer music between iTunes library and iPhone 7,transfer music between iOS/Android device and iPhone 7,manage music playlists on iPhone 7,find and remove duplicate music files,fix Music ID3 tags for iPhone 7,delete music on iPhone 7.In addition,iOS Manager help to transfer & manage videos and photos for iPhone 7.Not only iPhone 7,all the functions of iOS Manager is applicable to all models of iOS devices,such as iPhone SE,iPhone 6S/6/5S/5,iPad & iPod.


Part 1:How to Transfer Music from Computer to iPhone 7
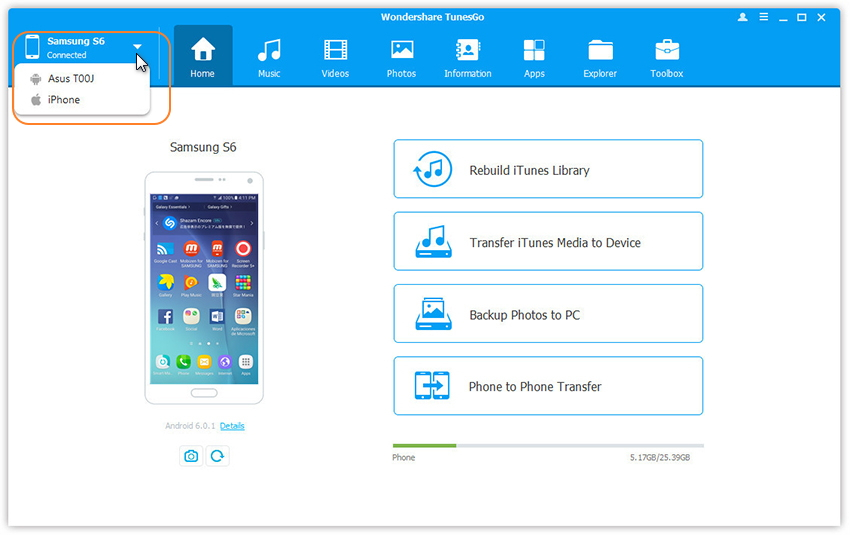
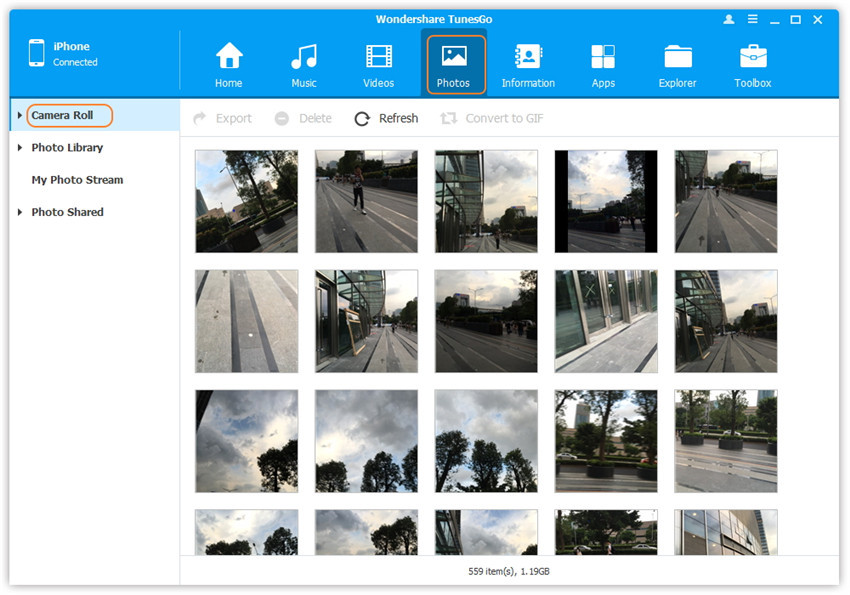
Step 1. Launch iOS Manager and connect your iPhone 7 with the computer.

Method 1.Transfer Music Using Buttons
Step 2. Add music from your computer to iPhone 7.
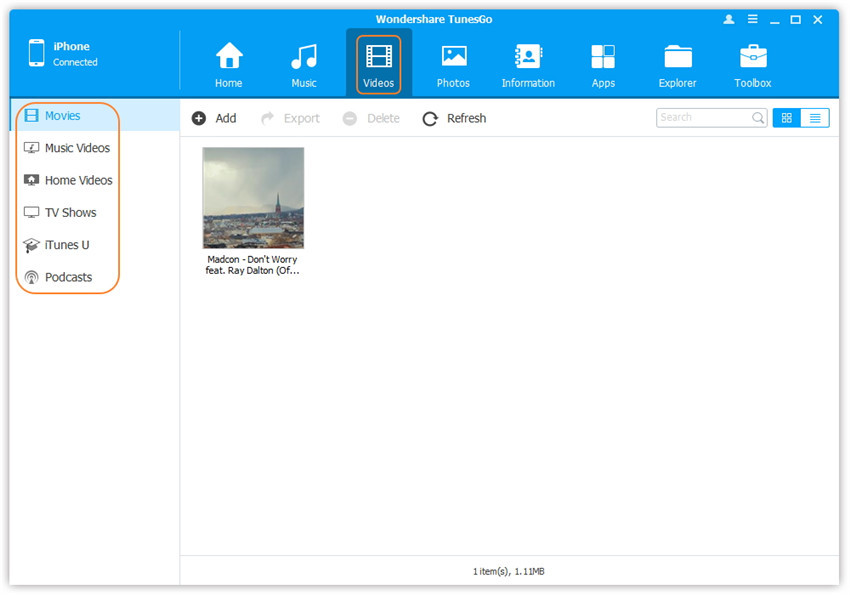
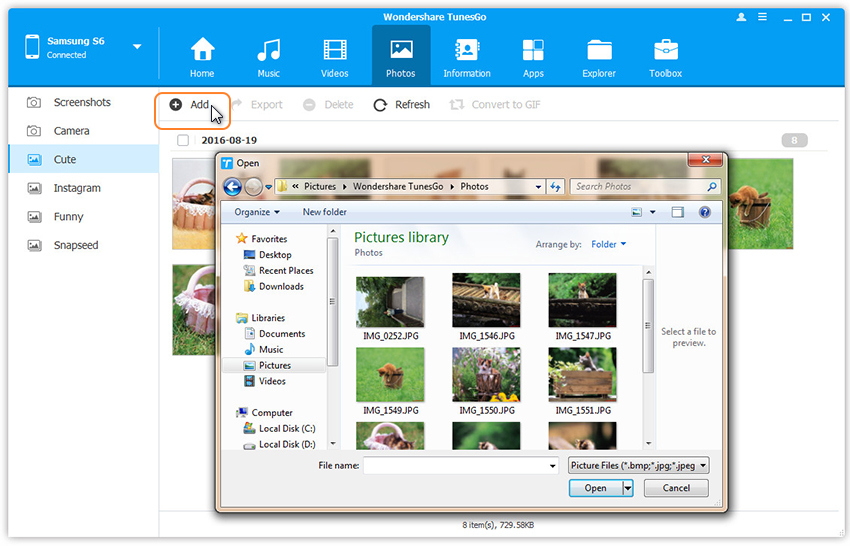
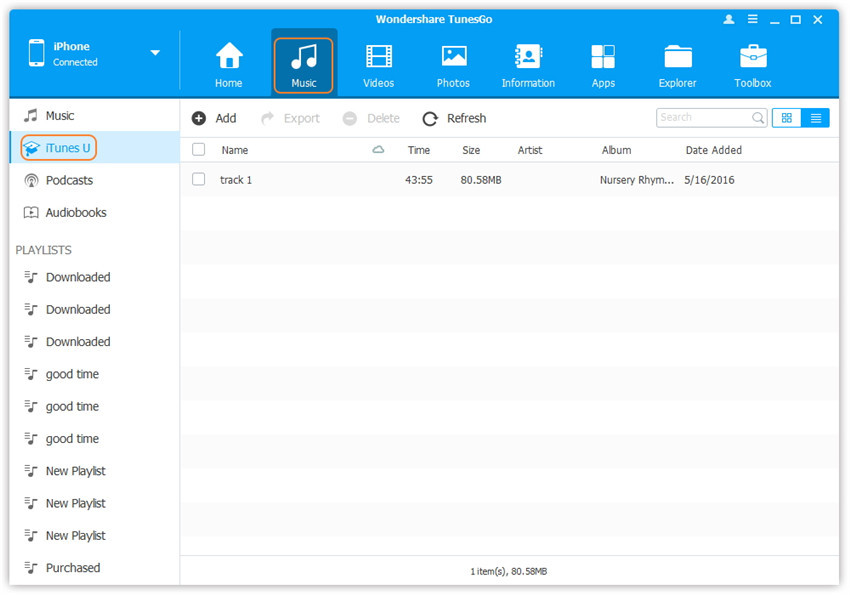
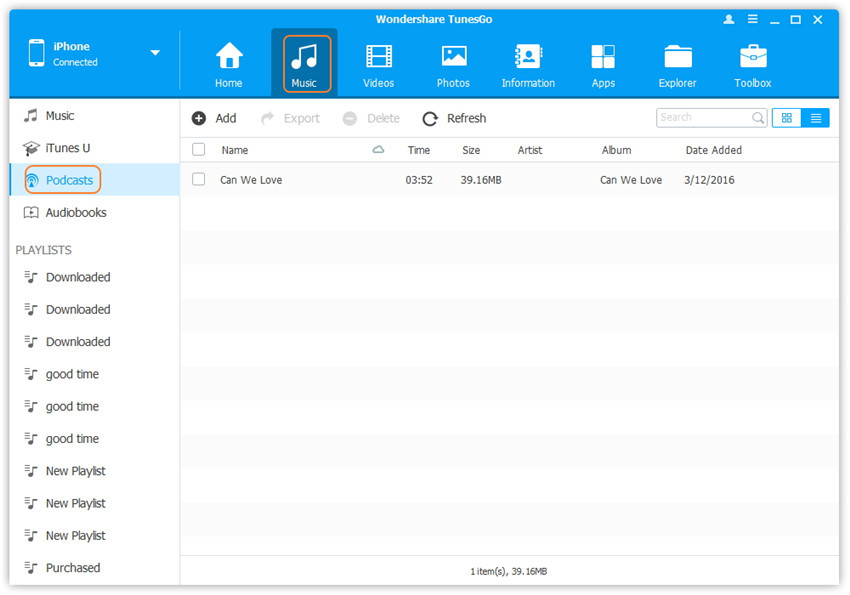
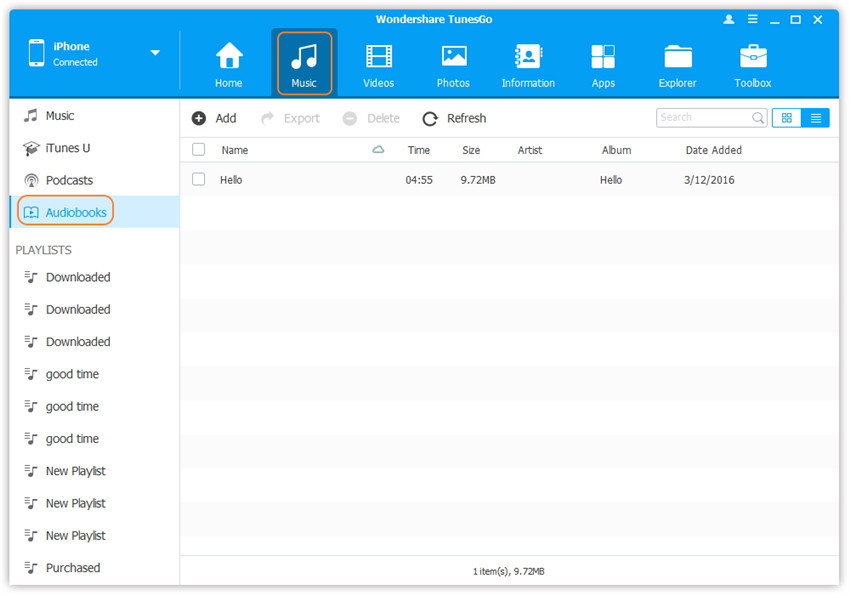
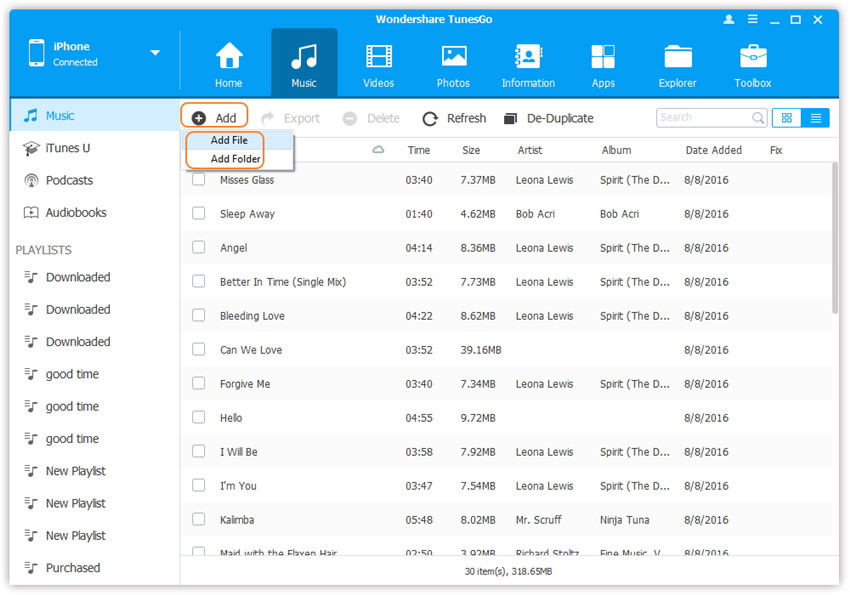
Click Music icon at the top of the interface, then select the specific option Music (Music is the default option). Please note that iTunes U/Audiobooks/Podcasts is available to select here too.
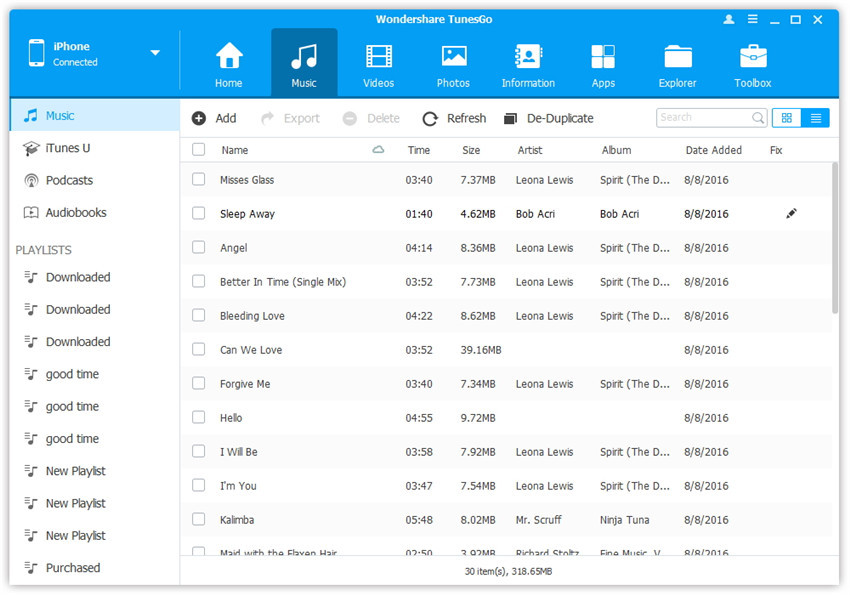
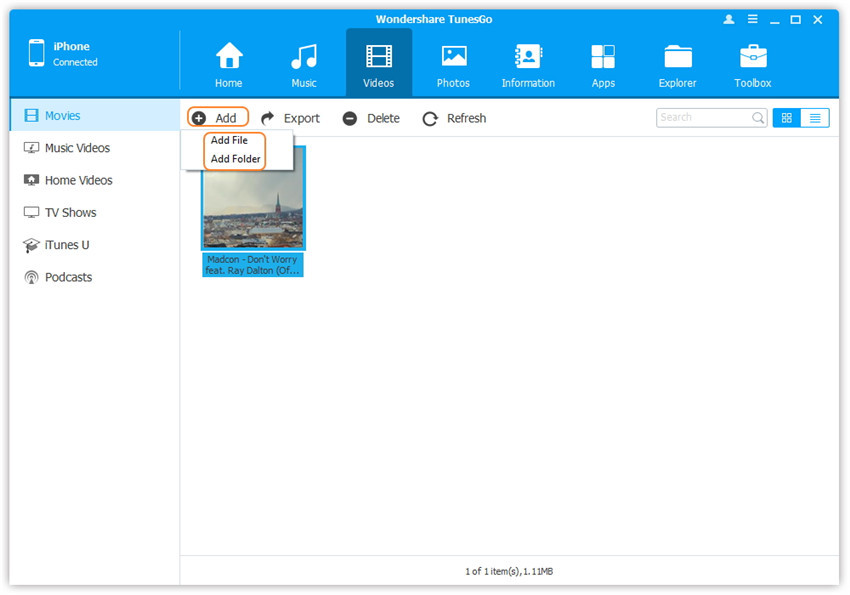
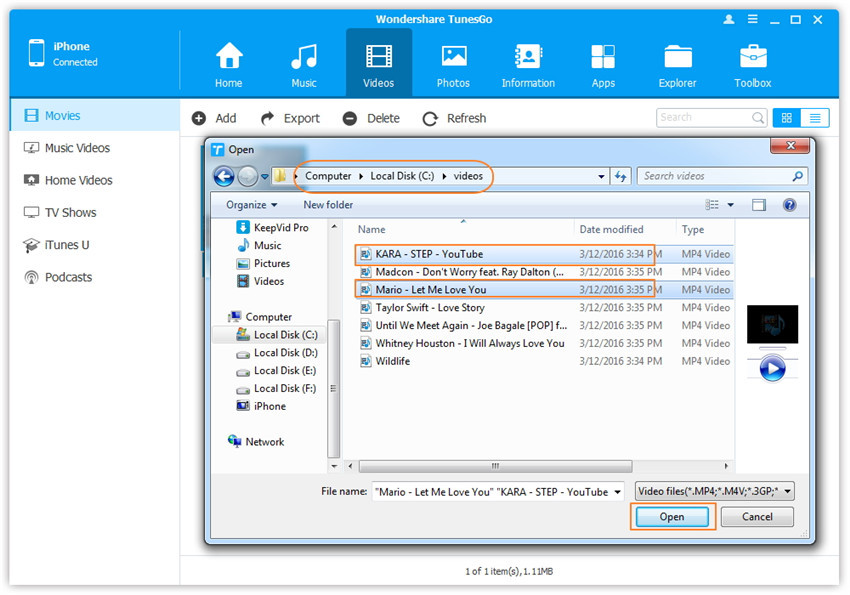
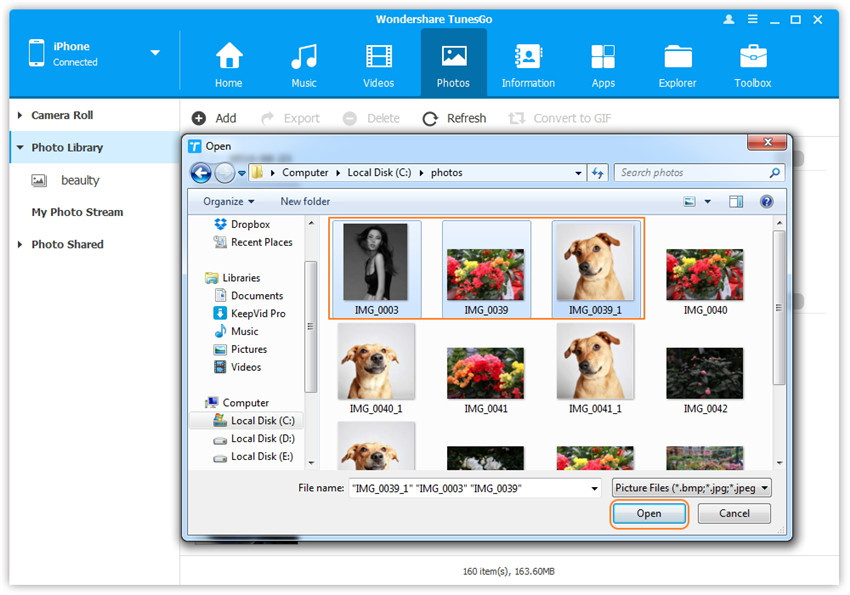
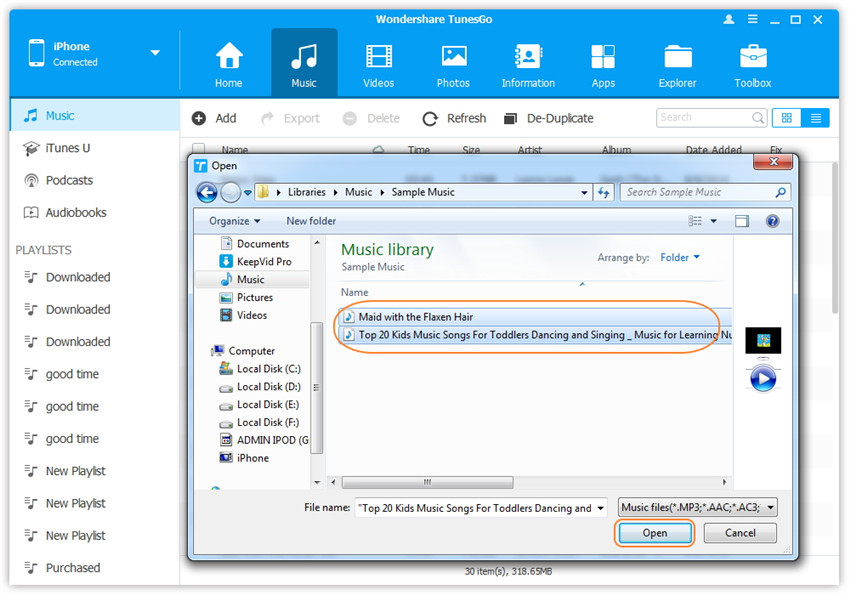
Later, click Add and then select Add File or Add Folder to add music files from your computer. If you only want to select some music files, then click Add File, and then hold down Shift or Ctrl key to choose multiple files; if you want to transfer all the music in one folder, then click Add Folder. After that, click Open to import the selected music. Here we only add music to iPhone 7 by clicking Add File for example, others are with the similar steps.
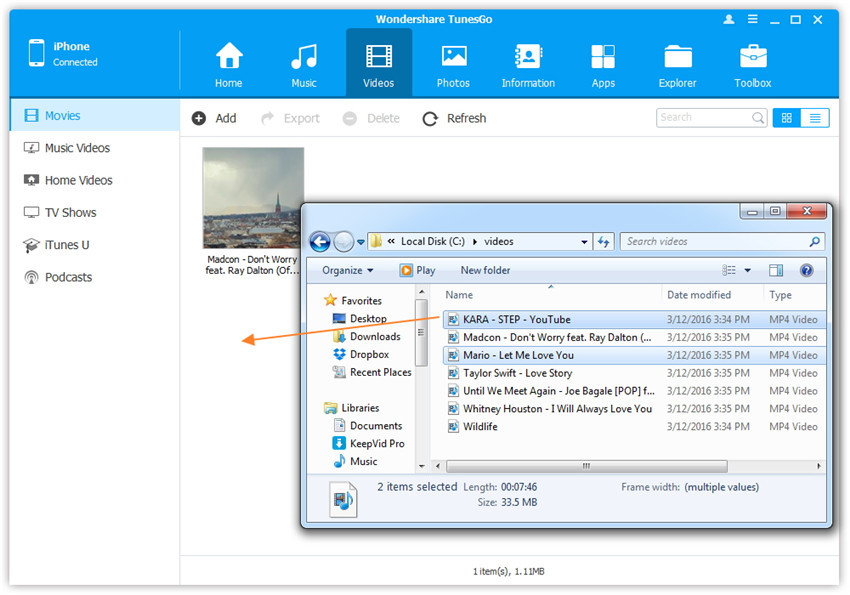
Method 2: Transfer Music by Drag and Drop
Step 2. Find songs on your PC/Mac.
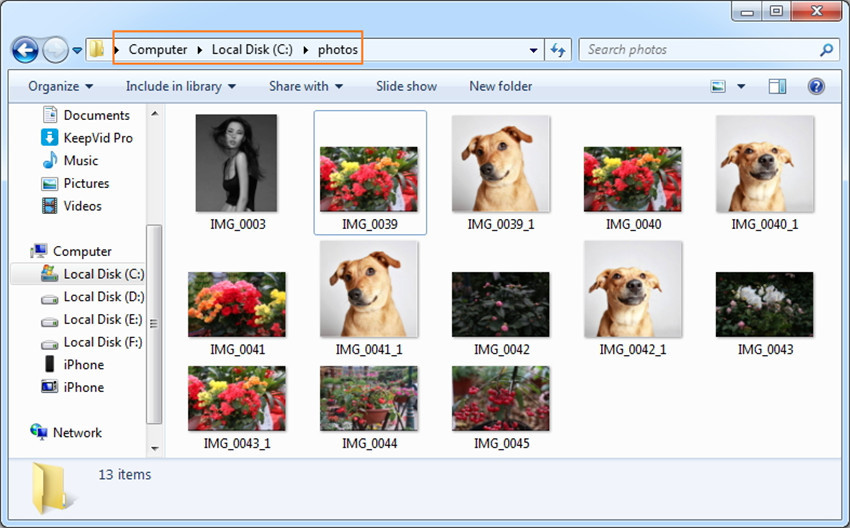
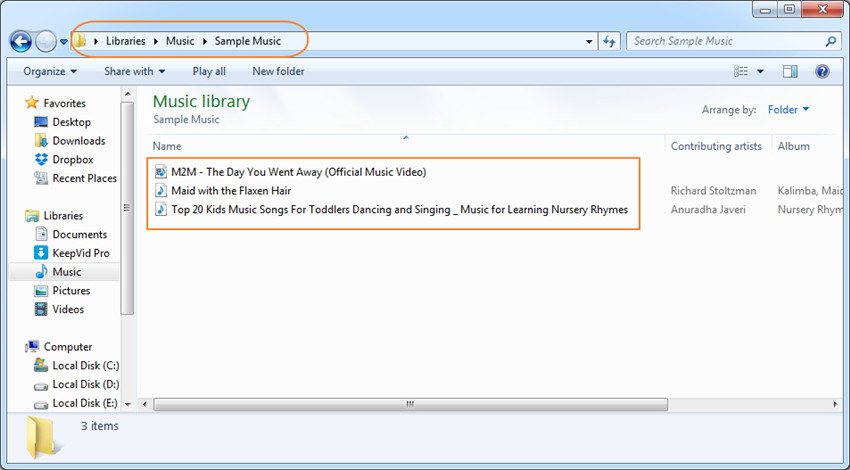
Find and open the music folder on your PC or Mac which includes the music files that you wish to transfer to iPhone 7.
Step 3. Export the songs to iPhone 7 by Drag and Drop.
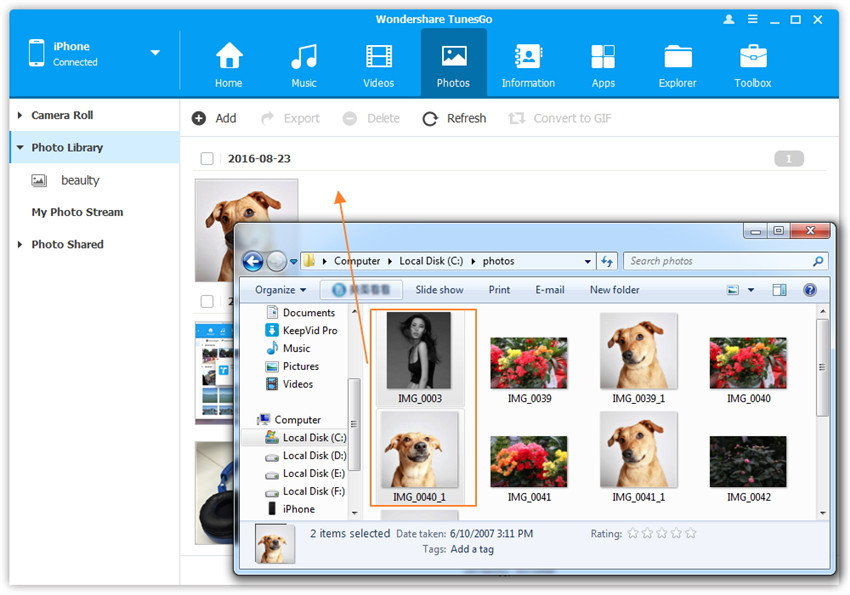
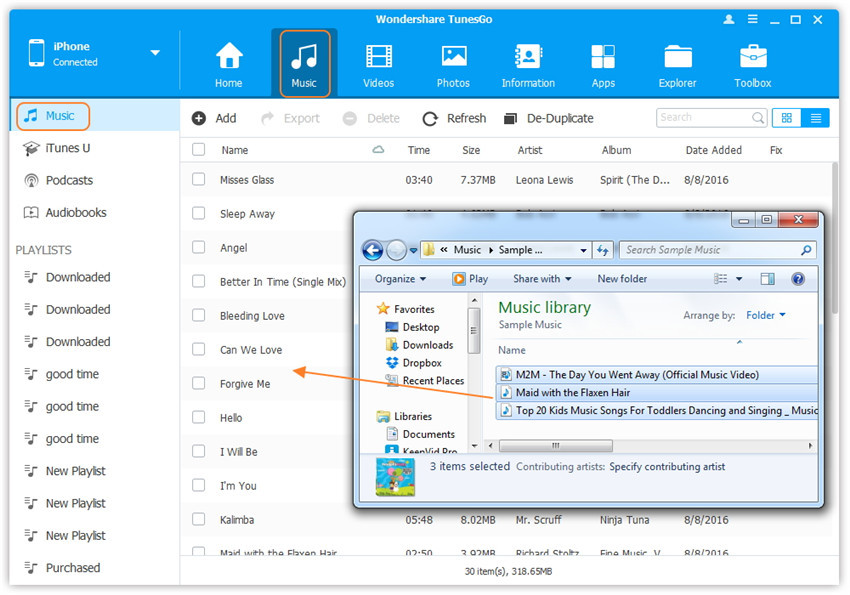
Click Music icon on the main interface of iOS Manager,it will go to the Music window by default. Drag and drop the selected music from your PC or Mac to the Music window of iOS Manager.
Tips:iOS Manager also supports to add Podcasts, iTunes U, Audiobooks from PC/Mac to iPhone 7 with this method too. The only change while adding these media files is to select one of the options: Podcasts, iTunes U, Audiobooks instead of Music.
Part 2:How to Transfer Music from iTunes to iPhone 7
Method 1: With 1-Click File Transfer
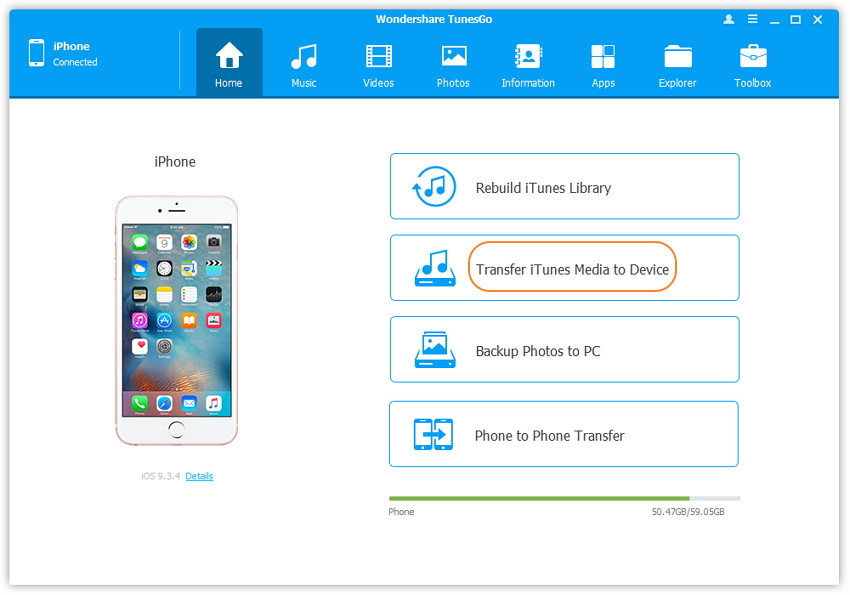
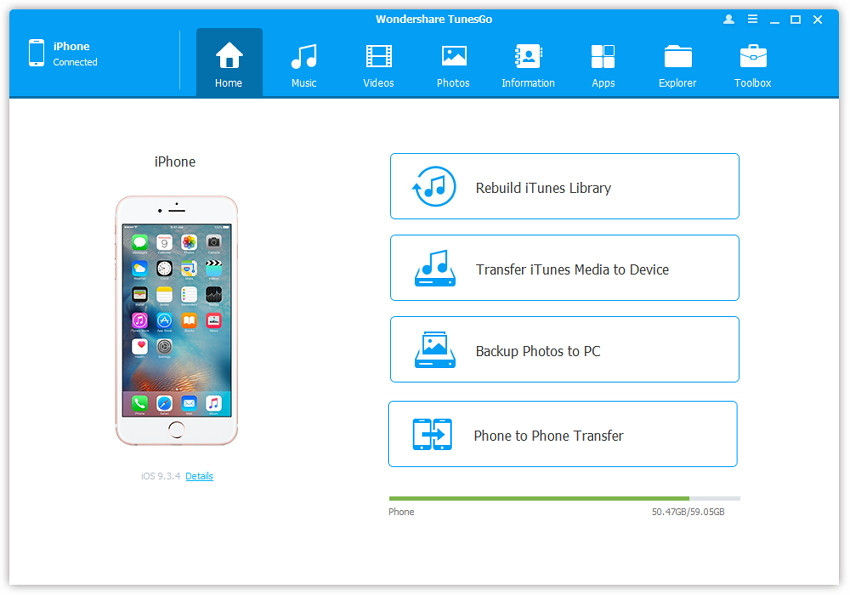
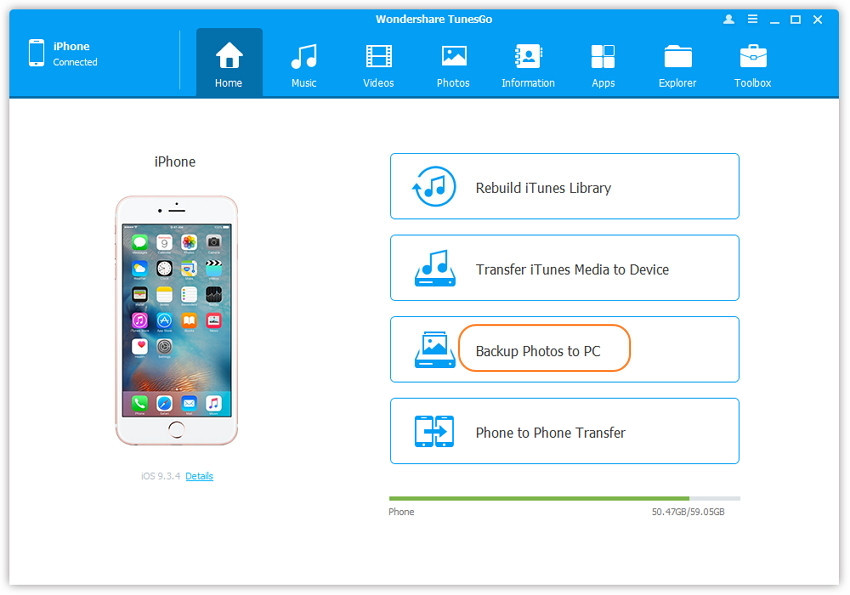
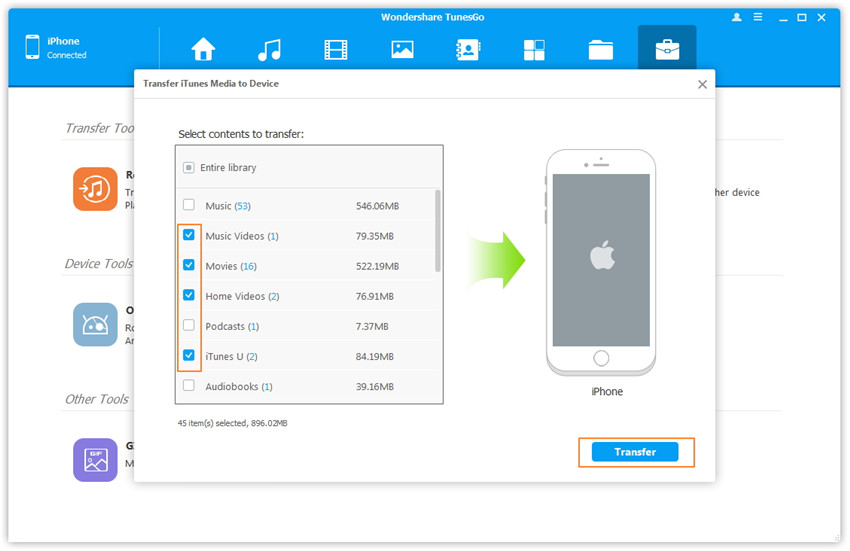
Step 1. Launch iOS Manager and connect your iPhone 7 with the computer. Then click Transfer iTunes Media to Device icon on the main interface.

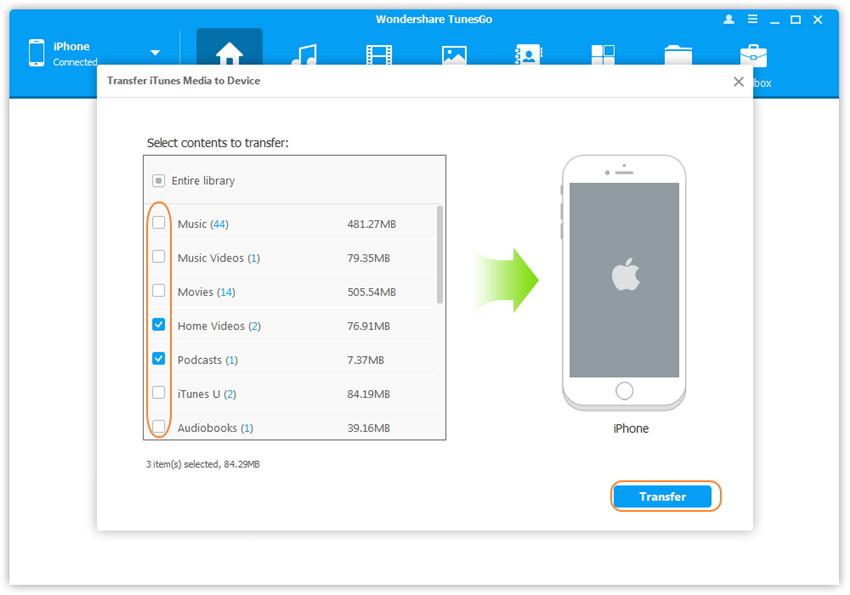
Step 2. iOS Manager will detect all the media files in iTunes and show them by list on the pop-up window. By default, the entire library has been checked. But you can uncheck some items that you won’t transfer to your iPhone 7.
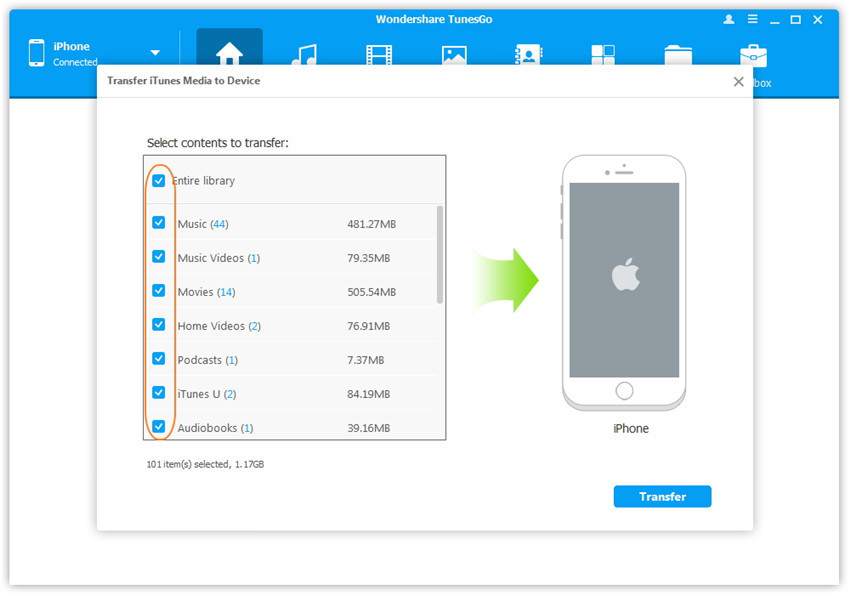
Step 3. Transfer media contents to your iPhone 7
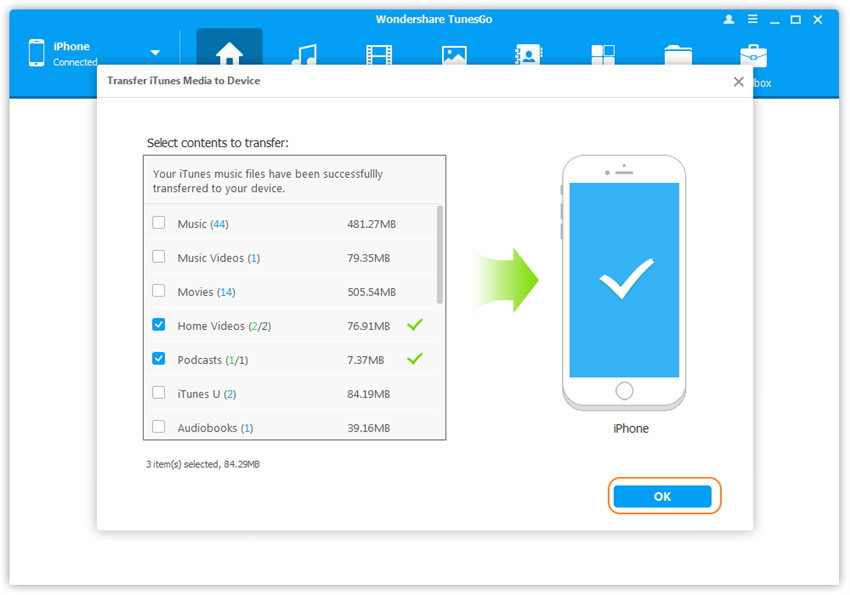
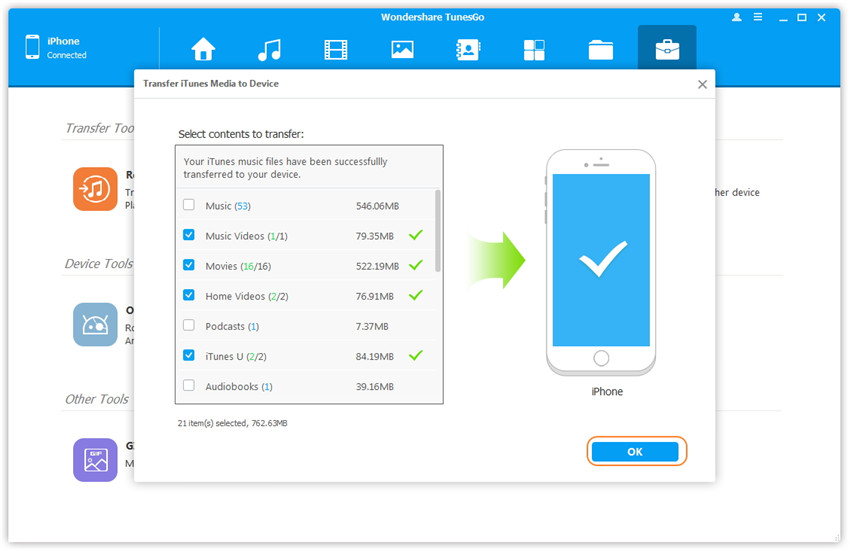
Click Transfer to start transferring selected files to your iPhone 7 and then click OK to complete the process.
Note: There is no worry about duplicate files as iOS Manager enables to automatically detect the duplicates and only transfer the exclusive contents from iTunes to iPhone 7.
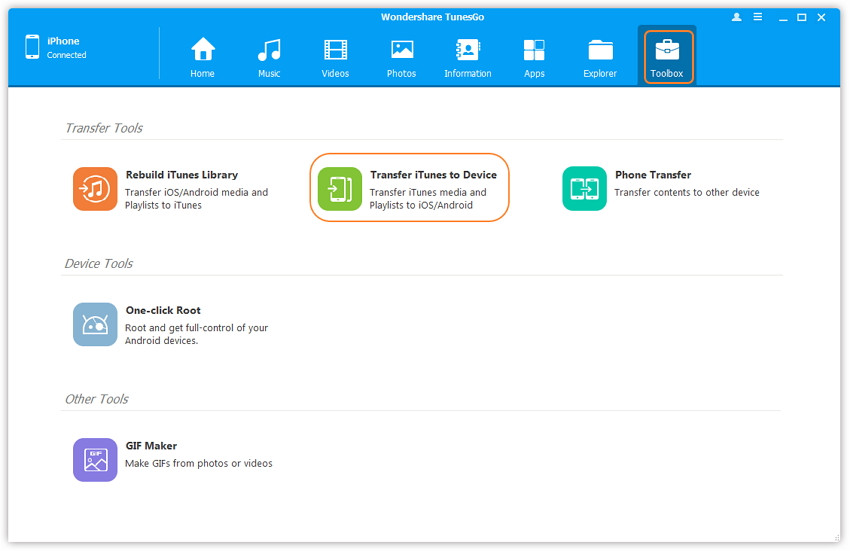
Method 2: With Toolbox
Step 1. Launch iOS Manager and connect your iPhone 7 with the computer. Then go to Toolbox > Transfer iTunes Media to Device on the Toolbox interface.
Step 2. iOS Manager will detect all the media files in iTunes and show them by list on the pop-up window. By default, the entire library has been checked. But you can uncheck some items that you won’t transfer to your iPhone 7.
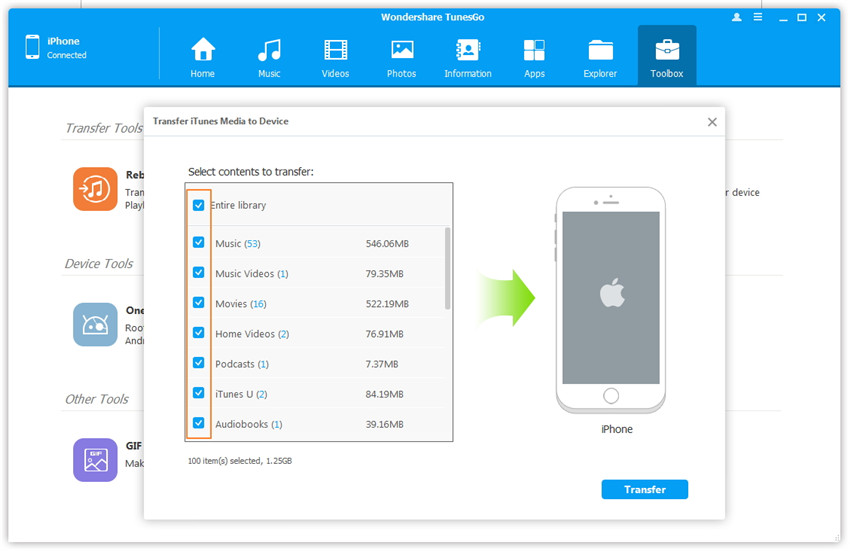
Step 3. Transfer media contents to your iPhone 7
Click Transfer to start transferring selected files to your iPhone 7 and then click OK to complete the process.
Note: iOS Manager enables to automatically detect the duplicates and only transfer the exclusive contents from iTunes to iPhone 7.
Part 3:How to Transfer Music between iOS/Android Device and iPhone 7
Method 1: Transfer All The Music and Playlists
Step 1. Launch iOS Manager and connect your devices with the computer.
Launch iOS Manager and connect more than one iPhone/iPad/iPod/Android device with the computer, here we name the connected devices: A, B, C.

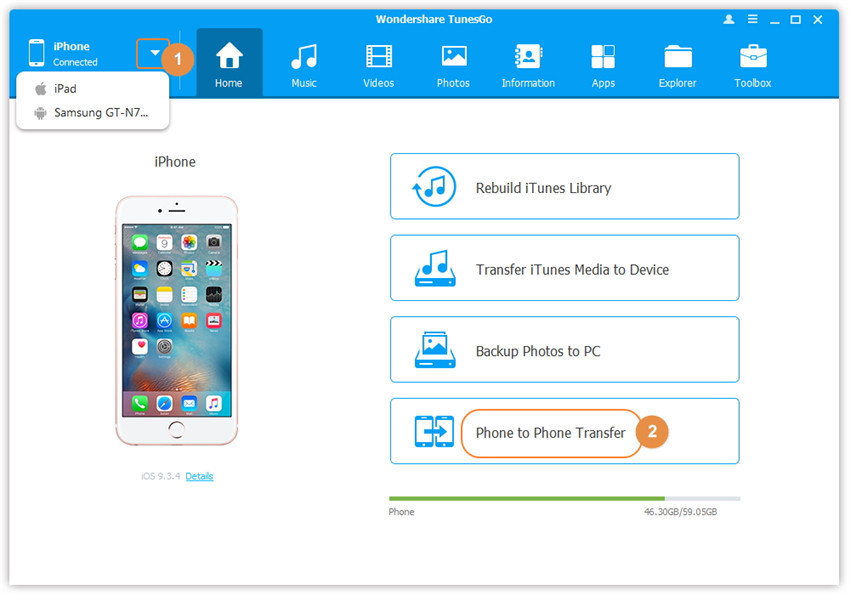
Step 2. Select the source device from which you want to transfer contents
Select the source device A, and click Phone to Phone Transfer option on the main interface. Then a new window will pop up.

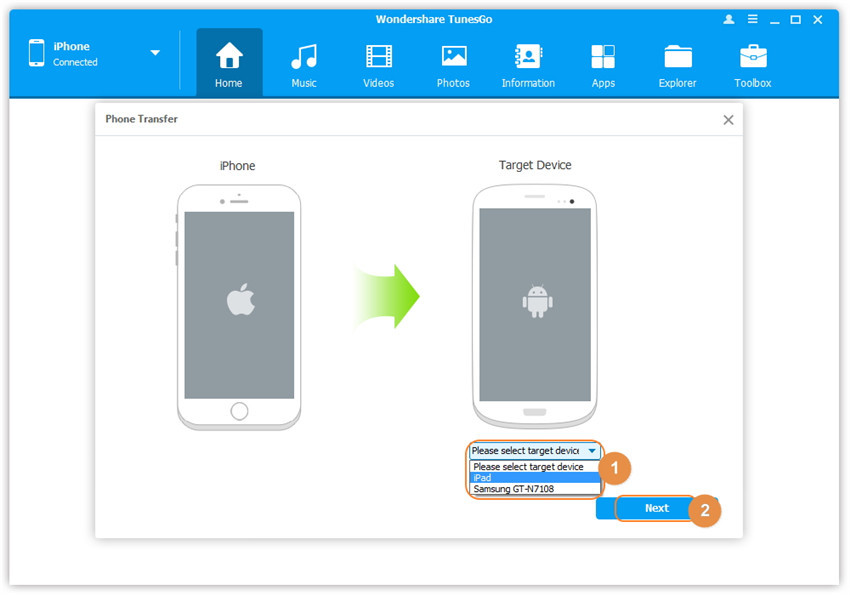
Step 3. Select the target device to which you want to transfer contents
From the pop-up window, select the target device B or C from the drop-down list and click Next.

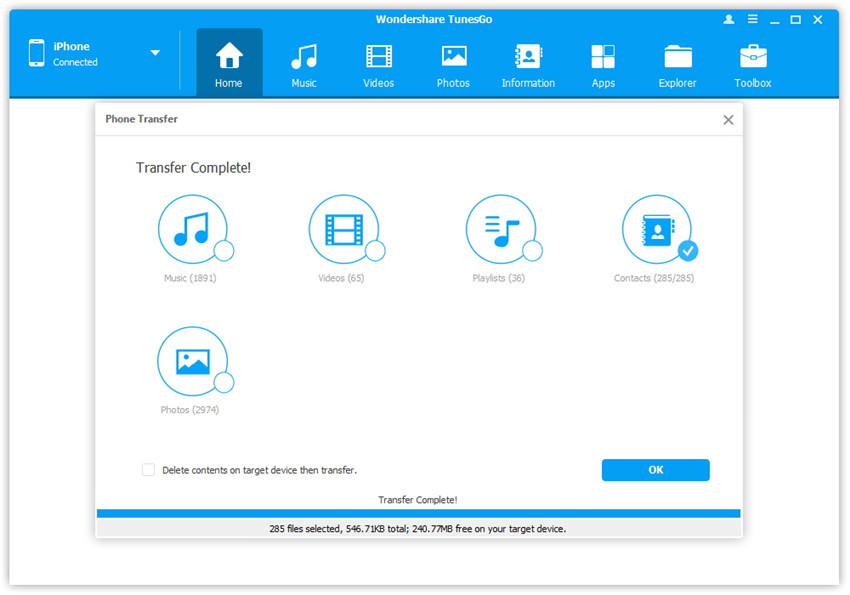
Step 4. Transfer contents from one device to another
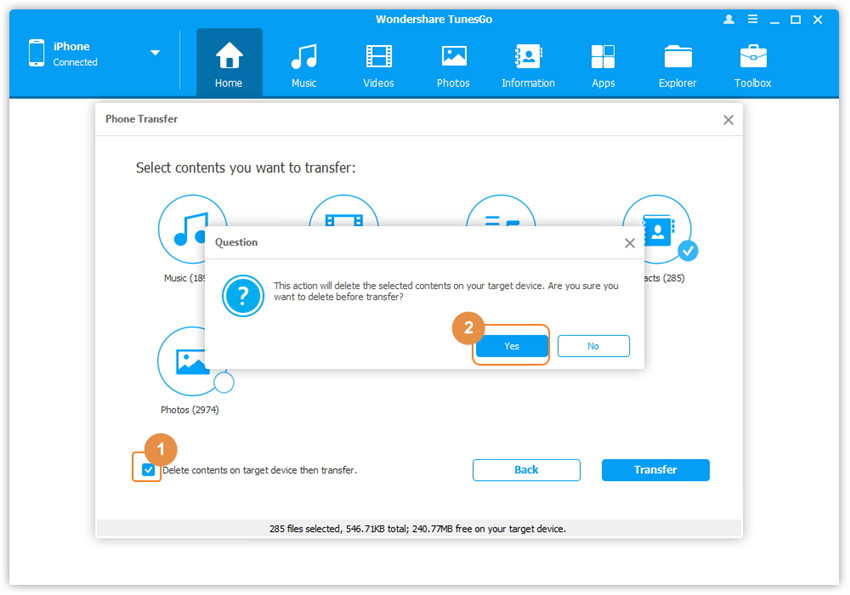
By default, all the content on your source device A that can be transferred are checked, namely Music and Videos, Playlists, Photos, Contacts( Note: Contacts are not supported by Mac version). You can uncheck the contents which you don’t want to transfer. Then, click Transfer. In the whole transfer process, DO NOT disconnect either of the devices. When the transfer completes, click OK.
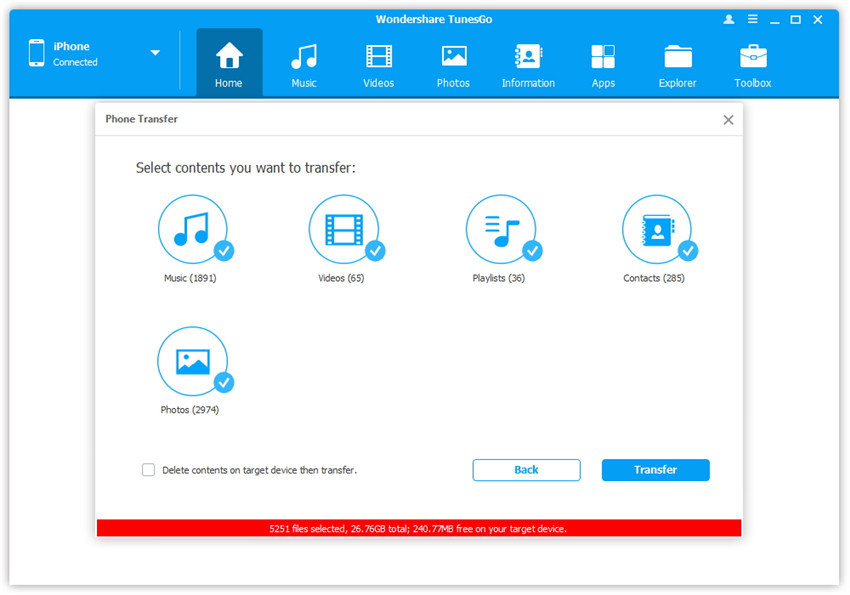
Note: Only for Windows version, you’re enabled to tick the option: “Delete contents on target device then transfer” before clicking Transfer button, then the selected contents on the target device will be deleted firstly before the transfer.
Method 2: Transfer Music Selectively
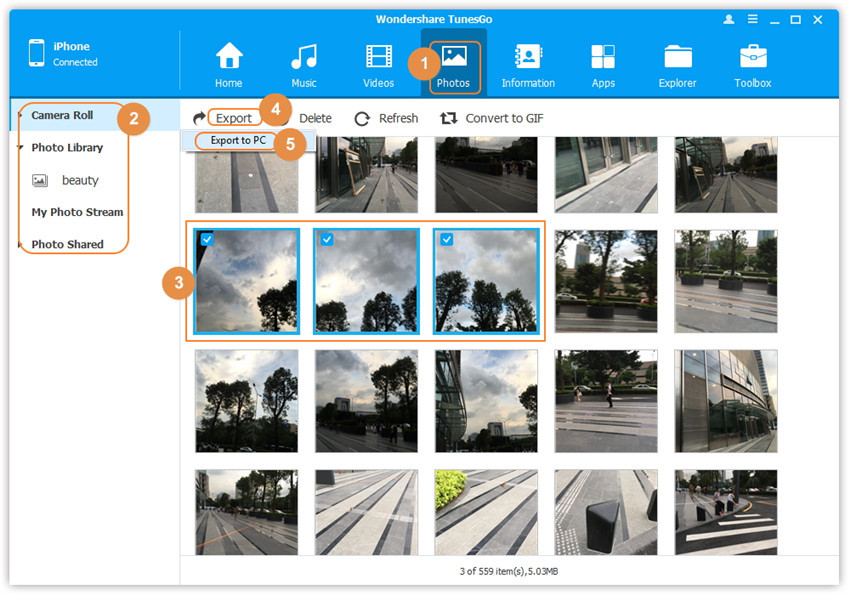
Step 1. Launch iOS Manager and connect your iPhone 7 with the computer.
Launch iOS Manager and connect more than one iPhone/iPad/iPod/Android device with your computer, here we name the devices: A, B, C.
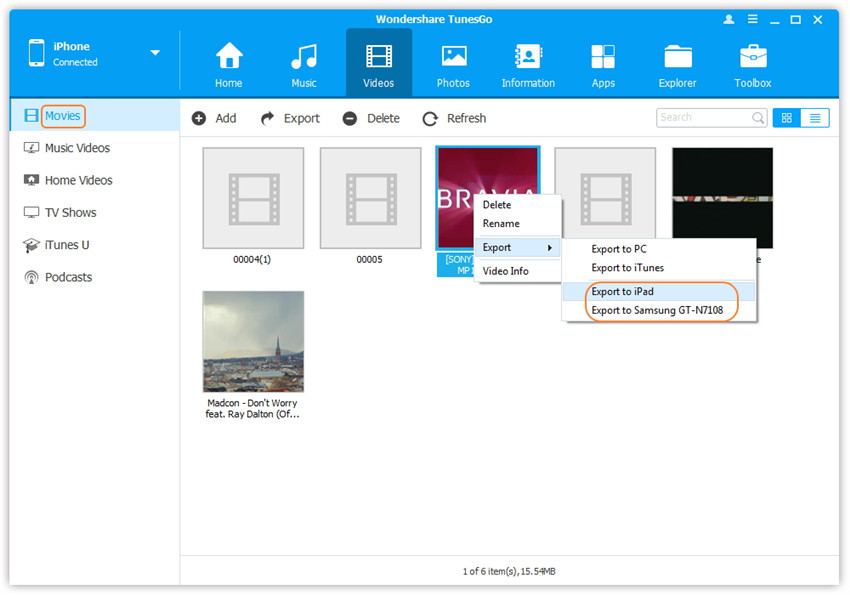
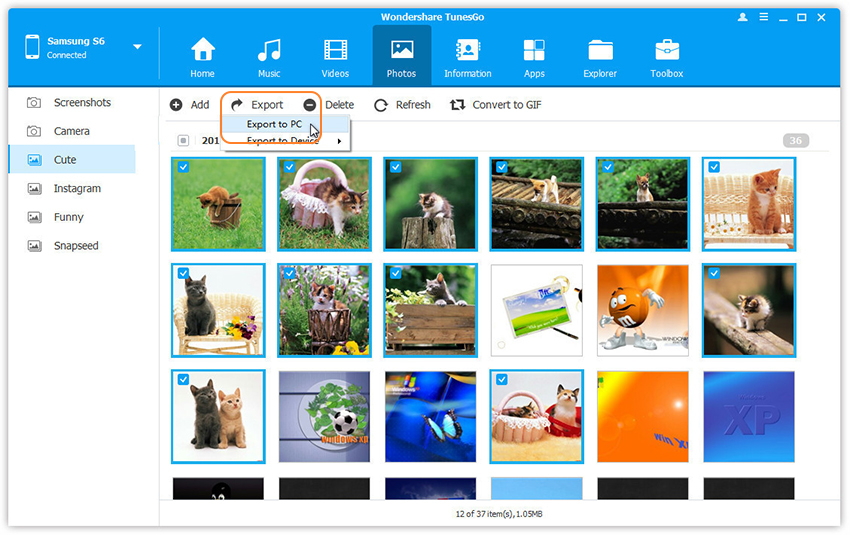
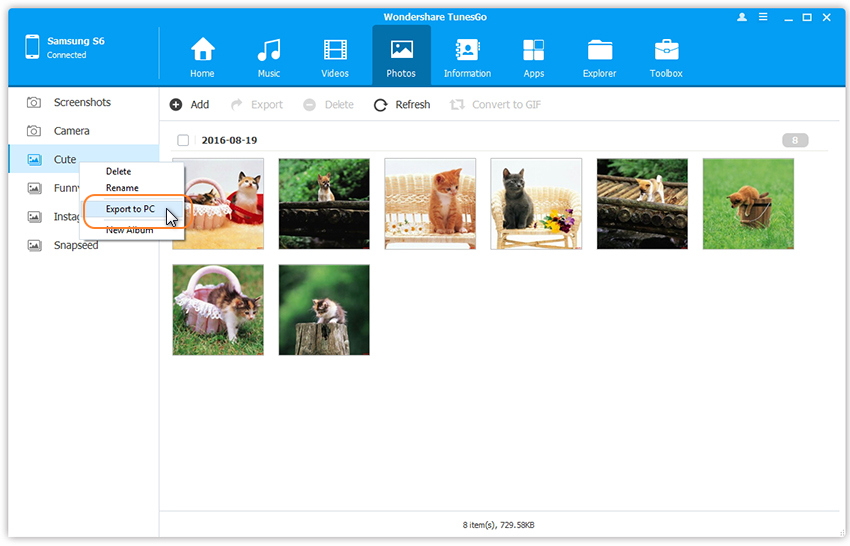
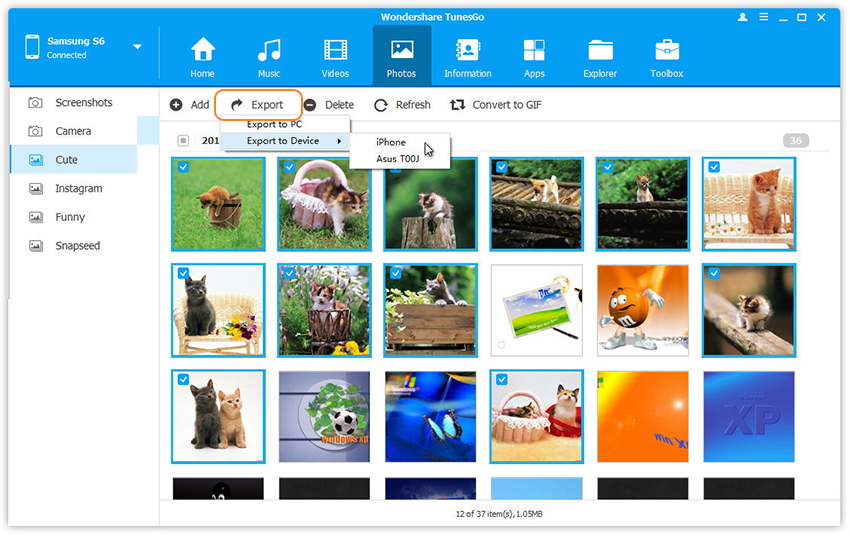
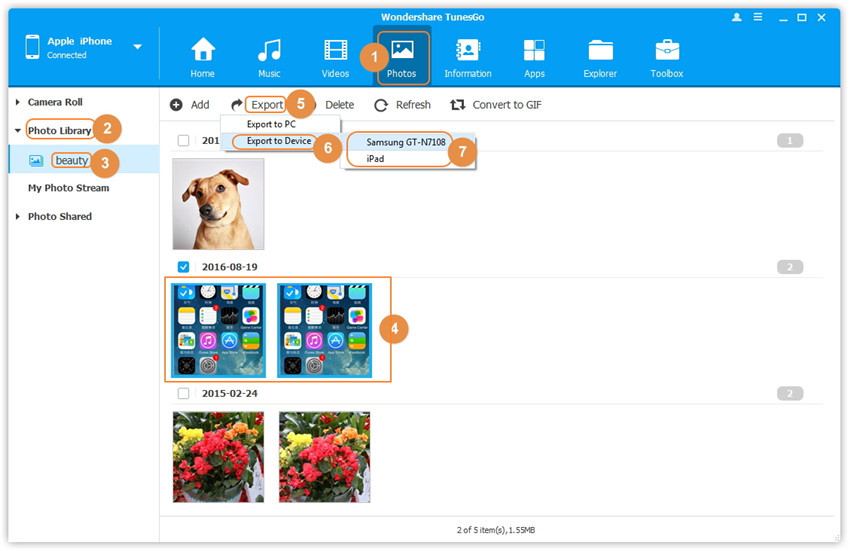
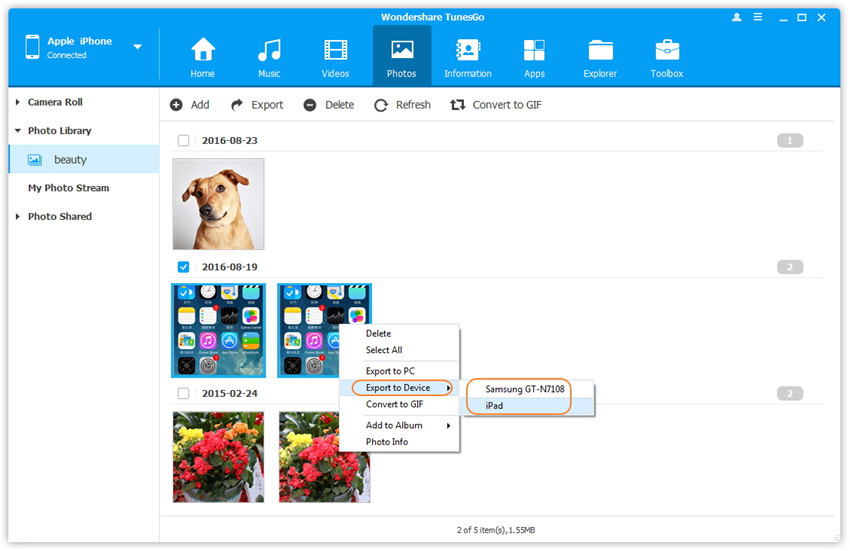
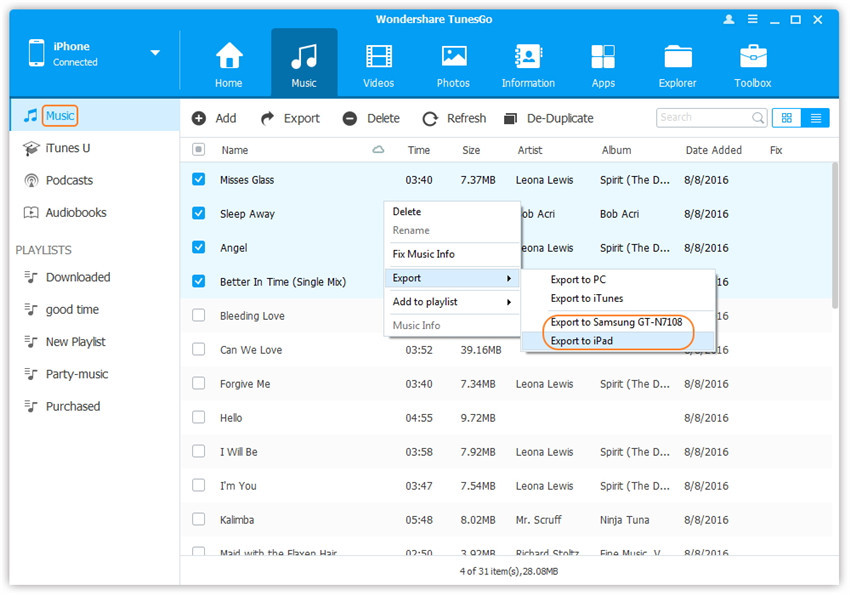
Step 2. Select and transfer music between devices.
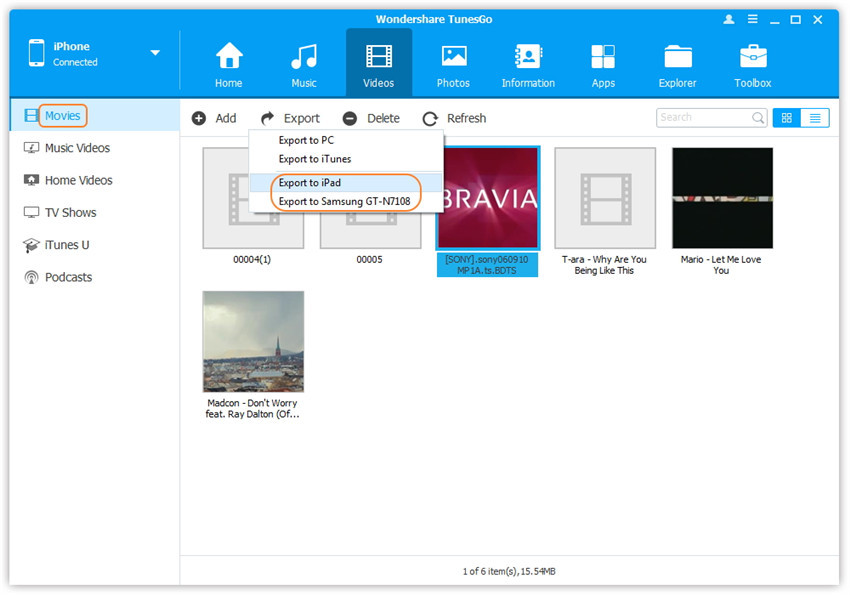
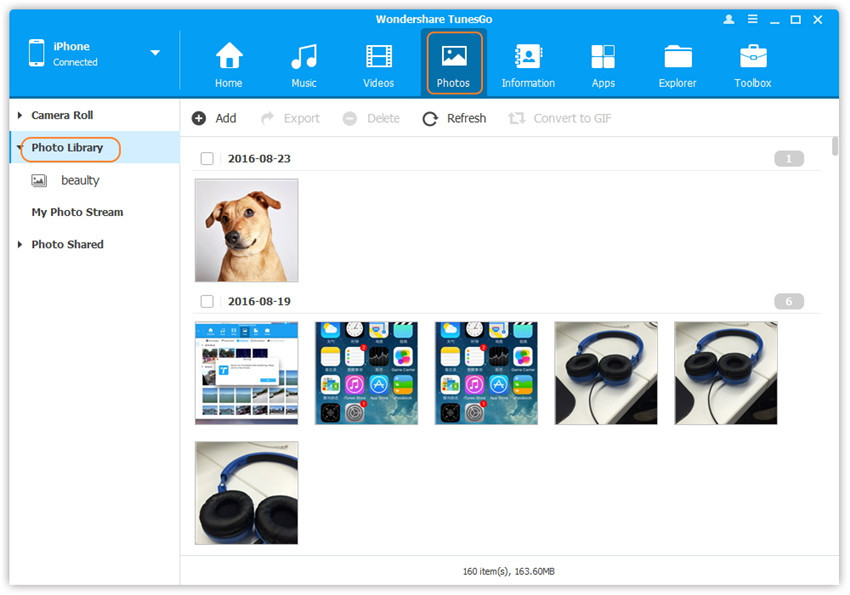
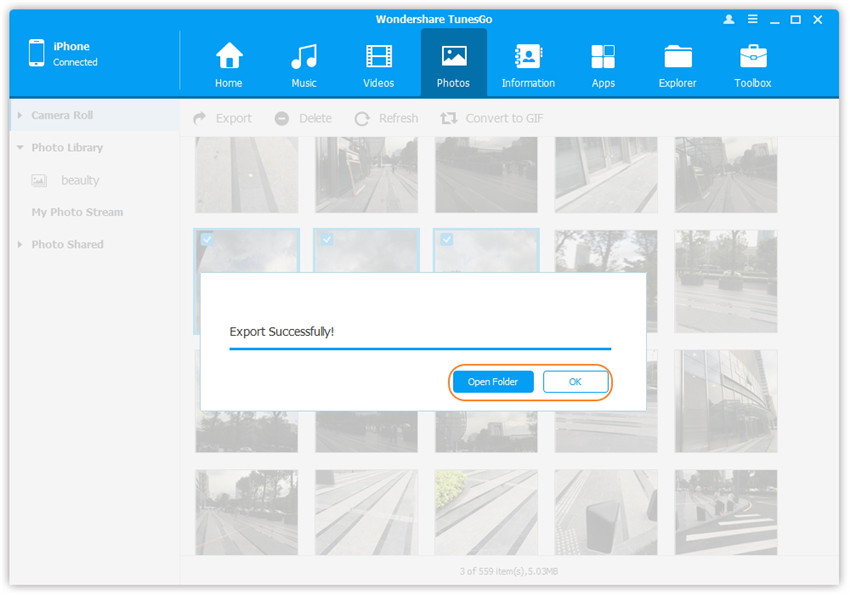
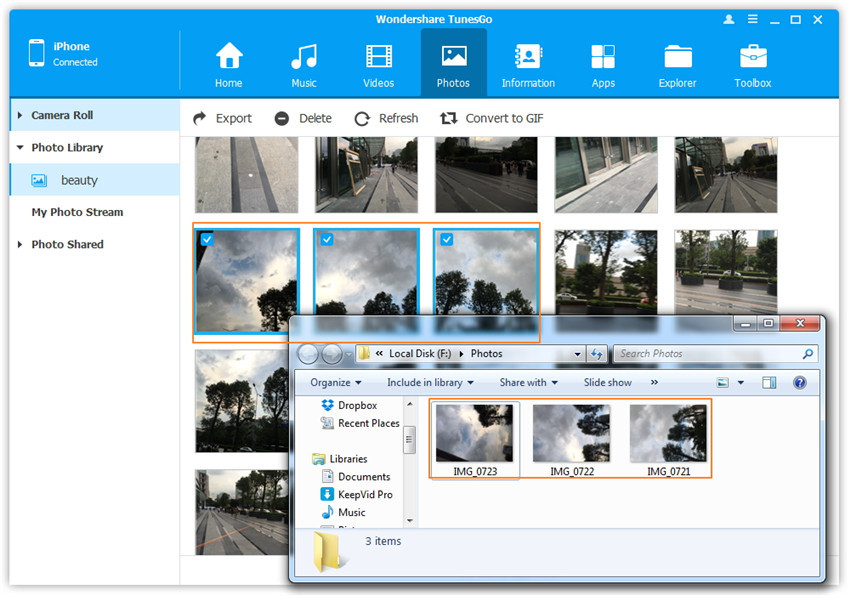
Select the device A from which you want to transfer music, and click Music icon at the top of the main interface, check the songs which you want to transfer from A to B or C, then click Export > Export to B or Export to C. As for the following screenshot, the music on the iPhone can be transferred to the Samsung phone or the iPad.
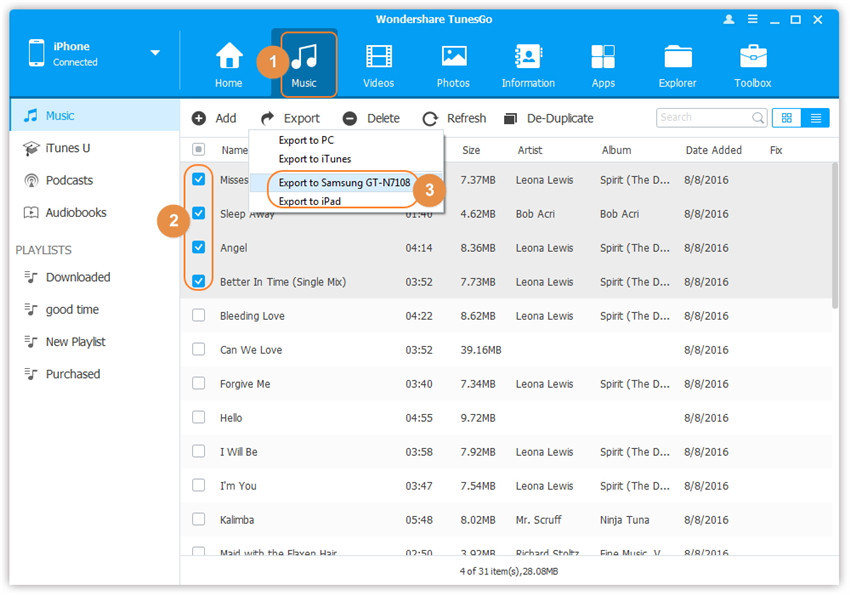
Note: Here you can right-click on the selected music and then select Export > Export to B or Export to C as well.
Part 4: Convert Apple Music M4P songs to DRM-free MP3 for Playing on iPhone for Free
Once you cancel the Apple Music subscription service, you can’t access it on your iOS devices. Even though you have downloaded the songs from Apple Music catalog,because of the DRM protected and with .m4p extension.However,how to remove Apple Music DRM for playing them on any music players like iPhone 7/6S/6/SE/5S/5, MP3 players, Car players, Android phone and more? The answer is yes,what you need to do is removing DRM from Apple Music songs and convert them to DRM-free file formats.
This Apple Music Converter for Mac and Windows,both is a professional Apple Music DRM removal and converter software,which could helps users remove DRM from Apple Music songs without downloading them. It also convert Apple Music M4p songs to MP3 for playing on iPhone,as well as more popular formats such as AC3, AIFF, FLAC, etc.When the conversion is done,you can remove the limitation and keep Apple Music as long as you like


Step 1.Download and Run Apple Music Converter on PC or Mac
When running the Apple Music Converter on the computer,the iTunes will be launched automatically.On the interface, you will see the entire iTunes library is loaded.
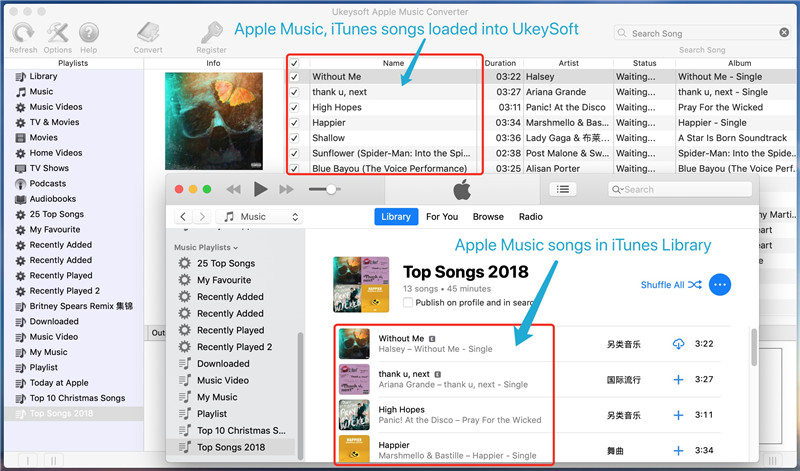
Note: You don’t need to download the Apple Music songs you want to remove DRM from. Just add them to your iTunes Library or Playlists and the program will detect them automatically and show them on the interface. iTunes will play the songs mutely in the background during the DRM removal process, so just make sure your internet connection is OK.
Step 2.Choose Apple Music You Want to Remove DRM and Convert from
When the iTunes library loaded on the program interface,you will find all Apple Music songs and playlists that you have added to iTunes,please select the Apple Music songs you want to remove DRM and convert as DRM-free MP3 files from. You can also quickly find the songs you want with the search feature.
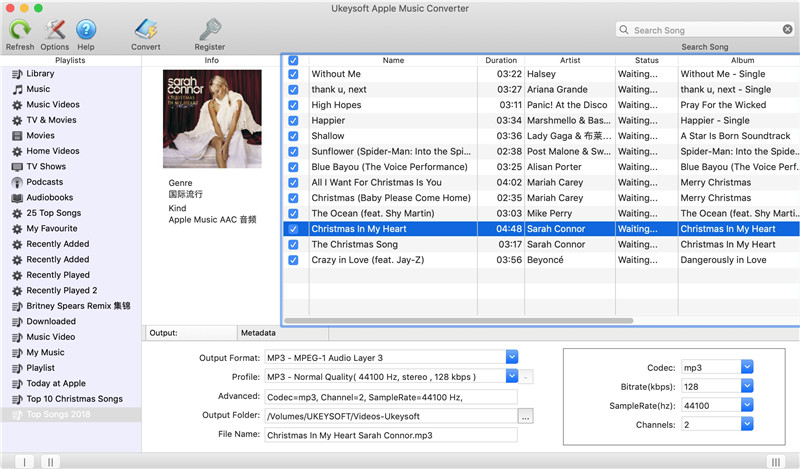
Step 3.Choose Output Format You Want to
In this step,please choose an output format “Output Settings” section,such as MP3, M4A, FLAC and AC3 before removing DRM from M4P files.Because of most music players (iPhone/iPod devices) support MP3 files,here we recommend you select MP3 as output format.

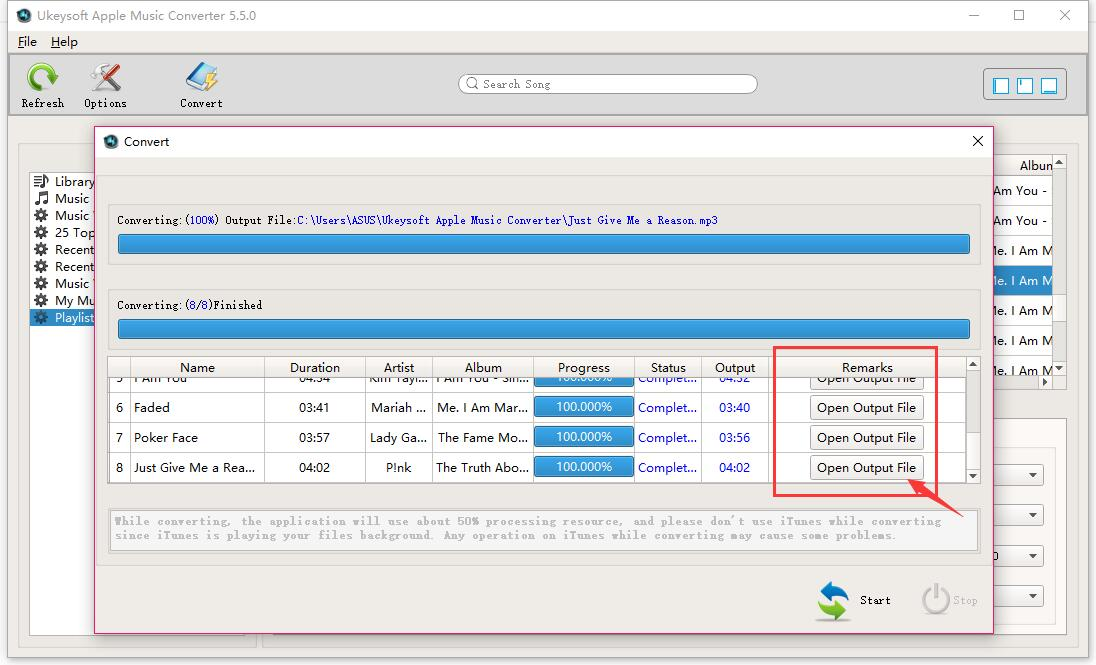
Step 4.Start Remove DRM from Apple Music and Convert M4P to MP3
Finally,please click start “Convert” button and you will get DRM-free Apple Music songs in MP3 format on the computer after the conversion. Now you can play them without iTunes on Mac or Windows computer.
Step 5.Import Converted Apple Music to iPhone 7
In order to playing the converted Apple music on our iPhone 7 for free forever,ever after the subscription service is canceled,you can transfer the converted Apple Music songs from computer to iPhone 7 for offline playback without DRM limitation.
Read More: How to Transfer Music from Computer to iPhone 7
Free download the Apple Music Converter and try to convert Apple Music songs to iPhone:
Related Article:
How to Transfer Music from Computer to iPhone 7/SE/6S/6
How to Sync Videos from Computer to iPhone 7/SE/6S/6
How to Transfer Music from Android to iPhone/iPad/iPod
How to Transfer Music from iTunes Library to iPod