Category Archives: iOS Solution

How to Fix the Issue of iTunes Can’t Read Data of iPhone

Summary:This tutorial talks about the two solutions of fixing the iTunes can’t read contents of iPhone issue,which is just right for who encounter the similar situation.

“Since updating my iPhone 6 to iOS 10,it was failed to read the data from my iPhone after connecting to iTunes.The connecting is well as usual,but the iTunes can’t sync any files with my phone.Am I the only experiencing this issue?What’s wrong with it?Any suggestions to solve this issue?”-Ariana

Why would iTunes can’t Read Contents of iPhone

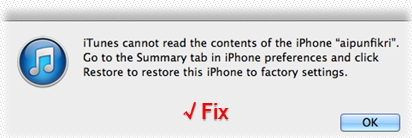
Sometimes iTunes might prompt you the message “iTunes cannot read the contents of the iPhone.”Why would this happen?The issue of iPhone cannot be synced to iTunes has happened among many iOS users. The most common reason is that you have played around with some CYDIA apps, most notably the apps which try to modify the contents of iTunes Database File and corrupts the iTunesDB and iTunesCDB files.To fix this problem, of course you can factory reset your iPhone,but once performing the factory reset on your device,you will lose all data and settings from it.

Further Reading:

Transfer iTunes Music and Keep Your Music from iTunes Library Forever

How to Play Apple Music on iPhone 7/6S/6 for Free

Part 1:Delete Corrupted Files to Fix iTunes Can’t Read Data of iPhone Issue

As you’ve already acknowledged that iTunes cannot read the contents of your iPhone or iPad/iPod because the iTunesDB and iTunesCDB files are corrupted, you can fix this issue by simply delete the corrupted files.

Note: Besides iPhone, the following solutions apply to iPad and iPod as well.
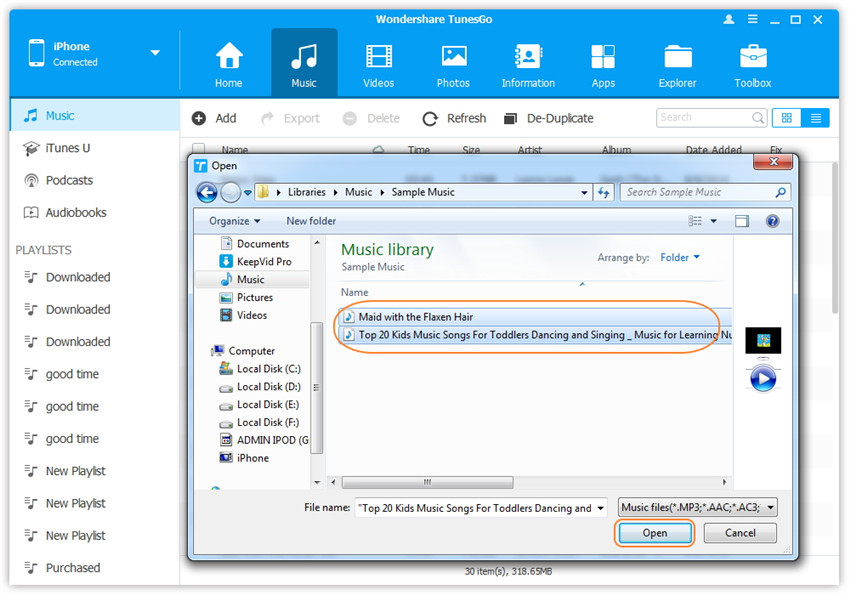
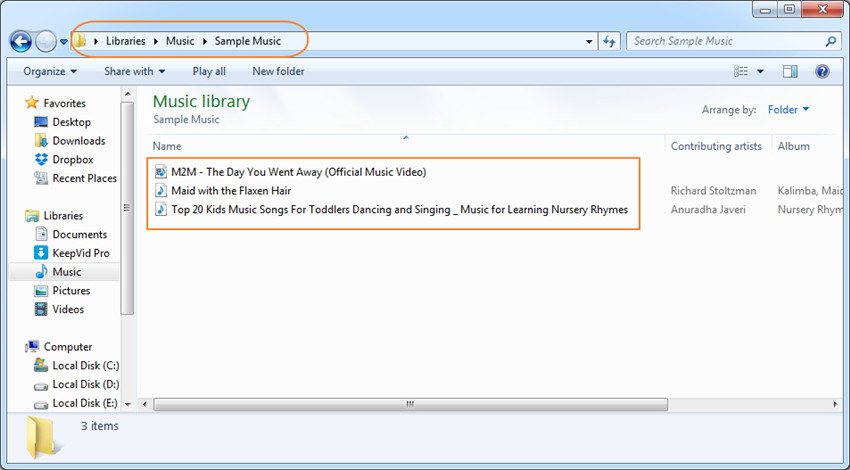
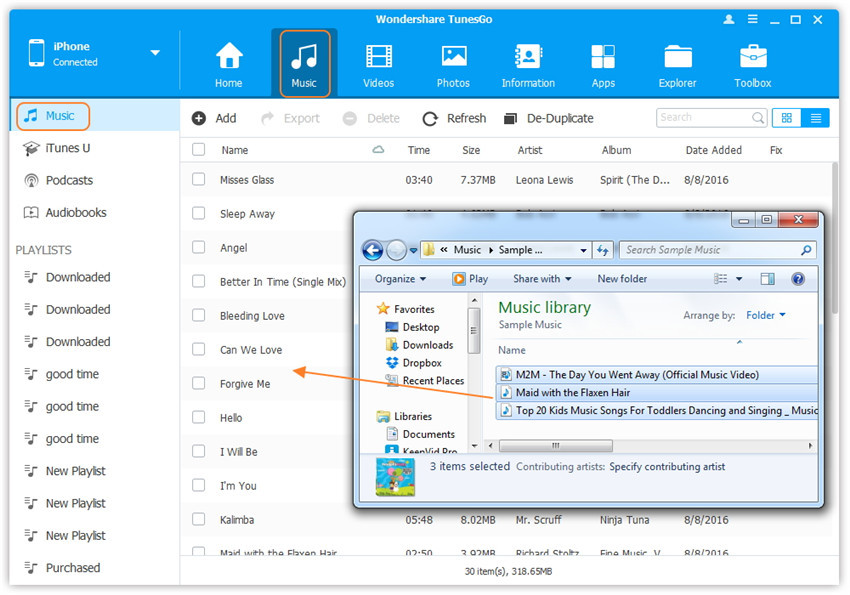
1)View the files on your iPhone using WinSCP (on Windows) or Cyberduck (on Mac).

Note: WinSCP and Cyberduck are open-source programs which are partly used to transfer data via SSH. Or, put it more straight forward, they allow users direct access to an iPhone system and files.To install WinSCP and Cyberduck,you are required to jailbreak iPhone first.

2) Navigate to /private/var/mobile/Media/iTunes_Control/iTunes/ and delete the file iTunesDB.

When all the steps above is done, iTunes won’t give you the error message any longer.BUT, the music, ringtones, podcasts of your device will still be taking up space on your iPhone but your iPhone won’t try to read them and iTunes won’t detect them. The solution is the next step.

cyberduck

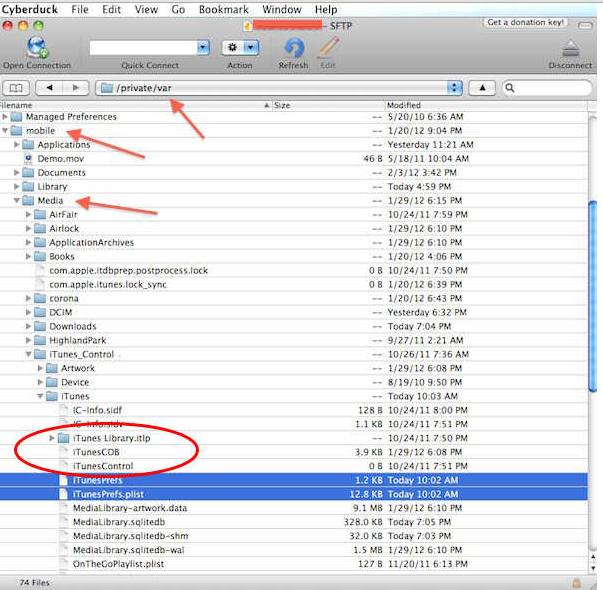
3)In WinSCP (or Cyberduck) navigate to /private/var/mobile/Media/iTunes_Control/Music and delete all of the folders in the Music directory.

4)Go back one level to /private/var/mobile/Media and go to the Ringtones directory and delete them too.

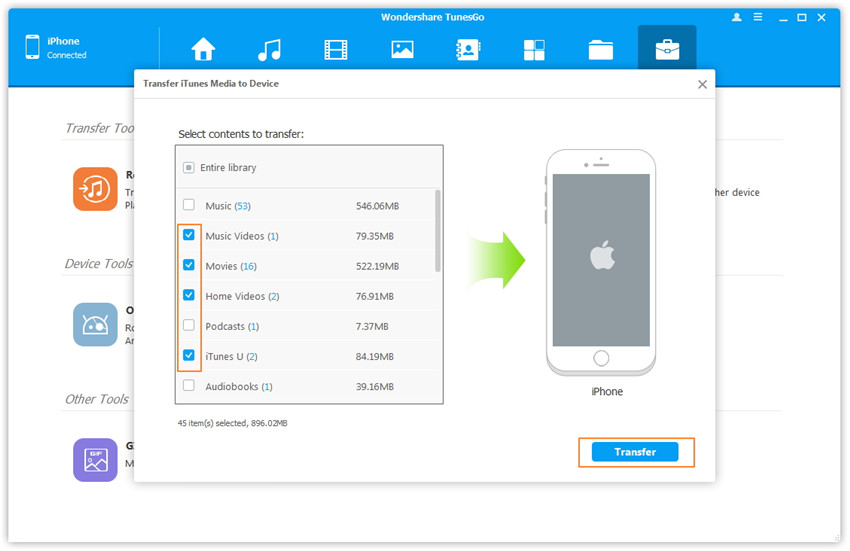
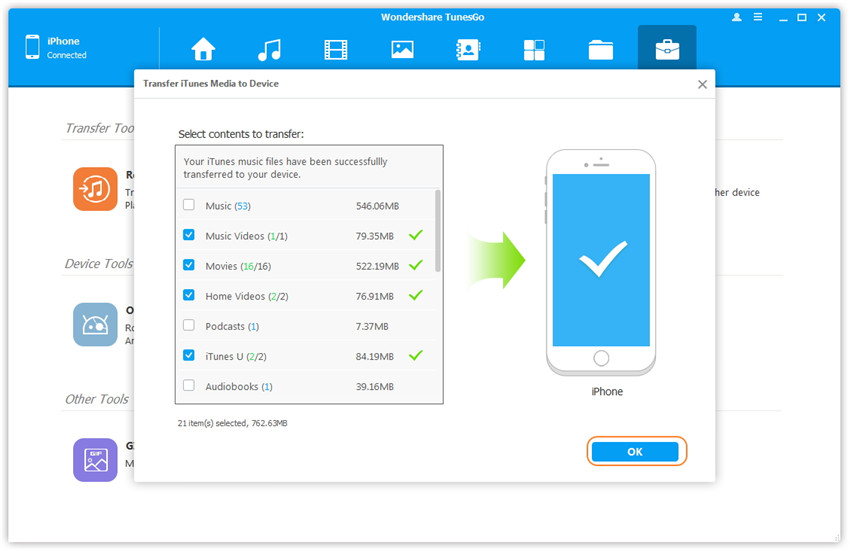
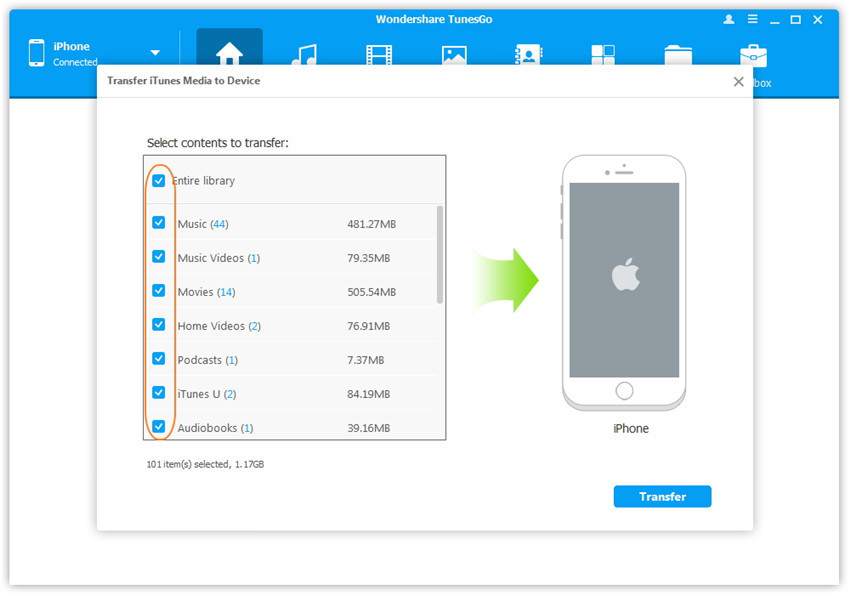
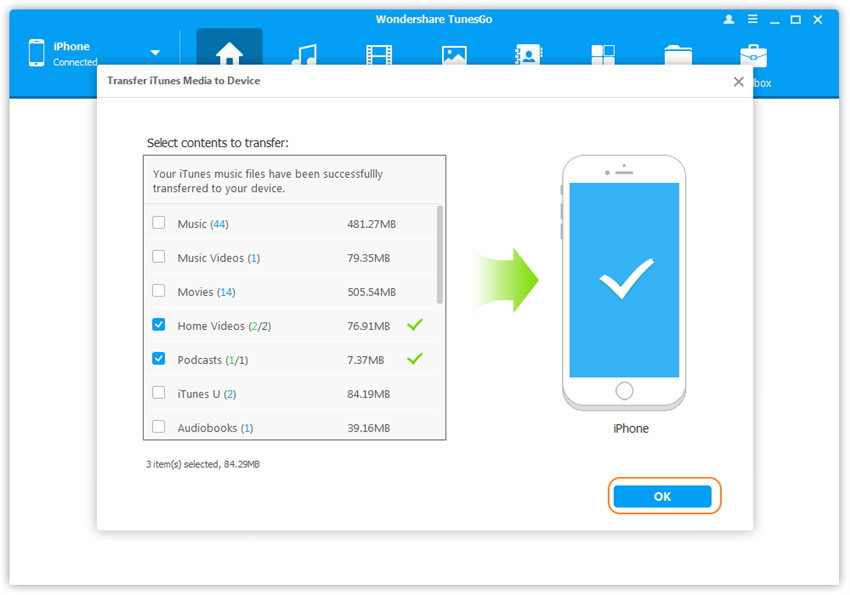
5)Finally, you can close iTunes and run it again, and allow your iPhone to sync again. It should transfer all your music, podcasts, and videos to your phone.

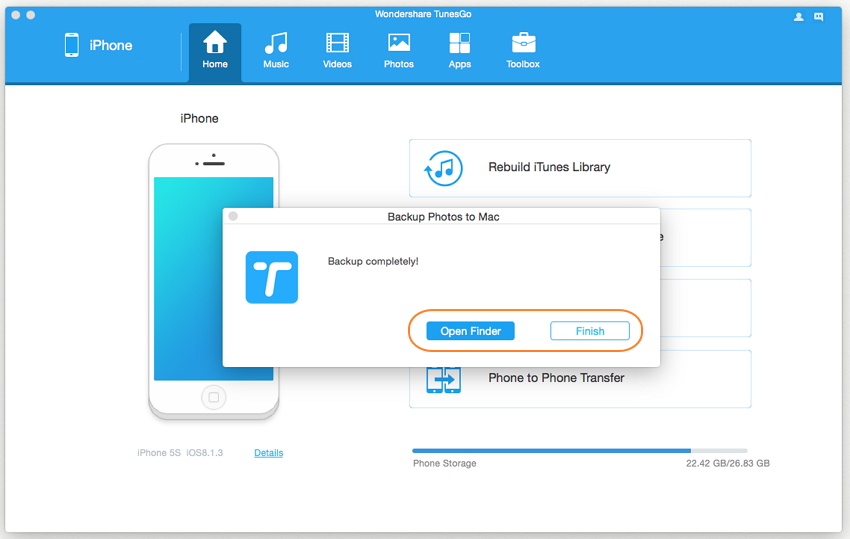
If these steps above is too complicated for you, and you don’t know how to properly use WinSCP and Cyberduck, you can just use iOS Data Recovery to view all the data on iPhone with iOS 10/9/8. Just like iTunes, the iOS Data Recovery will help you to backup and restore iTunes backup.In addition,it does more than iTunes as it help you to transfer data between iOS devices/iTunes/computer.

Extra tips:How to Backup and Restore iPhone Data via iOS Data Recovery

iPhone data backup and restore

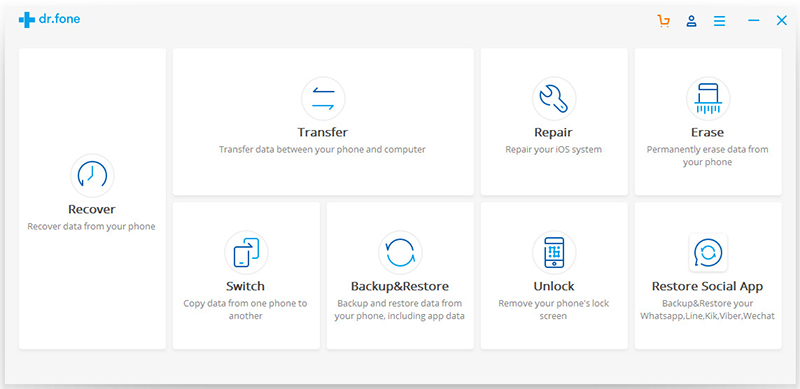
Part 2:Fix iTunes Can’t Read Data of iPhone Issue via iOS Manager

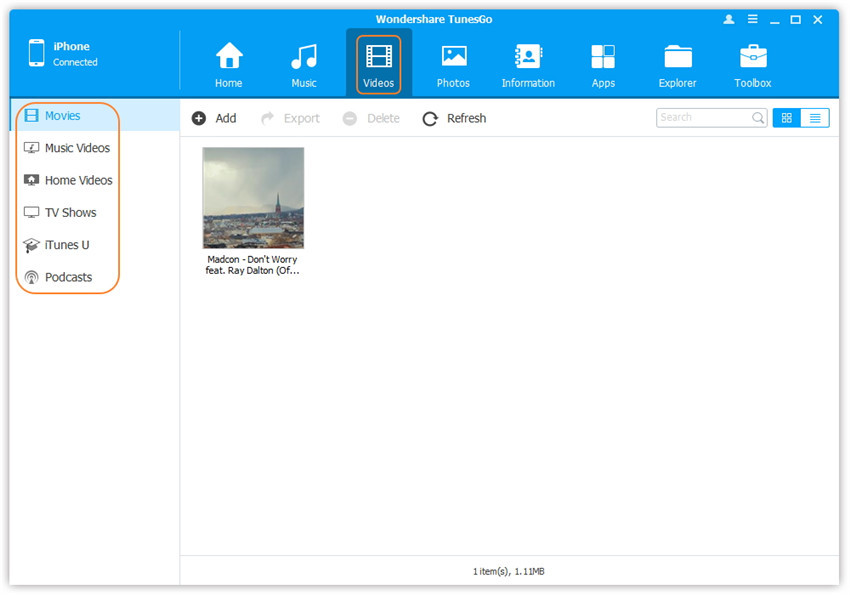
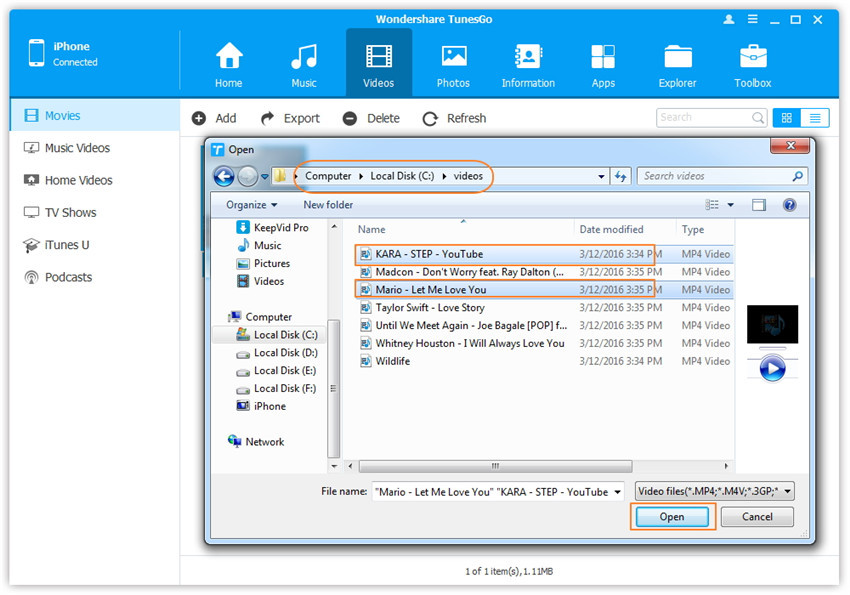
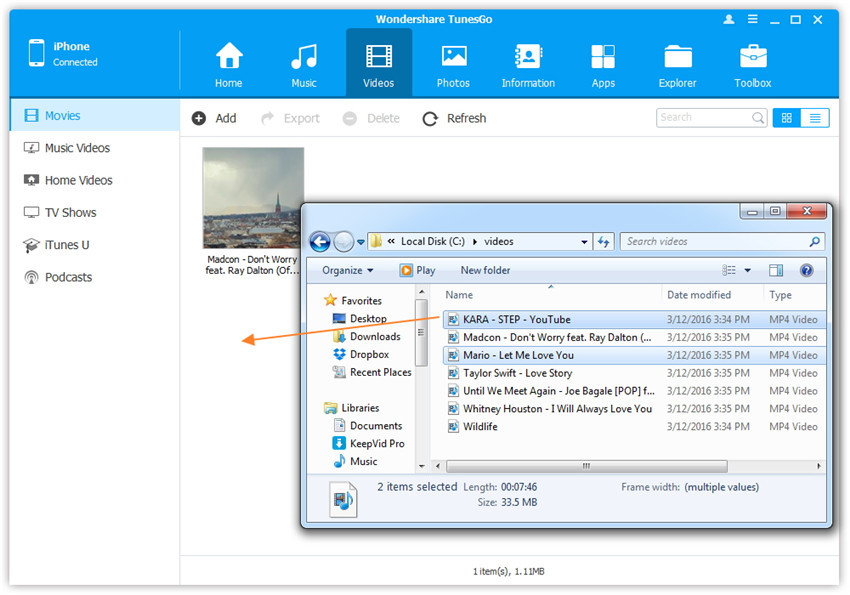
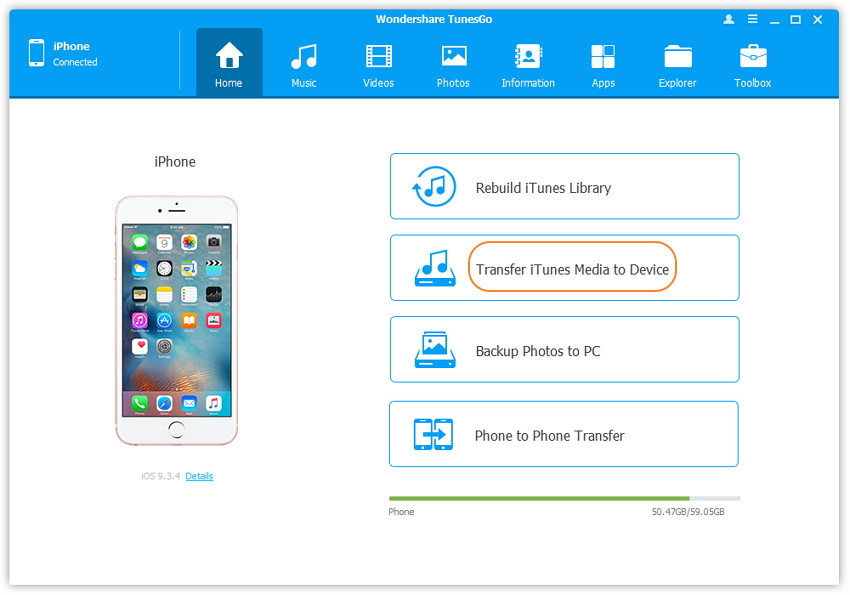
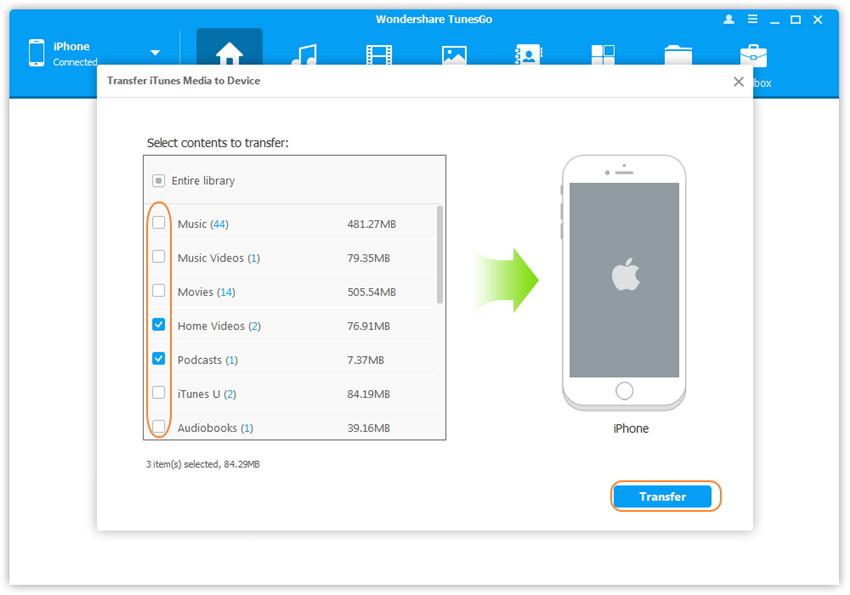
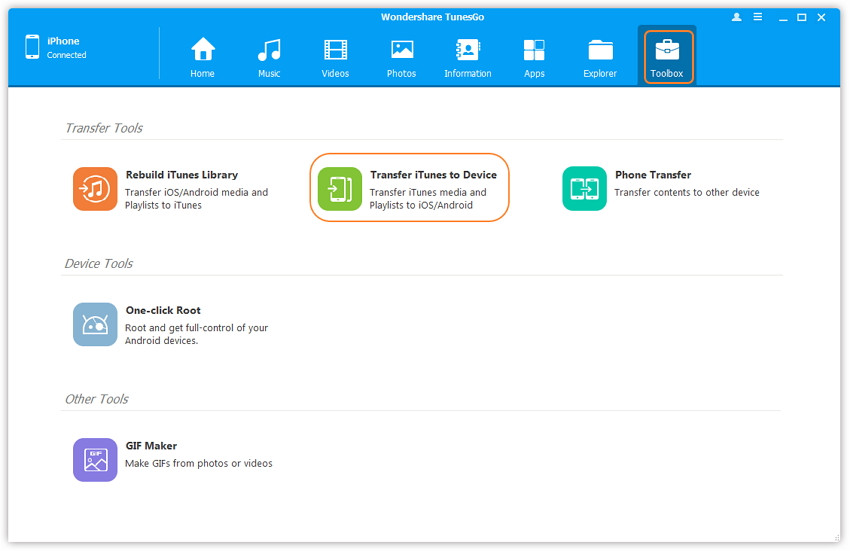
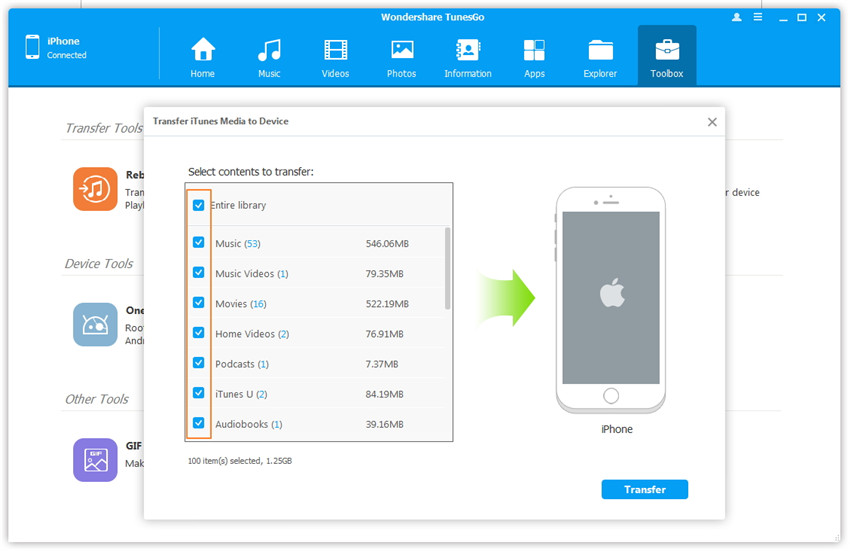
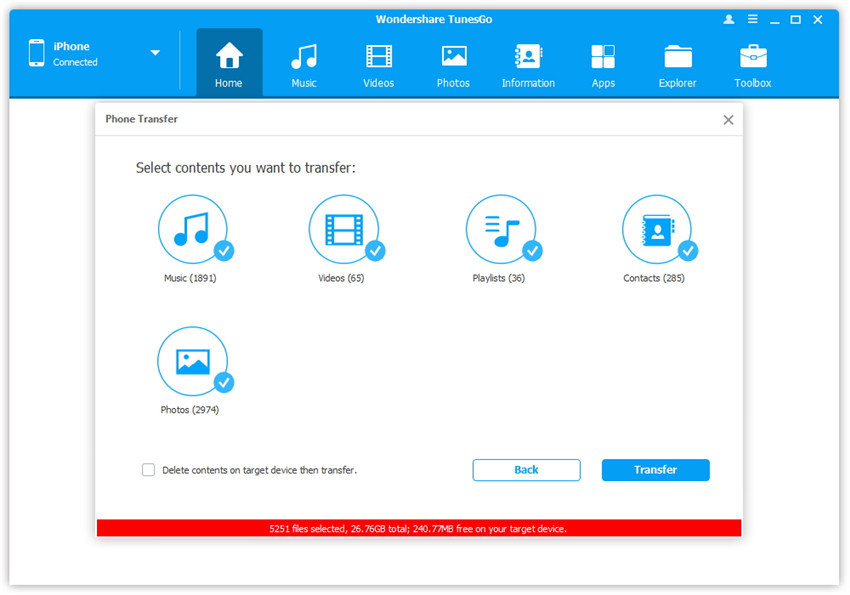
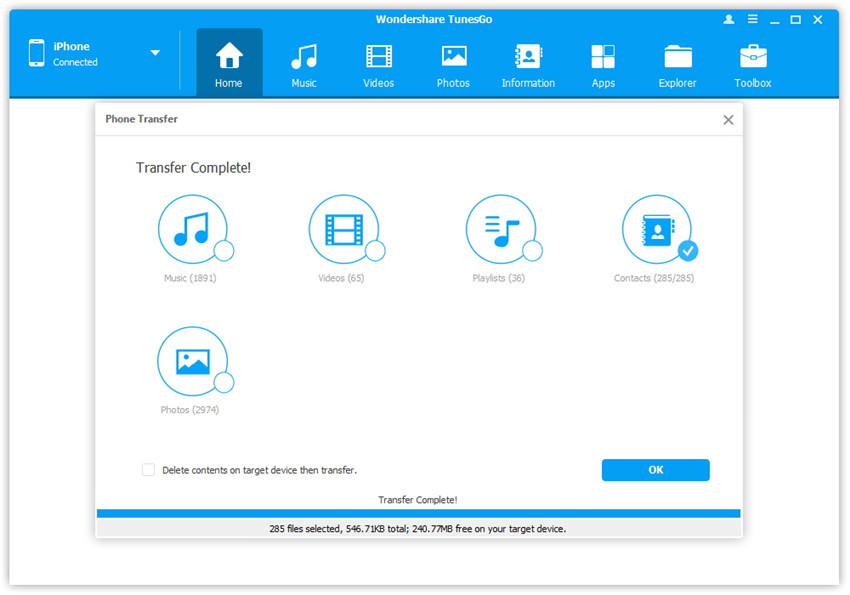
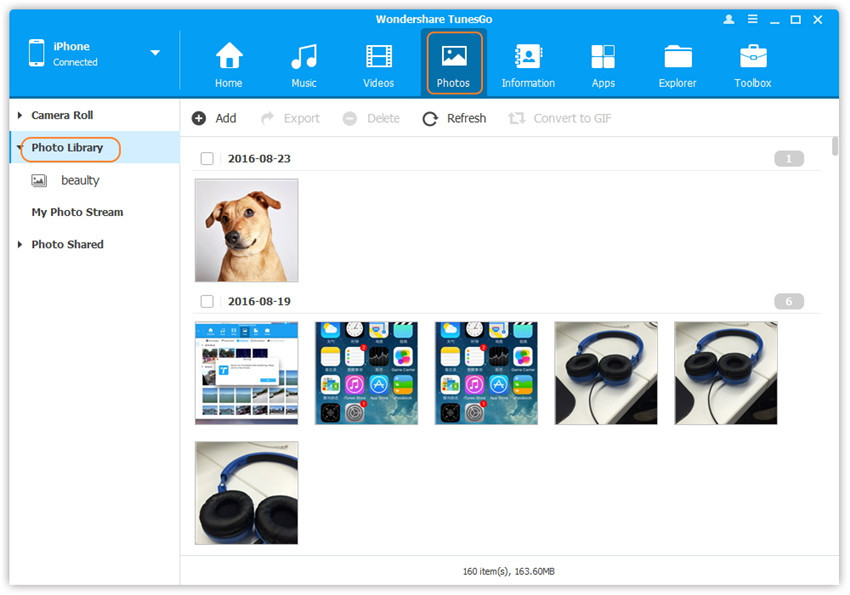
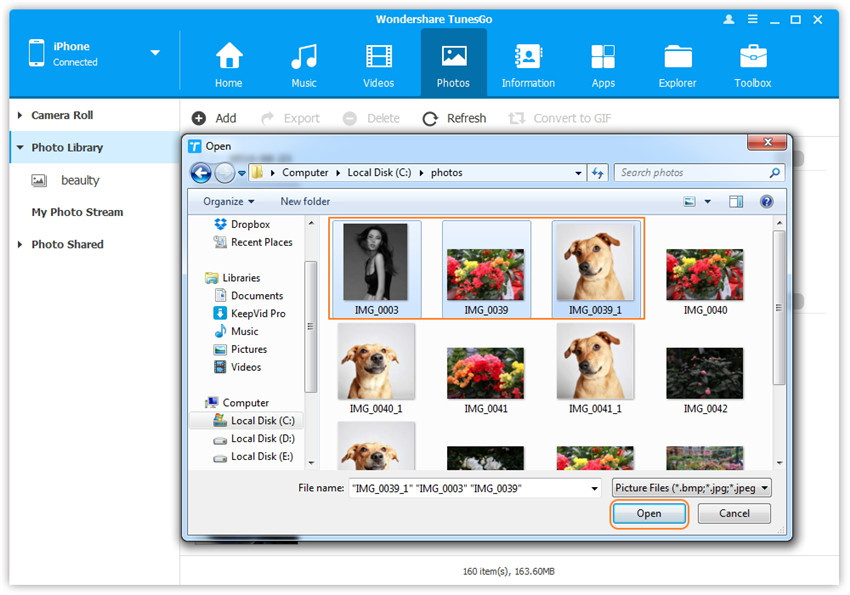
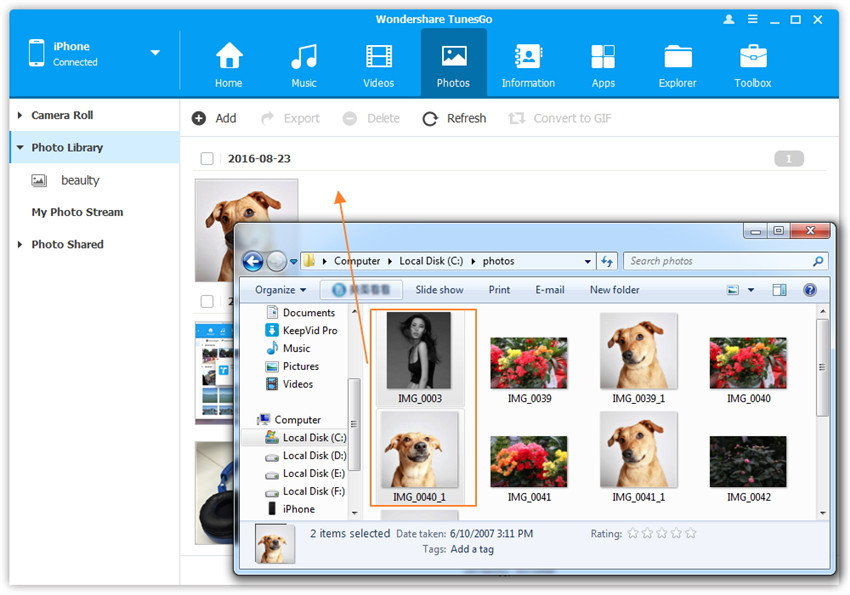
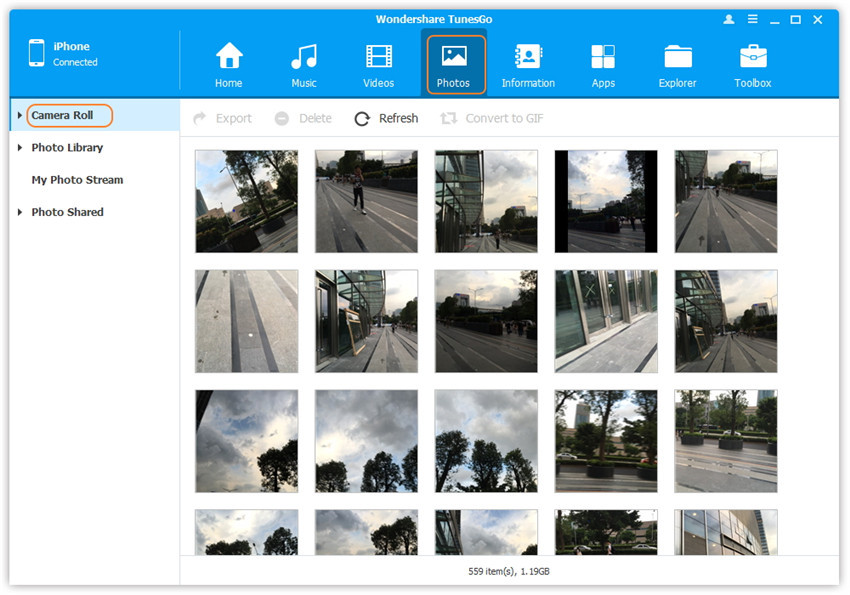
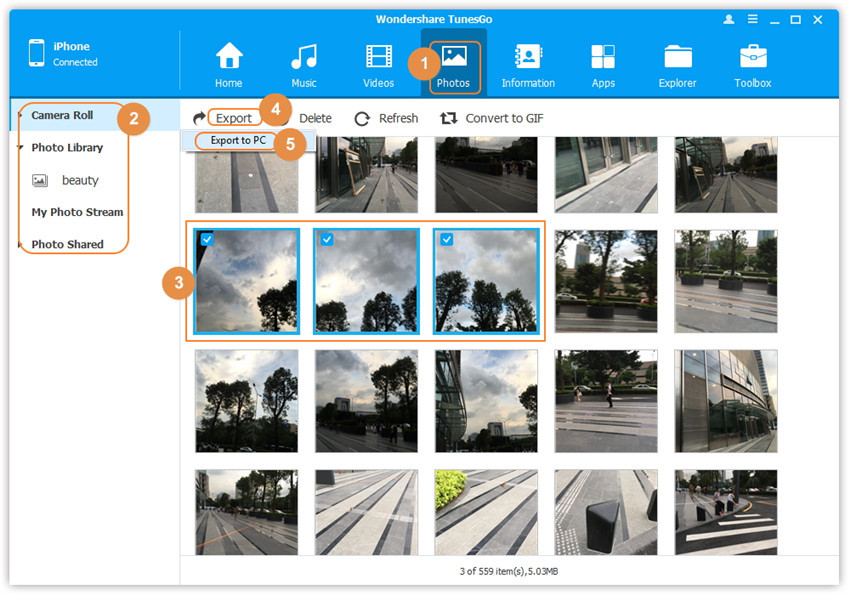
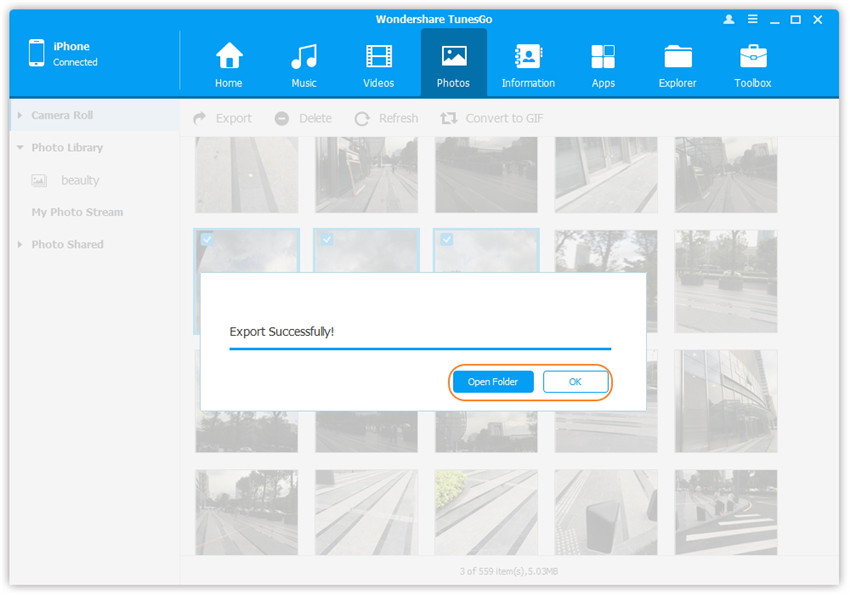
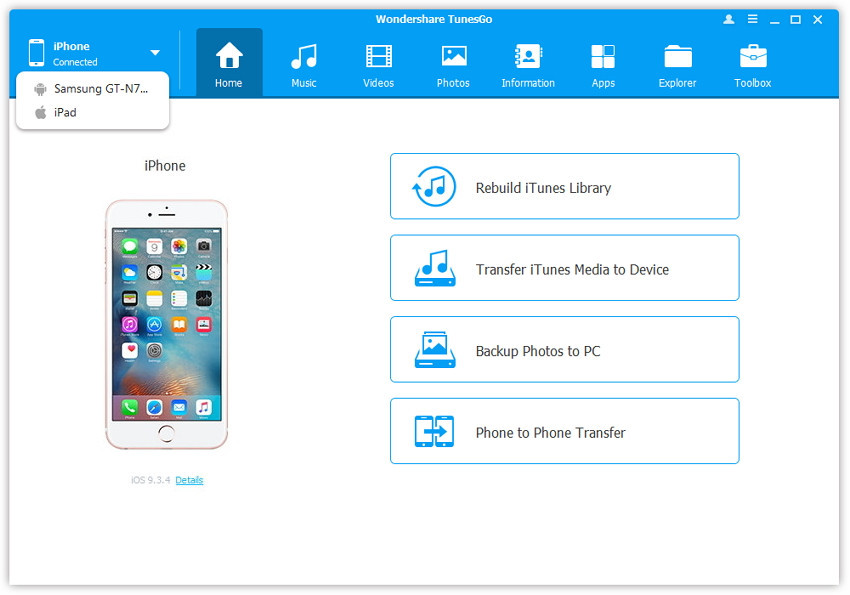
iOS Manager is a wonderful data manager that provide the best solution for you to solve the dreaded problem that iTunes cannot read the contents of iPhone.iOS Manager enables you to examine and fix damaged iOS devices which can’t be read by iTunes and return it to normal.Moreover,iOS Manager support to transfer & manage music,videos,photos on iPhone/iPad/iPod,transfer media files between iOS device and computer,transfer media files between iOS device and iTunes,transfer music,videos,photos between iOS device and Android device.

d_win d_mac

Extra tips:How to Transfer Video between iPhone and Computer
How to Transfer Music between iPhone and Computer

There are 3 damaged situations included when you connect your iPhone with computer:

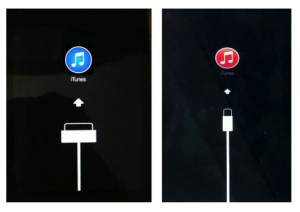
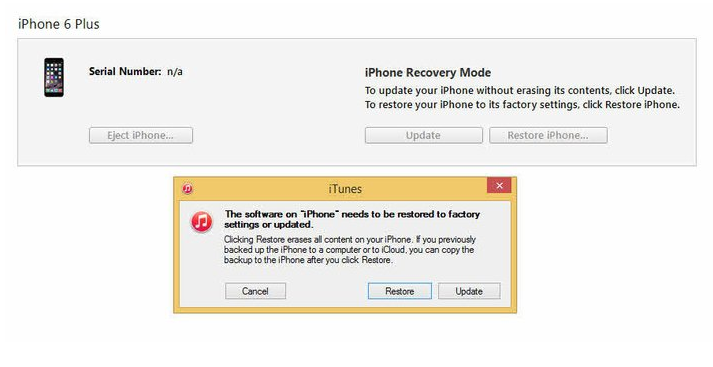
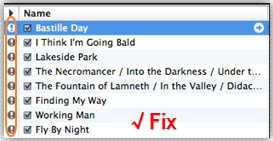
Situation 1: iTunes can’t read the contents of your iPhone. If you follow the prompt by iTunes as below to restore your device, you will have the risk to lose the original contents on your device.With iOS Manager, you can fix the problem with just one click without losing any data on your device.

iTunes can't read the contents of iphone

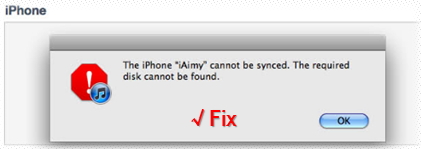
Situation 2: Your iPhone can’t be synced to iTunes.

iphone can't be synced to iTunes

Situation 3: The database on your iPhone has been damaged as below.

the database on iPhone has been damaged

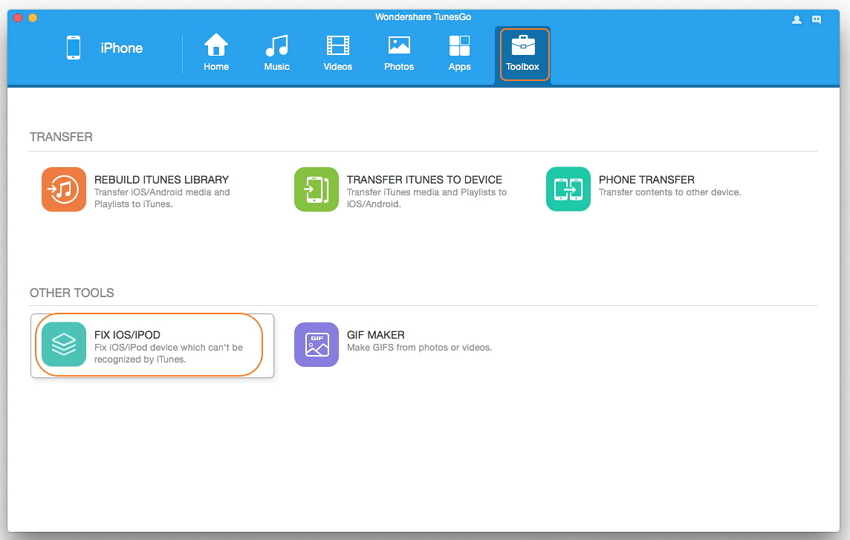
How to Fix Your iOS Device/iPod

Step 1. Launch iOS Manager and connect your iPhone/iPad/iPod with your computer. Then go to Toolbox > FIX IOS/IPOD.

FIX IOS IPOD option

Step 2. A window will pop up, click Start Repair to examine your device. There will be two situations:
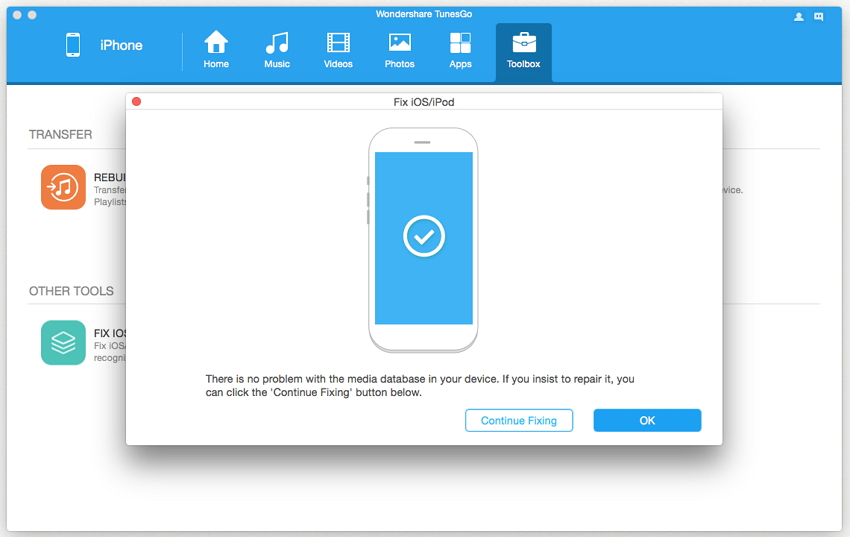
Situation 1: The media database on your device is normal.
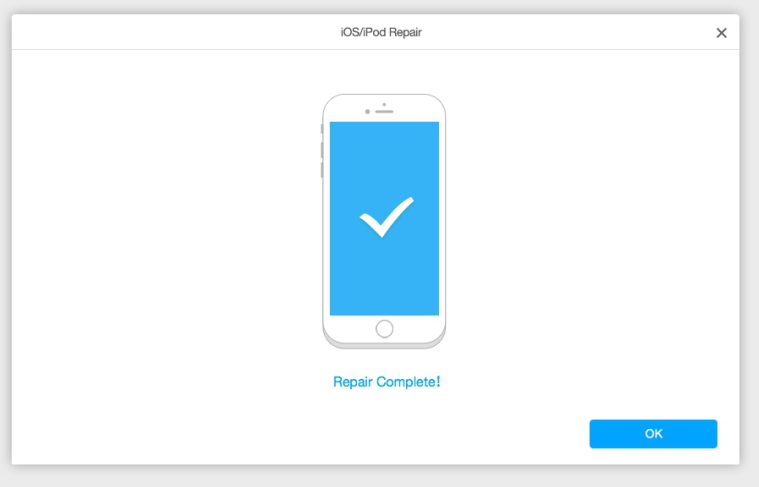
A pop-up window shows below and click OK to complete the process.

media database on device is normal

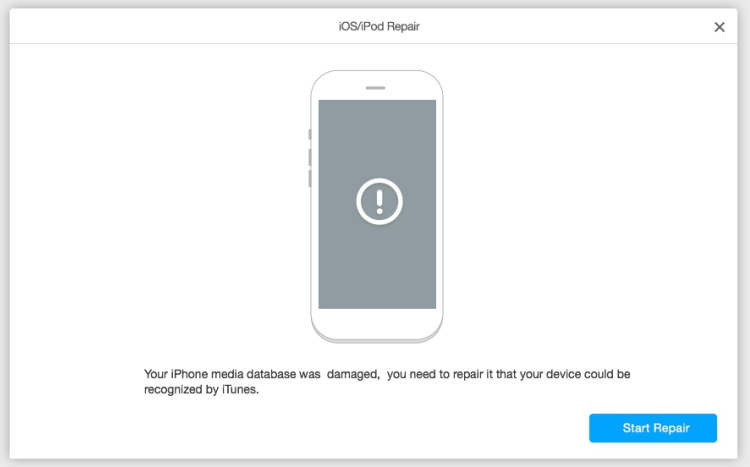
Situation 2: The media database on your device is damaged.
A pop-up window shows below and click Start Repair to start fixing the database and click OK to complete the process.

media database on device is damaged

repair iphone to normal

Done.Once completed following all the steps above,you can try to sync your device to iTunes again,then you will find that your iPhone data can be read by iTunes as usual.

d_win d_mac

Read more:

How to Restore iPhone System to Normal after iOS 10 Update

How to Fix iPhone Freezes during/after iOS 10 Update

How to Fix iPhone Stuck on Red iTunes Logo After iOS 10 Update

How to Restore iPhone in Recovery Mode with/without iTunes

How to Fix iOS 10 iPhone Running Slow Issue

How to Jailbreak iOS 10 on iPhone without Losing Data

How to Downgrade iPhone/iPad from iOS 10 to iOS 9.3.5

How to Transfer Media Files from Samsung to iPhone 7

“Hi.My Pinky.I bought the new iPhone 7 for a week.I try to sync the songs and videos on my computer then transferred to the new device.However,I got message prompted me that the files are not applicable for iPhone 7.Any fast ways to fix it?”-Pinky

Further Reading:

How to Convert Apple Music Files to DRM-free MP3

Transfer Music and Playlists from iTunes to Samsung Galaxy S8

iPhone 7 just announced for 2 months,which with the high quality play function.iPhone can be used as an external hard drive to play media files on it instead of the media players.Whether you try to sync music,videos or photos to iPhone from another mobile device,please make sure the file formats are supported by iPhone first.Otherwise, you have to convert them to iPhone with the suitable format before.If you’re not sure about if the media files with right format or not, or want an easy way to transfer media files to iPhone more convenient,you can follow the method below.

I suggest you try iOS Manager,which is a superior media files transfer tool to transfer & manage media files for iPhone 7/6S/6/5S/5,iPad and iPod.With iOS Manager,you are allow to freely transfer videos/music/photos between Android device and iPhone/iPad/iPod with the compatible format,it help to convert and transfer the media files with right format for iPhone.Moreover,iOS Manager support to transfer media files between computer and iPhone,transfer media files between iTunes and iPhone as well.

d_win d_mac

How to Sync Media Files from Samsung to iPhone 7

Step 1. Launch iOS Manager and connect your devices with the computer.
Launch iOS Manager and connect more than one iPhone/iPad/iPod/Android device with the computer, here we name the connected devices: A, B, C.

ios manager main page

Step 2. Select the source device from which you want to transfer contents
Select the source device A, and click Phone to Phone Transfer option on the main interface. Then a new window will pop up.

Step 3. Select the target device to which you want to transfer contents
From the pop-up window, select the target device B or C from the drop-down list and click Next.

select target device

Step 4. Transfer media files from one device to another
By default, all the content on your source device A that can be transferred are checked, namely Music and Videos, Playlists, Photos, Contacts( Note: Contacts are not supported by Mac version). You can uncheck the contents which you don’t want to transfer. Then, click Transfer. In the whole transfer process, DO NOT disconnect either of the devices. When the transfer completes, click OK.

select media file to transfer

1 click phone to phone transfer

Note: Only for Windows version, you’re enabled to tick the option: “Delete contents on target device then transfer” before clicking Transfer button, then the selected contents on the target device will be deleted before the transfer.

confirm to delete data on target device

d_win d_mac
Related Article:

How to Transfer Music from iPhone to iPhone 7

How to Transfer Videos to iPhone 7

How to Transfer Music to iPhone 7

How to Transfer Photos to iPhone 7

How to Sync Videos from Computer to iPhone 7

How to Transfer Music from Computer to iPhone 7

How to Transfer Music from iPhone to iPhone 7

“I got a new iPhone 7 lately,I just plan to sell my old iPhone 6 which used for 2 years,however,I need to transfer the favorite songs to my new device.I know that it should sync songs to computer,then export the songs to iPhone 7.But have any other more simple way to perform the music transfer?” -Tony

Just get a new iPhone 7 and want to transfer music from the old iPhone to the new one?iTunes gives a solution for transferring files from between current iPhone and another iOS device with synchronization,but you’ll need hours for the tedious and boring backup/restore time,and the songs will cover your previous data on device.Another solution is to copy songs to computer then transfer it from computer to new device,which is pretty complicated.

How to Simply Transfer Music between iPhone

Owning to the convenience of directness and immediacy by using the iOS Manager, now you can instantly transfer music between iPhone and iPhone 7.iOS Manager is an useful media files transfer tool to transfer & manage music/videos/photos on iOS devices,help to transfer media files between computer and iOS device,transfer media files between iTunes and iOS device,transfer media files between iOS device and Android device.All models of iOS device are applicable for iOS Manager,including iPhone 7,iPhone 6S/6,iPhone SE,iPhone 5S/5C/5,iPad and iPod.For a simpler solution, you can follow below step-by-step guide on how to copy music from old iPhone to new iPhone 7 directly.

d_win d_mac

How to Directly Transfer Songs from iPhone to iPhone 7

Method 1: Transfer All The Music and Playlists

Step 1. Launch iOS Manager and connect your devices with the computer.
Launch iOS Manager and connect more than one iPhone/iPad/iPod/Android device with the computer, here we name the connected devices: A, B, C.

select devices to transfer

Step 2. Select the source device from which you want to transfer contents
Select the source device A, and click Phone to Phone Transfer option on the main interface. Then a new window will pop up.

Step 3. Select the target device to which you want to transfer contents
From the pop-up window, select the target device B or C from the drop-down list and click Next.

select target device

Step 4. Transfer contents from one device to another
By default, all the content on your source device A that can be transferred are checked, namely Music and Videos, Playlists, Photos, Contacts( Note: Contacts are not supported by Mac version). You can uncheck the contents which you don’t want to transfer. Then, click Transfer. In the whole transfer process, DO NOT disconnect either of the devices. When the transfer completes, click OK.

select music file to transfer

1 click phone to phone transfer

Note: Only for Windows version, you’re enabled to tick the option: “Delete contents on target device then transfer” before clicking Transfer button, then the selected contents on the target device will be deleted before the transfer.

confirm to delete data on target device

Method 2: Transfer Music Selectively

Step 1. Launch iOS Manager and connect your iPhone 7 with the computer.
Launch iOS Manager and connect more than one iPhone/iPad/iPod/Android device with your computer, here we name the devices: A, B, C.
connect iphone 7-devices

Step 2. Select and transfer music between devices.
Select the device A from which you want to transfer music, and click Music icon at the top of the main interface, check the songs which you want to transfer from A to B or C, then click Export > Export to B or Export to C. As for the following screenshot, the music on the iPhone can be transferred to the Samsung phone or the iPhone 7.

select device to export

Note: Here you can right-click on the selected music and then select Export > Export to B or Export to C as well.

export music to devices

d_win d_mac

Related Article:

How to Transfer Music to iPhone 7

How to Transfer Music from Computer to iPhone 7

How to Transfer Videos to iPhone 7

How to Transfer Photos to iPhone 7

How to Transfer Videos to iPod

“I just buy a new iPod Touch and now I wanna transfer the Bigbang concert videos from my Samsung phone to iPod,but I have no idea to do it easily and simply.Someone provide a good suggestion for me?Thanks a lot.”-Henry

Instead of watching videos on a smartphone was in old days,lately more and more movies fans like to watch videos on iPod for its convenience and delightful.Four years after Apple launched the iPod, several iterations had perfected what the device could do. It was able to play music, photos and videos in the palm of your hand anytime.If you want to watch the videos whenever you want, you will need to download and save videos on your device.However,we found that there are several questions that people ask in the Apple forum,for example how to transfer videos from Samsung phone to iPod,how to export to videos from Mac to iPod,etc,.For solving this kinds of videos transfer problems,we sum up these solutions for reference.

How to Export Videos to iPod

iOS Manager is a media transfer program which enables you to transfer videos between mobile devices and iPod with an easy way in just few clicks only without losing existing videos on your iPod.iOS Manager enables also allows to transfer videos between computer and iPod,transfer videos between iTunes and iPod.Furthermore,this program empowers you to transfer music, videos, movies and any type of media files on iPod and if files are not in the supported format of iPod then iOS Manager will convert them automatically before transferring to iPod.Supported iPod list:iPod 4/3/2/1,iPod touch,iPod nano,iPod shuffle,etc,.

d_win d_mac

Part 1:How to Export Videos from Computer to iPod

Step 1. Launch iOS Manager and connect iPod with the Computer

iOS manager main page

Method 1: Transfer Videos Using Buttons

Step 2. Find video type on iPod
Click Videos icon at the top of the main interface. Select a specific option Movies/Music Videos/Home Videos/TV Shows/iTunes U/Podcasts to transfer( “Movies” is the default option).

select videos to transfer

Step 3. Select and Add Videos from PC/Mac to iPod
Later, click Add and then select Add File or Add Folder.
Note: If you need to select a few videos,then click Add File, and then hold down Shift or Ctrl key to choose multiple videos; if you want to transfer all the videos in one folder, then click Add Folder.

select Add File or Add Folder

From the pop-up window, browse and choose the target video(s) from your computer. And click Open. Then, the selected videos will be exported to the iPod.

open the video older

Method 2: Transfer Videos by Drag and Drop

Step 2. Find videos on your PC/Mac
Find and open the video folder on your PC or Mac which includes the videos that you wish to transfer to your iPod.

Find videos on computer

Step 3. Export the Videos to iPod by Drag and Drop
Click Videos icon on the main interface of iOS Manager,it will go to the Movies window by default, Music Videos, TV Shows, iTunes U and Podcasts are available here too. Drag and drop the selected videos from your computer to the Movies window of iOS Manager.

Export videos to iod by Drag and Drop

d_win d_mac

Part 2:How to Transfer Videos from iTunes to iPod

iOS Manager provides two solutions to transfer videos from iTunes to iPod, include Movies, Music Videos, TV Shows, iTunes U and Podcasts.

Method 1: With 1-Click File Transfer

Step 1. Launch iOS Manager and connect your iPod with the computer.Then click Transfer iTunes Media to Device icon on the main interface.

ios manager main page

Step 2. iOS Manager will detect all the media files in iTunes and show them by list on the pop-up window. By default, the entire library has been checked. But you can uncheck some items that you won’t transfer to your iPod.

select-transfer-videos-to-ipod

Step 3. Transfer media contents to iPod
Click Transfer to start transferring selected files to your iPod and then click OK to complete the process.

Note: iOS Manager enables to automatically detect the duplicates and only transfer the exclusive contents from iTunes to iPod.

click-transfer-button

transfer-music-to-ipod

Method 2: With Toolbox

Step 1. Launch iOS Manager and connect your iPod with the computer. Then go to Toolbox > Transfer iTunes Media to Device on the Toolbox interface.

tool box main page

Step 2. iOS Manager will detect all the media files in iTunes and show them by list on the pop-up window. By default, the entire library has been checked. But you can uncheck some items that you won’t transfer to your iPod.

select-video-file-transfer

Step 3. Transfer media files to your iPod
Click Transfer to start transferring selected files to your iPod and then click OK to complete the process.

Note: iOS Manager enables to automatically detect the duplicates and only transfer the exclusive files from iTunes to iPod.

click transfer to begin

transfer itunes videos to ipod

d_win d_mac

Part 3:How to Transfer Videos between iOS/Android Device and iPod

Method 1: Transfer All The Music and Playlists

Step 1. Launch iOS Manager and connect your devices with the computer.
Launch iOS Manager and connect more than one iPhone/iPad/iPod/Android device with the computer, here we name the connected devices: A, B, C.

transfer videos from iPod to devices

Step 2. Select the source device from which you want to transfer contents
Select the source device A, and click Phone to Phone Transfer option on the main interface. Then a new window will pop up.

select devices to transfer

Step 3. Select the target device to which you want to transfer contents
From the pop-up window, select the target device B or C from the drop-down list and click Next.

select device to transfer

Step 4. Transfer Videos from one device to another
By default, all the content on your source device A that can be transferred are checked, namely Music and Videos, Playlists, Photos, Contacts( Note: Contacts are not supported by Mac version). You can uncheck the contents which you don’t want to transfer. Then, click Transfer. In the whole transfer process, DO NOT disconnect either of the devices. When the transfer completes, click OK.

select media file to transfer

1-click-phone-to-phone-transfer

Note: Only for Windows version, you’re enabled to tick the option: “Delete contents on target device then transfer” before clicking Transfer button, then the selected contents on the target device will be deleted before the transfer.

confirm to delete data on target device

Method 2: Transfer Videos Selectively

Step 1. Launch iOS Manager and connect your devices with the computer.

Launch iOS Manager and connect more than one iPhone/iPad/iPod/Android device with your computer, here we name the devices: A, B, C.

transfer videos from iPod to devices

Step 2. Select and transfer videos between devices.

Select the device A from which you want to transfer videos, and click Videos icon at the top of the main interface, you will enter the Movies window by default. Please note that Movies, Music Videos, Home Videos, TV Shows, iTunes U and Podcasts are available here too. Then, check the videos which you want to transfer from A to B or C, then click Export > Export to B or Export to C. As for the following screenshot, the videos in Movies on the iPod can be transferred to the Samsung Phone or the iPad.

select device to export

Note: Here you can right-click on the selected videos and then select Export > Export to B or Export to C as well.

export-ipod-movies-to-devices

d_win d_mac

Related Article:

How to Transfer Photos from Computer to iPod

How to Transfer Music from iTunes Library to iPod

How to Sync Videos from Computer to iPhone 7

How to Transfer Videos to iPhone 7

How to Transfer Videos to iPhone 7

“Last morning, I downloaded some videos on my Mac.Then I try to transferred the media files from computer to my iPhone 7 but it was failed.If given any help, I will be appreciated a lot.Thanks advance.”Alen

Apple’s iPhone 7 is announced in September 2016,I guess you must be interested in this newest iPhone.Have you prepared well for the powerful iPhone 7 for iPhone upgrade? To enjoy videos on your device more convenient,sometimes you may need to sync the movies to your iPhone 7.However,the traditional ways are not work well everytime.That’s why it’s better to use a different video transfer tool to finish the sync process.It’s a guide on how to transfer videos from computer/iTunes/mobile device to iPhone 7.

How to Export Videos to iPhone 7

You should try iOS Manager. It allows you to transfer videos to iPhone 7 with fast transferring speed without erasing previous data on device.iOS Manager enables to transfer videos between computer and iPhone 7,transfer videos between iTunes Library and iPhone 7,transfer videos between iOS/Android device and iPhone 7.Not only iPhone 7,but also other iOS devices are supported,including iPhone 6S/6/SE/5S/5C/5,iPad and iPod.

Key features of iOS Manager:
•Transfer video, music, photo, media files,apps between Apple devices and PC/Mac without iTunes.
•Transfer data between iOS devices directly.
•Transfer movies, music (purchased/downloaded), photos, playlists, TV shows, music videos, podcasts, iTunes U and audio books between apple devices and iTunes.
•Automatically convert iOS-unsupported video/music formats to compatible ones.
•Create GIF from images or videos.
•Fix & optimize songs’ incomplete ID3 information, album cover to iPhone directly.
•Intelligently export exclusive files to iTunes and automatically filter the duplicate files.
•Perfectly rebuild iTunes library.
•Convert live photos to GIF.

d_win d_mac

Part 1:How to Transfer Videos from Computer to iPhone 7

Step 1. Launch iOS Manager and connect iPhone 7 with the Computer

iOS manager main page

Method 1: Transfer Videos Using Buttons

Step 2. Find video type on iPhone 7
Click Videos icon at the top of the main interface. Select a specific option Movies/Music Videos/Home Videos/TV Shows/iTunes U/Podcasts to transfer( “Movies” is the default option).

select videos to transfer

Step 3. Select and Add Videos from PC/Mac to iPhone 7
Later, click Add and then select Add File or Add Folder.
Note: If you need to select a few videos,then click Add File, and then hold down Shift or Ctrl key to choose multiple videos; if you want to transfer all the videos in one folder, then click Add Folder.

select Add File or Add Folder

From the pop-up window, browse and choose the target video(s) from your computer. And click Open. Then, the selected videos will be imported to the iPhone 7.

open the video older

Method 2: Transfer Videos by Drag and Drop

Step 2. Find videos on your PC/Mac
Find and open the video folder on your PC or Mac which includes the videos that you wish to transfer to your iPhone 7.

Find videos on computer

Step 3. Export the Videos to iPhone 7 by Drag and Drop
Click Videos icon on the main interface of iOS Transfer,it will go to the Movies window by default, Music Videos, TV Shows, iTunes U and Podcasts are available here too. Drag and drop the selected videos from your computer to the Movies window of iOS Manager.

Export videos to iPhone 7 by Drag and Drop

d_win d_mac

Part 2:How to Transfer Videos from iTunes to iPhone 7

iOS Manager provides two solutions to transfer videos from iTunes to iPhone 7, include Movies, Music Videos, TV Shows, iTunes U and Podcasts.

Method 1: With 1-Click File Transfer

Step 1. Launch iOS Manager and connect your iPhone 7 with the computer.Then click Transfer iTunes Media to Device icon on the main interface.

ios manager main page
Step 2. iOS Manager will detect all the media files in iTunes and show them by list on the pop-up window. By default, the entire library has been checked. But you can uncheck some items that you won’t transfer to your iPhone.

select transfer videos to iphone 7

Step 3. Transfer media contents to iPhone 7
Click Transfer to start transferring selected files to your iPhone and then click OK to complete the process.
Note: iOS Manager enables to automatically detect the duplicates and only transfer the exclusive contents from iTunes to iPhone 7.

click transfer button

transfer music to iphone 7

Method 2: With Toolbox

Step 1. Launch iOS Manager and connect your iPhone 7 with the computer. Then go to Toolbox > Transfer iTunes Media to Device on the Toolbox interface.

tool box main page

Step 2. iOS Manager will detect all the media files in iTunes and show them by list on the pop-up window. By default, the entire library has been checked. But you can uncheck some items that you won’t transfer to your iPhone.

select video file transfer

Step 3. Transfer media files to your iPhone 7
Click Transfer to start transferring selected files to your iPhone 7 and then click OK to complete the process.
Note: iOS Manager enables to automatically detect the duplicates and only transfer the exclusive files from iTunes to iPhone 7.

click transfer to begin

transfer itunes videos to iphone 7 complete

d_win d_mac

Part 3:How to Transfer Videos between iOS/Android Device and iPhone 7

Method 1: Transfer All The Music and Playlists

Step 1. Launch iOS Manager and connect your devices with the computer.
Launch iOS Manager and connect more than one iPhone/iPad/iPod/Android device with the computer, here we name the connected devices: A, B, C.

transfer videos from iPhone 7 to devices

Step 2. Select the source device from which you want to transfer contents
Select the source device A, and click Phone to Phone Transfer option on the main interface. Then a new window will pop up.

select devices to transfer

Step 3. Select the target device to which you want to transfer contents
From the pop-up window, select the target device B or C from the drop-down list and click Next.

select device to transfer

Step 4. Transfer Videos from one device to another
By default, all the content on your source device A that can be transferred are checked, namely Music and Videos, Playlists, Photos, Contacts( Note: Contacts are not supported by Mac version). You can uncheck the contents which you don’t want to transfer. Then, click Transfer. In the whole transfer process, DO NOT disconnect either of the devices. When the transfer completes, click OK.

select media file to transfer

1 click phone to phone transfer
Note: Only for Windows version, you’re enabled to tick the option: “Delete contents on target device then transfer” before clicking Transfer button, then the selected contents on the target device will be deleted firstly before the transfer.

confirm to delete data on target device

Method 2: Transfer Videos Selectively

Step 1. Launch iOS Manager and connect your devices with the computer.

Launch iOS Manager and connect more than one iPhone/iPad/iPod/Android device with your computer, here we name the devices: A, B, C.

transfer videos from iPhone 7 to devices

Step 2. Select and transfer videos between devices.

Select the device A from which you want to transfer videos, and click Videos icon at the top of the main interface, you will enter the Movies window by default. Please note that Movies, Music Videos, Home Videos, TV Shows, iTunes U and Podcasts are available here too. Then, check the videos which you want to transfer from A to B or C, then click Export > Export to B or Export to C. As for the following screenshot, the videos in Movies on the iPhone can be transferred to the Samsung Phone or the iPad.
select device to export

Note: Here you can right-click on the selected videos and then select Export > Export to B or Export to C as well.

export iphone movies to devices

d_win d_mac

A Professional iPhone Video Transfer Tool

If you need a professional iPhone video transfer tool, you should pay attention to this Mobile Sync. It is a famous tool designed for transfer & manage data for iOS device. With using this program, you could easily transfer videos to iPhone 7. It supports to transfer files between iOS device and computer, transfer files between iOS devices. The types of transferable files including videos, music, photos, contacts, SMS and more.All in all, it is the best iTunes alternative, a good iOS files transfer & manage tool for iPhone/iPad/iPod.

mobile sync home page

Related Article:

How to Transfer Videos from Computer to iPhone 7

How to Transfer Photos to iPhone 7

How to Transfer Music to iPhone 7

How to Transfer Music from Computer to iPhone 7

Transfer Videos to iPhone 7

How to Transfer Photos to iPhone 7

“I try to copy the birthday photos from computer to my new iPhone 7 but it was failed.I don’t know why.Anybody give me some extra advice to transfer the photos to my device conveniently?”Emma

Simple as it sounds,I guess a lot of people are confused about this:How to easily transfer photos to iPhone whatever from computer,iTunes library or other mobile devices.So we thought we’ll get this right. It’s a page that guide you to transfer photos to iPhone 7/SE/6S/6 correctly.Most of us are like to take photos everywhere and are accustomed to browse photos on device or share it with others anytime.However,a part of person reflect that the make some problems when try to transfer photos from computer/mobile device to iPhone 7.Now we are going to share the solutions available to complete the photos transfer task on iPhone 7.

How to Export Photos to iPhone 7 without Complication

There is no more better than use iOS Manager to export photos to iPhone 7/SE/6S/6,it’s an useful program to transfer photos between computer and iPhone/iPad/iPod,transfer photos between iOS/Android device and iPhone/iPad/iPod.Furthermore,this program support to transfer & manage videos and music for iOS device.Not only iPhone 7,all the functions of iOS Manager is applicable to all models of iOS devices,such as iPhone SE,iPhone 6S/6/5S/5,iPad & iPod.

d_win d_mac

Part 1:How to Transfer Photos from Computer to iPhone 7

Step 1.Launch iOS Manager and connect your iPhone 7 with the computer.

iOS manager main page

Method 1:Transfer Photos by Tapping Buttons

Step 2.Add photos from your computer to your iPhone 7
Click Photos icon at the top of the main interface, then select the specific option Photo Library. Please note that Camera Roll, Photo Stream and Photo Shared are not available to add photos.

transfer photos from photo library

Later,click Add and then select Add File or Add Folder to add photos from your computer.If you only want to select some photos,then click Add File, and then hold down Shift or Ctrl key to choose multiple photos; if you want to transfer all the photos in one folder, then click Add Folder. After that, click Open to import the selected photos. Here we only add photos to iPhone 7 by clicking Add File for example.

add file to transfer

select photos to transfer to iphone 7

Method 2:Transfer Photos by Drag and Drop

Step 2. Find photos on your computer.
Find and open the photo folder on your computer which includes the photos that you wish to transfer to iPhone 7.

open the photo folder on pc

Step 3.Export the photos to iPhone 7 by Drag and Drop
Click Photos icon on the main interface of iOS Manager,then go to the Photo Library window.Drag and drop the selected photos from your computer to the Photo Library window of iOS Manager.

drap and drop the selected photos

Note:With the two methods above, you can also select to add photos to one of the photo albums under Photo Library.

selected photos from photo albums

d_win d_mac

Part 2:How to Transfer Photos from iPhone 7 to Computer

Method 1: Transfer All The Photos With One Click

Step 1.Launch iOS Manager and connect your iPhone 7 with the computer

iOS manager main page

Step 2. Backup photos to the computer
If you use Windows PC:
Click Backup Photos to PC icon on the main interface. From the pop-up window, browse and select the destination folder for photos, click OK to start the export.
1-click-backup-photos-to-pc

backup-photos-to-pc

If you use Mac:
Click Backup Photos to Mac icon on the main interface. From the pop-up window, browse and select the destination folder for photos, click Save to start the export.

1-click-backup-photos-to-mac

transfer-photo-to-computer

Step 3. Export Photos to Computer
Click Open Folder to see the exported photos on the selected path of your computer, or click Finish to close the dialog.

finish-transfer-photo-to-computer

Method 2: Selectively Transfer Photos by Tapping Buttons

Step 1. Launch iOS Manager and connect your iPhone 7 with the computer. Then click Photos icon at the top of the main interface, you will enter the default photo type: Camera Roll.

transfer iphone 7 photo from camera roll

Situation 1.Transfer Photos from iPhone 7 to Computer Selectively
Step 2. Export photos from your iPhone 7 to the computer.
a. Select a specific photo type: Camera Roll/Photo Library/ Photo Stream/Photo Shared( Camera Roll is the default type), all the photos under this type will be shown on the right panel. Optionally, you can select one specific album under one photo type to enter the album window, then all the photos in this album will be shown on the right panel. Later, check the photos you want to transfer to your computer, and click Export > Export to PC or right-click on the selected photos and then select Export > Export to PC from the drop down list. Here we only make photos under Camera Roll type for example.

export photos from iphone 7 to computer

export-iphone 7-photo-to-pc

b. Browse and choose the target folder on the computer to export. And click OK to start the export process.

click-ok-to-start-process

Step 3. Export successfully
Click Open Folder to see the exported photos on the computer or click OK to close the dialog.

export-complete

finish-photo-transfer

Situation 2. Transfer All The Photos in One Photo Type from iPhone 7 to Computer
Step 2. Select a specific photo type: Camera Roll/Photo Library/ Photo Stream/Photo Shared, right-click on it, and choose Export to PC from the drop down list. After that, browse and select the target folder on your computer to export. Please see the screenshot to transfer all the photos in Photo Library below for reference.
export-photo-library-to-pc

Situation 3. Transfer All The Photos in One Photo Album from iPhone 7 to Computer
Step 2. Select a specific photo album under Camera Roll, Photo Library, Photo Stream or Photo Shared, right-click on it, and choose Export to PC from the drop down list. After that, browse and select the target folder on your computer to export. Please see the screenshot to transfer all the photos in the “beauty” album under Photo Library below for reference.

transfer-photos-from-photo-album-to-pc

d_win d_mac

Part 3:How to Transfer Photos between iOS/Android Device and iPhone 7

Method 1: Transfer All The Photos

Step 1. Launch iOS Manager and connect iPhone 7 with the computer
Launch iOS Manager and connect more than one iPhone/iPad/iPod/Android device with the computer, here we name the connected devices: A, B, C.

iOS manager main page

Step 2. Select the source device from which you want to transfer contents
Select the source device A, and click Phone to Phone Transfer option on the main interface. Then a new window will pop up.

phone to phone transfer option

Step 3. Select the target device to which you want to transfer contents
From the pop-up window, select the target device B or C from the drop-down list and click Next.

select target device

Step 4. Transfer contents from one device to another
By default, all the content on your source device A that can be transferred are checked, namely Music and Videos, Playlists, Photos, Contacts( Note: Contacts are not supported by Mac version). You can uncheck the contents which you don’t want to transfer. Then, click Transfer. In the whole transfer process, DO NOT disconnect either of the devices. When the transfer completes, click OK.
start transfer process

transfer complete

Note: Only for Windows version, you’re enabled to tick the option: “Delete contents on target device then transfer” before clicking Transfer button, then the selected contents on the target device will be deleted firstly before the transfer.

delete contents on target device then transfer

Method 2: Transfer Photos Selectively

Step 1. Launch iOS Manager and connect iPhone 7 with the computer
Launch iOS Manager and connect more than one iPhone/iPad/iPod/Android device with your computer, here we name the devices: A, B, C.
connect-iphone 7-other-devices

Step 2. Select and transfer photos between devices
Select the device A from which you want to transfer photos, and click Photos icon at the top of the main interface, then select a specific photo type: Camera Roll/Photo Library/ Photo Stream/Photo Shared( Camera Roll is the default type), all the photos under this type will be shown on the right panel. Optionally, you can select one specific album under the photo type to enter the album window, then all the photos in this album will be shown on the right panel. After that, check the photos which you want to transfer from A to B or C, then click Export > Export to Device > B or C. As for the following screenshot, the selected photos in “beauty” album under Photo Library on the iPhone 7 can be transferred to the Samsung Phone or another iPad.

select-photo-transfer-to-devices

Note: Here you can right-click on the selected photos and then select Export to Device > B or C as well.

export-photos-to-devices

d_win d_mac

Related Article:

How to Transfer Music from Computer to iPhone 7/SE/6S/6

How to Sync Videos from Computer to iPhone 7/SE/6S/6

How to Transfer Photos from Computer to iPod

How to Transfer Music from Android to iPhone/iPad/iPod

How to Transfer Music from iTunes Library to iPod

How to Transfer Music (Apple Music) to iPhone 7

Summary:Check out this article here we will teach you easy methods to transfer music/songs from computer/iTunes/Android/iOS devices to iPhone 7/7 Plus,we also recommend you Apple Music Converter to remove DRM from Apple Music songs and transfer to your iPhone/Android devices for playing for free with more freedom and convenience,once the subscription service is canceled.

As cool as the new iPhone 7 is, one thing that lots of people didn’t find cool was the fact that Apple ditched the 3.5mm headphone port. This meant that to use your old headphones you had to resort to an adapter. The catch is that if you want to listen to music with the headphone adapter and needed to charge your device at the same time, you had to choose one or the other.However,even though the iPhone 7 is a bit different from the previous iPhone,most iPhone fans like to enjoy music on it,for its advanced music system design.

iPhone 7 is a fully-featured music player.To add music to iPhone 7, you can purchase it from iTunes,add music files from computer to device,even share songs between mobile devices and iPhone 7.In order to freely listen to music on iPhone 7 anywhere anytime,here we are going to introduce three solutions selectively to transfer music to iPhone 7 that will cost you a little time.

How to Export Music to iPhone 7

iOS Manager,which is strongly recommended for you to transfer music between computer and iPhone 7,transfer music between iTunes library and iPhone 7,transfer music between iOS/Android device and iPhone 7,manage music playlists on iPhone 7,find and remove duplicate music files,fix Music ID3 tags for iPhone 7,delete music on iPhone 7.In addition,iOS Manager help to transfer & manage videos and photos for iPhone 7.Not only iPhone 7,all the functions of iOS Manager is applicable to all models of iOS devices,such as iPhone SE,iPhone 6S/6/5S/5,iPad & iPod.

d_win d_mac

Part 1:How to Transfer Music from Computer to iPhone 7

Step 1. Launch iOS Manager and connect your iPhone 7 with the computer.

iOS manager main page

Method 1.Transfer Music Using Buttons

Step 2. Add music from your computer to iPhone 7.
Click Music icon at the top of the interface, then select the specific option Music (Music is the default option). Please note that iTunes U/Audiobooks/Podcasts is available to select here too.

select music to transfer

select-itunes-u-music

select-podcasts-music

select-audiobooks-music

Later, click Add and then select Add File or Add Folder to add music files from your computer. If you only want to select some music files, then click Add File, and then hold down Shift or Ctrl key to choose multiple files; if you want to transfer all the music in one folder, then click Add Folder. After that, click Open to import the selected music. Here we only add music to iPhone 7 by clicking Add File for example, others are with the similar steps.

Add Folder to add music files

export-music-file-from-computer

Method 2: Transfer Music by Drag and Drop

Step 2. Find songs on your PC/Mac.
Find and open the music folder on your PC or Mac which includes the music files that you wish to transfer to iPhone 7.

open the music folder on computer

Step 3. Export the songs to iPhone 7 by Drag and Drop.
Click Music icon on the main interface of iOS Manager,it will go to the Music window by default. Drag and drop the selected music from your PC or Mac to the Music window of iOS Manager.

Export the songs to iPhone 7 by Drag and Drop

Tips:iOS Manager also supports to add Podcasts, iTunes U, Audiobooks from PC/Mac to iPhone 7 with this method too. The only change while adding these media files is to select one of the options: Podcasts, iTunes U, Audiobooks instead of Music.

d_win d_mac

Part 2:How to Transfer Music from iTunes to iPhone 7

Method 1: With 1-Click File Transfer

Step 1. Launch iOS Manager and connect your iPhone 7 with the computer. Then click Transfer iTunes Media to Device icon on the main interface.

Music from iTunes Library to iPhone 7

Step 2. iOS Manager will detect all the media files in iTunes and show them by list on the pop-up window. By default, the entire library has been checked. But you can uncheck some items that you won’t transfer to your iPhone 7.

transfer iTunes Music to iPhone 7

Step 3. Transfer media contents to your iPhone 7
Click Transfer to start transferring selected files to your iPhone 7 and then click OK to complete the process.

Note: There is no worry about duplicate files as iOS Manager enables to automatically detect the duplicates and only transfer the exclusive contents from iTunes to iPhone 7.

transfer iTunes Music to iPhone 7

sync iTunes music to iPhone 7

Method 2: With Toolbox

Step 1. Launch iOS Manager and connect your iPhone 7 with the computer. Then go to Toolbox > Transfer iTunes Media to Device on the Toolbox interface.

tool box main page

Step 2. iOS Manager will detect all the media files in iTunes and show them by list on the pop-up window. By default, the entire library has been checked. But you can uncheck some items that you won’t transfer to your iPhone 7.

select-music-file-transfer

Step 3. Transfer media contents to your iPhone 7
Click Transfer to start transferring selected files to your iPhone 7 and then click OK to complete the process.

Note: iOS Manager enables to automatically detect the duplicates and only transfer the exclusive contents from iTunes to iPhone 7.

click transfer to begin

transfer itunes music to iphone 7 complete

d_win d_mac

Part 3:How to Transfer Music between iOS/Android Device and iPhone 7

Method 1: Transfer All The Music and Playlists

Step 1. Launch iOS Manager and connect your devices with the computer.
Launch iOS Manager and connect more than one iPhone/iPad/iPod/Android device with the computer, here we name the connected devices: A, B, C.

transfer songs from Samsung to iPhone 7

Step 2. Select the source device from which you want to transfer contents
Select the source device A, and click Phone to Phone Transfer option on the main interface. Then a new window will pop up.

select devices to transfer

Step 3. Select the target device to which you want to transfer contents
From the pop-up window, select the target device B or C from the drop-down list and click Next.

select device to transfer

Step 4. Transfer contents from one device to another
By default, all the content on your source device A that can be transferred are checked, namely Music and Videos, Playlists, Photos, Contacts( Note: Contacts are not supported by Mac version). You can uncheck the contents which you don’t want to transfer. Then, click Transfer. In the whole transfer process, DO NOT disconnect either of the devices. When the transfer completes, click OK.

select media file to transfer

1-click-phone-to-phone-transfer
Note: Only for Windows version, you’re enabled to tick the option: “Delete contents on target device then transfer” before clicking Transfer button, then the selected contents on the target device will be deleted firstly before the transfer.

confirm to delete data on target device

Method 2: Transfer Music Selectively

Step 1. Launch iOS Manager and connect your iPhone 7 with the computer.
Launch iOS Manager and connect more than one iPhone/iPad/iPod/Android device with your computer, here we name the devices: A, B, C.

transfer songs from iPhone 7 to device

Step 2. Select and transfer music between devices.
Select the device A from which you want to transfer music, and click Music icon at the top of the main interface, check the songs which you want to transfer from A to B or C, then click Export > Export to B or Export to C. As for the following screenshot, the music on the iPhone can be transferred to the Samsung phone or the iPad.

Transfer Music from iPhone 7 to device

Note: Here you can right-click on the selected music and then select Export > Export to B or Export to C as well.

Transfer Music from iPhone to iPhone 7

d_win d_mac

Part 4: Convert Apple Music M4P songs to DRM-free MP3 for Playing on iPhone for Free

Once you cancel the Apple Music subscription service, you can’t access it on your iOS devices. Even though you have downloaded the songs from Apple Music catalog,because of the DRM protected and with .m4p extension.However,how to remove Apple Music DRM for playing them on any music players like iPhone 7/6S/6/SE/5S/5, MP3 players, Car players, Android phone and more? The answer is yes,what you need to do is removing DRM from Apple Music songs and convert them to DRM-free file formats.

This Apple Music Converter for Mac and Windows,both is a professional Apple Music DRM removal and converter software,which could helps users remove DRM from Apple Music songs without downloading them. It also convert Apple Music M4p songs to MP3 for playing on iPhone,as well as more popular formats such as AC3, AIFF, FLAC, etc.When the conversion is done,you can remove the limitation and keep Apple Music as long as you like

d_win d_mac

Step 1.Download and Run Apple Music Converter on PC or Mac
When running the Apple Music Converter on the computer,the iTunes will be launched automatically.On the interface, you will see the entire iTunes library is loaded.

launch apple music converter

Note
: You don’t need to download the Apple Music songs you want to remove DRM from. Just add them to your iTunes Library or Playlists and the program will detect them automatically and show them on the interface. iTunes will play the songs mutely in the background during the DRM removal process, so just make sure your internet connection is OK.

Step 2.Choose Apple Music You Want to Remove DRM and Convert from
When the iTunes library loaded on the program interface,you will find all Apple Music songs and playlists that you have added to iTunes,please select the Apple Music songs you want to remove DRM and convert as DRM-free MP3 files from. You can also quickly find the songs you want with the search feature.

select apple music to convert

Step 3.Choose Output Format You Want to
In this step,please choose an output format “Output Settings” section,such as MP3, M4A, FLAC and AC3 before removing DRM from M4P files.Because of most music players (iPhone/iPod devices) support MP3 files,here we recommend you select MP3 as output format.

select mp3 output profile

Step 4.Start Remove DRM from Apple Music and Convert M4P to MP3
Finally,please click start “Convert” button and you will get DRM-free Apple Music songs in MP3 format on the computer after the conversion. Now you can play them without iTunes on Mac or Windows computer.

convert apple music from m4p to mp3

Step 5.Import Converted Apple Music to iPhone 7
In order to playing the converted Apple music on our iPhone 7 for free forever,ever after the subscription service is canceled,you can transfer the converted Apple Music songs from computer to iPhone 7 for offline playback without DRM limitation.
Read More: How to Transfer Music from Computer to iPhone 7

Free download the Apple Music Converter and try to convert Apple Music songs to iPhone:

d_win d_mac

Related Article:

How to Transfer Music from Computer to iPhone 7/SE/6S/6

How to Sync Videos from Computer to iPhone 7/SE/6S/6

How to Transfer Music from Android to iPhone/iPad/iPod

How to Transfer Music from iTunes Library to iPod

How to Transfer Photos from Computer to iPod

”I was intend to transfer the photos from iTunes to my iPod,however,I don’t what’s happened,the iTunes just not as worked well as usual.Any others way to solve it?Thanks a lot.”-Victoria

Confused about how to sync photos to iPad?We’ve got you solutions.Do you saved a lot of photos on your computer/iTunes/mobile device or other Internet service account and want to transfer them to your iPod so that preview photos anywhere and sharing them with friends?We are going to share three ways to export photos to iPod with our readers through this article.

How to Freely Export Photos to iPod(touch)

iOS Manager is the best software which enables you to transfer photos between computer and iPod/iPad/iPhone easily in just one click without losing your previous photos,iOS Manager can easily do this tasks for you in minutes.Secondly,iOS Manager support to export photos between iOS devices and Android devices.Thirdly, iOS Manager allow to delete photos on iOS devices,manage photo albums in Photo Library,convert photos/video on iOS devices to GIF.

iOS Manager Features – Transfer & Manage Photos for iPod(touch)
-Easily transfer photos from computer to iPod.
-Easily transfer photos from iPod to computer.
-Easily transfer photos between iPhone,iPad,iPod and Android devices.
-Easily detect and delete duplicates.
-Supports all types of iOS device such as iPhone 7,iPhone SE, iPod touch,iPod nano and iPad Pro.
-Automatically detects the unsupported format of files and converts them to the supports formats according to the devices.

d_win d_mac

Part 1:How to Export Photos from Computer to iPod

Step 1.Launch iOS Manager and connect your iPod with the computer.

iOS manager main page

Method 1:Transfer Photos by Tapping Buttons

Step 2.Add photos from your computer to your iPod
Click Photos icon at the top of the main interface, then select the specific option Photo Library. Please note that Camera Roll, Photo Stream and Photo Shared are not available to add photos.

transfer photos from photo library

Later,click Add and then select Add File or Add Folder to add photos from your computer.If you only want to select some photos,then click Add File, and then hold down Shift or Ctrl key to choose multiple photos; if you want to transfer all the photos in one folder, then click Add Folder. After that, click Open to import the selected photos. Here we only add photos to iPod by clicking Add File for example.

add file to transfer

select photos to transfer to ipod

Method 2:Transfer Photos by Drag and Drop

Step 2. Find photos on your computer.
Find and open the photo folder on your computer which includes the photos that you wish to transfer to iPod.

open the photo folder on pc

Step 3.Export the photos to iPod by Drag and Drop
Click Photos icon on the main interface of iOS Manager,then go to the Photo Library window.Drag and drop the selected photos from your computer to the Photo Library window of iOS Manager.

drap and drop the selected photos

Note:With the two methods above, you can also select to add photos to one of the photo albums under Photo Library.

selected photos from photo albums

d_win d_mac

Part 2:How to Transfer Photos from iPod to Computer

Method 1: Transfer All The Photos With One Click

Step 1.Launch iOS Manager and connect your iPod with the computer

iOS manager main page

Step 2. Backup photos to the computer
If you use Windows PC:
Click Backup Photos to PC icon on the main interface. From the pop-up window, browse and select the destination folder for photos, click OK to start the export.
1-click-backup-photos-to-pc

backup-photos-to-pc

If you use Mac:
Click Backup Photos to Mac icon on the main interface. From the pop-up window, browse and select the destination folder for photos, click Save to start the export.

1-click-backup-photos-to-mac

transfer-photo-to-computer

Step 3. Export Photos to Computer
Click Open Folder to see the exported photos on the selected path of your computer, or click Finish to close the dialog.

finish-transfer-photo-to-computer

Method 2: Selectively Transfer Photos by Tapping Buttons

Step 1. Launch iOS Manager and connect your iPod with the computer. Then click Photos icon at the top of the main interface, you will enter the default photo type: Camera Roll.

transfer ipod photo from camera roll

Situation 1.Transfer Photos from iPod touch to Computer Selectively
Step 2. Export photos from your iPod to the computer.
a. Select a specific photo type: Camera Roll/Photo Library/ Photo Stream/Photo Shared( Camera Roll is the default type), all the photos under this type will be shown on the right panel. Optionally, you can select one specific album under one photo type to enter the album window, then all the photos in this album will be shown on the right panel. Later, check the photos you want to transfer to your computer, and click Export > Export to PC or right-click on the selected photos and then select Export > Export to PC from the drop down list. Here we only make photos under Camera Roll type for example.

export photos from iPod to computer

export-ipod-photo-to-pc

b. Browse and choose the target folder on the computer to export. And click OK to start the export process.

click-ok-to-start-process

Step 3. Export successfully
Click Open Folder to see the exported photos on the computer or click OK to close the dialog.

export-complete

finish-photo-transfer

Situation 2. Transfer All The Photos in One Photo Type from iPod to Computer
Step 2. Select a specific photo type: Camera Roll/Photo Library/ Photo Stream/Photo Shared, right-click on it, and choose Export to PC from the drop down list. After that, browse and select the target folder on your computer to export. Please see the screenshot to transfer all the photos in Photo Library below for reference.
export-photo-library-to-pc

Situation 3. Transfer All The Photos in One Photo Album from iPod to Computer
Step 2. Select a specific photo album under Camera Roll, Photo Library, Photo Stream or Photo Shared, right-click on it, and choose Export to PC from the drop down list. After that, browse and select the target folder on your computer to export. Please see the screenshot to transfer all the photos in the “beauty” album under Photo Library below for reference.

transfer-photos-from-photo-album-to-pc

d_win d_mac

Part 3:How to Transfer Photos between iPod and iPhone/iPad/iPod/Android Devices

Method 1: Transfer All The Photos

Step 1. Launch iOS Manager and connect iPod with the computer
Launch iOS Manager and connect more than one iPhone/iPad/iPod/Android device with the computer, here we name the connected devices: A, B, C.

iOS manager main page

Step 2. Select the source device from which you want to transfer contents
Select the source device A, and click Phone to Phone Transfer option on the main interface. Then a new window will pop up.

phone to phone transfer option

Step 3. Select the target device to which you want to transfer contents
From the pop-up window, select the target device B or C from the drop-down list and click Next.

select target device

Step 4. Transfer contents from one device to another
By default, all the content on your source device A that can be transferred are checked, namely Music and Videos, Playlists, Photos, Contacts( Note: Contacts are not supported by Mac version). You can uncheck the contents which you don’t want to transfer. Then, click Transfer. In the whole transfer process, DO NOT disconnect either of the devices. When the transfer completes, click OK.
start transfer process

transfer complete

Note: Only for Windows version, you’re enabled to tick the option: “Delete contents on target device then transfer” before clicking Transfer button, then the selected contents on the target device will be deleted firstly before the transfer.

delete contents on target device then transfer

Method 2: Transfer Photos Selectively

Step 1. Launch iOS Manager and connect iPod with the computer
Launch iOS Manager and connect more than one iPhone/iPad/iPod/Android device with your computer, here we name the devices: A, B, C.
connect-ipod-other-devices
Step 2. Select and transfer photos between devices
Select the device A from which you want to transfer photos, and click Photos icon at the top of the main interface, then select a specific photo type: Camera Roll/Photo Library/ Photo Stream/Photo Shared( Camera Roll is the default type), all the photos under this type will be shown on the right panel. Optionally, you can select one specific album under the photo type to enter the album window, then all the photos in this album will be shown on the right panel. After that, check the photos which you want to transfer from A to B or C, then click Export > Export to Device > B or C. As for the following screenshot, the selected photos in “beauty” album under Photo Library on the iPod can be transferred to the Samsung Phone or another iPad.

select-photo-transfer-to-devices

Note: Here you can right-click on the selected photos and then select Export to Device > B or C as well.

export-photos-to-devices

d_win d_mac

Related Article:

How to Transfer Videos from Computer to iPhone

How to Transfer Music from Computer to iPhone

How to Transfer Photos from Computer to Mobile Phone

How to Transfer Android Photos and Videos to iPhone

How to Transfer Music from iTunes Library to iPod

Nowadays,people like listening to songs in daily life,enjoy music anywhere and anytime.Most of them download the music on the Internet,such as the Youtube.Some of them sync the songs on the iTunes library.What’s the same things is that all of them are accustomed to transfer the music to their mobile device and share it conveniently.

transfer itunes music to ipod

My best friends Tommy and Kaskade are the fans of electronic music,they always notice the newest popular electronic music everytime.They need to download the songs from iTunes Library to iPod.However,somethings was wrong,they can’t sync the iTunes songs to the iPod as usual,then they fine another way to fix this issue.This page is describing on how to smoothly export music from iTunes Library to iPod.

1 Click Transfer Music from iTunes Library to iPod(touch) without Overwriting your Previous Content

Before starting tutorial about how to sync music to iPod without iTunes, we will make a brief introduction of iOS Data Manager firstly.iOS Manager is meticulously designed for transferring & managing media file on iPod, iPhone and iPad without overwriting the previous data.What’s this program can do for you materially?It help to transfer music between iTunes Library and iPod/iPad/iPhone,transfer music between computer and iPod/iPad/iPhone,transfer music between Android device and iOS device.There is no doubt that iOS Manager provide a full solution to manage music playlists on iPod/iPad/iPhone.

Applicable iOS Device:
-iPod touch 6/5/4,iPod nano,iPod shuffle,iPod classic, iPod mini
-iPhone 7,iPhone 6S(Plus),iPhone 6(Plus),iPhone SE,iPhone 5S/5C/5
-iPad air,iPad pro,iPad mini,etc,.

d_win d_mac

Part 1:How to Export Music from iTunes Library to iPod

Step 1.Launch iOS Manager and connect your iPod with the computer.Then click Transfer iTunes Media to Device icon on the main interface.

ios manager main page

Step 2.iOS Manager will detect all the media files in iTunes and show them by list on the pop-up window.By default,the entire library has been checked.But you can uncheck some items that you won’t transfer to your iPod.

select transfer itunes media to ipod

Step 3.Transfer Music from iTunes Library to iPod
Click Transfer to start transferring selected files to your iPod and then click OK to complete the process.

Note:There is no worry about duplicate files as iOS Manager enables to automatically detect the duplicates and only transfer the exclusive contents from iTunes to iPod.

click transfer button

transfer music to ipod

d_win d_mac

Part 2:How to Sync Music from iPod to iTunes Library

Step 1.Launch iOS Manager and connect your iPod with the computer.

connect ipod with computer

Step 2.Export music from your iPod to iTunes library.
Click Music icon at the top of the interface,then select the specific option Music (Music is the default option).Please note that iTunes U/Audiobooks/Podcasts is available to select here too.Then check the files you want to transfer to iTunes,and click Export > Export to iTunes.

select music transfer to itunes

select-itunes-u-transfer-to-itunes

select podcasts music transfer to itunes

select audiobooks transfer to itunes

Step 3.Export successfully,click OK to finish the export process.

transfer music to itunes complete

d_win d_mac

Part 3:How to Transfer Music between Android Device/iOS Device and iPod

Step 1.Launch iOS Manager and connect your devices with the computer.
Launch iOS Manager and connect the devices(iPhone/iPad/iPod/Android device) with your computer,here we name the devices: A, B, C.

connect devices to pc

Step 2.Select and transfer music between devices.
Select the device A from which you want to transfer music, and click Music icon at the top of the main interface, check the songs which you want to transfer from A to B or C, then click Export > Export to B or Export to C. As for the following screenshot,the music on the iPod can be transferred to the Samsung phone or the iPad.

select device to export

Note:Here you can right-click on the selected music and then select Export >Export to B or Export to C as well.

export music to devices

d_win d_mac

Part 4:How to Convert and Play iTunes Music on iPod

Here is another solution we are strongly recommend for you. A powerful Apple Music Converter for Windows & Mac,which enables to convert Apple music to MP3, M4A, AC3, AU, AC3, FLAC, AIFF or MKA,and remove the DRM encryption from Apple music,you can enjoy Apple Music tracks with more freedom and convenience and play on iPod for free forever.After converting the iTunes DRM-Protected Music to MP3, you are able to play them on any computers or devices such as MP3 player, iPhone, iPod, iPad, PSP, Zune, Windows Phone, Nokia, Sharp and other Android devices.

Click here to download Apple Music Converter:

d_win d_mac

Apple Music Converter Key Features:

-Free load and convert previous purchases Apple music from iTunes to the local computer for playing at any time any place.
-Convert Apple Music, iTunes M4P songs to DRM-free MP3 and keep Apple Music as long as you like
-Play Apple Music on iPhone/iPod/iPad for Free
-Convert iTunes DRM-Protected Music to most popular mobile device
-Supports the latest iTunes 12.6.2

Click to get the steps on play iTunes music on iPod in detail:

How to Play iTunes Music on iPod

Step 1. Run Apple Music Converter on the Computer
To begin with, please run Apple Music Converter program on the computer.

launch apple music converter

Step 2. Select the Apple Music to Convert
Select the Apple music you need to convert, including music, playlists, Audiobooks, M4P Audio, iTunes movies and TV shows. Then click “Download“.

Step 3. Select MP3 Output Format for Converting
Select the format for the converted music, here we suggest you to choose “MP3” format, that is match with iPod.

Step 4. Convert Apple Music to MP3 for iPod
Click “Start Convert” to begin to convert selected music on the computer.

convert itunes music to mp3 for ipod

Step 5. View the Converted Apple Music on the Computer
When the conversion is finish, you could explore the output files and folders by clicking “Open Output File” button to view the converted music file on the computer.

Step 6. Import Converted Apple Music to iPod via iOS Data Manager
In the last step what you should do is to transfer the converted music to your iPod  via iOS Data Manager.

Related Article:

How to Transfer Music from Android to iPhone/iPad/iPod

How to Transfer Music from Computer to iPhone

How to Sync Videos from Computer to iPhone

How to Transfer Android Photos and Videos to iPhone

How to Transfer Photos from Computer to Mobile Phone

How to Restore iPhone in Recovery Mode with/without iTunes

“Hello.I’m Lily.My iPhone was get into the Recovery Mode when I was updated iOS 10 on it,then I opened the iTunes and try to get my iPhone out of the Recovery Mode,but it was failed.What’s wrong?Can someone tell me the true?And please tell me the way to restore iPhone in Recovery Mode without iTunes.Thanks advance.”-Lily Ann

It’s pretty common that iPhone get into Recovery Mode and stuck in the loop.It is a state of iBoot when iPhone users are applying updates,restoring data or performing other operations on device.What’s worse,the phone can not return to normal state unless something is done to solve this problem.When your iPhone stuck in Recovery Mode it can be quite frustrating.It is equally as confused when you don’t know how to get iPhone out of Recovery Mode.There are actually several ways you can get your iPhone out of Recovery Mode.Now we are providing you two solutions available to restore iPhone in Recovery Mode with/without iTunes separately.

Part 1:Restore iPhone in Recovery Mode via iTunes

Follow these simple steps to restore your iPhone in Recovery Mode with iTunes.

Note:Restore iPhone in Recovery Mode with iTunes will lead to data loss on your device,all your personal file will be erased after this operation.Remind you doing backup for your iPhone to protect data.

Extra tips:How to Restore Deleted Data from iPhone after getting out of Recovery Mode with iTunes

Step 1.First,ensure that iTunes is updated on your computer.Please connect the USB cable to your computer but don’t connect it your iPhone just yet.Instead,power off your iPhone.

power off iphone

Step 2.keep holding the home button and connect the USB cable to the iPhone.The Apple Logo will appear and then quickly change to the “Connect to iTunes” logo.

connect iphone to itunes

Step 3.Release the home button now and your iPhone should be into Recovery Mode.iTunes will display a message confirming this.You can then click on “Restore” to restore a previously saved iTunes backup file.

get iphone out of recovery mode via itunes

Part 2:Restore iPhone in Recovery Mode via iOS System Recovery without Data Loss

One of the most effective program to get iPhone out of Recovery Mode without data loss is iOS System Recovery.With this iOS System Recovery program, you are allow to easily restore iPhone to normal state without iTunes in minutes.Mostly importantly, it won’t lost data during the whole repairing process.

d_win d_mac

Focus on the Features of iOS System Recovery:
-Fix with various iOS system issues like Recovery Mode,white Apple logo,black screen, looping on start screen,etc,.
-Only fix your device out of abnormal mode, no data loss at all.
-Work for all models of iPhone, iPad and iPod touch including iPhone 7,iPhone SE.
-Fully compatible with Windows or Mac, iOS 10 or lower.

Step 1.Run iOS System Recovery on Computer and Select Recovery Mode
Launch iOS System Recovery on your computer.In the primary interface window,click “More Tools”,choose “iOS System Recovery” and then connect your iPhone to your computer using USB cable.Your iPhone will be detected soon.Click on “Start” to begin.

iOS System Recovery main page

restore iphone in recovery mode without itunes

Step 2.Download the Firmware for iPhone
In order to fix iPhone stuck in Recovery Mode,you will need to download the latest firmware for restoring.The program will offer the latest iOS version for you to download.Just click on “Download” and the program will download it automatically.

select your iPhone model

download the firmware for iPhone

Step 3.Get iPhone Out of Recovery Mode without iTunes
Once the download is complete,iOS System Recovery will start to repair the iOS system of your iPhone and easily get it out of Recovery Mode without iTunes.

restore iphone in recovery mode without itunes

Then your iPhone will restart in normal mode after iOS System Recovery has completed the process.The whole process will take you less than 10 minutes.

restore iphone in recovery mode without itunes

Pros/Cons:Your iPhone will be updated to the latest iOS version.If your iPhone is jail-broken,it will be updated to before it was jail-broken and the device will be re-locked if it was unlocked before the restoring via iOS System Recovery.

d_win d_mac

Related Article:

How to Enter & Exit iPhone Recovery Mode

How to Restore iPhone System to Normal without Firmware Update to iOS 10

How to Get iPhone 7/SE/6S/6/5S/5 out of Recovery Mode

How to Fix Bricked iPhone after iOS 10,iOS 9 Update

How to Fix iOS 10 System Update Failed

How to Downgrade iPhone or iPad from iOS 10 to iOS 9.3.5