Huawei Technologies Co. Ltd. is a company operating at multi national level, and it is labelled as the biggest Telecommunications Equipment Company in the world at the moment. It’s a Chinese based company. Huawei phones become more and more popular around the word, not only in China. The most used Android mobile phone is Samsung, however, Huawei, is the second. All of the Huawei Phones are based on the popular Android OS. Their devices are based on cutting-edge technologies and Huawei is determined to be the next big thing in the smartphone market.
Huawei phones are based on Android, when you stored a number of personal data on your Huawei phone, manage data is one thing you can’t ignore, including videos, music, photos, contacts, SMS and more. Most of mobile users think that it is necessary to backup and secure the data on their devices so that in case of accidents, Huawei users is no exception. It is possible to recover the data which was stored on their Huawei phones from backed up after losing. This is available with the help of some professional data manager tool.
One-Click Manage Huawei Phone on Computer
Android & iOS Manager – Huawei Manager is the tool which totally meets your need. It’s a wonderful manager tool for Android and iOS devices, help to manage Huawei phone on computer safely, backup/restore/transfer files for Huawei phone, including videos, music, playlists, photos, contacts, SMS, apps. It is capable of transferring files between Huawei and iTunes library, transferring files between Huawei and computer, transferring files between Huawei and Android/iOS device. Compatible with all Huawei and Android models, such as, Huawei P20/P10/P9, Mate 10/9, Honor, etc,.


More Main Features of Android & iOS Manager:
-Backup music, photos, videos, contacts, SMS, Apps etc. to computer and restore them easily.
-Manage, export/import music, photos, videos, contacts, SMS, Apps etc,.
-Phone to Phone Transfer – Transfer everything between two mobiles.
-Highlighted features such as 1-click root, gif maker, ringtone maker.
-Fully compatible with 3000+ Android devices (Android 2.2 – Android 8.0) from Huawei, Samsung, LG, Lenovo, HTC, Motorola, Sony, OnePlus, OPPO, etc,.
Part 1: How to Manage Videos on Huawei Phone
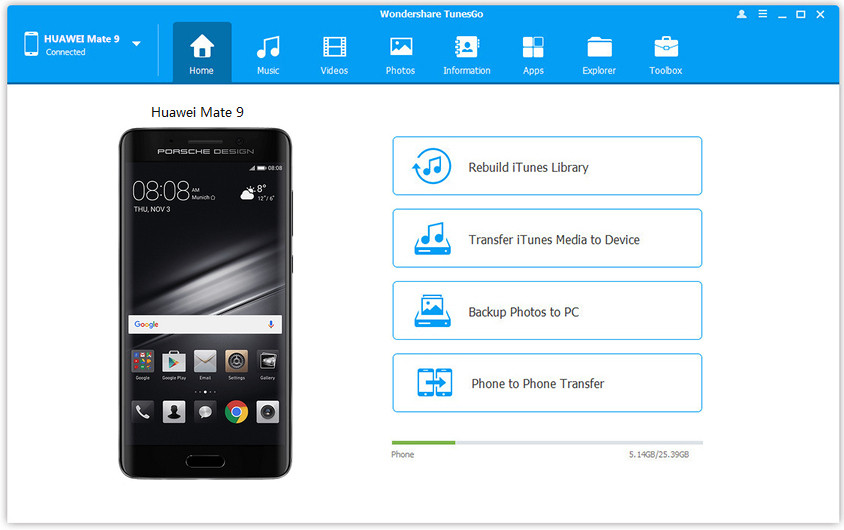
Launch Huawei Manager and connect your Huawei phone to computer.Your Huawei phone will be detected and displayed in the primary window.
Step 1.Select Music File to Transfer
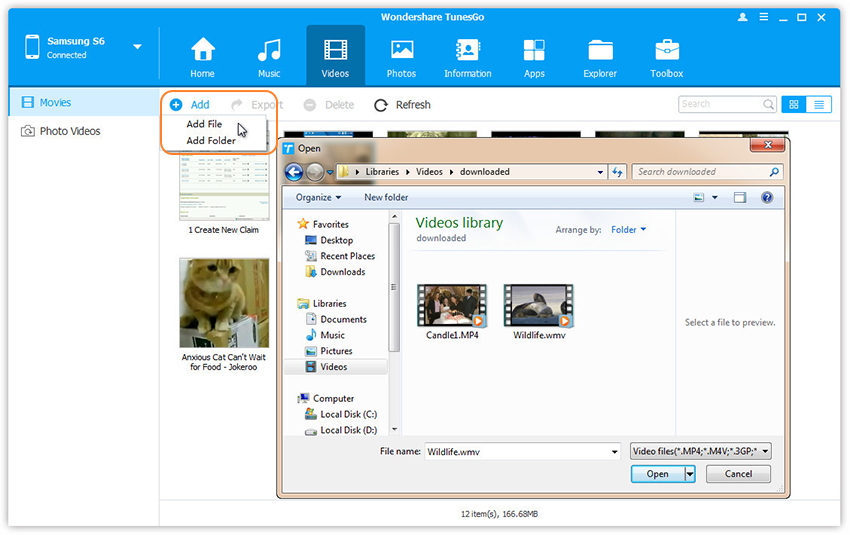
Select Music tab.Once your media loads, click Add > Add File or Add Folder.
Step 2.Sync Songs from Computer to Huawei Phone
This brings up your file browser window,from which you can select videos to import from your computer.All videos imported can be watched with the built-in player.You can simply Drag and Drop videos from computer to Huawei phone.
Part 2: How to Manage Music on Huawei Phone
Launch Huawei Manager and connect your Huawei to computer.Your device will be detected and displayed in the primary window.
Step 1.Select Music File to Transfer
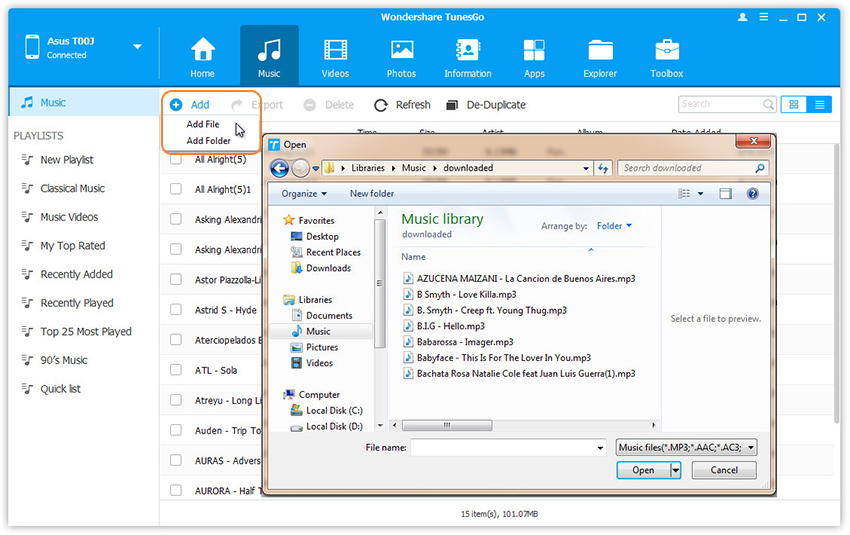
Select Music tab.Once your media loads, click Add > Add File or Add Folder.
Step 2.Sync Songs from Computer to Huawei Phone
This brings up your file browser window, from which you can select songs to export from your computer.And you can also create new playlist by right clicking Music to save the imported songs.You can simply Drag and Drop music files from computer to your Huawei.
Part 3: How to Manage Photos on Huawei Phone
Launch Huawei Managr and connect your Huawei phone to PC.Your device will be detected and displayed in the primary window.
Step 1.Select Photos File to Transfer
Click Photos tab.All the albums will be displayed on the left.Select one to import photos from PC to selected Samsung photo album.
Step 2.Sync Photos from Computer to Huawei Phone
Click Add > Add File or Add Folder.
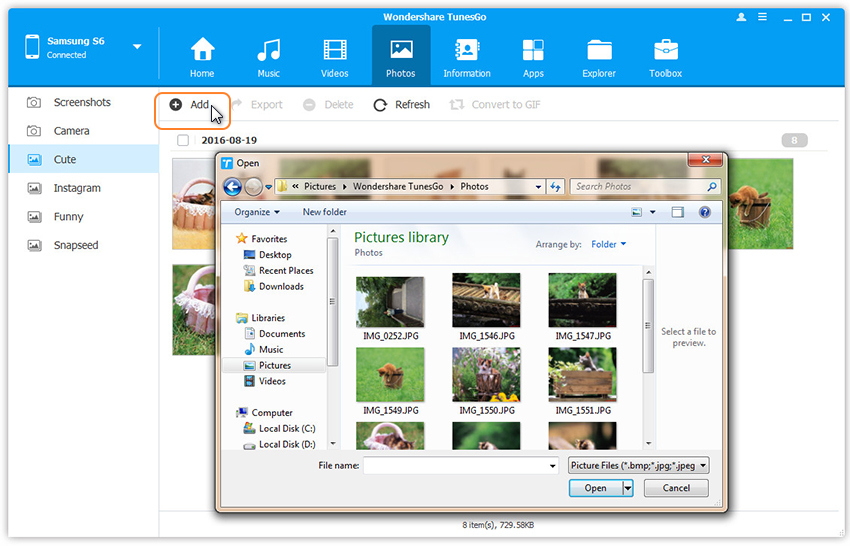
If you only want to select some photos,then click Add File.You can create new albums and add photos in it. Simply right-click the photos category on the left panel, then click New Album.
If you want to transfer all the photos in one folder,then click Add Folder.
Select photos or photo folders and add to your Huawei phone.Hold down Shift or Ctrl key to choose multiple photos.
Part 4: How to Manage Contacts on Huawei Phone
Huawei Manager makes it extremely easy to add and edit contacts, group contacts, merge duplicate contacts and delete useless contacts in batches.Huawei Manager also allows you to manage contacts on your Phone, SIM card, iCloud, Exchange, Yahoo! and other accounts. In the following part, we would like to show you the detailed tutorial.
Launch Huawei Manager and connect your Huawei to computer.
Manage Contact Groups
Step 1. Click Information tab. In the contact management window, select and expand account from which you want to add and edit contacts, including your phone Contacts, SIM Contacts and Google Contacts.
Step 2. Right-click the contact groups on the left panel.
You can select to create New Group, Rename Group, or Delete Group.
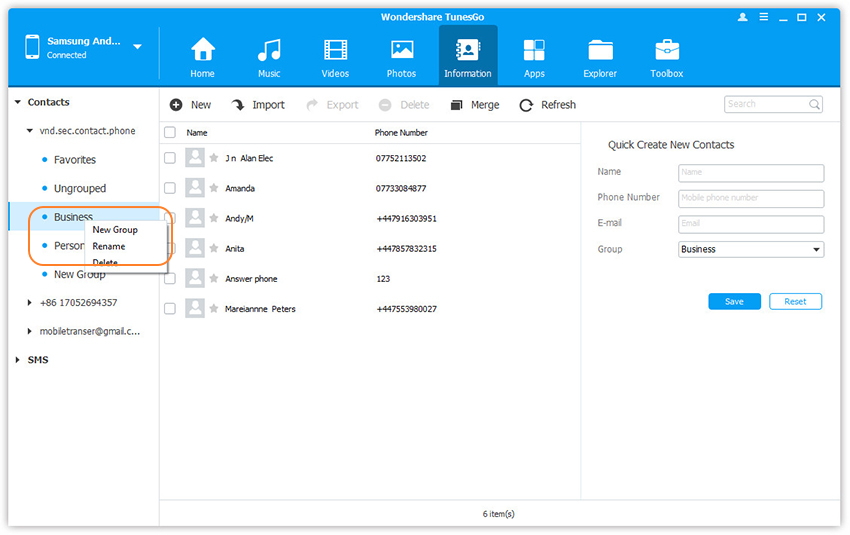
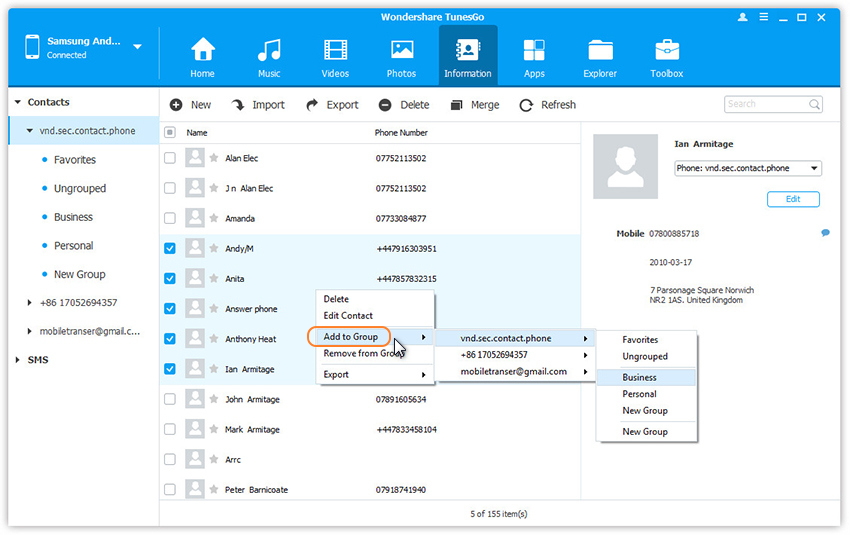
Step 3. Right-click on selected contacts, you can add contacts to specified group.
Merge Duplicates
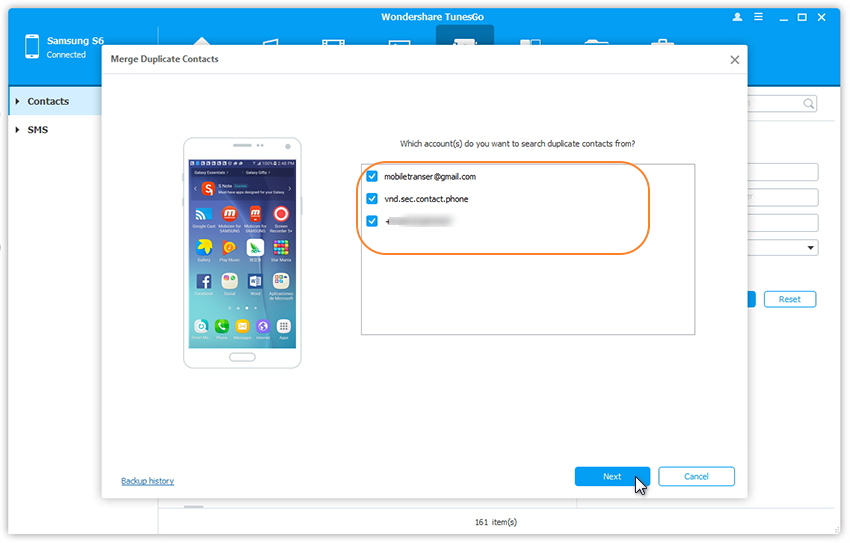
Step 1. Click Information tab. In the contact management window, click Merge.
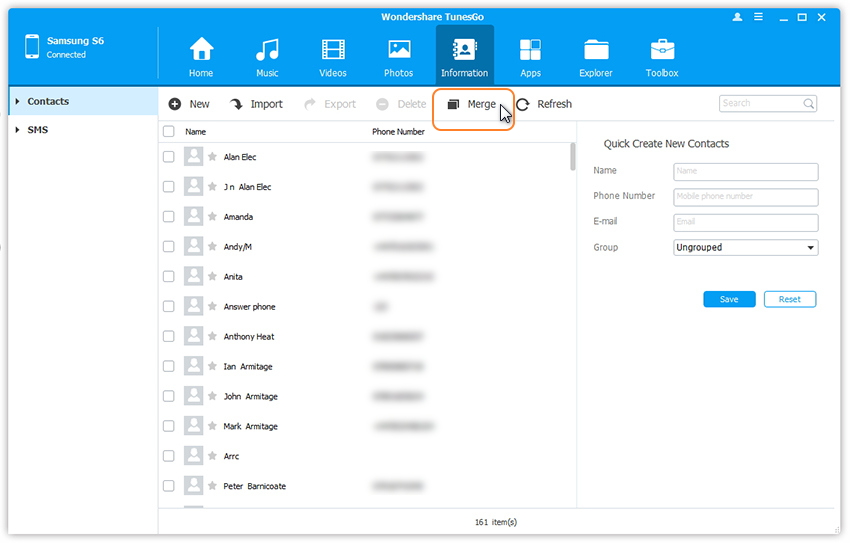
Step 2. Select account(s) from which you want to search duplicate contacts, including your phone Contacts, SIM Contacts and Google Contacts.
Step 3. All duplicate contacts that have the same name, phone number or email will appear for your review.
Step 4. Select a match type to find duplicate contacts.
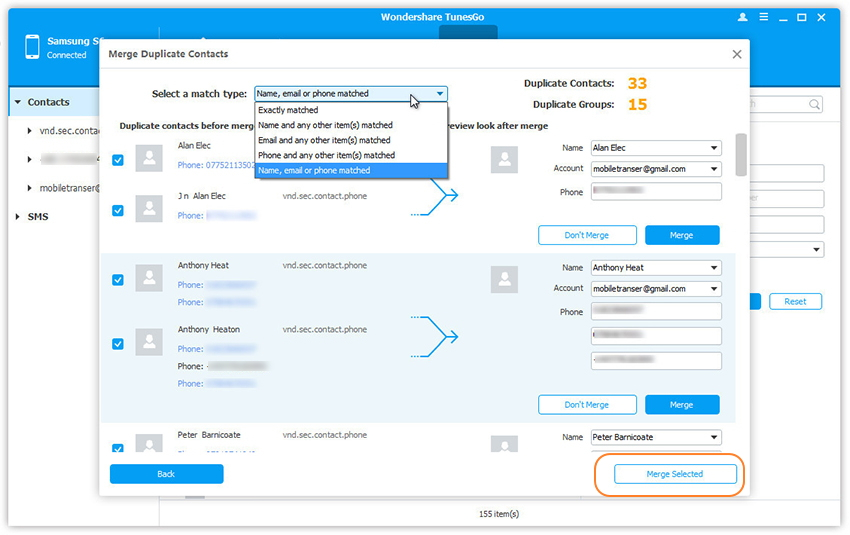
Step 5. Click Merge Selected to merge all the contacts or Merge selected contacts one by one.
How to Add & Edit Contacts
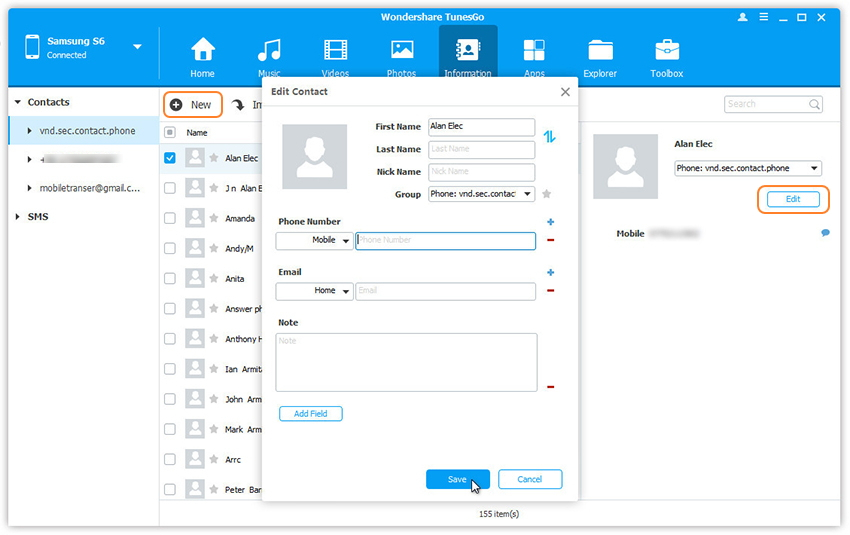
Step 1. Click Information tab. In the contact management window, select account and group from which you want to add and edit contacts, including your Phone Contacts, SIM Contacts and Google Contacts.
Step 2. Click New to open the Add to contact window. As you see, you can edit name, email, phone number, website, address, middle name, etc,. You can also search and Edit selected contacts.
Delete Contacts in Batches
Step 1. Click Information tab. In the contact management window, select group from which you want to delete unwanted contacts, including your Phone Contacts, SIM Contacts and Google Contacts.
Step 2. Tick Contacts you want to delete and click Delete.
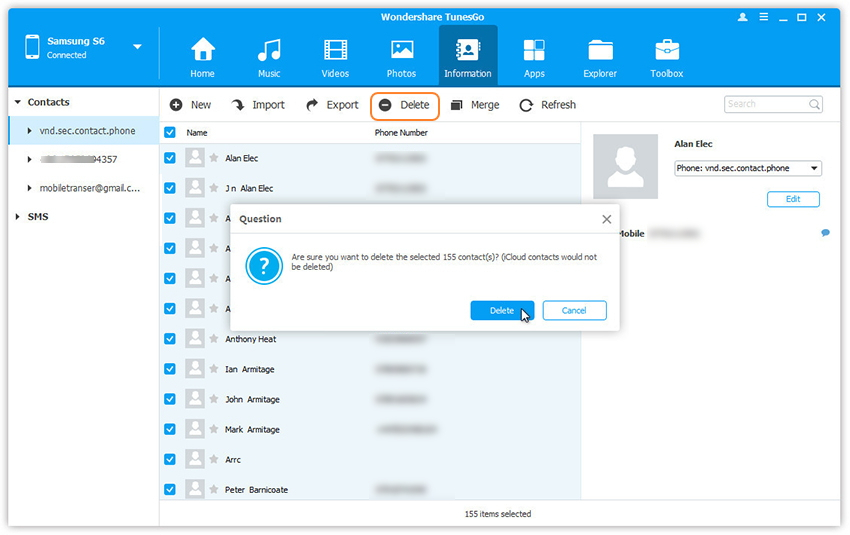
Step 3. In the pop-up dialog, click Yes.
Part 5: How to Manage SMS on Huawei Phone
Huawei Manager works like a desktop SMS assistant, helping to manage all SMS of your Android device on computer. With it, you could save SMS and transfer to computer, send and receive SMS on computer, and mark unread SMS as read.
Launch Huawei Manager and connect your device to computer.
Delete Messages in Batches
Step 1. Click Information tab, then select SMS on the left panel. All messages will be shown on the right.
Step 2. Tick Messages you want to delete and click Delete.
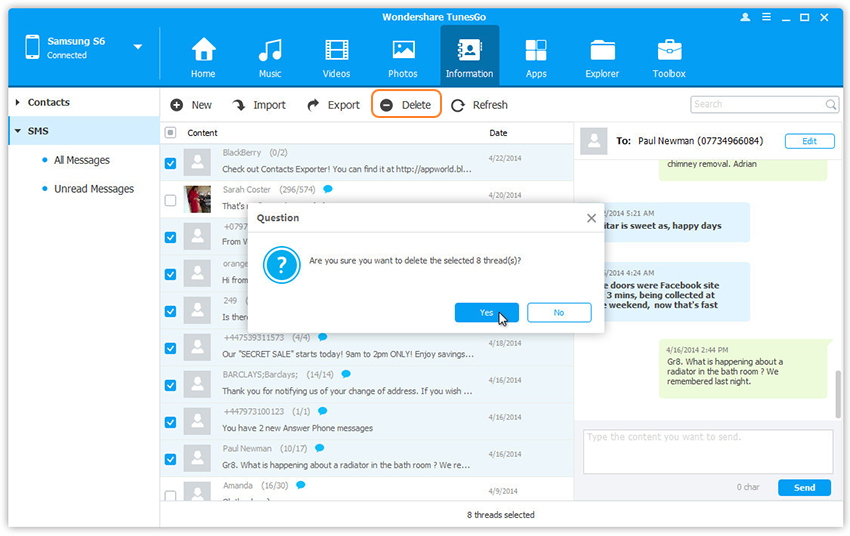
Step 3. In the pop-up dialog, click Yes.
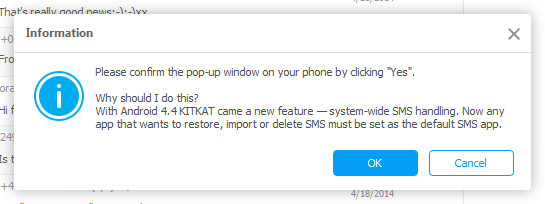
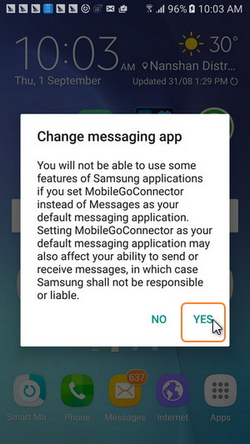
Note: The program may ask you to set MobileGoConnect as your default messaging application, as shown below. Tap on Yes on your device first, and then confirm it on your computer.
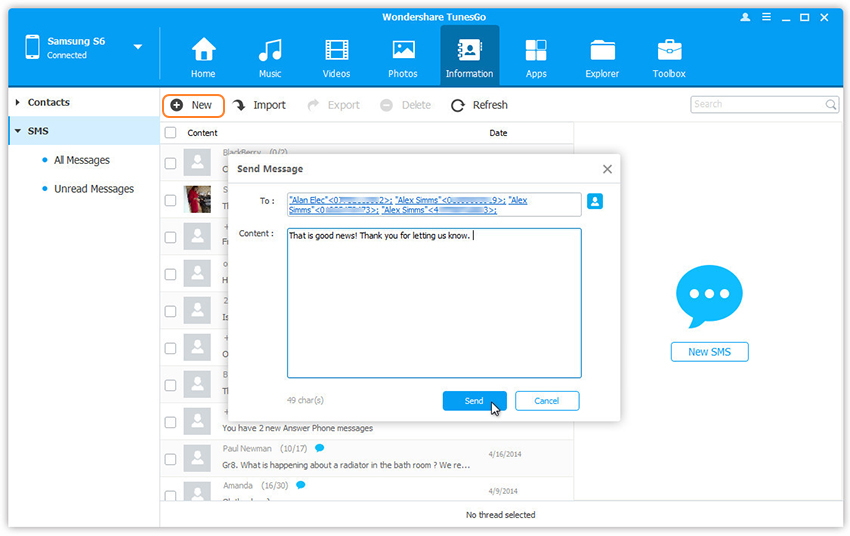
Send Messages via PC
Step 1. Click Information tab, then select SMS on the left panel. All messages will be shown on the right.
Step 2. Search and read selected messages. You can simply type the content and click Send to send messages via Huawei Manager on the computer.
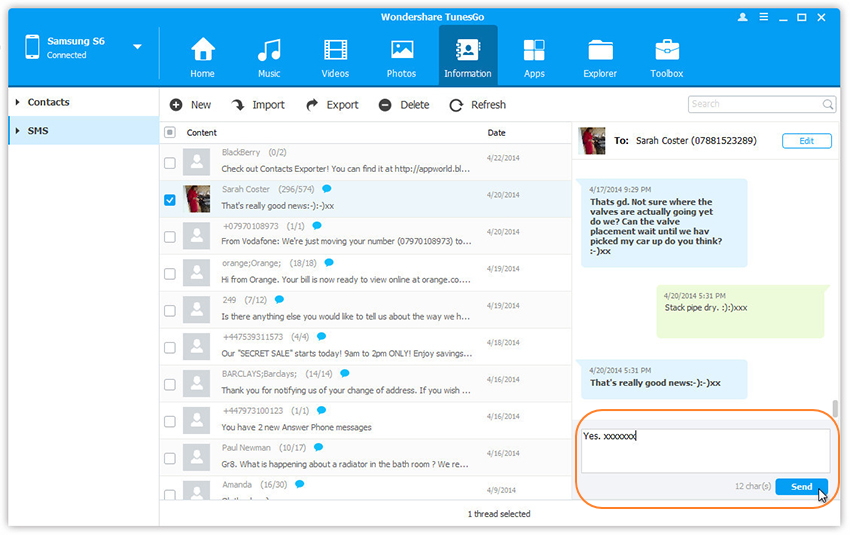
Or you can click New SMS on the right column to create and send a new message to multiple recipients.
Related Articles:
How to Recover Deleted Data from Huawei Phone
How to Transfer iPhone Data to Huawei Phone
How to Transfer Android Data to Huawei Phone
How to Backup and Restore Huawei Phone
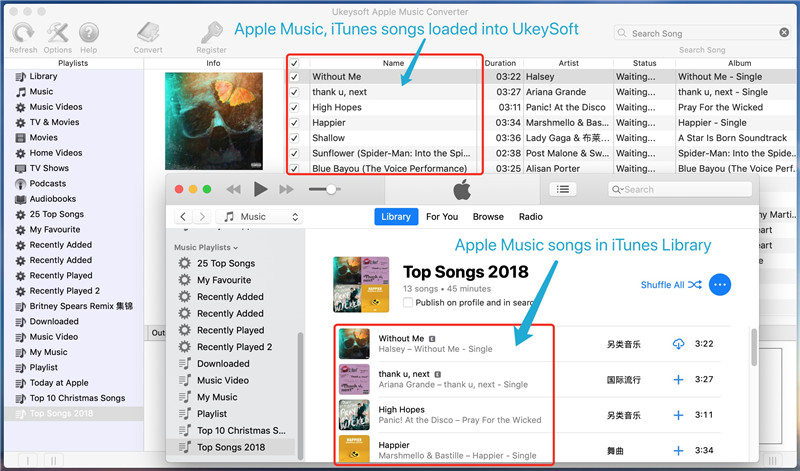
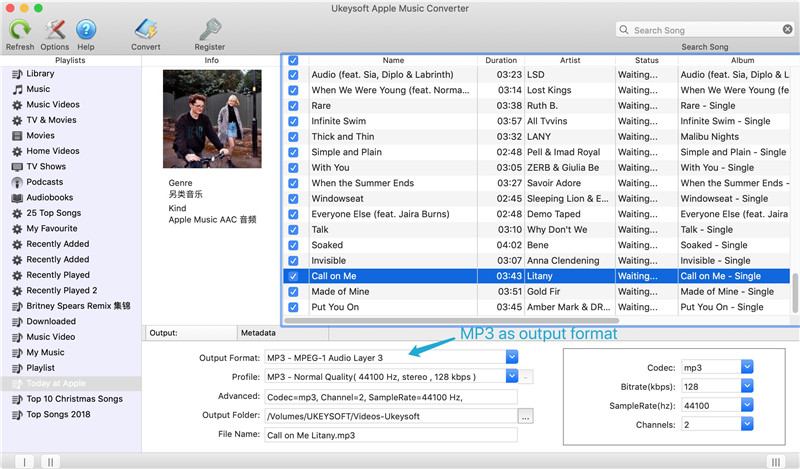
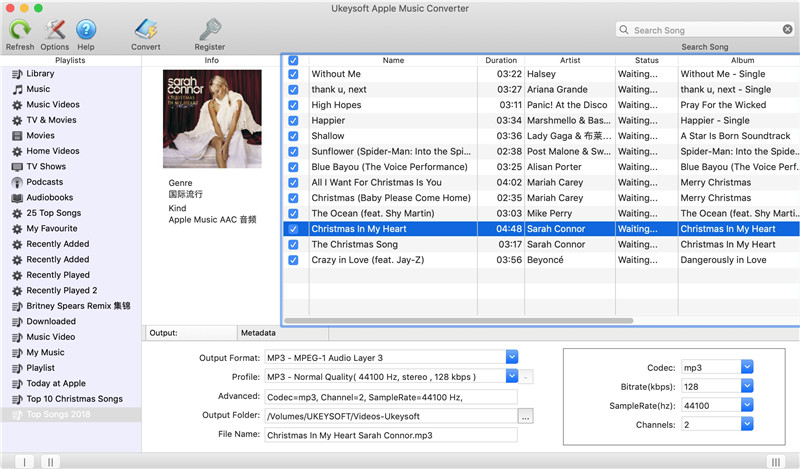
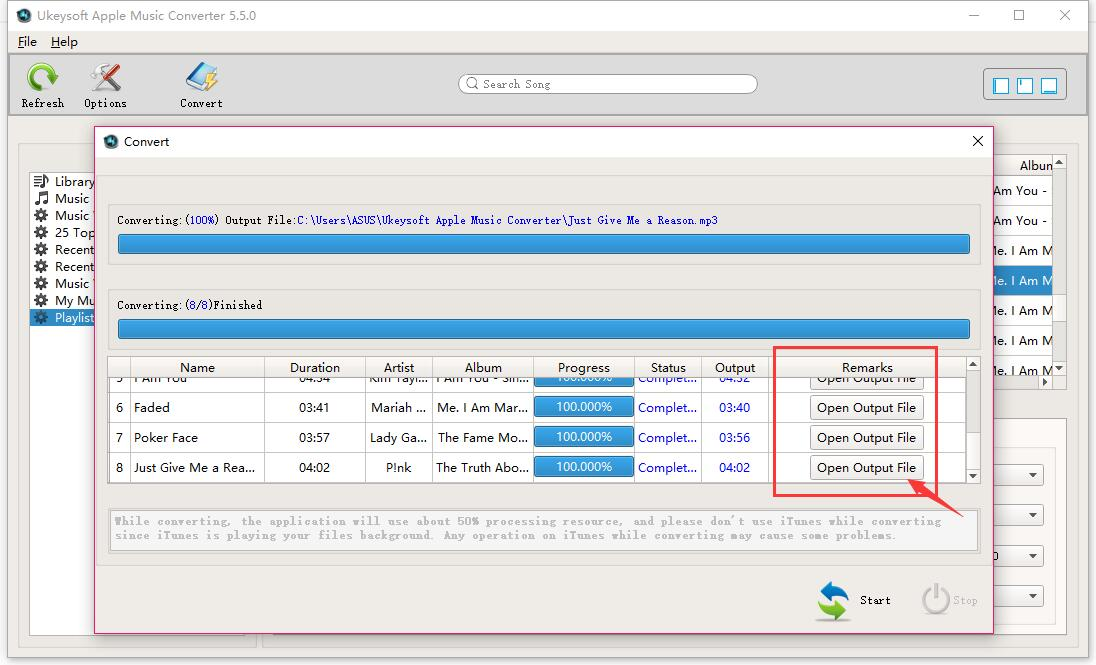
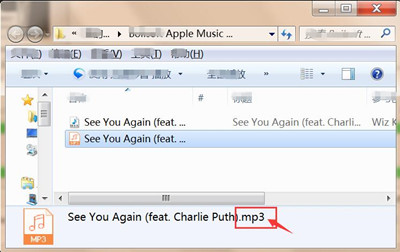
How to Play Apple Music on Huawei Phone
How to Sync iTunes Videos/Movies to Huawei Phone