Is there any way to recover lost data from Android phone after 6.0 Marshmallow update?I updated my Samsung Galaxy S6 to Android 6.0 Marshmallow last day, and after that, I found that some photos, messages got lost on the phone. Is it possible to get those files back?It’s really such important for me.-Hyde
After months of waiting, the beginning has arrived. We’ve been excited about the changes that Android 6.0 Marshmallow is bringing to the table. Not just new features, but bug fixes and stability improvements over Lollipop as well. The first official builds of Android 6.0 Marshmallow have hit and it’s time to see what this operating system can really offer!

ANDROID 6.0 MARSHMALLOW – NEW FEATURES EXPLAINED
There are a few changes that are more notable than others. The apps section of the Settings menu has been changing to accommodate the new permissions system. The priority notification settings that caused quite a stir in Lollipop have now been relegated to the Quick Settings. Other minor changes include a more colorful Google Search bar, a new app drawer, and dragging app icons around the home screen now provides a shortcut to uninstall.
There are also a host of new animations that are too numerous to list here. Some of the more notable ones include the new Google Search animations and a more streamlined set of animations for opening and closing the app drawer and applications. Text selection also got a slight revamp with a little box that pops up now with the usual set of controls.
UNFORTUNATELY TO LOST DATA AFTER UPGRADING
I can surmise that you must feel excited about the new features of Android 6.0 marshmallow and can’t wait to upgrade your Samsung phones or Android phones by some upgrade program.However,some of you may meet the circumstances that your lose data from phone after upgrading process and be sick to the back luck stuff.Fortunately,there is a suitable and safely data rescue recovery I strongly recommend here for you-Android 6.0 Data Recovery.
Android 6.0 Data Recovery-Recover Samsung Lost Data after Android 6.0 Upgrade
Android 6.0 Data Recovery is a reliable tool that you can use to recover data from Samsung phone after upgrading to Android 6.0.It allows you to recover lost files including contacts, videos, photos, text messages, documents from all popular Android devices,such as Samsung, LG, HTC, Huawei, Sony, ZTE, etc,for example Samsung Galaxy S7/S6/S5/Alpha,Galaxy A5,Note 7/Note 5/Note 4/Note 3,LG Nexus 5X/G5,Huawei Nexus 6P,Nexus 6P/5X/5.Now you can read the detailed guide to learn how to perform the data recovery job.


Recover Data from Samsung after Android 6.0 Marshmallow Upgrade
Step 1.Avoid Data Overwritten on Samsung Phone
Keep your phone data from being overwritten is essential to protect your Samsung data.The mean is stop update your Samsung files once your data is lost.
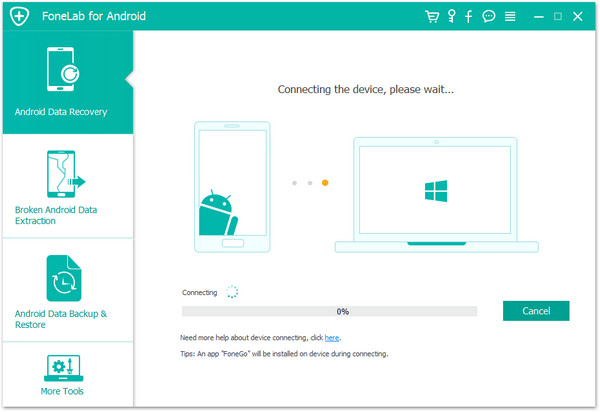
Step 2.Connect Samsung to Computer and Run Android 6.0 Data Recovery
Then connect your Samsung phone to PC with an USB.
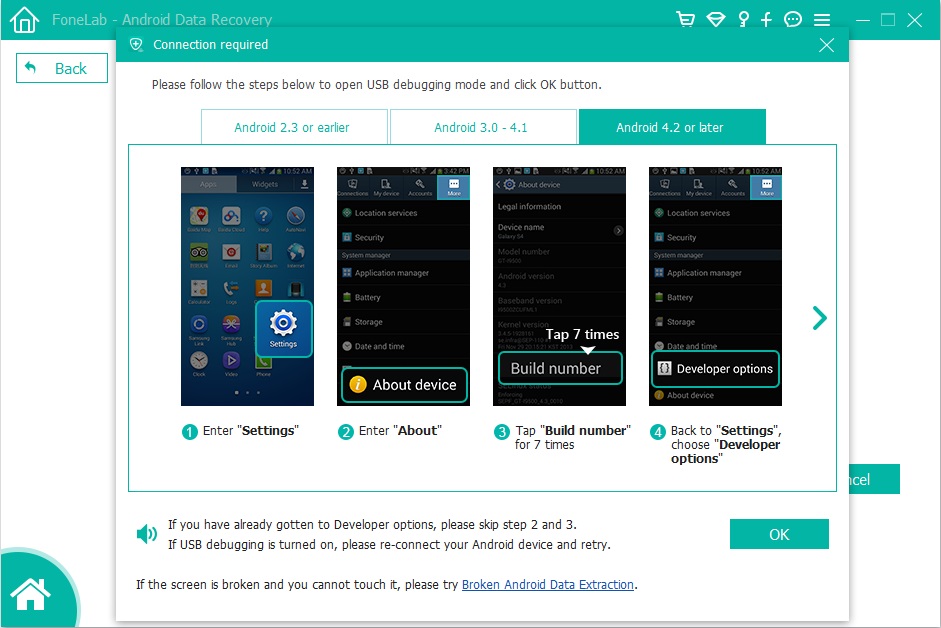
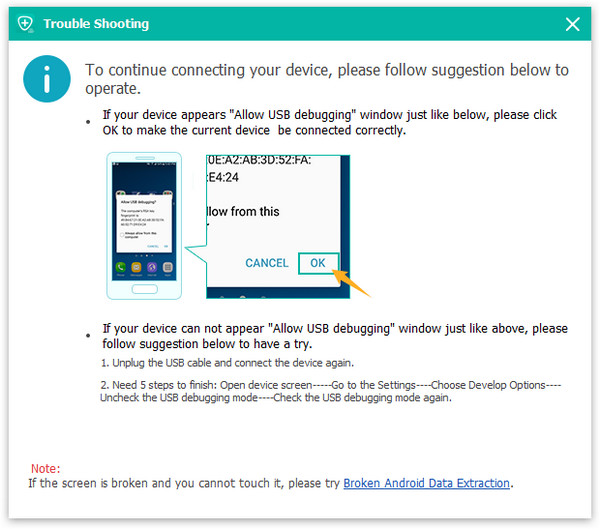
Step 3.Enable USB Debugging on Samsung Phone
If you have not opened the USB debugging option yet, this program will ask you to do it.If your phone running Android 4.2.2 or above, there will be a pop up message on your Android phone, tap on “OK” to allow USB debugging.
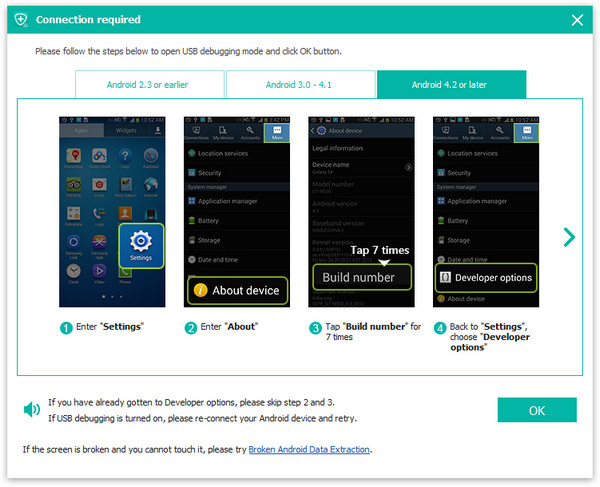
Tips:For Galaxy S7 or S7 edge,please click “Allow” on the phone and go to next steps.
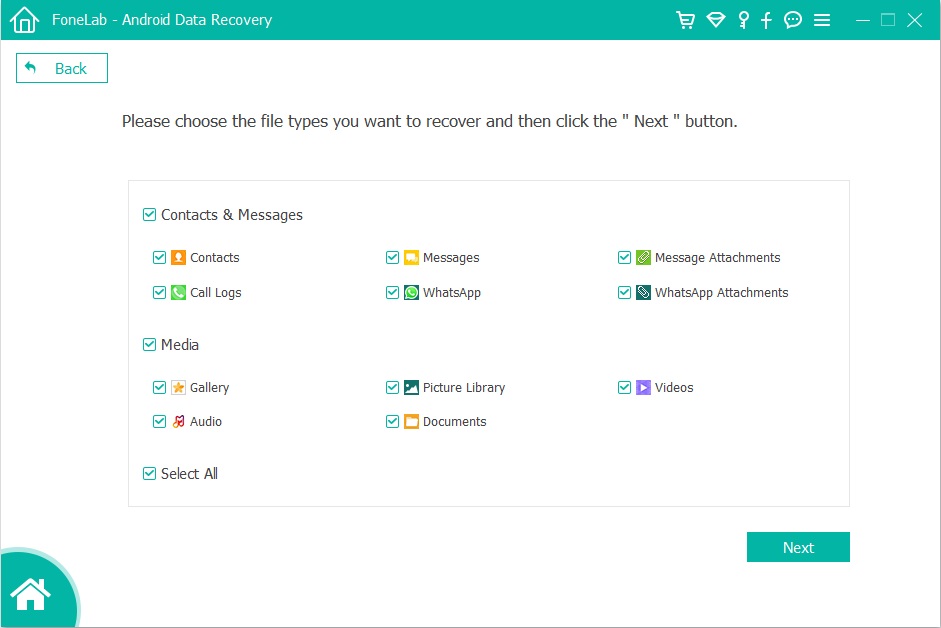
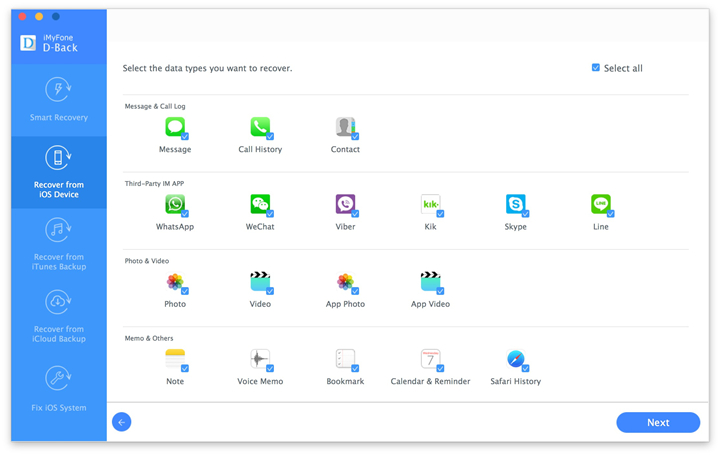
Step 4.Select the Type of Files you Want to Recover on Samsung
Tick “Gallery” only if you lost your Samsung Galaxy S5 photos,pictures,App images and want to recover them only. It you save you much time and you can recover your deleted photos back quicker.

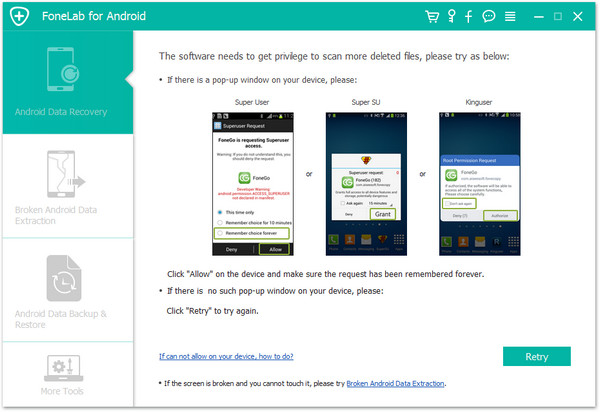
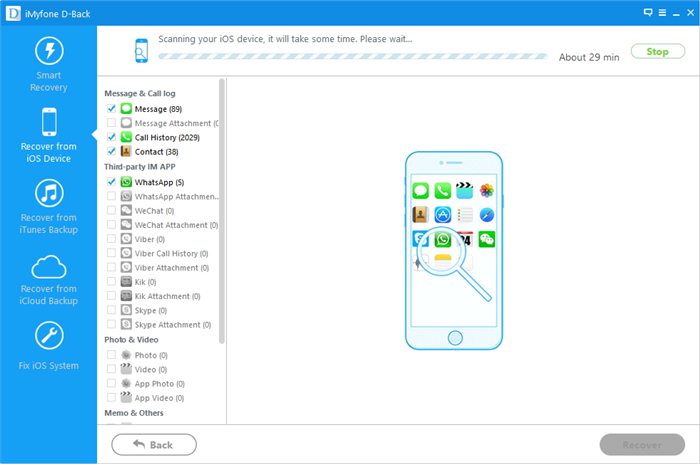
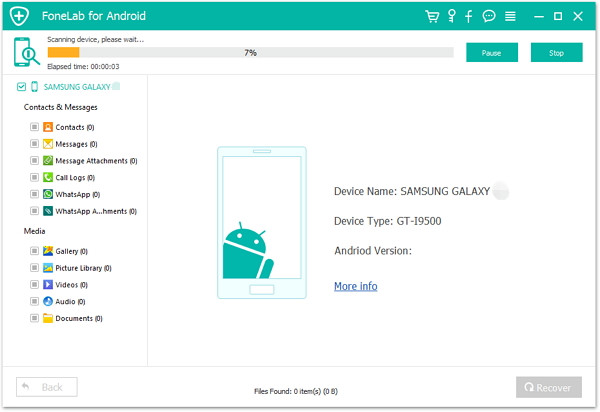
Step 5.Allow the Program Analyze your Samsung Galaxy
During the Android 6.0 Data Recovery analyzing your phone,a pop-up will ask whether allow or not to proceed.Here you need to tap on “Allow” on Samsung in order to enable the Superuser Request.And then click “Start” on the program’s window to begin scanning your device.

Step 6.Begin Analyzing and Scanning Lost Data from Samsung Phone
Now the program begin analyzing your Samsung device.
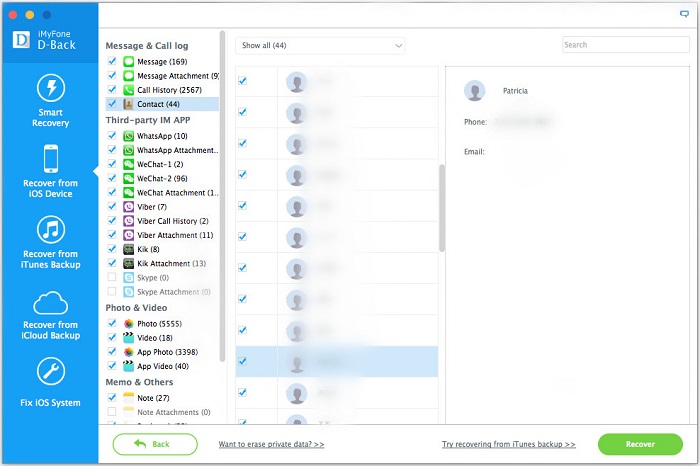
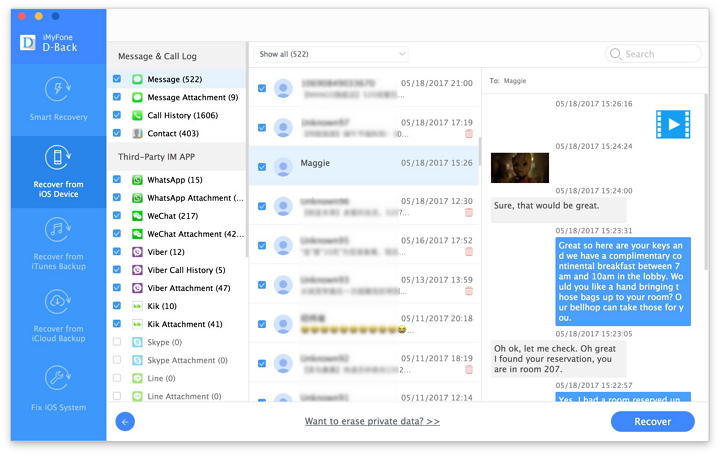
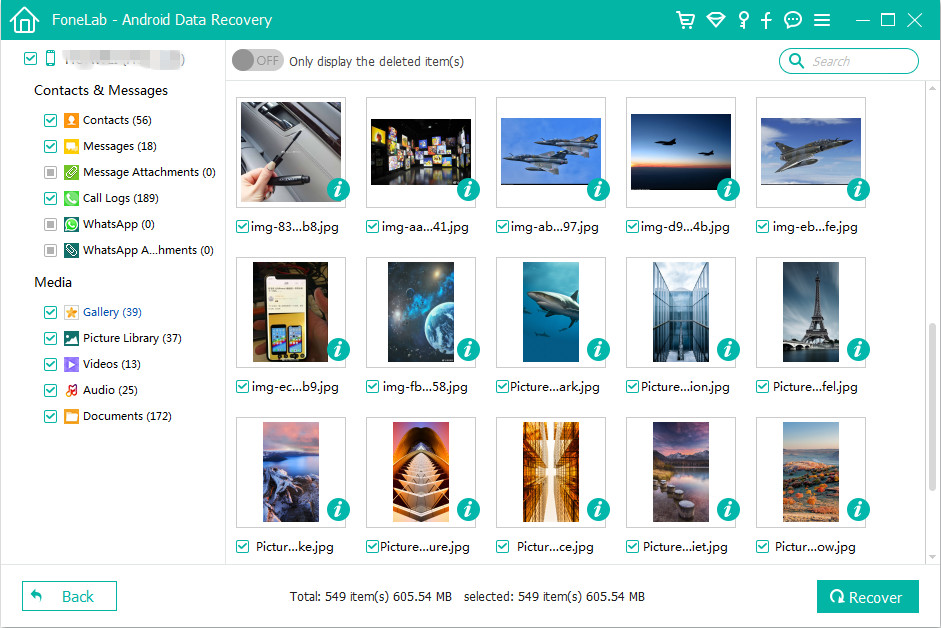
Step 7.Preview and Recover Samsung Data after Android 6.0 Update
After scanning,the recoverable files will be display in the scan result.Preview them one by one and mark those you want to get back,the last step is just click “Recover” to save them on computer.
Android Data 6.0 Recovery is professionally designed to recover data from Android phones especially Samsung.It is able to recover files from Android phones for operating system upgrade,restore to factory resetting,rooting,device damaged,phone stolen or more state of affairs.Although our program can help you get missing data back after Android 6.0,Android 7.0,Android 7.1 N update,we strong recommend you shuld backup Android data to computer before Android 6.0/Android 7.0 update,the Android Data Backup & Restore features in Android tool kit allows users backup and restore photos, videos, music, contacts, messages, WhatsApp and other App data on Android easily.
Read More:
How to Backup and Restore Samsung Data
Recover Lost Data after Upgrading to Android 6.0 Marshmallow
How to Root Samsung Galaxy Phone