iOS 10 now is applies to the iPhone and iPad.So before you upgrade to the newest operating system, you need to perform a backup of iPhone.I’m sure that some of you must be perplexed about backing up your iPhone data,such as contacts,SMS,photos, videos, call history, notes, whatsapp messages, App data,etc, you’ve heard countless horror stories of backup data missing, and data loss over the backup process.Relax,if follow this process we are about outline following,you will have no issues with your back up case.It will take the least amount of time, and you will not lose any of your files in the process,even selectively restore backup data on iPhone.
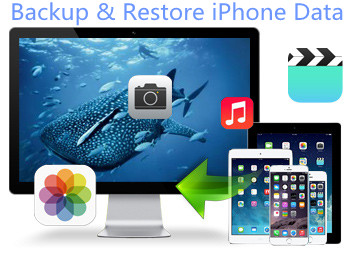
Backup Data and Restore your iPhone, iPad, or iPod touch from a backup
We recommend you should back up your iPhone, iPad, and iPod touch and restore after iOS reset, jailreaking, iOS upgrading; When you plan to buy an new iPhone 7/7 Plus,you may need to backup data from old iPhone,iPad and then restore them to new iPhone 7; you would not expect when your phone broken, damaged or stolen,it’s very necessary to back up your iPhone, iPad, and iPod touch,including iMessages, text messages, contacts, pictures, notes,App data and more!
2 Methods to Backup and Restore iPhone on Computer
Also for those of you who have or plan on purchasing the new iPhone 6s or iPhone SE models and want to transfer all your precious contents from your old phone to the new one,you’ll want to make sure to read this entire post as well as backing up is still the first step before moving content from one phone to another or restoring.
Method 1: Backup and Restore iPhone Data by iOS Backup & Restore Tool
iOS ToolKit – iOS Backup & RestoreTool permits to back up contacts,SMS,whatsapp messages from iPhone to computer safely,as well as restore data from backup files on iPhone directly.In addition,this predominate data manage program is useful for backup and restore various files on iPhone,photos,videos,notes,call logs and other personal document.It offers full support for iPhone 7, iPhone 6 and 6S,6 Plus and 6S Plus,iPhone SE/5S/5C/5/4S/4 and iPad,iPod.It works with all iOS versions, including iOS 9.3 and iOS 10.


Know more about iOS ToolKit:
-Restore backup content from BlackBerry, iCloud, iTunes, Kies and more to Android and iOS devices.
-Permanently erase all content from your old phone to protect your privacy being leaked.
-Works with 3,000+ phones including Droid, Symbian (Nokia), and all models of iPhones, including the newest iOS 9 devices.
-Transfers content between phones on different networks.
-Zero quality loss & risk-free: everything you transfer is 100% same as the original and can be only read by yourself.
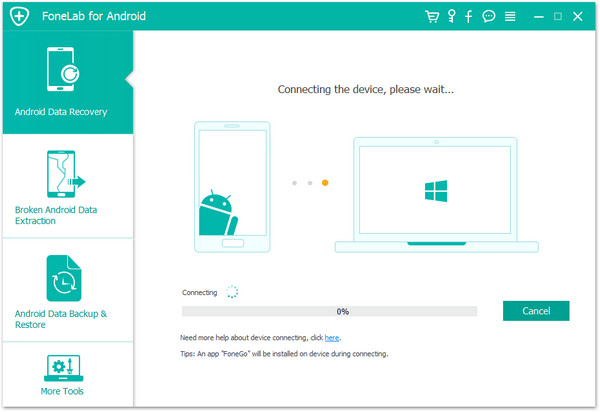
Step 1.Run the iOS Backup & Restore program and Connect iPhone to Computer
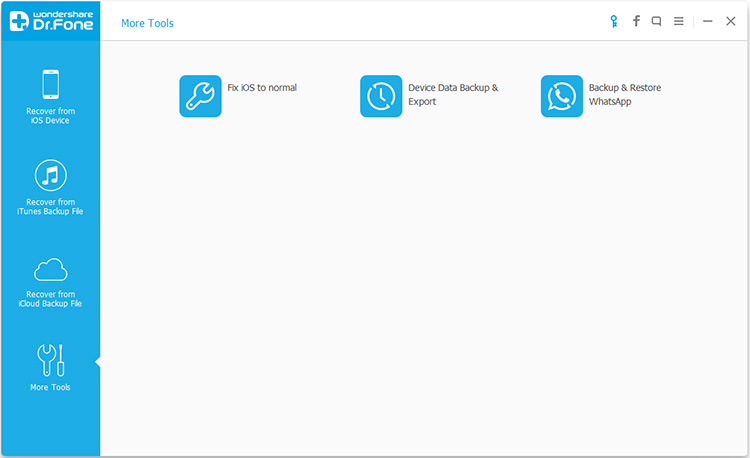
After launching iOS Backup & Restore program on computer,click on “More Tools”from the left column,select “Device Data Backup & Export”option from the tool list.Then use the USB cable to connect your iPhone to computer.By default,iPhone Data Recovery will automatically detect your iPhone soon.
Tip:If you have used iOS Backup & Restore program to backup your device before,you can click on “To view the previous backup file” to view the previous backup files list.
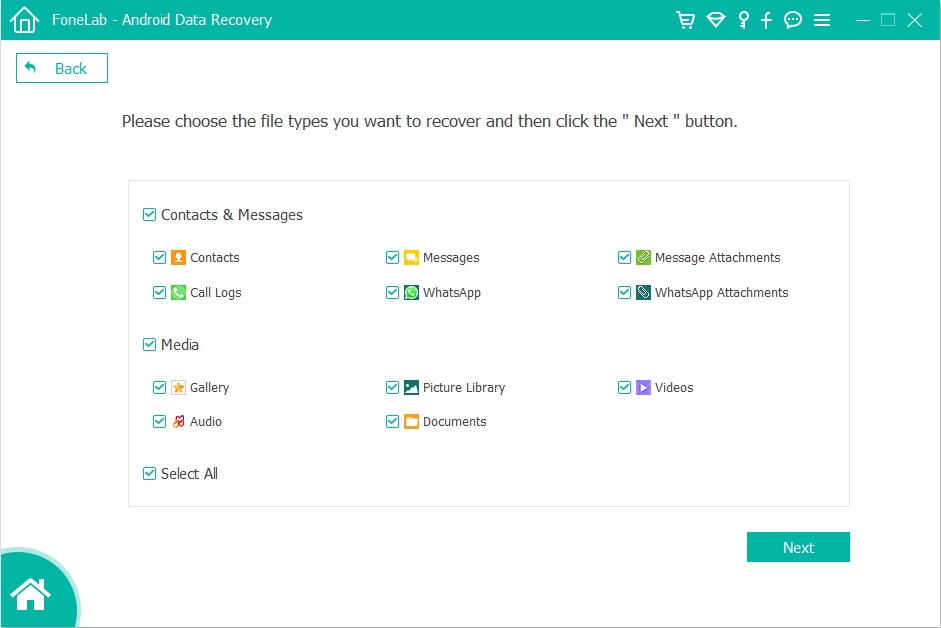
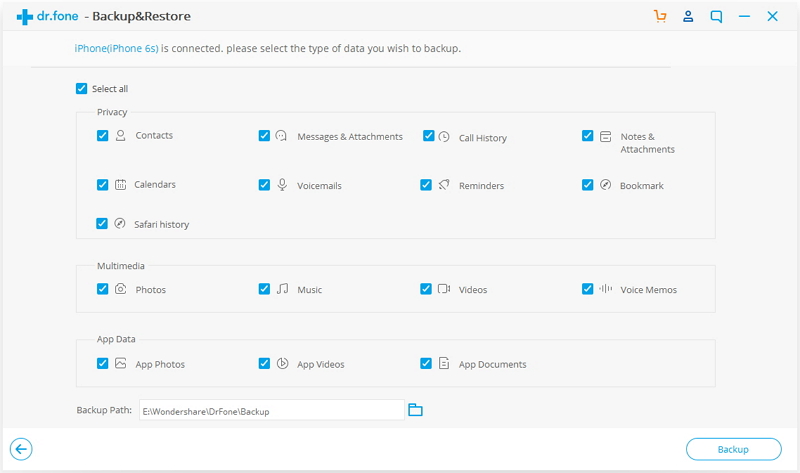
Step 2.Select File Types to Backup from iPhone
When your iPhone is connected successfully,iOS Backup & Restore program will detect the file types on your device automatically and you can select what file types to backup.Then click on “Backup”.
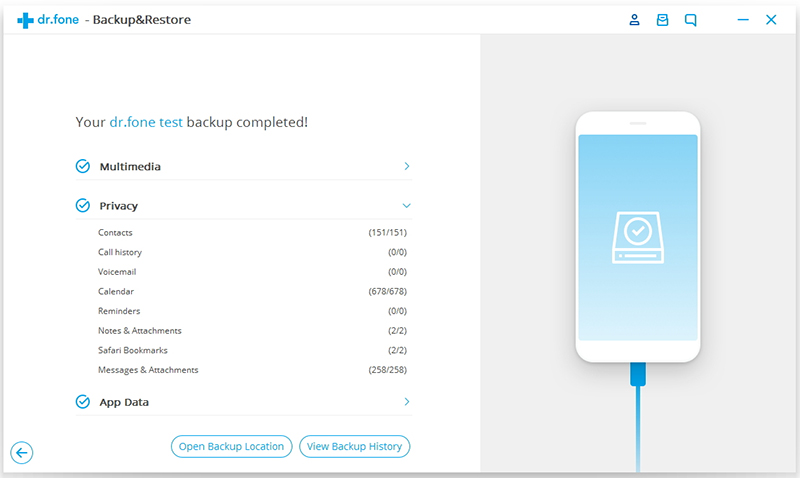
The whole backup process will take a few minutes,depending on the data storage on your device.Then iOS Backup & Restore program will display all the supported data,like Photos & Videos, Messages & Call Logs, Contacts, Memos and other data.
Step 3.Restore your iPhone, iPad, or iPod touch from a backup
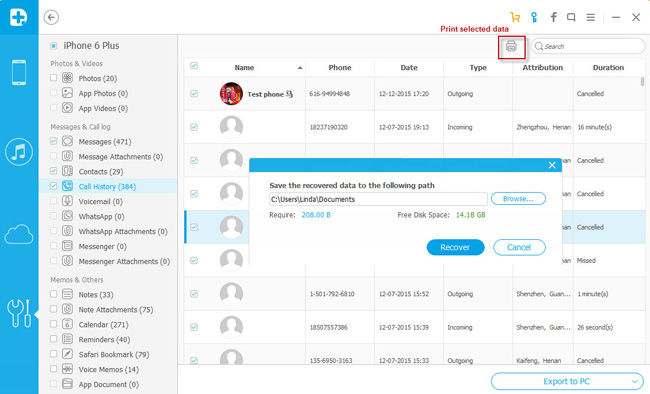
After you select the files you need to backup by checking the box before them, please click “Export to PC “button to export the files to computer.When you click “Export to PC”, you will have two options:Only Export this file type and Export all the selected file types.Then you can customize the backup file save path on the popup window to successfully export your iPhone data.
iOS ToolKit program enables to restore deleted files or lost data from iPhone completely even if you haven’t backed up iPhone,it provide the function that extract backup content from iTunes,iClouds files or computer with iPhone Data Recovery.Click here to see the detail steps to recover data from iPhone with 3 different ways.
Method 2: Backup and Restore iPhone by Phone Transfer
Phone Transfer is a reliable iPhone backup and restore tool.It can backup iPhone contacts,SMS,whatsApp messages without iTunes and iCloud on iPhone efficiently and conveniently.Moreover,you can use Phone Transfer to move backup files to a new device or to the same device after a restore.Click here to view the additional procedure:How to back up iPhone or iPad data before update.
Highlight the features of Phone Transfer:
-Most types of files are supports:contacts, SMS, call logs, photos, music, videos, apps, etc.
-Restore backup content from BlackBerry, iCloud, iTunes, Kies and more to Android and iOS devices.
-Permanently erase all content from your old phone to protect your privacy being leaked.
-Works with 3,000+ phones including Droid, Symbian (Nokia), and all models of iPhones, including the newest iOS 9 devices.
-Transfers content between phones on different operating system.
Step 1.Download and Run Phone Transfer
Step 2.Select the Backup Mode
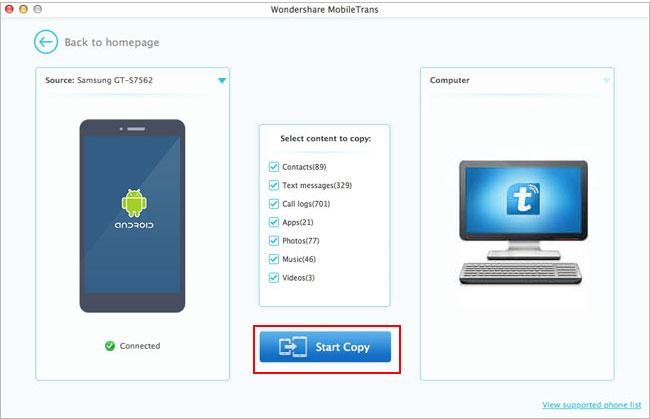
Click “Back up your Phone“on the main page of this program.

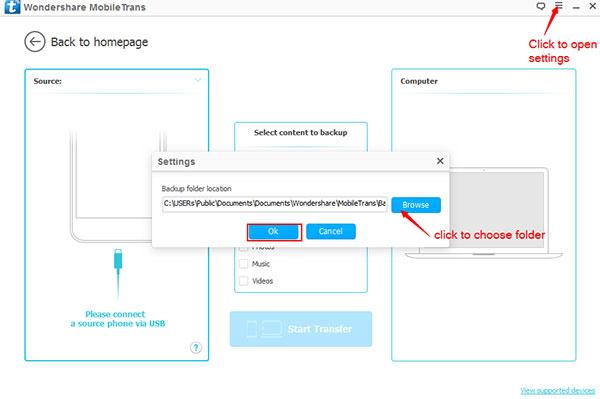
PS:If you want to customize the location of your backup folder.Simply click the menu on the right top of the window and then choose “Settings” to do this.Once you are finish with the location folder, click “Ok”.

Step 3.Connect iPhone to Computer
Connect your iPhone to computer using an USB cable.Make sure that Phone Transfer recognizes your devic.
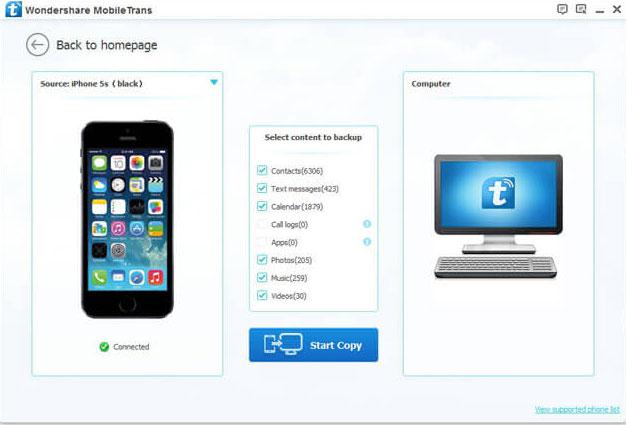
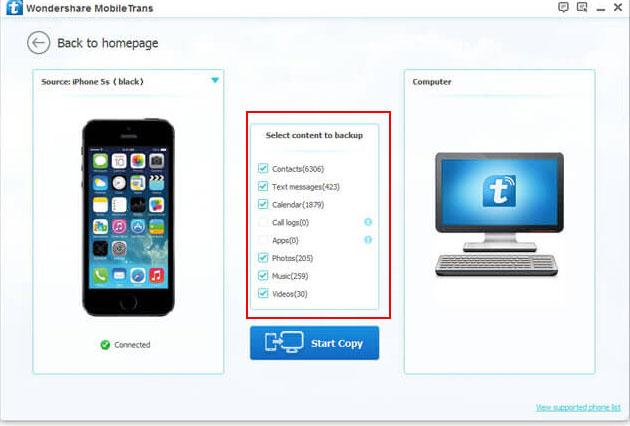
Step 4.Click the Files You need to Backup
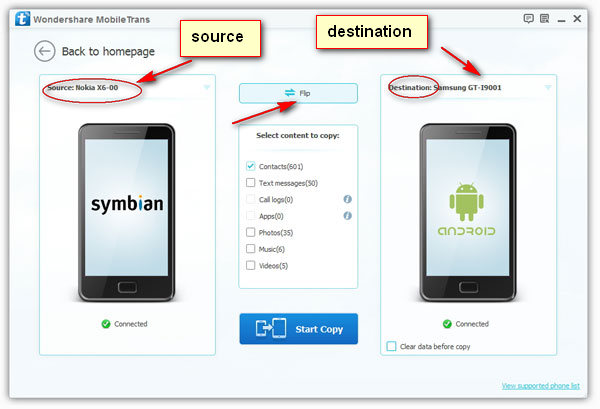
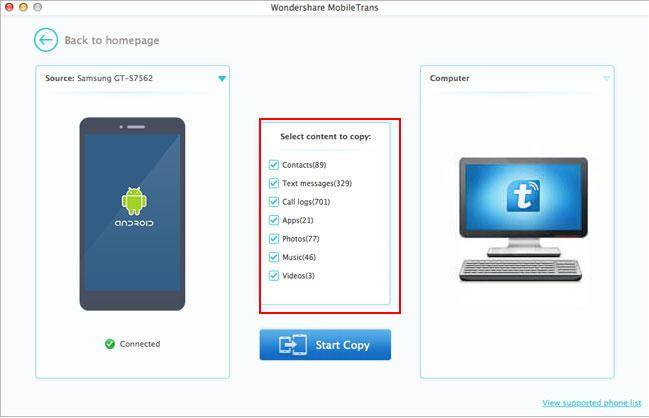
Check the files you would like to backup.Such as “Contacts”,”Text Messages”,”Photos”,”Videos”,”Music”.
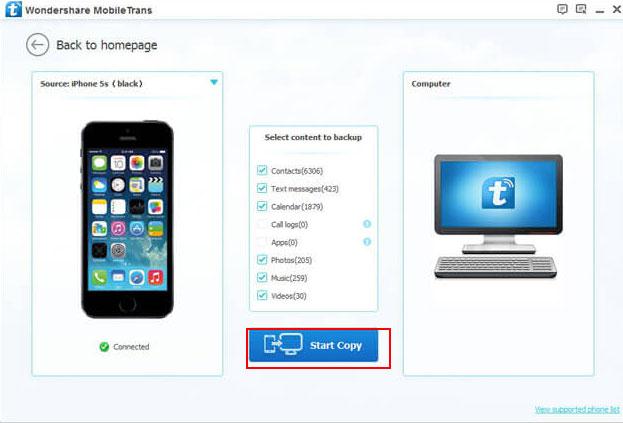
Step 5.Backup Data from iPhone to Computer
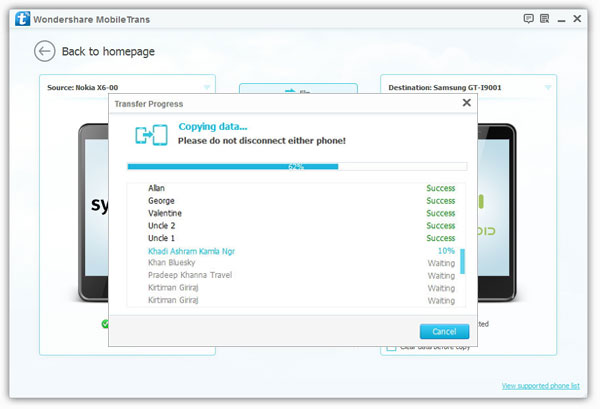
Click on “Start Copy” to begin the process.Keep the phones connected through the entire process.
If you need to restore files from iPhone with Phone Transfer,you should choose the mode of “Restore from Backups”on step 1 with Phone Transfer.
Accidentally delete important iPhone files? Jailbreak failure of iOS devices? Hardware or system Malfunction?No matter what reason you wanna make a protection of backing up iPhone data or restore iPhone data,iPhone Data Recovery and Phone Transfer are your best choice and worth you having a try.
Mobile Sync – iTunes Alternative, iOS Back & Restore Tool
Another terrific tool here we want to share you is Mobile Sync. It is the best tool for sync iOS data between iOS device and computer. With using Mobile Sync, you could backup iPhone data to the computer safely, restore backed up files from computer to iPhone completely. Additionally, it could be used to transfer files between two iOS devices directly. The supported types of iOS files including music, videos, photos, contacts, text messages, and others. What’s more, it features with Ringtone Maker & HEIC to JPEG/PNG Converter. All in all, Mobile Sync is the best iTunes alternative, a good iOS files transfer & manage tool for iPhone/iPad/iPod.

Read more:
How to Transfer Data from old iPhone to iPhone 7/6S/6(Plus)
How to Recover Lost Data from iPhone 6S/6(Plus)
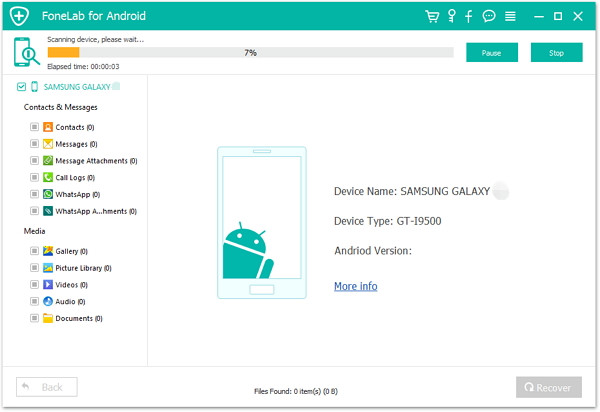
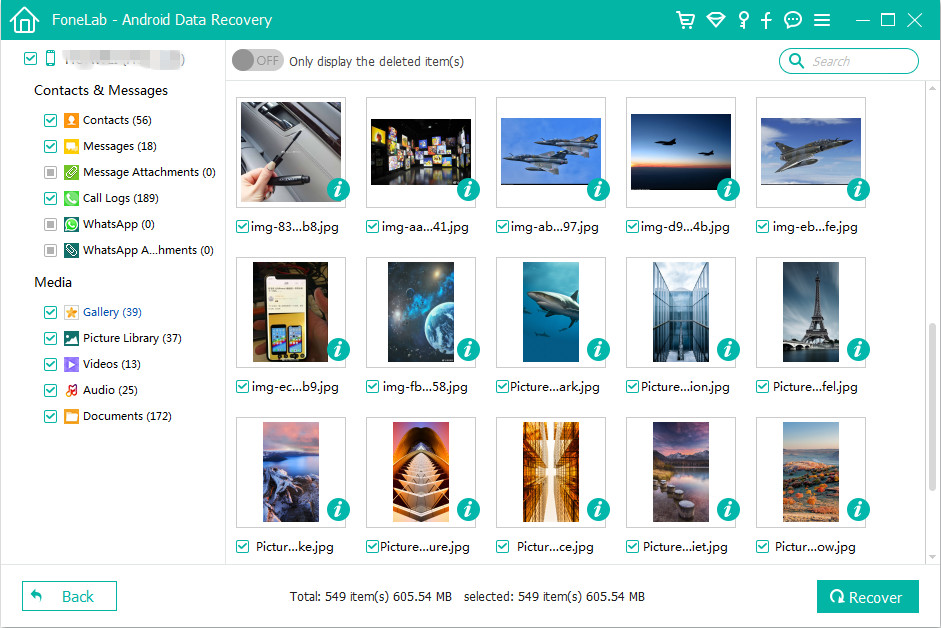
How to Backup and Restore Files on Samsung
How to Recover Deleted Data on iPhone SE
How to Recover iPhone/iPad/iPod Data After iOS 9.3 Upgrade
Backup and Restore iPhone Data