Summary:There are many circumstances may lead to get brick on your bricked Samsung device.The most common factor due to brick for device is rooting your Samsung.Well,when your device get brick,the most disturbing you is the data loss problem.This post will show you how to rescue data from a bricked Samsung smartphone.Please read it if you are in need.
Are you looking a simple and effective way to restore data on your bricked device like messages,contacts,photos,videos and more?If you’ve tried a lot of methods but failed,just pay attention,you are never too late to use the Broken Android Data Recovery to rescue your data.
Broken Android Data Recovery perfectly helps to restore SMS from bricked Samsung without losing data,besides SMS,it enable to restore various of data on bricked Samsung such as contacts,photos,videos,audio,call logs,WhatsApp Messages & attachment,documents.Broken Android Data Recovery helps to restore data from almost all models of bricked Samsung device,including Samsung Galaxy S, Galaxy Note, Galaxy A, Galaxy J, Galaxy Tab and so on.The Program allows you restore data which lost due to deleted, system crash, SD card issue, rooting error, ROM flashing, OS update, of course including the bricked Samsung.


How to Restore SMS from Bricked Samsung
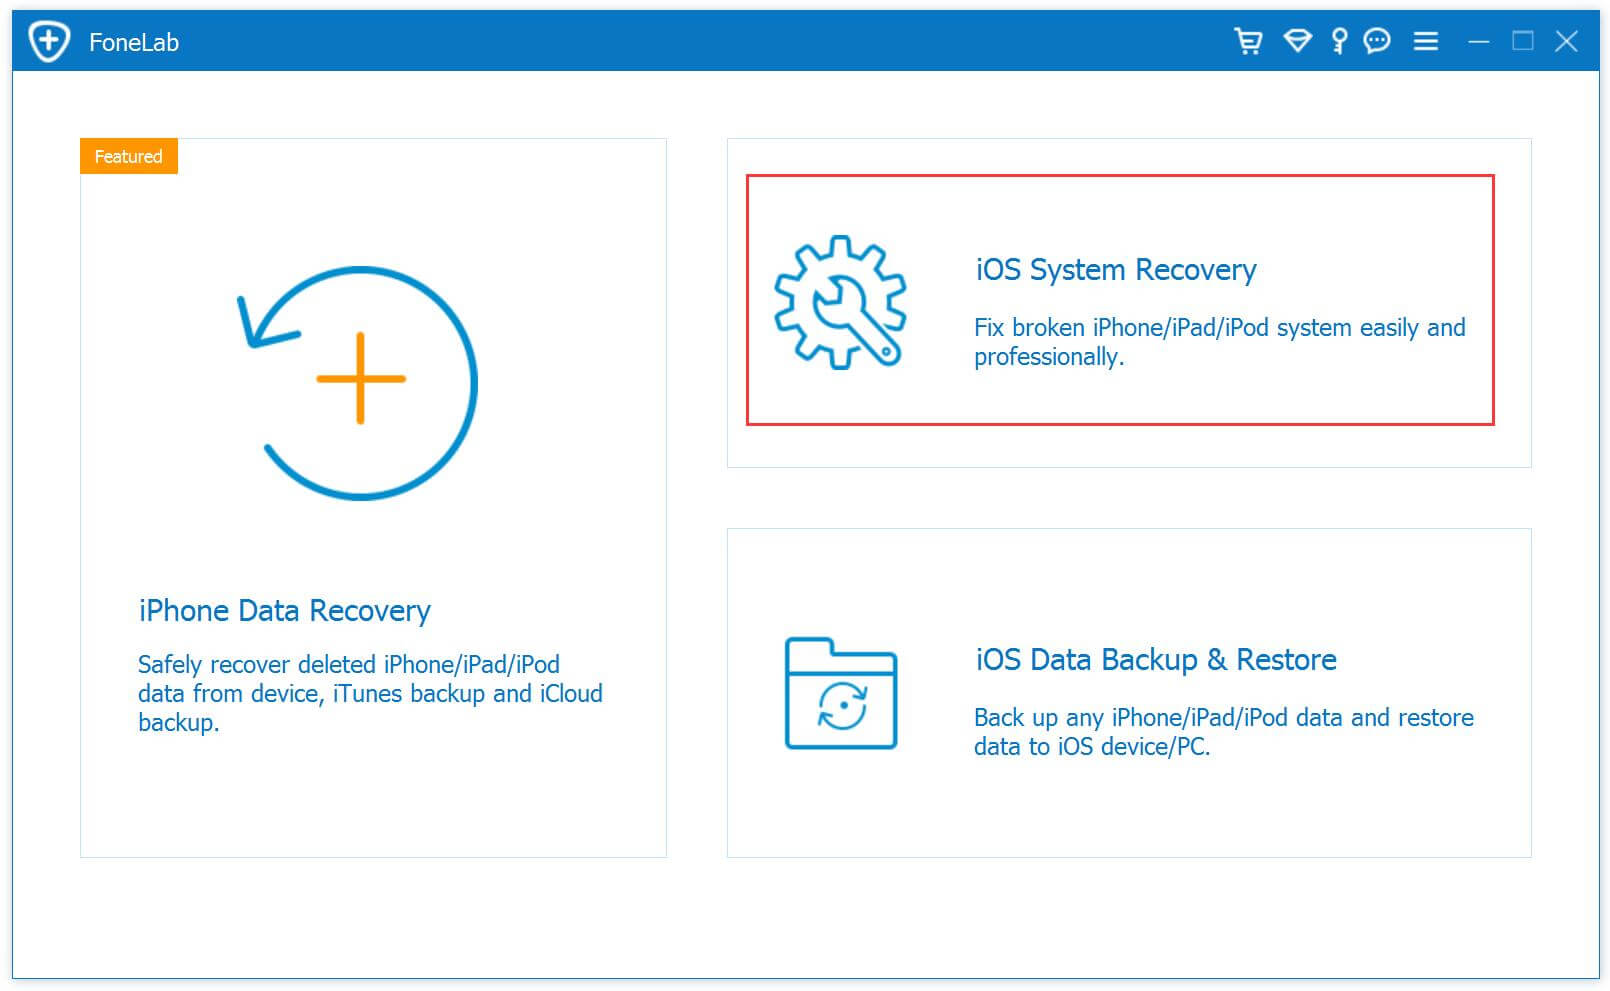
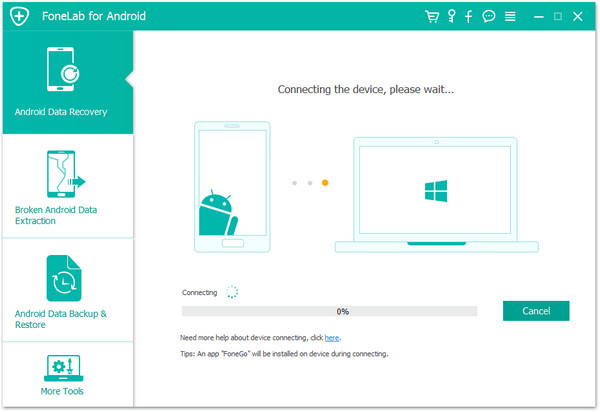
Step 1.Launch and Run Broken Android Data Recovery on Computer
Download and install Broken Android Data Recovery on computer.Launch and run it properly and choose “Android Broken Data Recovery” mode.
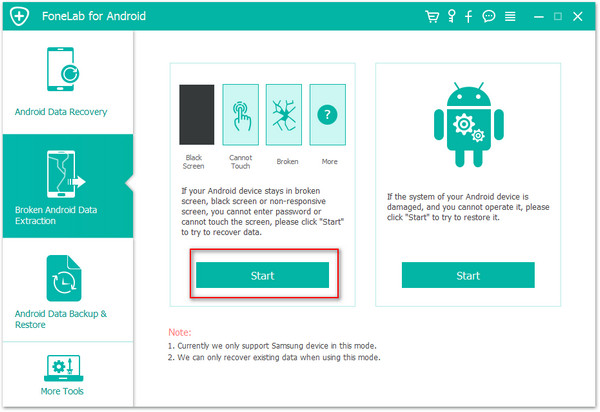
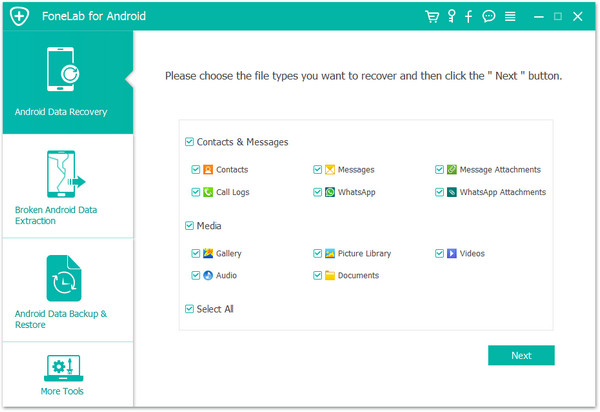
Select the type of files you wanna restore and press “Start” button to enter next step.For SMS recovery,you should click “Messaging”.

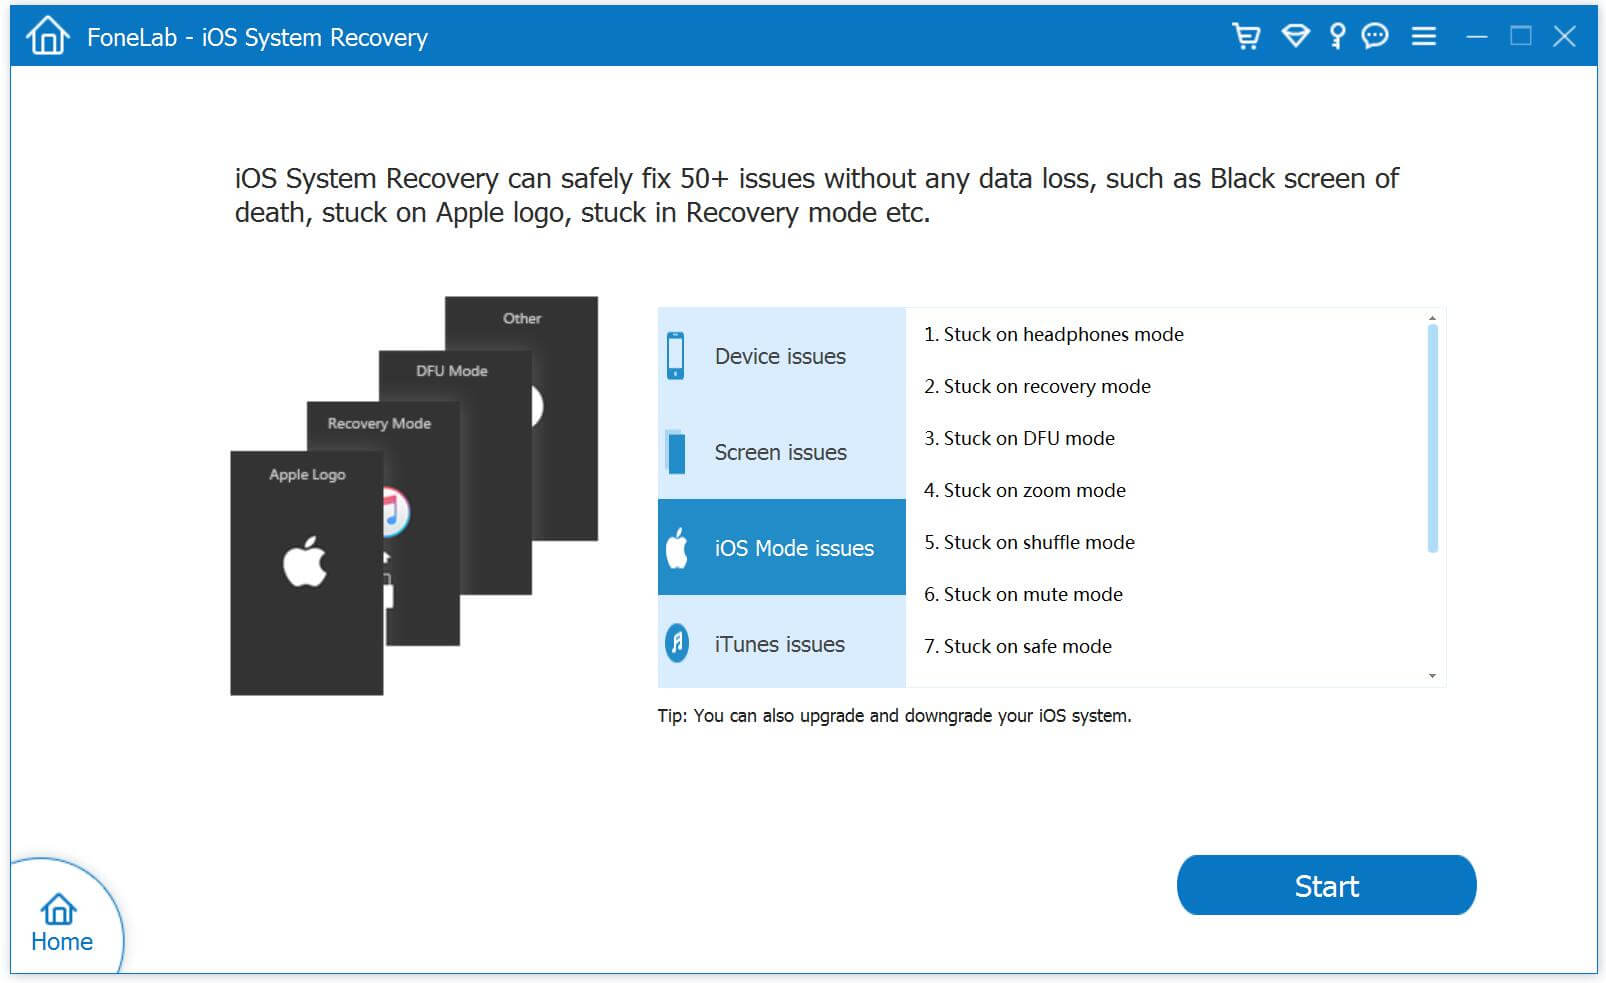
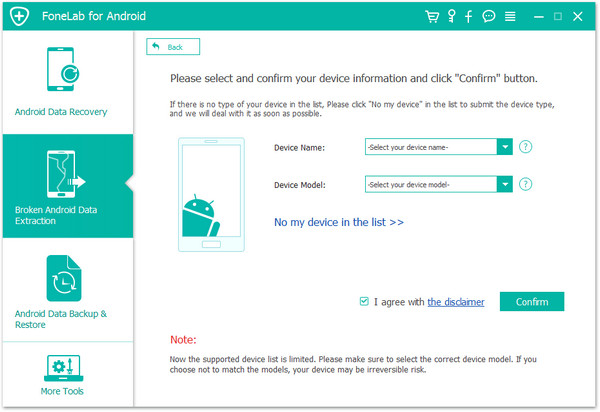
Step 2.Choose the Correct Fault Type of Your Bricked Samsung
Firstly,there are two fault types.One is “Touch doesn’t work or cannot access the phone” and the other is “Black/broken screen”.Just choose the correspond one which matches your bricked device state.Click “Next” to go on.

Secondly,you should select “Devise Name” and “Devise Mode” for your phone on the new window.Currently this function only works for some of Samsung devices in Galaxy S, Galaxy Note and Galaxy Tab series.Then click “Next” to go on.
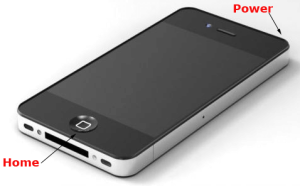
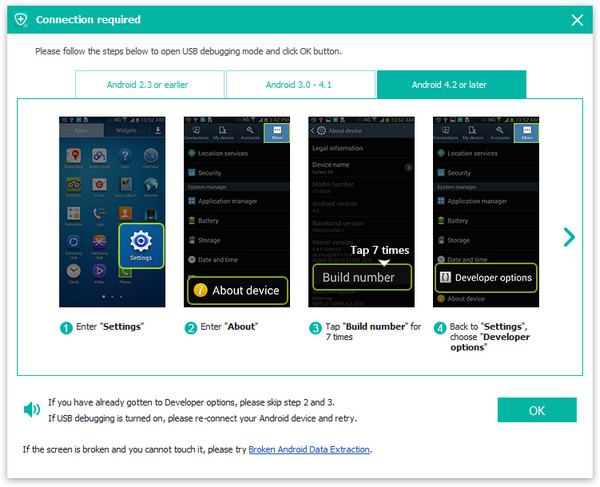
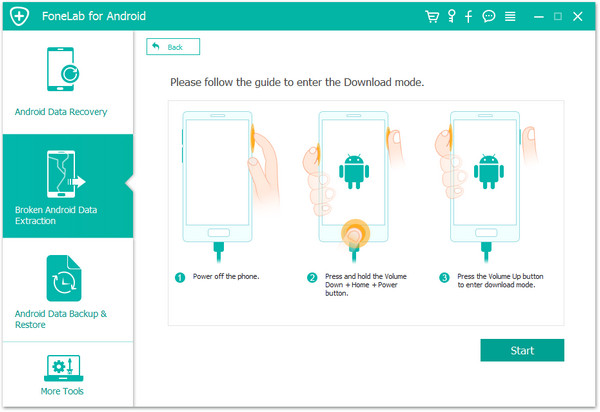
Step 3.Enter Download Mode on the Bricked Samsung
Follow the illustration on the program to enter your phone into the Download Mode.
1. Power off your Samsung phone.
2. Press and hold Volume “-“, “Home” and “Power” button on the phone.
3. Click “Volume +” button to enter download mode.
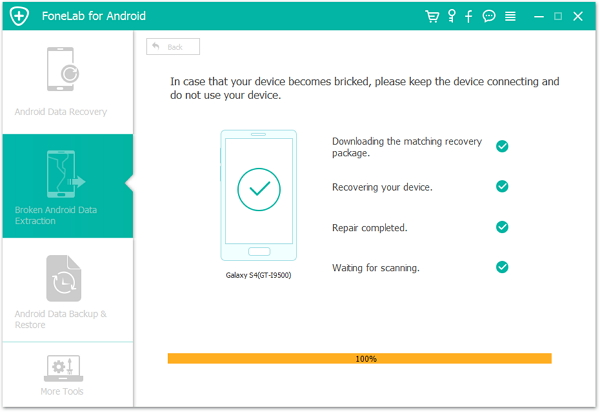
Step 4.Analyze and Scan Data on Bricked Samsung
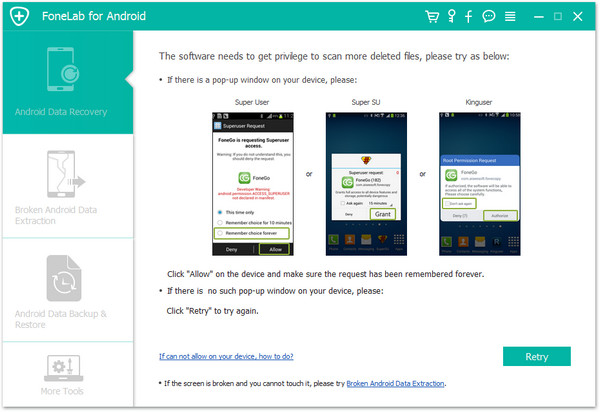
Connect your bricked phone to the computer.And then the program will analyze and scan data on your phone automatically.
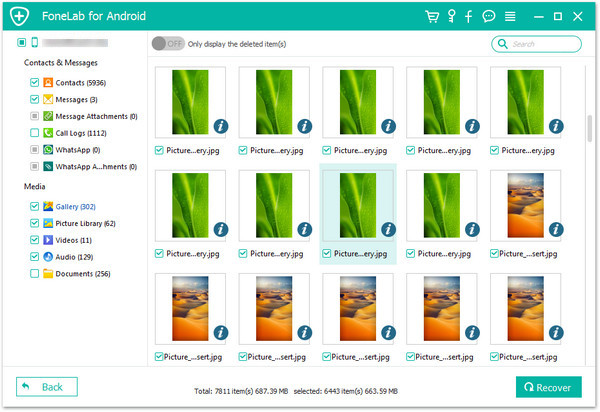
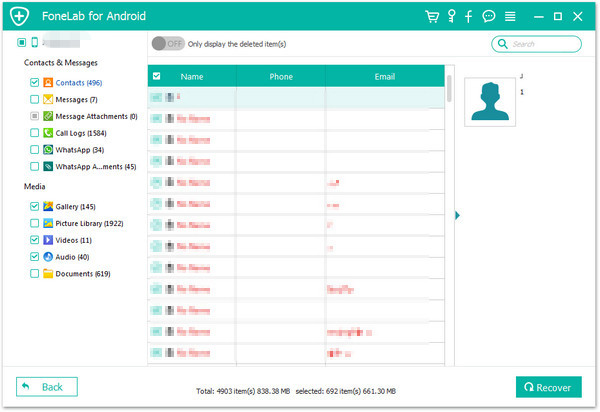
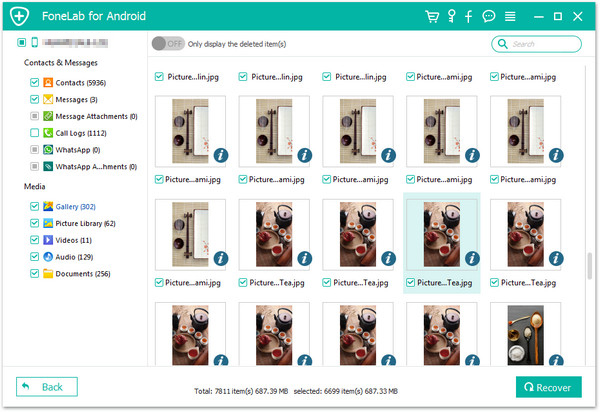
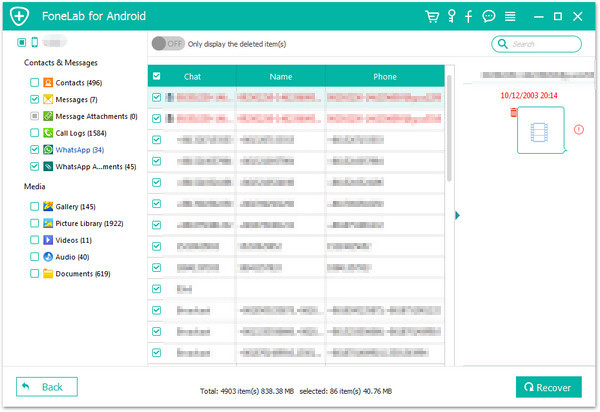
Step 5.Preview and Restore SMS from Bricked Samsung
Once the scanning completes,all data from your device will display by categories on the screen.You are allow to check and preview them.Select the data in detail you want and click “Recover” to save all of them on the computer.
Related Article:
How to Restore Data from Bricked Samsung