By Selena KomezUpdated on November 13, 2019
[Summary]: Want to put the iPhone XS, XR, XS Max, or iPhone X into recovery mode or DFU mode to restore with iTunes or macOS Finder (for Catalina and later), or to fix ios system to normal? This article teach you how to enter recovery mode or exit recovery mode on iPhone XR, XS, XS Max, iPhone X, iPhone 8/8 Plus.
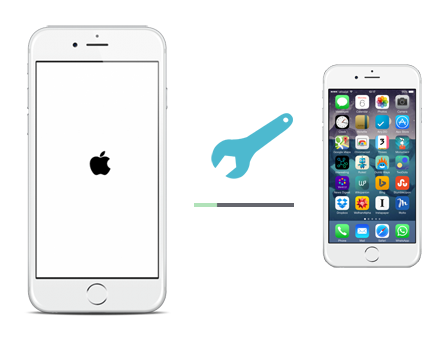
Sometimes you may put your iPhone into Recovery Mode to effectively restore the device, fix iPhone stuck on Apple logo screen/black screen of death, remove iPhone screen passcode(unlock iPhone) and fix various ios system error.
If your iPhone XS, XR, XS Max or X is stuck on the Apple logo for an extended amount of time and does not boot, is stuck on the iTunes logo with a USB cable, or if the computer is not recognizing the iPhone. When in Recovery Mode, the iPhone XS, XR, XS Max, or X can be restored directly with iTunes or macOS Finder (for Catalina and later), but it will erase all iOS data and settings when your using iTunes/macOS Finder to restore the devices.
Also read: How to fix iOS to normal without data loss
How to put an iPhone XR, iPhone XS, iPhone XS Max, or iPhone X into recovery mode? This article teach you how to enter or exit recovery mode on iOS 13 devices, If you have an older iPhone, then follow the instructions for putting older iPhone models into Recovery Mode instead.

1. A Apple USB cable
2. A computer with the latest version of iTunes, or MacOS Catalina or later
3. Update iTunes to the latest version before attempting to use Recovery Mode.
4. Backup your iPhone data, because using recovery mode or attempting to restore without a backup can result in permanent erase your data.
Backup your iPhone data before beginning. Failure to have an available backup may lead to permanent data loss from the iPhone.
Step 1. Connect the iPhone XR, iPhone XS, iPhone XS Max, or iPhone X to a computer with a USB cable
Step 2. Open iTunes on the computer (Mac or Windows, or in macOS Catalina open Finder)
Step 3. Press and release Volume Up on the iPhone
Step 4. Press and release Volume Down on the iPhone
Step 5. Press and continue holding the Power button until the iPhone XR, XS, XS Max, X is in recovery mode

iTunes (or Finder) will show an alert stating an iPhone has been found in Recovery Mode
After the iPhone has entered into Recovery Mode, you can update the iPhone XR, XS, XS Max, X with the latest available iOS release, or restore with iTunes (or Finder) as usual either with a backup or by setting the device up as new.
An iPhone in recovery mode can also be restored by using IPSW if needed, as long as the IPSW file is actively being signed by Apple and matches the specific iPhone XR, XS, XS Max, X model. You may find iOS IPSW files here for the latest iOS versions.
Exiting Recovery Mode happens automatically once the iPhone is restored or updated, but you can also exit recovery mode without restoring by issuing a force reboot to the iPhone XR, XS, XS Max, X as follows:
Step 1. Disconnect the iPhone XR, XS, XS Max, X from the computer
Step 2. Press and release the Volume Up button on iPhone
Step 3. Press and release the Volume Down button on iPhone
Step 4. Press and hold the Power button on iPhone, continue to hold until you see the Apple logo appear on iPhone screen
Step 5. Exiting Recovery Mode will return the iPhone to whatever the prior state was before it was placed into recovery mode in the first place. If the iPhone was stuck on the ‘connect to iTunes’ screen anyway, then it won’t boot back into the normal home screen or lock screen.
All other iPhone (and iPad) models can also enter into recovery mode is needed for troubleshooting purposes, but the steps to do so differ per device.
Additionally, DFU mode is available for when Recovery Mode is not working to restore a device. DFU mode is a lower level restore mechanism but is rarely needed.
Looking for a safe way to fix your system problem? Please keep reading the below effective guide, you need to free download an iOS system recovery to repair your iPhone software problem.
If you’re having trouble with your iPhone or iPad – for example: iPhone Stuck in Recovery Mode, iPhone Stuck in Spinning Circle, iPhone Stuck on Apple Logo, White Screen of Death, Black Screen of Death, iPhone Frozen, iPhone Boot Loop, iPhone Won’t Turn On, iPhone Restore Failure, iPhone Update Failure, or you can’t get it out of recovery mode – this reliable iOS system recovery software is exactly what you need.
This iOS System Recovery is expert at fixing your iPhone/iPad/iPod touch device when you cannot enter the system in normal way and compared with iTunes, the iPhone fix tool can repair with various iOS system issues like white Apple logo, boot loop, recovery mode, DFU mode, etc. Besides, it can fix your iOS system without data loss. What’s more, it also can help you downgrade iOS without iTunes through downloading and installing IPSW firmware, no data loss at all.
Main Features of iOS System Recovery
Step 1: Launch the iOS Toolkit on PC or Mac
Run the software on your computer and connect your iPhone to the computer via a USB cable.

Step 2: Click “iOS System Recovery”
You’ll see there are three main functions: iPhone Data Recovery, iOS System Recovery , iOS Data Backup & Restore. To fix the iPhone stuck in DFU mode, click the More tools and click “iOS System Recovery“.

The iOS System Recovery can hep you fix iPhone stuck on recovery mode, headphones mode, DFU mode, etc. Then, hit the “Start” button at the lower right corner to go on.

Step 4: Choose a Repair Mode
You then will get into a new window, like the screenshot below. Please select “Standard Mode” or “Advanced Mode” to fix your iPhone device, then click “Confirm” to go on.
“Standard Mode” – Fix your device with this mode, all data on your device will not be lost.
“Advanced Mode” – Fix your device with this mode, it will erase all data on your device.
Suggest that you go to the advanced mode only if the standard mode fails.

Step 5: Enter Recovery Mode
If your iPhone stuck on recovery mode, please skip this step. At this point, follow the instructions on the window to put your iPhone into recovery mode, you also can follow the below instructions to enter recovery mode on iPhone 11/11 Pro, iPhone XR/XS/X, iPhone 8 and iPhone 8 Plus.

Step 6: Select Firmware to Download
Select a suitable ios firmware package and start to download.

Step 7: Download Firmware Package for Repair your iPhone
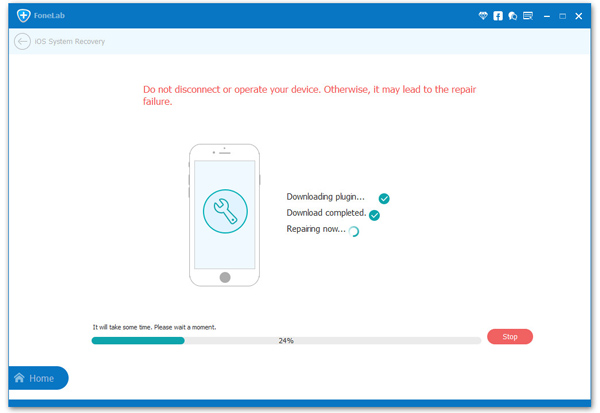
The software start downloading firmware package and fix your iPhone device.

Step 8: Repair the iPhone in Recovery mode or DFU mode
After downloading firmware package completed, then just click the “Repair” button at the lower right corner. The software starts the process of restoring your iPhone.

When it’s done, your iPhone will boot up automatically and get back to normal.
This powerful iOS Toolkit is not only able to fix iPhone stuck on recovery mode or DFU mode, but also allows you recover lost and deleted data from your iPhone/iPad/iPod touch, such as messages, photos, video, contacts, and more. Even better, you can backup your iPhone data to your computer or external hard drive to in case your iPhone is lost, damaged or stolen.
How to Fix iPhone Stuck in Recovery Mode After iOS 13 Update
How to Fix an iPhone iPad Stuck on Apple Logo
How to Recover Lost Data from iPhone after iOS 13 Update
How to Recover Deleted Data on iPhone 11/11 Pro
Prompt: you need to log in before you can comment.
No account yet. Please click here to register.

No comment yet. Say something...