By Selena KomezUpdated on January 24, 2018
“I am gonna to backup iPhone 7 on Mac,but I’m not sure which one is the most simple ways to backup my personal data on computer.Anyone give me some advice?”-Tommy
iPhone are one of the most important and valuable possessions we have. Making sure that all of this precious data is backed up somewhere is a crucial safeguard against losing data by stolen,getting damaged,be deleted accidentally,iOS update,iOS jailbreak or more other unexpected circumstances.To ensure the security of your personal data of iPhone, you should backup iPhone regularly.Once something goes wrong with your device, you can easily restore iPhone from backup.In the follow part, we will offer solutions on how to backup iPhone 7/6S/6 on Mac safely.Continue to read the part you’re interested in.
Step 1.Close iCloud before Backup
Go to Settings > iCloud > Storage & Backup and turn off the iCloud Backup switch.
Step 2.Connect iPhone 7/6S/6 to Mac and Run iTunes
Tips:If you would like to sync your iPhone with iTunes using wi-fi,then go to Settings > General > iTunes Wi-Fi Sync and select your computer from the list.You’ll see an option to “Sync Now” but by default the iOS device will automatically sync when the device meets three conditions: 1) the screen is locked (i.e., you’re not using the device), 2) the device is connected to Wi-Fi, and 3) the device is plugged into a power source.
Step 3.Begin to Backup iPhone on Mac via iTunes
Choose your device in left panel,then click Back Up Now on the right.Then iTunes will begin to backup your iPhone automatically.
Note:You are not allow to select data types to sync via iTunes instead the whole iPhone data.

If it is a little trouble for you to connect your iPhone with Mac to backup iPhone via iTunes, you might like using iCloud to backup iPhone to Mac instead of iTunes.It’s pretty easy to backup iPhone on Mac with iCloud. The only thing you need to make sure is that the network is stable.Here are the steps to backup iPhone on Mac via iCloud.
Steps to Backup iPhone on Mac with iCloud:
Step 1.Connect iPhone 7/6S/6 with Wi-Fi and make sure the network is stable.
Step 2.Tap Settings > iCloud.From here,you should enter your iCloud account or Apple ID.
Step 3.Tap Storage > Backup and then wipe the iCloud Backup on.Tap Back Up Now.Then iCloud will begin to backup your iPhone automatically.
Note:You are not allow to select data types to sync via iCloud instead the whole iPhone data.

iOS Toolkit – iOS Backup & Restore is a manage program useful for backup and restore various files on iPhone,including contacts,SMS,whatsapp messages,photos,videos,notes,call logs and other personal documents.It enables to backup data from iPhone 7/6S/6 to Mac safely,as well as restoring data from backup files on iPhone directly.It offers full support for iPhone 7,iPhone 6 and 6S,iPhone SE/5S/5C/5 and iPad,iPod.It works with all iOS versions, including iOS 9.3 and iOS 10.
Step 1.Run the iOS ToolKit program and Connect iPhone to the Mac
After launching iOS Toolkit on Mac,click on “More Tools”from the left column,select “iOS Data Backup & Export”option from the tool list.Then use the USB cable to connect your iPhone to the Mac.By default,iOS Toolkit will automatically detect your iPhone soon.

Tip:If you have used iOS Toolkit to backup your device before,you can click on “To view the previous backup file” to view the previous backup files list.
Step 2.Select File Types to Backup from iPhone
When your iPhone is connected successfully,iOS Toolkit will detect the file types on your device automatically and you can select what file types to backup.Then click on “Backup”.
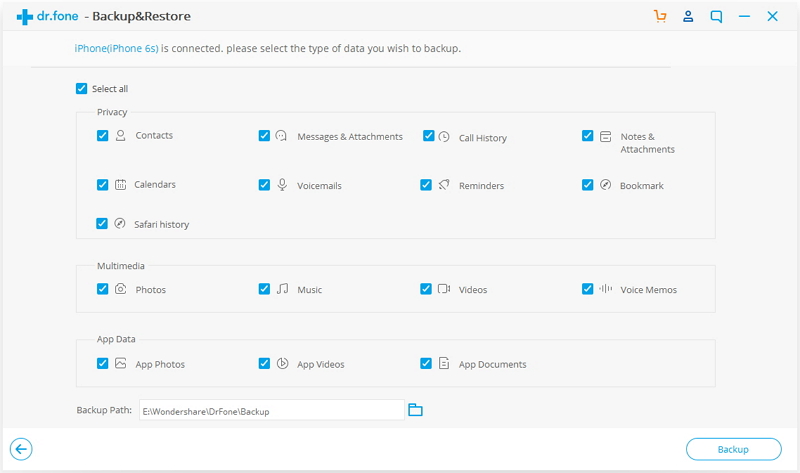
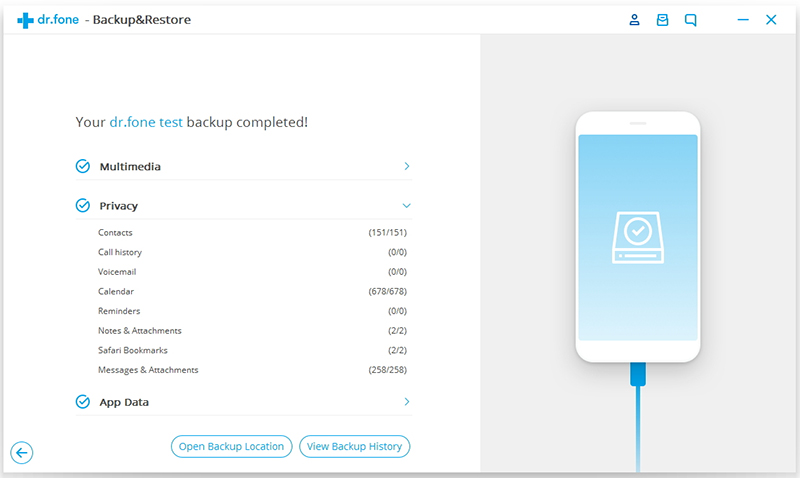
The whole backup process will take a few minutes,depending on the data storage on your device.Then iOS Toolkit will display all the supported data,like Photos & Videos, Messages & Call History, Contacts, Memos and other data.
Phone Transfer is a professional iPhone backup and restore tool.It empowers to backup iPhone 7/6S/6 data safely without iTunes and iCloud on Mac efficiently.On the other hand,this program allows to restore backup data on device completely.Supported types of data including contacts,SMS,calendar,call logs,apps,photos,music,videos.
Step 1.Download and Run Phone Transfer on Mac
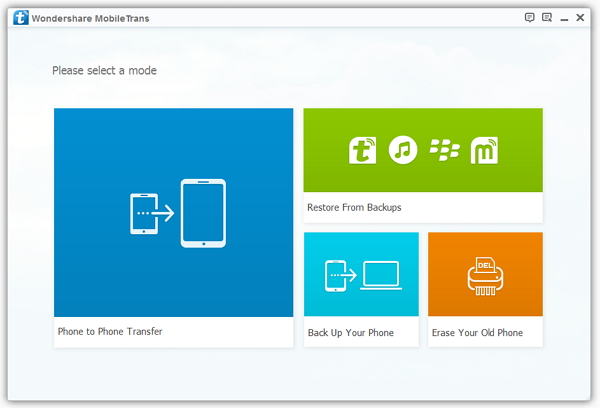
Step 2.Select the Backup Mode
Click “Back up your Phone“on the home page of program.
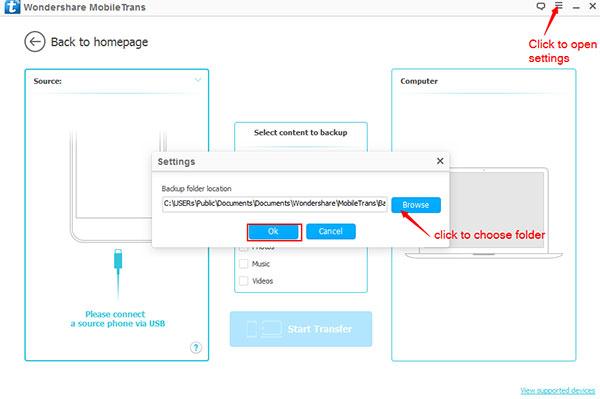
PS:If you want to customize the location of your backup folder.Simply click the menu on the right top of the window and then choose “Settings” to do this.Once you are finish with the location folder, click “Ok”.
Step 3.Connect iPhone 7/6S/6 to the Mac
Connect your iPhone to Mac via an USB cable.Make sure that Phone Transfer detects your device.
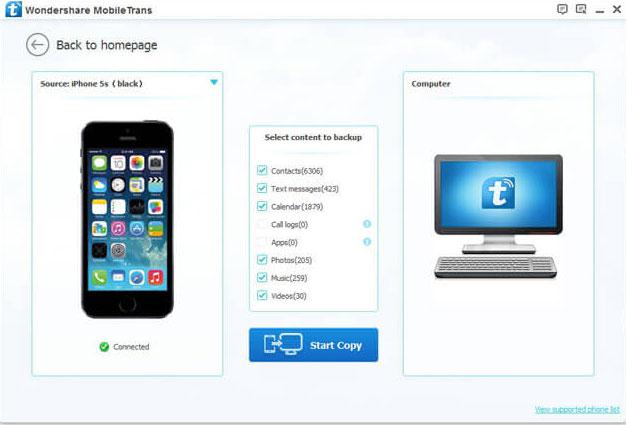
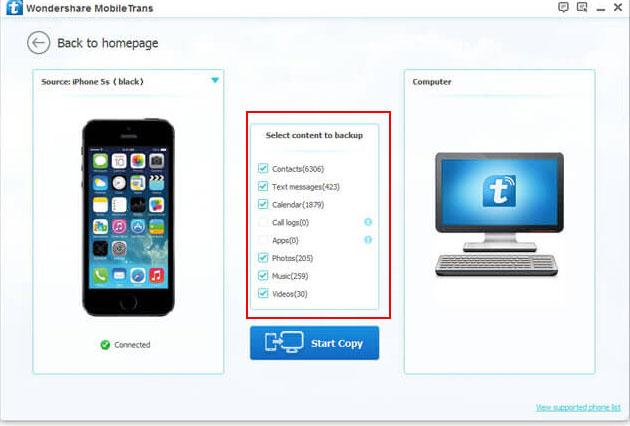
Step 4.Select Files You need to Backup
Check the files you would like to backup.Such as “Contacts”,”Text Messages”,”Photos”,”Videos”,”Music”.
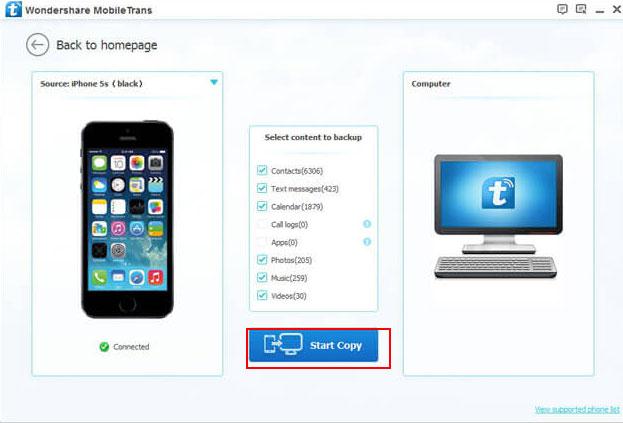
Step 5.Backup Data from iPhone 7/6S/6 to Mac
Click on “Start Copy” to begin the process.Keep the phones connected through the entire process.
If you need to restore files from iPhone with Phone Transfer,you should choose the mode of “Restore from Backups”on step 1 with Phone Transfer.
Related Article:
2 Ways to Backup and Restore iPhone Data on Computer
How to Backup iPhone/iPad Data
How to Backup and Restore Data from iPhone 7/6S/6/SE
How to Backup and Restore iPhone/iPad Files after iOS 10 Update
Prompt: you need to log in before you can comment.
No account yet. Please click here to register.