There’s a curious dynamic in human psychology whereby as things improve, we sometimes complain about them even more. Respected international philanthropist Mo Ibrahim noted this with respect to Africa in an interview this week: as governance and the provision of healthcare have improved across the continent, people’s perception of the quality of those services has declined. Basically, expectations are outrunning actual progress, and there’s no better example of this in the tech world than Google’s brand new Pixel phone.
![]()
Let’s look at where we started this year. Samsung had a great phone in the Galaxy S6, Google had a terrific phone in the Nexus 6P, and that was pretty much the full extent of viable iPhone competition from the premium Android smartphone makers. LG, HTC, Sony, and a litany of others were throwing devices at a wall of uninterested consumers, but all failed to make anything stick. Where we were this January was not a good place for anyone looking for aggressive mobile innovation. Google’s Nexus was great, but it was phablet-sized and available through limited channels, leaving only the Apple-Samsung duopoly for most people to choose from.
Google’s Trying to Assemble and Distill the Best of Android,Hardware and Software,into One
Android phones have, for a few years now, been consistently beating Apple’s iPhone to new hardware breakthroughs and innovations. The problem is that they’ve been scattered across brands, and no single company has been able to really put the whole package together. You might want Huawei fingerprint scanner, Sony’s camera sensor, Samsung’s display, and HTC design in your ideal Android phone. You’d certainly want the Nexus peace of mind about getting long-term OS updates. And that’s where Google comes in.
Every year, the recurring complaint with HTC phones is that they might be the best in the world if only they ran stock (which is to say Google’s best version of) Android and had high-quality cameras. Well, that’s exactly what the Google Pixel is. It’s a new Android smartphone, built by the highly experienced team at HTC, augmented with Google’s best Android, Google’s timely and longer-lasting software support, and a camera good enough to surpass every other mobile camera on DxOMark. Now, I don’t invest too much trust in such benchmarks, but this paints a promising picture for the Pixel’s photo-taking capabilities.
Google’s Presentation was Far Less Polished than the Phones Themselves
If earlier this summer you were to offer me an HTC 10 with a better camera, nicer Android interface, and the reassurance that Google itself would be doing everything within its power to make that device a success, I’d have been elated. So why am I not feeling quite so thrilled today? Because the way we frame things, the way we talk about them, matters.
One problem for Google is that the Pixel’s appearance didn’t so much leak as pour out onto the online world during the month of September. Apple knows the challenges of stirring excitement about an already familiar design, and it tries to do so with flashy manufacturing videos voiced by the dulcet tones of chief designer Jony Ive. Google didn’t go in for any such glamorizing of its new devices, and consequently the Pixel felt almost stale by the time it made its formal debut.
We also keep obsessing about Google’s overall strategy, who the company is targeting, and the minute spec comparisons against alternatives like the water-resistant Galaxy S7, which Samsung also endows with a microSD card slot. Here’s a newsflash: the Galaxy S7 is a kickass phone, and so is the iPhone 7, and there’s nothing at all preventing a third phone from sitting alongside them in the premium price bracket. Maybe you’ll like the feel and ergonomics of the Pixel better, or maybe you’ll find its camera more reliable than the others. Google doesn’t need to win a spec race to have a successful smartphone on its hands, and the mobile market is big enough to sustain more than two great options.
The Pixel is a Vessel for Google Assistant,whose Benefits are yet to be Established
Context is, of course, important, but sometimes it helps to take a step back and simply appreciate how far and how fast technology has advanced. Some of us are preemptively questioning and writing off a device backed by the considerable might of Google just because it doesn’t have anything to immediately wow us. Fast performance, aluminum unibody design, a high-definition AMOLED display, phase-detect and laser autofocus systems, fast and reliable fingerprint sensors… we’re taking all of these things as easy and automatic. But if they are, what sort of wild-eyed additional spec bump would have satisfied us that the Pixel is a suitably advanced device?
I understand how the Pixel, assembled from off-the-shelf components and exhibiting no radical departure from existing forms and designs, can seem underwhelming. But let’s not forget that this phone’s greatest advantage and uniqueness will come from the software within it – Google spent more time talking up its Google Assistant software than any individual hardware product at yesterday’s event. So it’s certainly too early to pass any definitive judgment on the Pixel, other than to declare that its existence is a positive sign for the Android ecosystem.
HTC used to be a legitimate competitor to Samsung at the top of the Android pile, but that position has lapsed and we need a new contender to keep Apple and Samsung honest at the premium end of the market. Google’s invasion of that space is exciting, and the Pixel itself – when stripped of our constantly speeding expectations and preconceptions – is a highly advanced device with which Google can begin to disrupt the status quo.
We asked and asked, for many years, to see Google get serious about building and designing its own smartphones. The Pixel isn’t everything we wanted, but it is definitely the device and strategy we’ve been demanding from Google for so long. And just like the enigmatic Google Assistant, this new initiative of Google acting as a hardware designer and builder is likely to only grow better with more time and experience.
Read more:
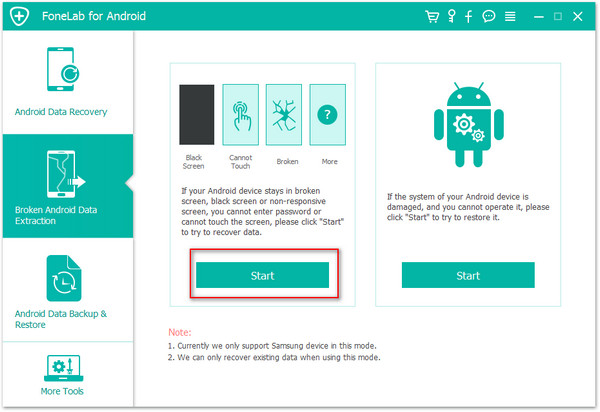
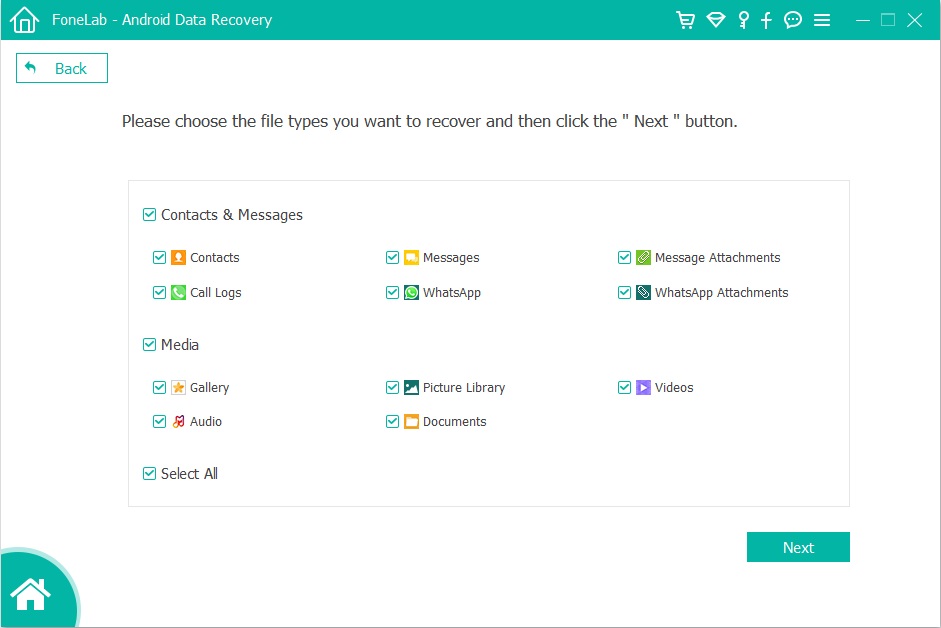
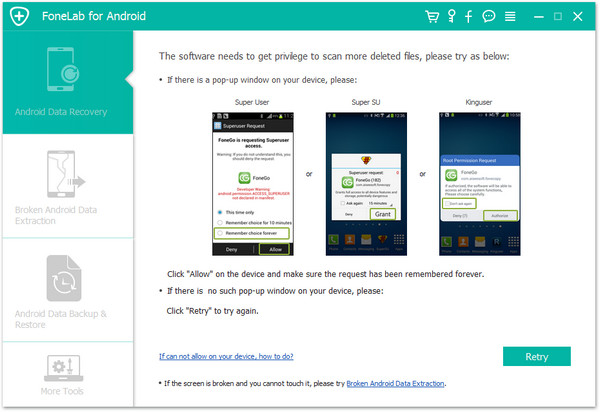
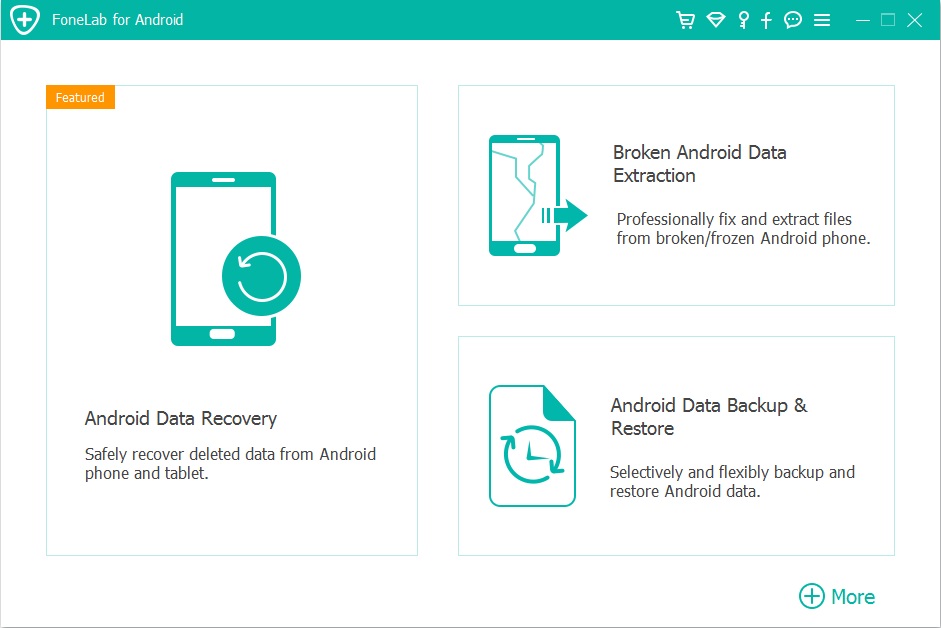
How to Recover Deleted Data from Pixel
How to Recover Deleted Photos on Pixel
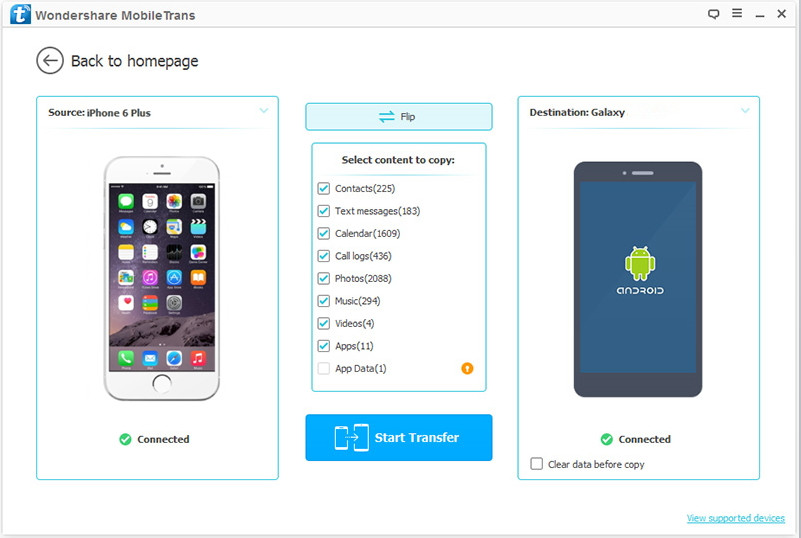
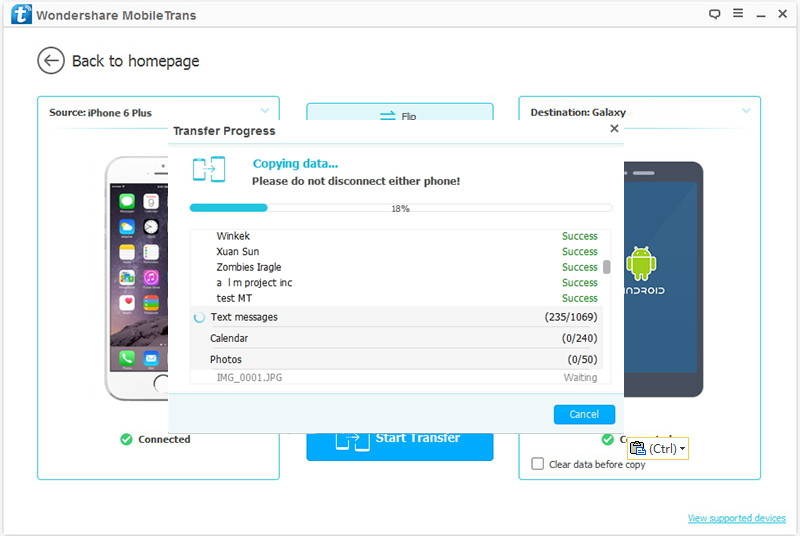
How to Transfer iPhone Data to Pixel
How to Transfer Samsung Data to Pixel