“A person who has cooperation intention called me at this noon but I missed for sleeping.What’s worse, I removed it mistakenly thought it was a garbage call.So is there any ways of restoring the deleted call log from my Android phone (Samsung Galaxy S5)?”-Sheldon
Sometimes in our daily life,we will miss the calls when we are busy or other reasons,however,it’s common thing that you may wanna get back the lost phone number which was missed.Most of people have no idea to restore the call logs from their mobile device,it puzzles them and they don’t know how to solve it.Are you one of them who are worried and cannot find a solution to this serious problem. Don’t worry. Here I would like to introduce an useful program for you to perfectly solve the problem.
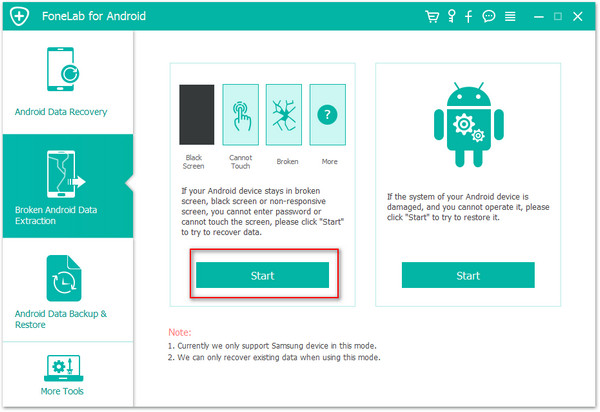
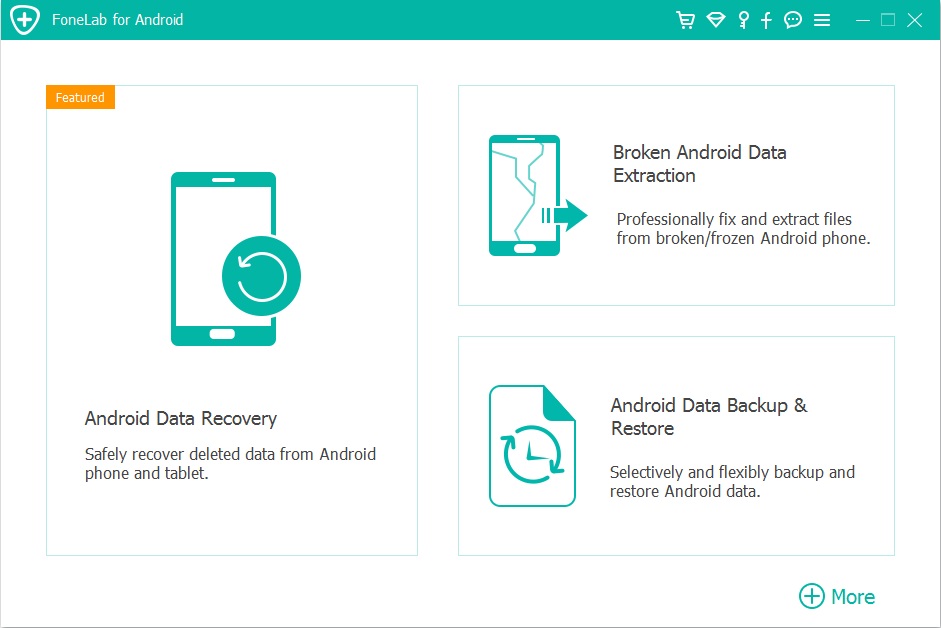
Android Data Recovery – An Ideal Program to Recover Deleted Call Logs
As its name,Android Data Recovery is a superior tool that allows you to access Android call logs and restore deleted call logs from Android.The kinds of recoverable data include, of course, call history, messages,contacts,photos,videos,documents and the others which you will see in the steps following.Android Data Recovery is to choose an easy and safe solution for recovering deleted data from Android devices, including Samsung, Motorola,HTC, Sony, Google, LG and so on.


Part 1: How to Restore Call History on Android Phone
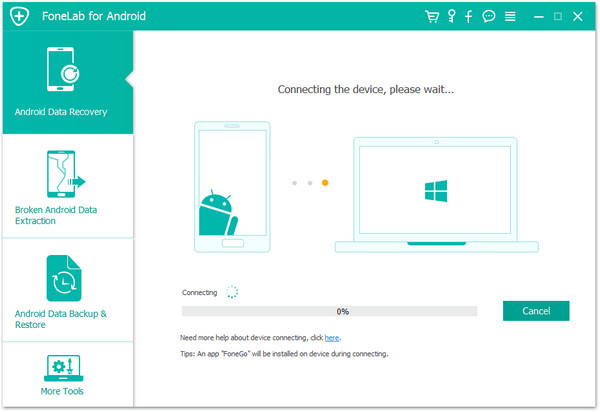
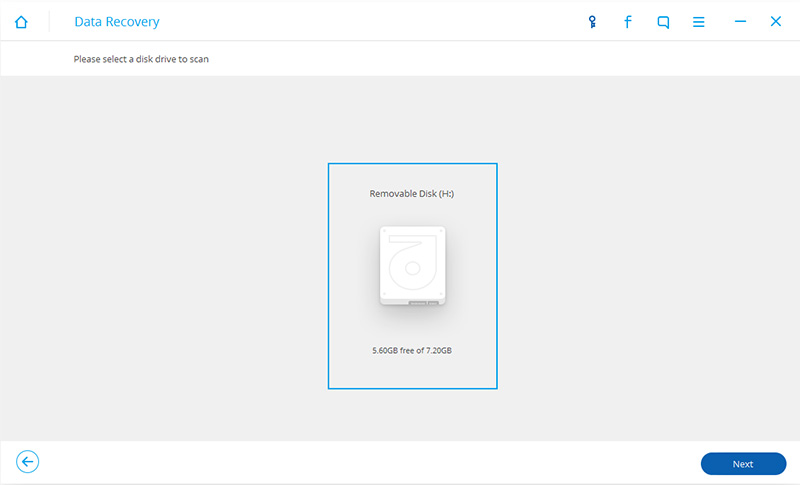
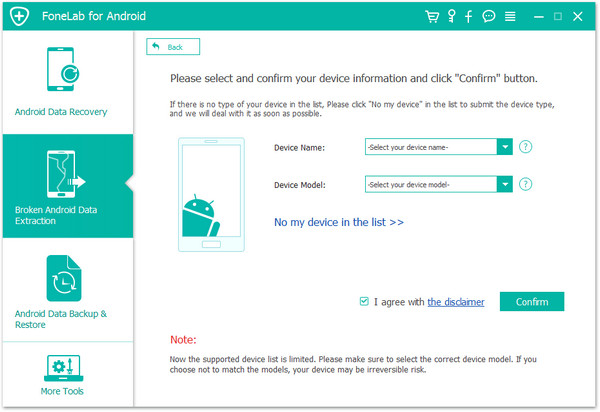
Step 1.Run Android Data Recovery and Connect Android
Download and install Android Data Recovery on your computer. Run Android Data Recovery and then connect your Android device to your computer via an USB cable.

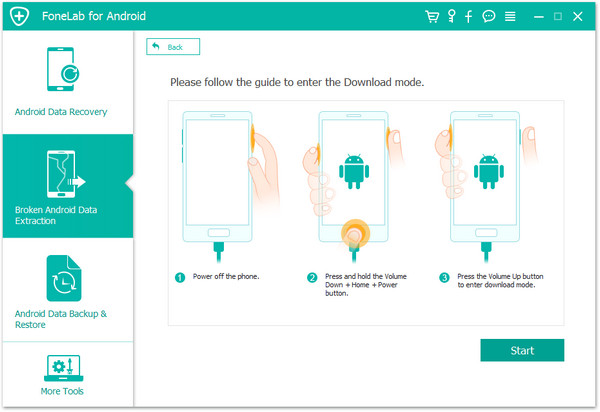
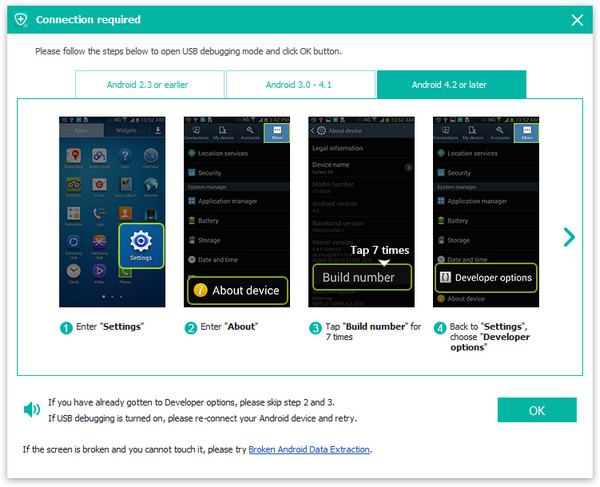
Step 2.Enable USB Debugging on Android
When you see a message pop up on your phone, click “OK” to enable USB debugging. For different Android version, the steps are various. If you had enabled USB debugging before, just skip this step. Then click on “Development” and tick “USB debugging”.

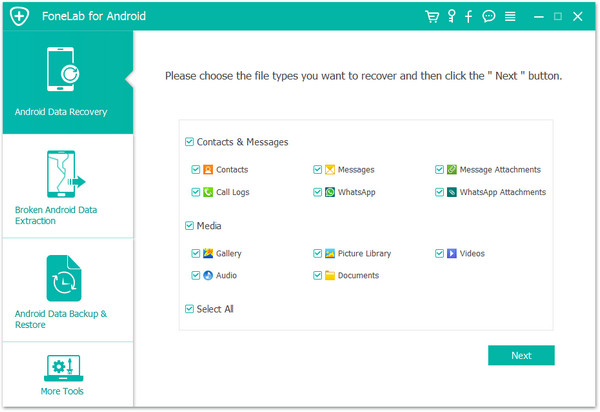
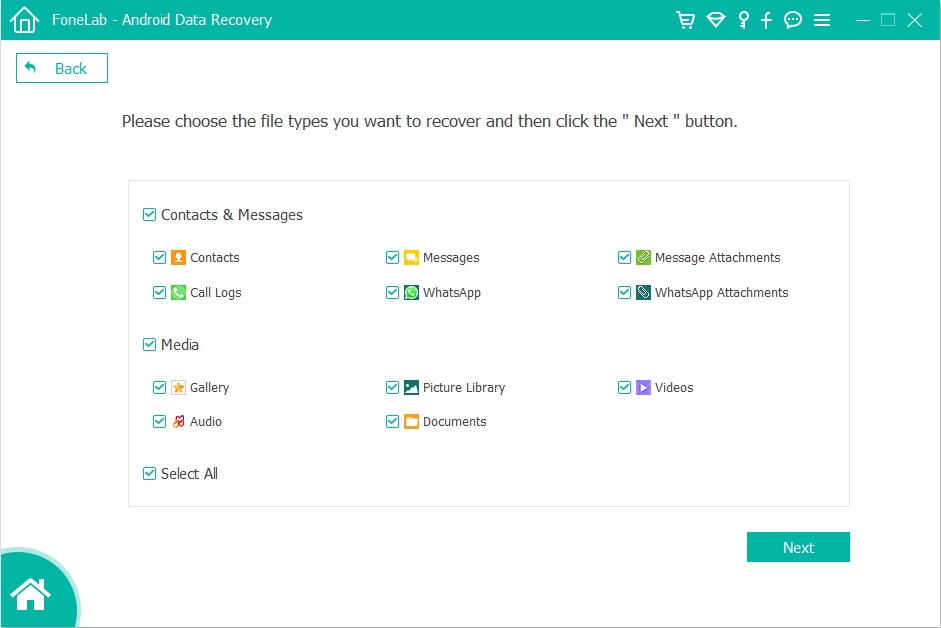
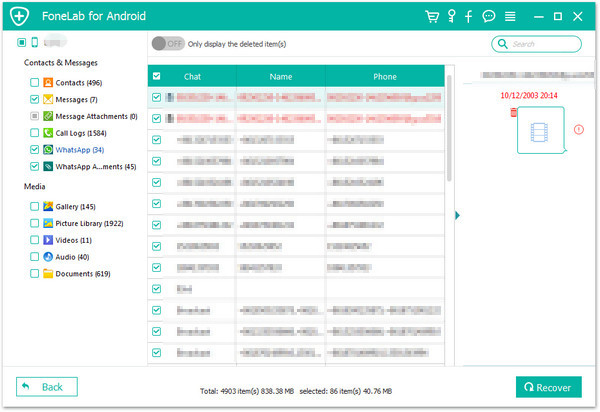
Step 3.Choose “Call History” to Scan
Choose the file type you need to retrieve.If you need to restore any other files on your Android device, check them.

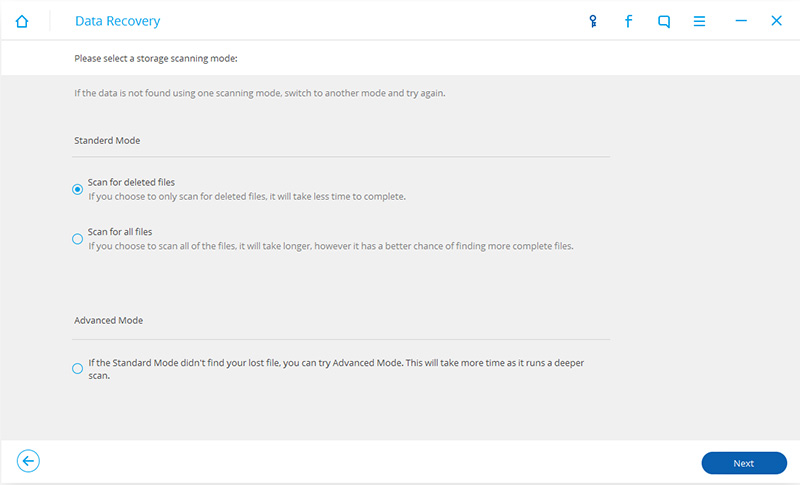
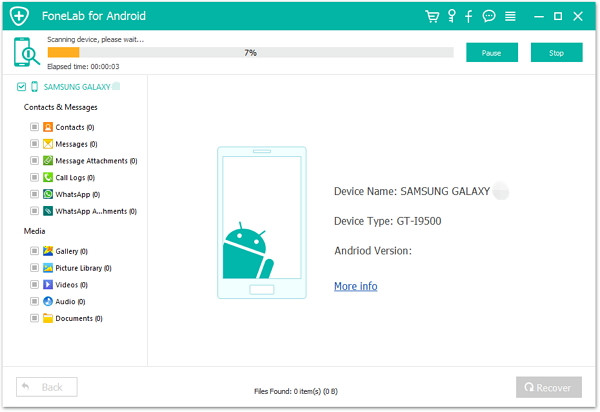
Step 4.Scan the Android Device and choose the Scan Mode
Click “Start” to allow the program to scan your Android phone. And then you will see the following window. Choose the “Standard Mode”. For the “Advanced Mode”, it will take you more time.

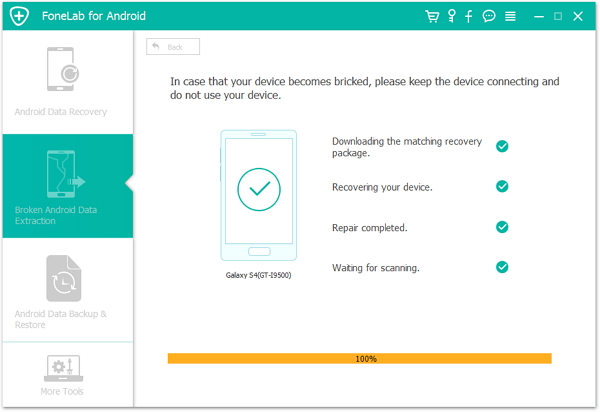
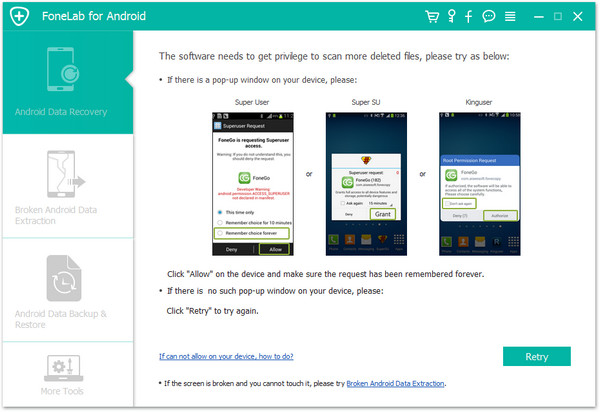
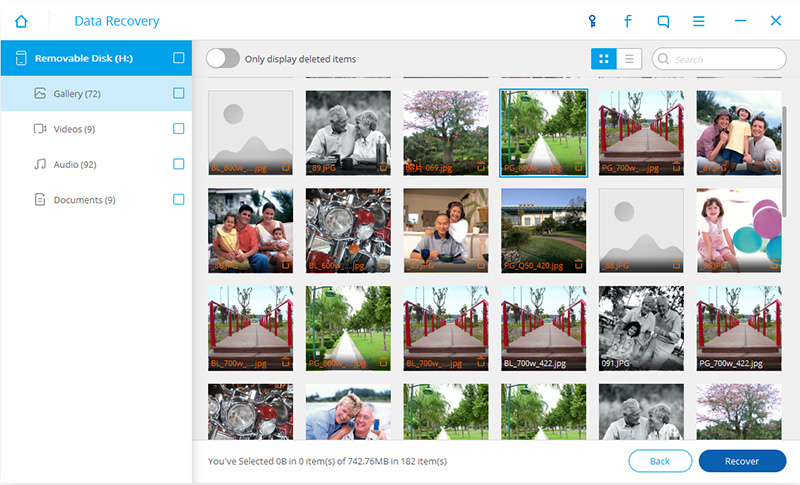
Step 5.Restore Deleted Call Logs on Android Device
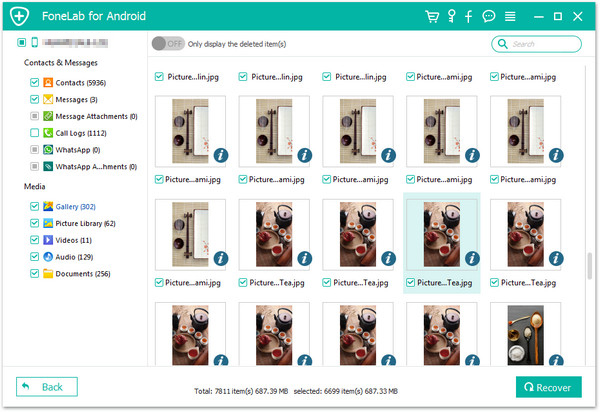
The process of scanning will take some time. If you receive a Super-user Authorization request on your device, tap “Allow” to continue. And after the scanning, you will see all the call history data displayed on the next window. Select what you want to recover and then click “Recover”.


Part 2: Tips to Manage Your Android Call Logs
Sometime you may feel chaotic about the call log on your device. Here we share some tips with you to manage your call logs easily on the Android device.
1. Find a call logs from the past days
There is a search button which is very helpful for you to find out the exact call history quickly. Please open the Phone App on your Android. Then click “LOG > MORE > Filter by”. Then you can eliminate some other logs by choosing the given conditions.

2. Check the call duration
It allows you to check the call duration including the duration of last call, dialed calls, received calls and all calls by navigating to “LOG >MORE > Call duration”.
3. Other settings
Moreover, you are able to do the other settings about call logs like call blocking, call alerts and identify unsaved numbers. Please have a try, and you will find it make your life easier.

Related Article:
How to Recover Data from Android Phone
How to Recover Deleted Text Messages from Android Phone
How to Recover Lost Data from Android SD Card